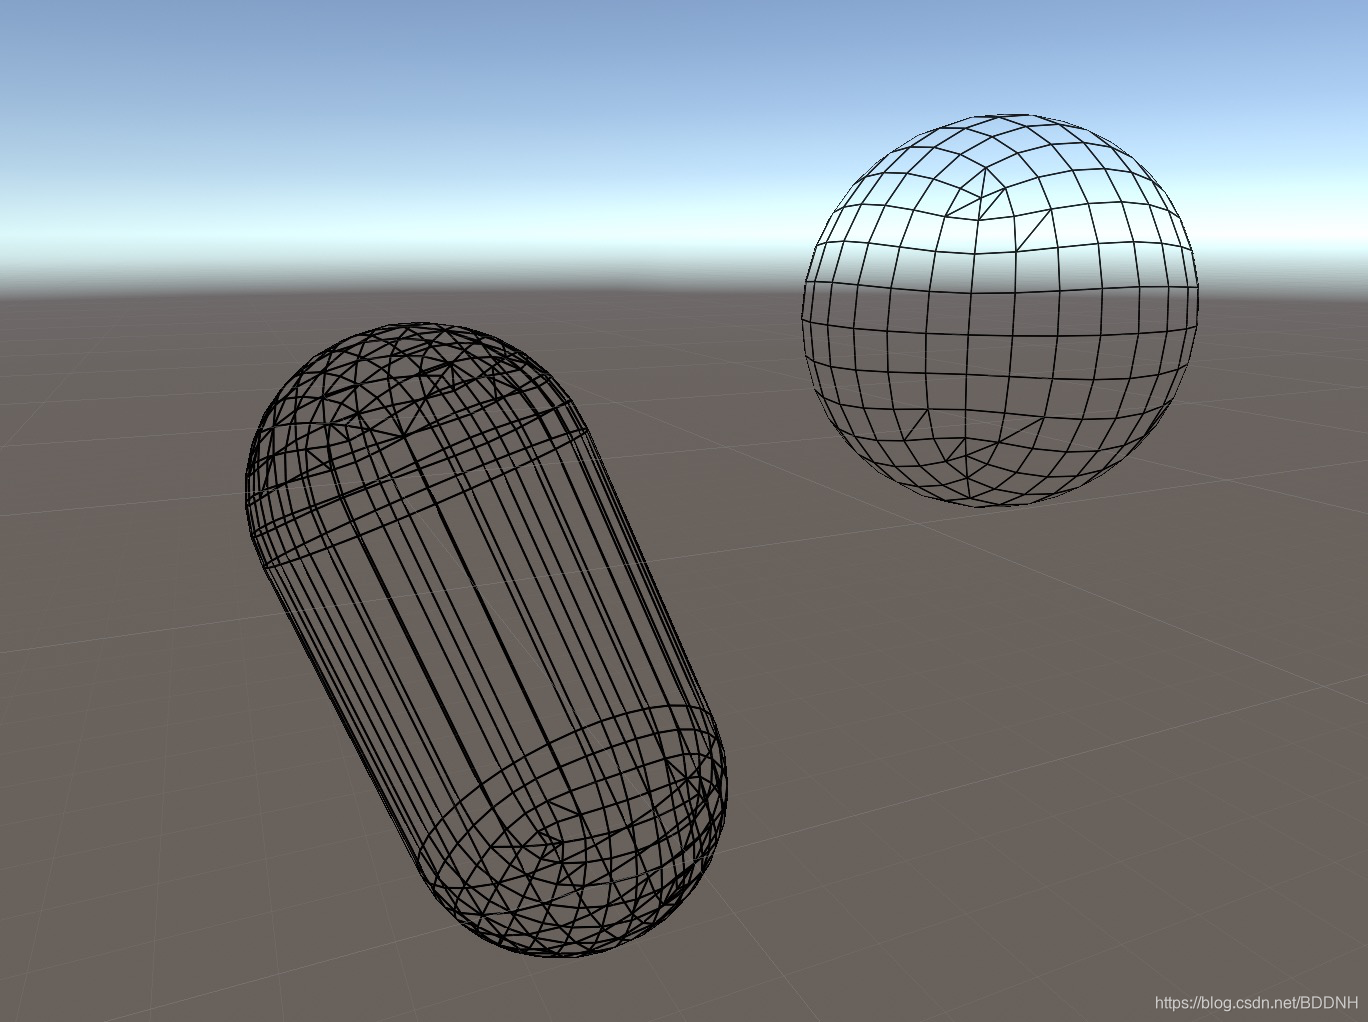
本文不是使用GeometryShader!
移动端和WebGL由于一些限制不能使用GeometryShader,因此不好实现线框Shader。

一、手动绘制
有的人可能会选择用GL画线来实现绘制线框,具体就是读取mesh信息然后绘制线条,但是GL绘制不能调整线条粗细。有的人可能有回使用LineRender或者直接用圆柱体。这样确实可以调整粗细,但是性能堪忧。。。
手动绘制,基本大一点的Mesh就会严重影响性能,不是很可取。
二、通过Mesh传参数
线框用shader实现的难度,就是很难找到三角的边
我的灵感来自Github上的一个工程, UnityWireframeRenderer ,感兴趣的可以去看看,感觉真的很厉害。
主要通过修改Mesh的UV,然后通过uv插值,计算出点到边的距离。
因为要创建新的Mesh,所以其实还是有内存消耗的,但是除了内存问题,运行性能完美。我的做法是在这个原理上进行了修改。
Normal传参
原文通过UV传递信息有一个问题,就是需要自己计算第三条边的距离,因为uv变化只能保存两条边的距离。然而normal具有三个值,可以完美保存三条边的插值距离,就不用在shader中额外计算了。
还有一个优点,可以通过normal的值,实现绘制4边形,而不是绘制三角面的线。因为Mesh提前计算的,所以可以提前计算出同义平面上的相交边,然后修改Normal值,然后在Shader中插值时,就不会显示相交边了。
建议Github上搜索原工程看看,上面有注释,很容易理解。
fixed4 _LineColor;
float _LineSize;
float4 _EmissionColor;
float _Intencity;


struct appdata
{
    float4 vertex : POSITION;
    float3 normal : NORMAL;
    float2 uv : TEXCOORD0;
};

struct v2f
{
    float2 uv : TEXCOORD0;
    float4 vertex : SV_POSITION;
    float3 normal : TEXCOORD1;
};

v2f vert (appdata v)
{
    v2f o;
    o.vertex = UnityObjectToClipPos(v.vertex);
    //If we are rendering in shaded mode (showing the original mesh renderer)
    //we want to ensure that the wireframe-processed mesh appears "on top" of
    //the original mesh. We achieve this by slightly decreasing the z component
    //(making the vertex closer to the camera) without actually changing its screen space position
    //since the w component remains the same, and thus, after w division, the x and y components
    //won't be affected by our "trick".
    //So, in essence, this just changes the value that gets written to the Z-Buffer
    o.vertex.z -= 0.001;
    o.uv = v.uv;
    o.normal = v.normal;
    return o;
}


fixed4 frag (v2f i) : SV_Target
{
    float lineWidthInPixels = _LineSize;
    float lineAntiaAliasWidthInPixels = 1;


    float2 normalxVector = float2(ddx(i.normal.x),ddy(i.normal.x));
    float2 normalyVector = float2(ddx(i.normal.y),ddy(i.normal.y));
    float2 normalzVector = float2(ddx(i.normal.z),ddy(i.normal.z));

    float normalxLength = length(normalxVector);
    float normalyLength = length(normalyVector);
    float normalzLength = length(normalzVector);


    float maximumXDistance = lineWidthInPixels * normalxLength;
    float maximumYDistance = lineWidthInPixels * normalyLength;
    float maximumZDistance = lineWidthInPixels * normalzLength;

    float minimumXDistance = i.normal.x;
    float minimumYDistance = i.normal.y;
    float minimumZDistance = i.normal.z;


    float normalizedXDistance = minimumXDistance / maximumXDistance;
    float normalizedYDistance = minimumYDistance / maximumYDistance;
    float normalizedZDistance = minimumZDistance / maximumZDistance;


    float closestNormalizedDistance = min(normalizedXDistance,normalizedYDistance);
    closestNormalizedDistance = min(closestNormalizedDistance,normalizedZDistance);


    float lineAlpha = 1.0 - smoothstep(1.0,1.0 + (lineAntiaAliasWidthInPixels/lineWidthInPixels),closestNormalizedDistance);

    lineAlpha *= _LineColor.a;


    return fixed4(_LineColor.rgb + _EmissionColor.rgb * _Intencity,lineAlpha);

}
这是Shader 的主要部分,我的修改也是基于原工程,可以对比着看。


 725
725


 被折叠的 条评论
为什么被折叠?


