


iOS UIKit:TableView之编辑模式
一般table view有编辑模式和正常模式,当table view进入编辑模式时,会在row的左边显示编辑和重排控件,如图 42所示的编辑模式时的控件布局;左边的editing control有表 61的两种图标。
表 61 table view编辑控件
| 图标 | 描述 |
| | Deletion控件 |
| | Insertion控件 |


若table view在编辑模式时,用户点击编辑控件,那么table view会发送一系列消息给data source 和delegate对象。可以通过实现这些方法来修改table view的外观和行为,或者执行插入和删除操作。
1 插入与删除row
UITableView中有两个编辑row的方法:插入和删除。在任何时候都可直接调用这两个方法,无需在tableView进入编辑模式才能调用。并且当调用这两方法后,tableView会自动重新加载(reload)。
| - (void)deleteRowsAtIndexPaths:(NSArray<NSIndexPath *> *)indexPaths withRowAnimation:(UITableViewRowAnimation)animation |
| - (void)insertRowsAtIndexPaths:(NSArray<NSIndexPath *> *)indexPaths withRowAnimation:(UITableViewRowAnimation)animation |
| 参数语义: indexPaths:希望修改的rows路径,是一个路径对象的数组; animation:为动画类型。 |
注意:
这两个方法的调用需要相应修改tableview中显示的数据模型,即应保持data source的三个方法(section数、row数和cell对象)返回的数据与修改后的数据一致。如调用方法删除某一行,那么该行就不能在tableview中再显示,否则会奔溃出错。
1.1 进入编辑模式
当tableView进入编辑模式时,即在每个row的左边会出现插入或删除控件。其中可以通过UITableView的setEditing:animated:方法来控制其进入和退出编辑模式。
| - (void)setEditing:(BOOL)editing animated:(BOOL)animate |
| 参数语义: editing:控制进出操作,若为YES为进入编辑模式;若为NO为退出编辑模式。 animate:为设置是否进行动画播放。 |
当调用了setEditing方法之后,tableView会陆续调用data source和delegate的几个方法,具体执行次序如图 61所示。
1) tableView对象首先调用data source对象的tableView:canEditRowAtIndexPath:方法(可选);
2) 然后tableView对象首先调用delegate对象的tableView:editingStyleForRowAtIndexPath:方法(必选),该方法返回row所要显示的控件类型,即删除或插入控件。
3) 接着,在table view中的row左边会显示响应的控件,此时用户可以进行操作;
4)当用户对row的编辑控件进行点击时,会调用data source对象的tableView:commitEditingStyle:forRowAtIndexPath:方法(必选),用户即可实现该方法,从而实现希望完成的操作,如删除或添加某一row。

图 61 Calling sequence for inserting or deleting rows in a table view
1.2 操作示例
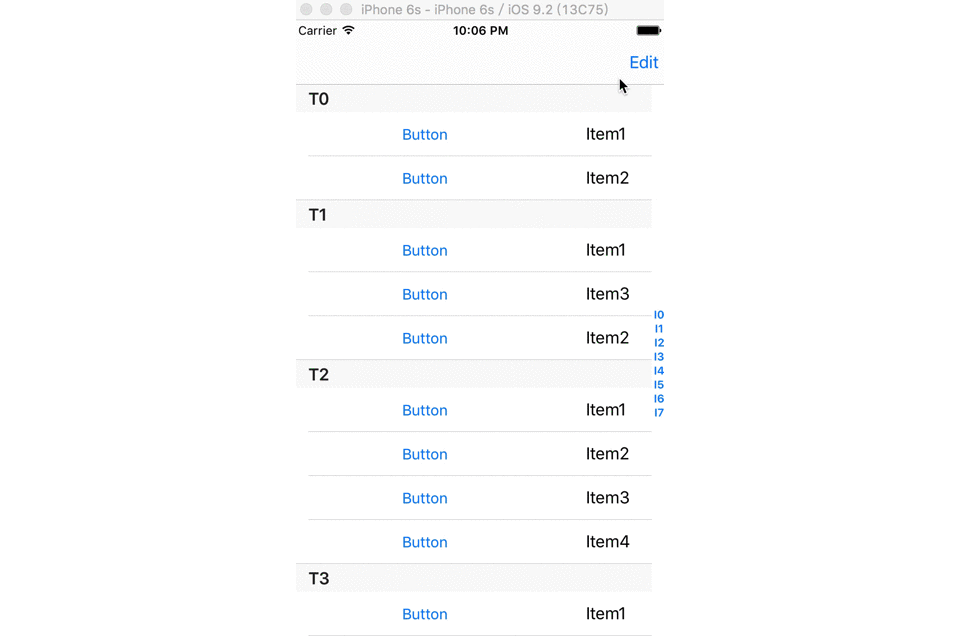
1)tableView初始化
首先初始化一个数组来显示table view中的cell,并在导航栏右边添加一个进入编辑模式的按钮,该按钮为UITableView对象提供的控制项。

2 @property NSMutableArray * array;
3 @end
4 @implementation ViewController
5 - ( void)viewDidLoad {
6 [super viewDidLoad];
7 self.navigationItem.rightBarButtonItem = self.editButtonItem;
8
9 _array = [[NSMutableArray alloc] initWithObjects:
10 [NSMutableArray arrayWithObjects: @" Item1 ", @" Item2 ", nil],
11 [NSMutableArray arrayWithObjects: @" Item1 ", @" Item2 ", @" Item3 ", nil],
12 [NSMutableArray arrayWithObjects: @" Item1 ", @" Item2 ", @" Item3 ", @" Item4 ", nil],
13 [NSMutableArray arrayWithObjects: @" Item1 ", @" Item2 ", @" Item3 ", @" Item4 ", @" Item5 ",nil],
14 nil];
15 }
16 - (NSInteger)numberOfSectionsInTableView:(UITableView *)tableView
17 {
18 return [_array count];
19 }
20 -(NSInteger) tableView:(UITableView *)tableView numberOfRowsInSection:(NSInteger)section
21 {
22 return [_array[section] count];
23 }
24 -(UITableViewCell*)tableView:(UITableView *)tableView cellForRowAtIndexPath:(NSIndexPath *)indexPath
25 {
26 UITableViewCell *cell = [tableView dequeueReusableCellWithIdentifier: @" myCell "];
27 return cell;
28 }
2) 进入编辑模式
当用户点击导航按钮时,将会自动调用如下实现的setEditing方法,在该方法中调用tableView对象的setEditing方法进入编辑模式;然后在第二个方法中将每个section中的奇数row显示插入控件,偶数的row显示为删除控件;
2 [super setEditing:editing animated:animated];
3 [self.tableView setEditing:editing animated:YES];
4 }
5 - (UITableViewCellEditingStyle)tableView:(UITableView *)tableView editingStyleForRowAtIndexPath:(NSIndexPath *)indexPath {
6 if (indexPath.row % 2 == 1) {
7 return UITableViewCellEditingStyleInsert;
8 } else {
9 return UITableViewCellEditingStyleDelete;
10 }
11 }
3) 响应操作
当用户点击编辑控件时,执行如下方法,从而在该方法中判断是什么类型(插入或删除操作);接着执行对array数组执行不同的操作,最终通过调用tableview的deleteRowsAtIndexPaths方法和insertRowsAtIndexPaths方法来刷新表格的内容。
2
3 if (editingStyle == UITableViewCellEditingStyleDelete) { // 若是删除操作,则删除数组内容,并刷新表格
4 [_array[indexPath.section] removeObjectAtIndex:indexPath.row];
5 [tableView deleteRowsAtIndexPaths:[NSArray arrayWithObject:indexPath] withRowAnimation:UITableViewRowAnimationFade];
6 }
7 else // 若是插入操作,则添加一个数组元素,并刷新表格
8 {
9 [_array[indexPath.section] insertObject: @" hlw " atIndex:indexPath.row];
10 [tableView insertRowsAtIndexPaths:[NSArray arrayWithObject:indexPath] withRowAnimation:UITableViewRowAnimationFade];
11 }
12 }
4) 显示效果
如影 61所示是表格的显示效果,和删除操作视频。

影 61 删除操作效果图(双击)
2 批量操作
除了可以对row进行编辑,UITableView还支持对section进行编辑,并且可以一次性进行插入、删除和重载等多个操作。如下所示是UITableView总共提供了8个方法:
| - (void)beginUpdates; - (void)endUpdates; |
| - (void)insertSections:(NSIndexSet *)sections withRowAnimation:(UITableViewRowAnimation)animation; - (void)deleteSections:(NSIndexSet *)sections withRowAnimation:(UITableViewRowAnimation)animation; - (void)reloadSections:(NSIndexSet *)sections withRowAnimation:(UITableViewRowAnimation)animation; |
| - (void)insertRowsAtIndexPaths:(NSArray *)indexPaths withRowAnimation (UITableViewRowAnimation)animation; - (void)deleteRowsAtIndexPaths:(NSArray *)indexPaths withRowAnimation: (UITableViewRowAnimation)animation; - (void)reloadRowsAtIndexPaths:(NSArray *)indexPaths withRowAnimation:(UITableViewRowAnimation)animation; |
其中对row和section的6个操作方法必须处于beginUpdates和endUpdates两方法之间调用。
如下的示例,当用户点击某行时,就添加和删除几行:
2 {
3 [_array[ 2] removeObjectAtIndex: 0];
4 [_array[ 1] removeObjectAtIndex: 0];
5 [_array[ 0] insertObject: @" hlw " atIndex: 0];
6 [_array[ 3] insertObject: @" hlw " atIndex: 0];
7 NSArray *deleteIndexPaths = [NSArray arrayWithObjects:
8 [NSIndexPath indexPathForRow: 0 inSection: 2],
9 [NSIndexPath indexPathForRow: 0 inSection: 1],
10 nil];
11 NSArray *insertIndexPaths = [NSArray arrayWithObjects:
12 [NSIndexPath indexPathForRow: 0 inSection: 0],
13 [NSIndexPath indexPathForRow: 0 inSection: 3],
14 nil];
15
16 UITableView *tv = self.tableView;
17 [tv beginUpdates];
18 [tv deleteRowsAtIndexPaths:deleteIndexPaths withRowAnimation:UITableViewRowAnimationFade];
19 [tv insertRowsAtIndexPaths:insertIndexPaths withRowAnimation:UITableViewRowAnimationRight];
20 [tv endUpdates];
21 }
上述对_array的操作顺序可以与调用tv的顺序不一样,其中动画的展示效果是按tv的调用顺序执行。
3 交换操作
UITableView提供了一个方法能够交互两row或两section的顺序,从而实现重新排序的效果,这两个方法能够在任何情况下使用,并不是必须进入编辑模式才能使用。
| - (void)moveRowAtIndexPath:(NSIndexPath *)indexPath toIndexPath:(NSIndexPath *)newIndexPath - (void)moveSection:(NSInteger)section toSection:(NSInteger)newSection |
| 注意: moveRowAtIndexPath方法可以交换任意的两row;但moveSection只能交换两个section有相同数量的row。 |
如下所示,当用户点击任何一行时,即与下一行交换:
2 {
3 NSIndexPath * to = [NSIndexPath indexPathForRow:indexPath.row+ 1 inSection:indexPath.section];
4 [tableView moveRowAtIndexPath:indexPath toIndexPath:to];
5 }
3.1 进入编辑模式
与删除和插入row类型,当table view进入编辑模式,即调用了setEditing方法之后,tableView会陆续调用data source和delegate的几个方法,具体执行次序如图 62所示。
1) tableView对象首先调用data source对象的tableView:canMoveRowAtIndexPath:方法(必选);如果该方法返回YES,则在cell的右边会显示一个可交换的控件。
2) 当在cell中出现交换控件后,用户即可拖拽交换row。
3) 若当用户拖拽了row后,那么tableView对象会去调用delegate对象的tableView:targetIndexPathForMoveFromRowAtIndexPath方法(可选)。
4) 接着,table view对象会去调用data source对象tableView:moveRowAtIndexPath:toIndexPath:方法(必选),这个方法会自动交换拖拽的两行,不需要调用 UITableView的moveRowAtIndexPath方法即可进行交换。

图 62 Calling sequence for reordering a row in a table view
3.2 操作示例
如在6.1.2小节所示的示例基础之上进行操作,不允许每个section的第0行进行交换,而其它方法是可以交换的,如下是实现的两个方法:
2 if (indexPath.row == 0) {
3 return NO;
4 }
5 return YES;
6 }
7 - ( void)tableView:(UITableView *)tableView
8 moveRowAtIndexPath:(NSIndexPath *)fromIndexPath
9 toIndexPath:(NSIndexPath *)toIndexPath
10 {
11
12 }
如影 62所示展示的显示效果,其与插入和删除操作不会冲突,都能够显示。
影 62 交换row效果图
4 自定义editingAccessoryView
4.1 修改附加视图
当进入编辑模式时,cell右边还有一个附件视图的位置,默认情况为空,用户可以使用标准视图或者自定义视图内容,只需修改UITableViewCell对象的editingAccessoryView属性,同时还可以修改删除按钮的显示内容,其由tableView:titleForDeleteConfirmationButtonForRowAtIndexPath方法决定显示的内容:
| -(NSString*)tableView:(UITableView*)tableView titleForDeleteConfirmationButtonForRowAtIndexPath:(NSIndexPath*)indexPath |
| 返回参数: 为所要显示的标题内容。 |
如下所示,当进入编辑模式时,显示附件视图并修改删除按钮的内容:
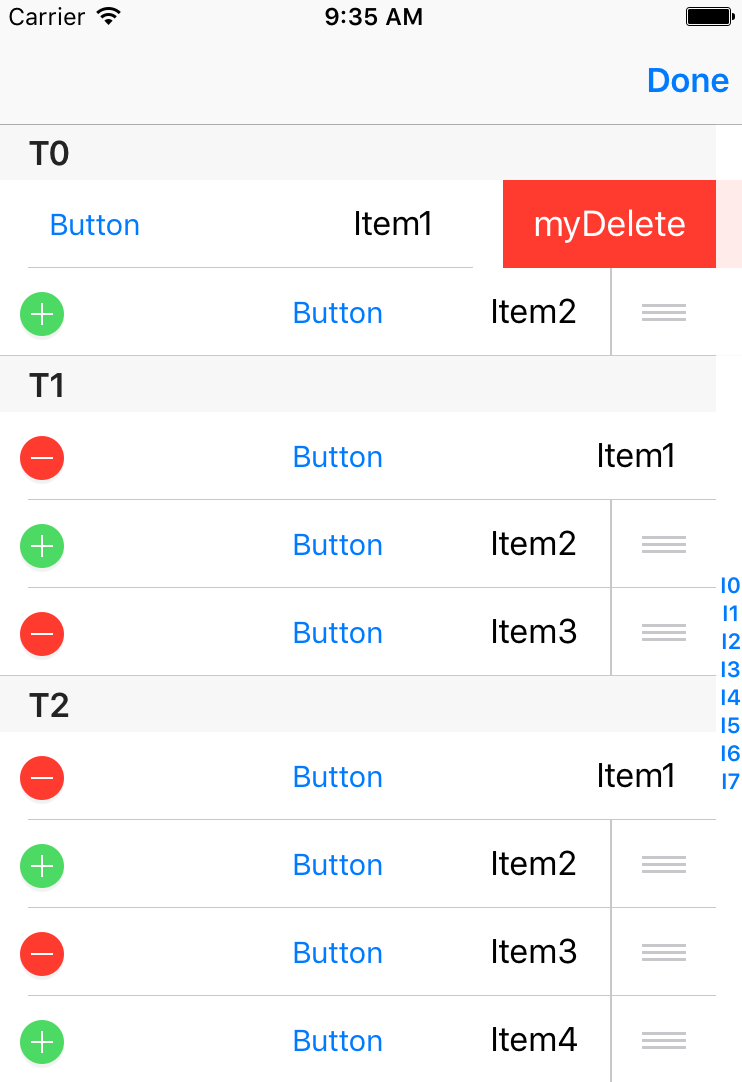
图 63 编辑模式自定义accessoryView效果图
4.2 修改删除按钮
对于那些支持删除操作的cell,当在编辑模式中点击左边的删除控件,会在右边出现有一个删除按钮;或者在正常模式下,水平滑动也能出现这个删除按钮,当点击这个删除按钮后,会调用data source对象的tableView:commitEditingStyle:方法(如6.1.1小节所示)。
UITableView支持修改上述这个删除按钮和相应响应方法,即用户可以实现UITableViewDelegate协议的tableView:editActionsForRowAtIndexPath方法来自定义显示内容和响应方法,该方法的定义为:
| -(NSArray<UITableViewRowAction*>*)tableView:(UITableView*)tableView //UITableViewDelegate协议方法 editActionsForRowAtIndexPath:(NSIndexPath *)indexPath |
| + (instancetype)rowActionWithStyle:(UITableViewRowActionStyle)style //UITableViewRowAction类的便利方法 title:(NSString *)title handler:(void (^)(UITableViewRowAction *action, NSIndexPath *indexPath))handler |
| rowActionWithStyle方法参数语义: style:为显示的类型; title:为显示的标题; handler:为响应的block。 |
如下所示,创建两个按钮来替换系统默认的删除按钮,当用户水平滑动时,出现两个按钮,当点击时执行相应的block。
2 editActionsForRowAtIndexPath:(NSIndexPath *)indexPath
3 {
4 UITableViewRowAction *first = [UITableViewRowAction rowActionWithStyle:UITableViewRowActionStyleDestructive title: @" first " handler:^(UITableViewRowAction * _Nonnull action, NSIndexPath * _Nonnull indexPath) {
5 NSLog( @" UITableViewRowAction action first ");
6 }];
7 UITableViewRowAction *second = [UITableViewRowAction rowActionWithStyle:UITableViewRowActionStyleNormal title: @" second " handler:^(UITableViewRowAction * _Nonnull action, NSIndexPath * _Nonnull indexPath) {
8 NSLog( @" UITableViewRowAction action second ");
9 }];
10
11 NSArray * array =[[NSArray alloc] initWithObjects:first, second, nil];
12
13 return array;
14 }

影 63 效果图
其中上述的itemX为附加视图的内容,而first和second按钮为修改的内容。
5 参考文献
[1] Table View Programming Guide for IOS


 1532
1532

 被折叠的 条评论
为什么被折叠?
被折叠的 条评论
为什么被折叠?
 到【灌水乐园】发言


