


11.30日更新,实现了简单的微信朋友圈,点赞,评论,图片,高度自适应,下拉展开等各种效果Demo
11.10更新
这种高度自适应的Label切记一定要加上这个属性
preferredMaxLayoutWidth
不然你会死的很难看
11.4日更新 用这个库实现了类似微信朋友圈的简单排版点击打开链接
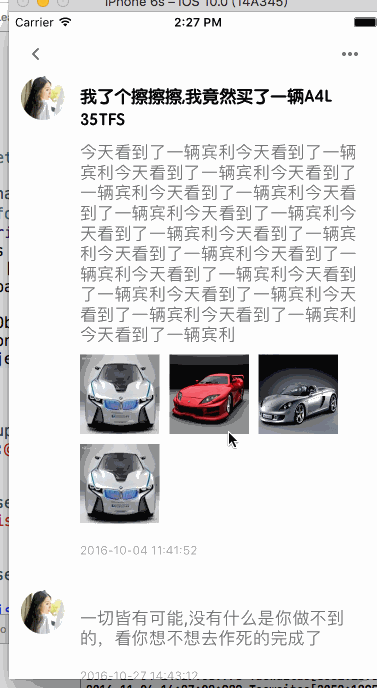
这里我没这么考虑性能,只是简单先做了这个功能,tableViewcell里面嵌套了collectionView来进行图片的布局,效果如下,咱们先不考虑性能,这种情况下切记不能调用带有缓存的方法cacheByIndex的方法,由于内部是动态的,一定要用(只能牺牲性能了)
return [tableView fd_heightForCellWithIdentifier:identify configuration:^(ConsultDetailTableViewCell *cell) {
        [self configCell:cell indexpath:indexPath];
    }];
UITableView里面的Cell固定高度那是基本不可能了,很多功能和界面都会涉及到高度自适应,而且电商类的尤其普遍,之前都是自己算啊算,代码写的非常多,逻辑还没写,光这布局UI和高度计算都能接近1000了,写完之后关键出点Bug整个人都不好了
当时的是这样的:

突然在github上看到UITableView+FDTemplateLayoutCell这个库
传送门:点击打开链接
刚看到的时候是这样的:
能 用 么 ??? 真 的 这 么 叼 ???

第一次用的时候是这样的:
哥们,你是在逗我么,这什么鬼,从来没见过这样的场面,当时我就懵逼了。。。。。。

用了几次之后就出效果了,是这样的:

哎呦,不错呦。。。。。。感觉真的有点叼啊

OK 看下基本流程
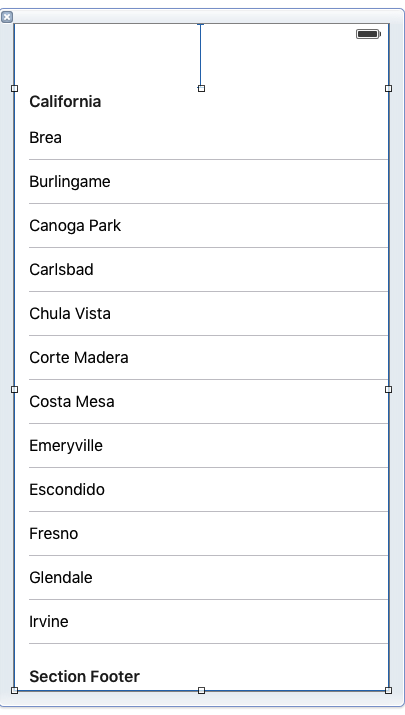
由于咱们还是用IB来布局,操作NSConstraintLayout类来进行计算,所以先把官网上给出的布局案例贴出来,如下
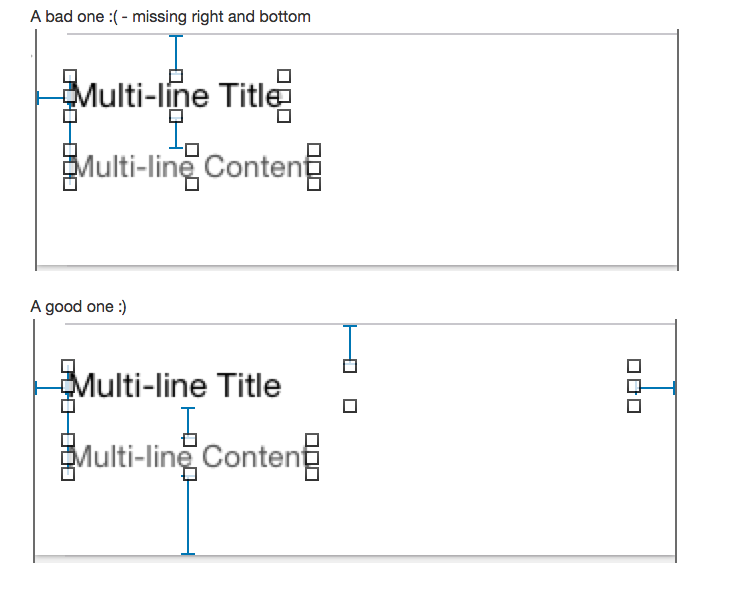
注:
a fully self-satisfied cell is constrainted by auto layout and each edge("top", "left", "bottom", "right") has at least one layout constraint against it
一个自适应高度的cell用Autolayout来进行约束,内部所有控件的约束整合起来,距离Cell四个边的( top left bottom right)至少要各出现一次,不然就是bad one
如下图所示:
箭头所指的方向必须出现至少一次才是一套完整的约束
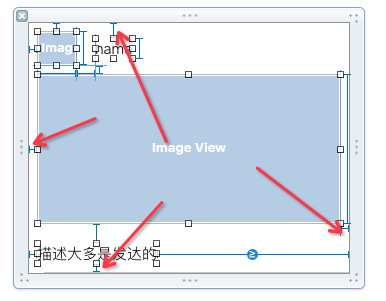
1.首先新建个工程,造一个TableView出来,设置好代理,布局好基本框架
2.然后弄一个Cell,布局玩之后把关键箭头所指的两个约束拖出来,以后要用,先看下主要布局,Demo最后给
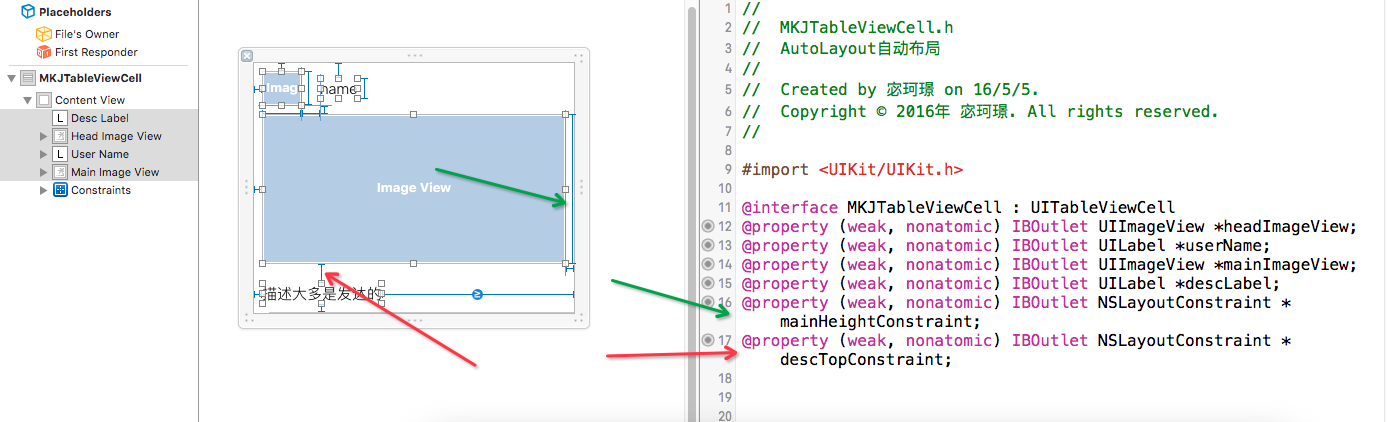
3.我自己找了几个数据源出来,我个人遇到的是,如果每个cell有图片,或者没图片,而且图片的高度不等,那么服务器也要求返回具体的图片宽和高,利于我们直接拿来进行等比例计算,然后在下面这个代理方法布局的时候进行操作
-(UITableViewCell *)tableView:(UITableView *)tableView cellForRowAtIndexPath:(NSIndexPath *)indexPath
{
    MKJTableViewCell *cell = [tableView dequeueReusableCellWithIdentifier:identify forIndexPath:indexPath];
    [self configCell:cell indexpath:indexPath]; //!< 该方法等下也会用到
    return cell;
}最关键的方法- (void)configCell:(MKJTableViewCell *)cell indexpath:(NSIndexPath *)index
{
// 获取模型
MKJModel *model = self.dataSource[index.row];
__weak typeof(cell) weakCell = cell;
// 配置用户头像的的图片,以下操作是让图片0-1的渐现的动画
[cell.headImageView sd_setImageWithURL:[NSURL URLWithString:model.headImageURL] completed:^(UIImage *image, NSError *error, SDImageCacheType cacheType, NSURL *imageURL) {
if (image && cacheType == SDImageCacheTypeNone) {
weakCell.headImageView.alpha = 0;
[UIView animateWithDuration:1.0 animations:^{
weakCell.headImageView.alpha = 1.0;
}];
}
else
{
weakCell.headImageView.alpha = 1.0;
}
}];
// 用户名
cell.userName.text = model.userName;
// 用户描述
cell.descLabel.text = model.desc;
// 当图片存在的时候
if (![model.mainImageURL isEqualToString:@""])
{
// 图片不隐藏
cell.mainImageView.hidden = NO;
// 配置主图的方法,同头像
[cell.mainImageView sd_setImageWithURL:[NSURL URLWithString:model.mainImageURL] completed:^(UIImage *image, NSError *error, SDImageCacheType cacheType, NSURL *imageURL) {
if (image && cacheType == SDImageCacheTypeNone) {
weakCell.mainImageView.alpha = 0;
[UIView animateWithDuration:1.0 animations:^{
weakCell.mainImageView.alpha = 1.0;
}];
}
else
{
weakCell.mainImageView.alpha = 1.0;
}
}];
// 我们进行等比例计算出刚才那个主图高度的约束
cell.mainHeightConstraint.constant = (model.mainHeight * 375) / model.mainWidth;
// 底部描述具体图片底部的约束固定为19
cell.descTopConstraint.constant = 19;
}
// 图片没有的时候,只显示描述
{
// 主要图片隐藏
cell.mainImageView.hidden = YES;
// 主图的高度越是为0 其实也代表了隐藏了
cell.mainHeightConstraint.constant = 0;
// 底部如果约束还是19的话,会拉的太长,所以咱们让他为0
cell.descTopConstraint.constant = 0;
}
}4.那么见证奇迹的时刻到了,按官方说法是这样的:
#import <UITableView+FDTemplateLayoutCell.h>
- (CGFloat)tableView:(UITableView *)tableView heightForRowAtIndexPath:(NSIndexPath *)indexPath {
    return [tableView fd_heightForCellWithIdentifier:@"identifer" cacheByIndexPath:indexPath configuration:^(id cell) {
       // 配置 cell 的数据源,和 "cellForRow" 干的事一致,比如:
       [self configCell:(UITableViewCell *)cell indexPath:(NSIndexPath *)indexPath];
    }];
}
人家都说了,一句话搞定,反正我是这样的:
- (CGFloat)tableView:(UITableView *)tableView heightForRowAtIndexPath:(NSIndexPath *)indexPath
{
    return [tableView fd_heightForCellWithIdentifier:identify cacheByIndexPath:indexPath configuration:^(MKJTableViewCell *cell)
            {
               [self configCell:cell indexpath:indexPath];
            }];
}
我觉得挺好用的,还是要感谢下有那么牛B的作者!

让我们轻松愉快,不用再纠结于算Frame了,简单效果如下
本次展示Demo的Github地址:Demo地址,需要的点我 各位有啥意见就告诉我,虚心求教
 Over~~~~~~~~~~~~~~~~~~


 6457
6457


 被折叠的 条评论
为什么被折叠?
被折叠的 条评论
为什么被折叠?
 到【灌水乐园】发言


