


视频地址:http://www.56.com/w66/play_album-aid-8999112_vid-NTg0NTQ2MTk.html(Raphael 框架介绍 )
1. Getting Set Up
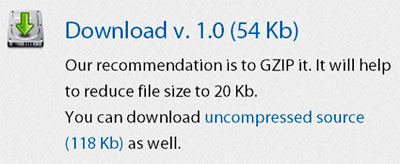
Let’s get started by downloading the Raphael JS framework from here. At the top right of the page, you’ll see
compressed and uncompressed copies of Raphael version 1.0. I’d recommend you grab yourself a copy of the uncompressed source for the time being – this way you can have a peek at the source and see what extra edge you can get on the documentation.
With that downloaded, let’s set up a simple HTML document called index.htm and include Raphael in it. We also includeour_script.js, which is where we’ll write our own JavaScript, and in the body of the document we create a minimally styled div with IDcanvas_container, which will act as a container for our drawings.
<html>
    <head>
        <title>Raphael Play</title>
        <script type="text/javascript" src="path/to/raphael.js"></script>
        <script type="text/javascript" src="path/to/our_script.js"></script>
        <style type="text/css">
            #canvas_container {
                width: 500px;
                border: 1px solid #aaa;
            }
        </style>
    </head>
    <body>
        <div id="canvas_container"></div>
    </body>
</html>
N.B. The first stable release of version 1.0 was only made available on the 7th October 2009, so it’s pretty new. It makes one very important change to the way you draw paths, so if you’re using an earlier version of Raphael, make sure you upgrade and check out the documentation on effecting backwards compatibility.
2. Creating our Drawing Canvas
When we draw with Raphael, we do so onto a canvas. This canvas, which we’ll reference in a variable called ‘paper’, is created using the Raphael() object. We always specify the width and height of the canvas, but have the option of also specifying either a) the absolute position of the canvas relative to the viewport, or b) an element ‘container’ that the canvas is drawn inside.
var paper = new Raphael(x, y, width, height); //option (a)
var paper = new Raphael(element, width, height); //option (b)
I generally prefer the latter method (b), since we usually know where our divs are. In our_script.js, let’s wait for the DOM to load and then create a 500px by 500px canvas inside our canvas_container div:
window.onload = function() {
    var paper = new Raphael(document.getElementById('canvas_container'), 500, 500);
}
All our drawing methods will now be bound to the paper variable.
3. Built-in Shapes
Now that we have our canvas, let’s draw some shapes onto it. The origin, that is, the x = 0, y = 0 point, is at the top-left corner of our canvas. This means that any x, y coordinates we specify in our methods are relative to this point.
First off, a circle. Modify our_script.js to look like this:
window.onload = function() {
var paper = new Raphael(document.getElementById('canvas_container'), 500, 500);
var circle = paper.circle(100, 100, 80);
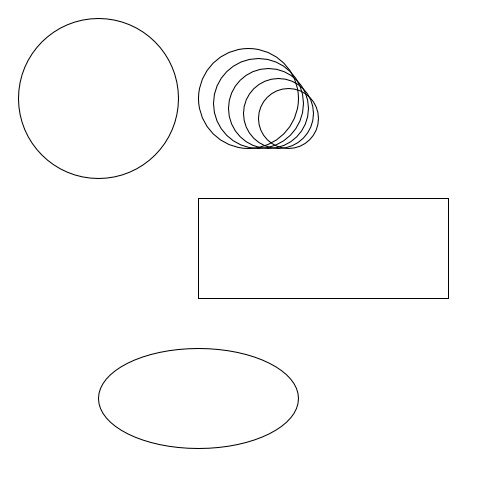
}This will draw a circle with a radius of 80px with its center placed at x = 100, y = 100. We can draw as many circles as we like and we don’t have to reference them in a variable:
for(var i = 0; i < 5; i+=1) {
    var multiplier = i*5;
    paper.circle(250 + (2*multiplier), 100 + multiplier, 50 - multiplier);
}
Next, let's draw a rectangle. We do this using the rect() method, which takes as parameters: the x and y coordinates of the rectangle's top-left corner and the rectangle's desired width and height.
var rectangle = paper.rect(200, 200, 250, 100);Finally, we'll draw an ellipse. Its parameters are the same as the circle, i.e. x, y, radius, except that we can specify x and y radii specifically.
var ellipse = paper.ellipse(200, 400, 100, 50);This will draw an ellipse with x-radius = 100, y-radius = 50 at x = 200, y = 400. Our our_script.js file should now look like this:
window.onload = function() {
    var paper = new Raphael(document.getElementById('canvas_container'), 500, 500);
    var circle = paper.circle(100, 100, 80);
    for(var i = 0; i < 5; i+=1) {
        var multiplier = i*5;
        paper.circle(250 + (2*multiplier), 100 + multiplier, 50 - multiplier)
    }
    var rectangle = paper.rect(200, 200, 250, 100);
    var ellipse = paper.ellipse(200, 400, 100, 50);
}
If we now open up index.htm in our browser, we should get a bunch of shape drawings:
4. Drawing Paths
While the built-in shapes are handy to have, it is paths that offer us true drawing flexibility.
When drawing paths, it helps to think of an imaginary cursor or pen-point pressed against the screen. When we create our canvas, the cursor is rooted to the top-left corner. The first thing we should do, then, is
lift up our cursor or pen-point and move it to a spacious region in which we can draw.
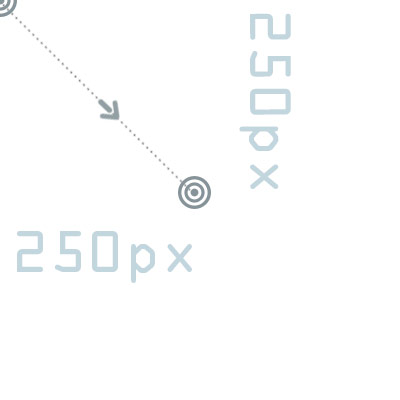
As an example, let's move our cursor to the centre of our canvas. That is, let's move it 250px in the x-direction and move it 250px in the y-direction.
We do this using a so-called path string.
A path string is a string comprised of 'action' commands and numeric values corresponding to the command. We move our cursor to x = 250, y = 250 using the following string:
"M 250 250" 'M' means we want to move without drawing and is followed by x and y canvas co-ordinates.
Now that our cursor is where we want it, let's draw a line relative to this point using the lower-case 'L' command, 'l'.
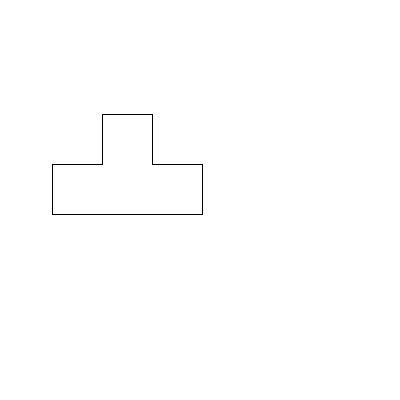
"M 250 250 l 0 -50"This will draw a line upwards 50px in the y-direction. Let's write a path string that will draw a tetris tetronimo:
"M 250 250 l 0 -50 l -50 0 l 0 -50 l -50 0 l 0 50 l -50 0 l 0 50 z"The 'z' command signifies the path closing - it will join a line from wherever we are to the point specified by our initial 'M' command.
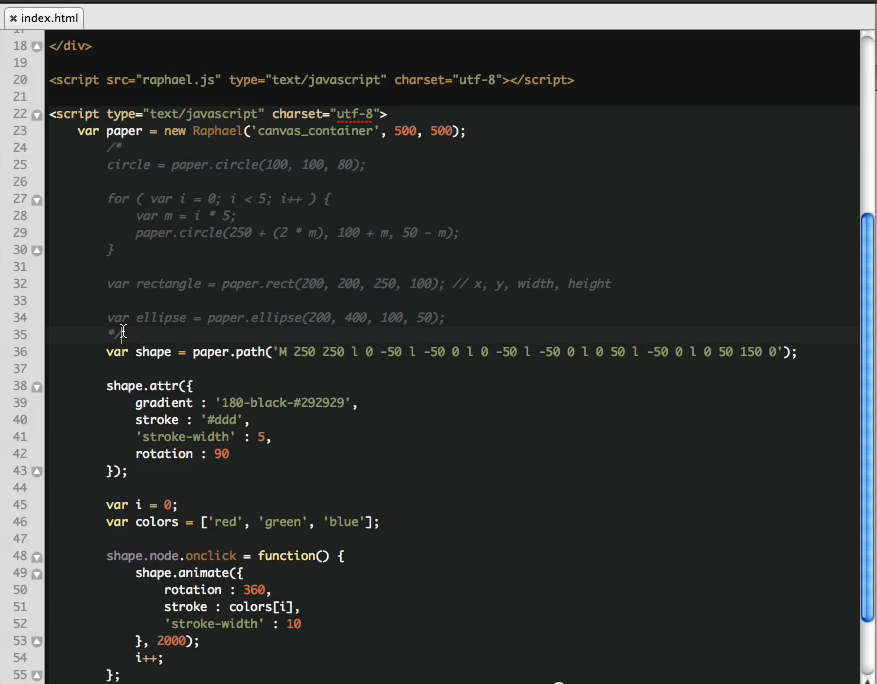
We tell Raphael to actually draw this path using the path() method. Modify our_script.js to look like this:
window.onload = function() {
var paper = new Raphael(document.getElementById('canvas_container'), 500, 500);
var tetronimo = paper.path("M 250 250 l 0 -50 l -50 0 l 0 -50 l -50 0 l 0 50 l -50 0 l 0 50 z");
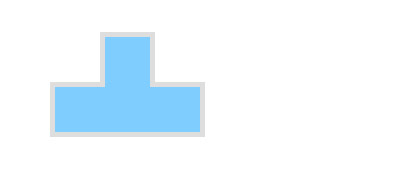
}If you load up index.htm, you should now see a tetronimo like this:
5. Attribute Styling
Our tetris tetronimo, whilst wonderful, is not very aesthetically pleasing. We'll fix that using the attr() method.
The attr() method takes an object consisting of various property-value pairs as its parameter. Since we stored a reference to our tetronimo in the variabletetronimo, we can take this variable and add the attr() method to it. We could equally well chain the attr() method to the path() method, but let's keep things sane for the time being. I'll demonstrate the use of attr() by example:
window.onload = function() {
    var paper = new Raphael(document.getElementById('canvas_container'), 500, 500);
    var tetronimo = paper.path("M 250 250 l 0 -50 l -50 0 l 0 -50 l -50 0 l 0 50 l -50 0 l 0 50 z");

    tetronimo.attr({fill: '#9cf', stroke: '#ddd', 'stroke-width': 5});
}
produces this:
window.onload = function() {
var paper = new Raphael(document.getElementById('canvas_container'), 500, 500);
var tetronimo = paper.path("M 250 250 l 0 -50 l -50 0 l 0 -50 l -50 0 l 0 50 l -50 0 l 0 50 z");
tetronimo.attr(
{
gradient: '90-#526c7a-#64a0c1',
stroke: '#3b4449',
'stroke-width': 10,
'stroke-linejoin': 'round',
rotation: -90
}
);
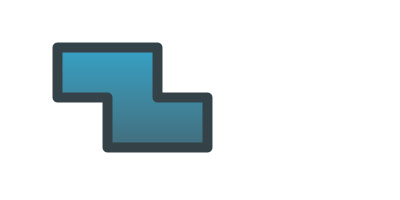
}produces this:

The Raphael documentation is pretty extensive when it comes to the attr() method.
Have a play around with the various object property-value combinations.
6. Animation
The animate() method in Raphael is really, really good. It allows us to animate our drawings in a jQuery-esque manner, animating the attributes we supply it over some period of time with an optional easing.
Let's rotate our most recent tetronimo by 360 degrees. The rotation attribute is absolute, so this should take it one full rotation and bring it back to its un-rotated state.
window.onload = function() {
    var paper = new Raphael(document.getElementById('canvas_container'), 500, 500);
    var tetronimo = paper.path("M 250 250 l 0 -50 l -50 0 l 0 -50 l -50 0 l 0 50 l -50 0 l 0 50 z");
    tetronimo.attr(
        {
            gradient: '90-#526c7a-#64a0c1',
            stroke: '#3b4449',
            'stroke-width': 10,
            'stroke-linejoin': 'round',
            rotation: -90
        }
    );

    tetronimo.animate({rotation: 360}, 2000, 'bounce');
}
The animation takes place over 2 seconds (2000 milliseconds) and is told to ease into its final state with a 'bounce'.
We can also supply a callback function as an argument. This callback function is invoked after the animation finishes. The following example will animate the tetronimo's rotation and stroke-width and then reset itself with another animation in the callback function.
tetronimo.animate({rotation: 360, 'stroke-width': 1}, 2000, 'bounce', function() {
    /* callback after original animation finishes */
    this.animate({
        rotation: -90,
        stroke: '#3b4449',
        'stroke-width': 10
    }, 1000);
});
The this keyword references the original tetronimo from within the callback function.
Animating Paths
Being a bit of a code geek, I rarely ever got past drawing simple shapes in Flash. But one thing I liked playing with wasshape tweening. Well, Raphael goes some way to emulating shape tweening by specifying a path string in the animate() method. Another tetronimo, the Z tetronimo in Tetris, has the following path string,
"M 250 250 l 0 -50 l -50 0 l 0 -50 l -100 0 l 0 50 l 50 0 l 0 50 z"and it looks like this:
Now, using our original tetronimo with minimal attribute styling, i'm going to specify the new path string in our animate() method.
tetronimo.attr(
    {
        stroke: 'none',
        fill: 'blue'
    }
);

tetronimo.animate({
    path: "M 250 250 l 0 -50 l -50 0 l 0 -50 l -100 0 l 0 50 l 50 0 l 0 50 z"
}, 5000, 'elastic');
You should see our original tetronimo morph into our new one. The effect is made all the more pronounced by specifying 'elastic' as the easing type.
Example here.
7. Dom Accessibility
If we want to get access to our elements as DOM elements, we can do so with some ease. This is thanks to thenode property. Using this, we can add event handlers to our drawings, which i'll proceed to show you.
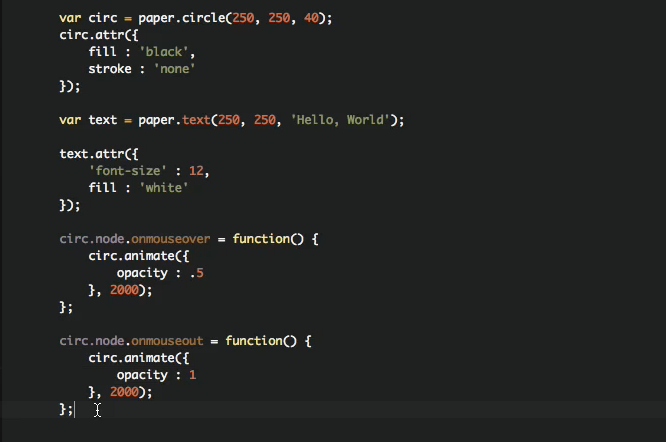
Let's start by drawing a circle in our our_script.js file.
window.onload = function() {
        var paper = new Raphael(document.getElementById('canvas_container'), 500, 500);

        var circ = paper.circle(250, 250, 40);
        circ.attr({fill: '#000', stroke: 'none'});
}
Now, let's add the text, 'Bye Bye Circle!' so that its center point is at the same point as our circle center.
var text = paper.text(250, 250, 'Bye Bye Circle!')
text.attr({opacity: 0, 'font-size': 12}).toBack();
I have set the opacity to 0 so that it is initially hidden. Notice the chaining of the toBack() method. This places the text behind all other canvas drawing elements (similarly, toFront() brings elements to the very front of our canvas). Now, let's add a mouseover event handler to our circle using the node property. We will set the cursor style to 'pointer'.
circ.node.onmouseover = function() {
    this.style.cursor = 'pointer';
}
What this actually does is set the style property of the <circle> object in our document. Our document looks like this:
<circle cx="250.5" cy="250.5" r="40" fill="#000000" stroke="none" style="fill: #000000; stroke: none; cursor: pointer">
</circle>
Now, let's finally add an onclick event handler to our circle:
circ.node.onclick = function() {
    text.animate({opacity: 1}, 2000);
    circ.animate({opacity: 0}, 2000, function() {
        this.remove();
    });
}
When the circle is clicked, the text we referenced in the variable text is animated to full opacity over 2 seconds. The circle itself is animated to 0 opacity over the same time period. We also include a callback function in the circle's animate method. This removes the the circle element from our document once the animation has finished, since whilst the circle has 0 opacity, it is still clickable until removed.
Example here.
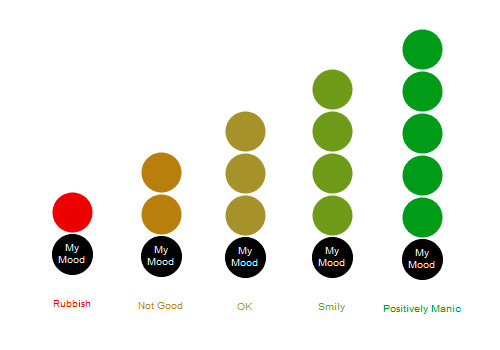
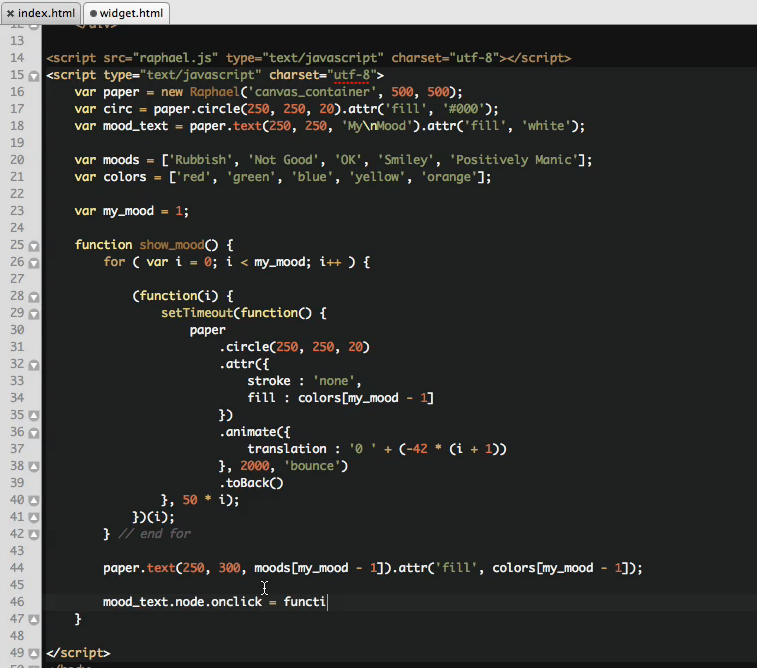
8. Let's Build a Widget
Finally, let's pull together what we've learned and build a pretty little Mood Meter. Basically, you will select a mood value between 1 and 5, 1 being 'rubbish' and 5 being 'positvely manic', and Raphael will create a nice representation of this.
View the widget here
window.onload = function() {
    var paper = new Raphael(document.getElementById('canvas_container'), 500, 500);
    var circ = paper.circle(250, 250, 20).attr({fill: '#000'});
    var mood_text = paper.text(250, 250, 'My\nMood').attr({fill: '#fff'});
}
This creates a circle of radius 20px at the center of our canvas and some text on top of the circle saying 'My Mood'. 'Mood' is placed on a new line using '\n'.
Next, let's create some custom information corresponding to our moods and choose which mood we're in.
moods = ['Rubbish', 'Not Good', 'OK', 'Smily', 'Positively Manic'];
colors = ['#cc0000', '#a97e22', '#9f9136', '#7c9a2d', '#3a9a2d'];

//pick a mood between 1 and 5, 1 being rubbish and 5 being positively manic
var my_mood = 1;
The text description of our mood is stored in an array called 'moods' and the color corresponding to this mood is stored in an array called 'colors'. The chosen mood, a value between 1 and 5, is stored in the variable my_mood.
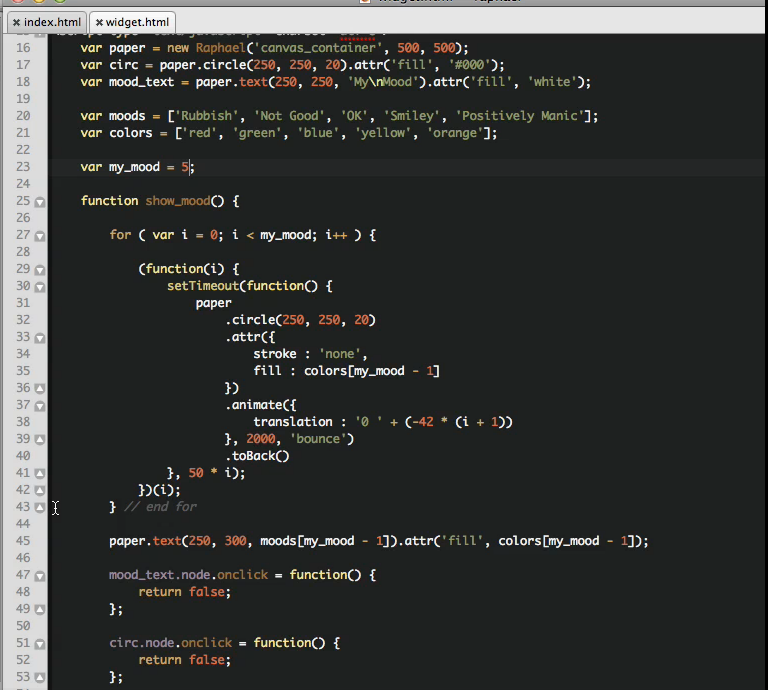
Now let's create a function called show_mood. When invoked, this function will display our mood circles (the colored circles) and the text corresponding to this mood.
function show_mood() {

    for(var i = 0; i < my_mood; i+=1) {
        (function(i) {
            setTimeout(function() {
                paper.circle(250, 250, 20).attr({
                    stroke: 'none',
                    fill: colors[my_mood - 1]
                }).animate({translation: '0 ' + (-42 * (i+1))}, 2000, 'bounce').toBack();
            }, 50*i);
        })(i);
    }
    paper.text(250, 300, moods[my_mood - 1]).attr({fill: colors[my_mood - 1]});

    mood_text.node.onclick = function() {
        return false;
    }
    circ.node.onclick = function() {
        return false;
    }

}
In show_mood(), we have a loop that iterates as many times as the value of my_mood. Inside this loop is a self-executing anonymous function. This is necessary so that we have access to the variable i at each stage of the iteration. Inside the self-executing function, we create a timeout - every 50*i seconds, a circle is created at the point of our original circle. Each circle is then translated over 2 seconds to 0px in x and some multiple of -42px in y. We make sure to place each successive circle at the back of the canvas. Note that the circles are filled according to the color in the colors array, determined by my_mood.
show_mood() is also responsible for the display of our mood text which uses my_mood to pick the corresponding mood from the moods_array.
show_mood() then finally get rid of any onclick event handlers assigned to the original text and circle we placed at the center of the canvas. This prevents the re-drawing of moods circles.
Finally, let's assign onclick event handlers to the center circle and 'My Mood' text. I assign event handlers to both elements so that clicking on either the text or circle has the effect of calling show_mood().
circ.node.onclick = show_mood;
mood_text.node.onclick = show_mood;
Conclusion
Well, that's it! You should now have a sound platform on which to base your explorations into the Raphael JS framework. Most importantly, I hope
you're now eager to delve into Raphael JS and concoct some beautiful browser drawings and widgets. Don't forget to follow me on Twitter, and share your creations.
- Follow us on Twitter, or subscribe to the Nettuts+ RSS Feed for more daily web development tuts and articles.
来源:http://net.tutsplus.com/tutorials/javascript-ajax/an-introduction-to-the-raphael-js-library/
转载自:http://justcoding.iteye.com/blog/1618691
圆中字


 2694
2694


 被折叠的 条评论
为什么被折叠?
被折叠的 条评论
为什么被折叠?
 到【灌水乐园】发言


