


工欲善其事,必先利其器。学习任何框架,下载安装总是第一步。Qt因为开发源码,所以有直接安装和源码安装两种方式,建议是第一次先直接安装,如果后面需要重新编译特定的模块,或者需要静态库,再额外的编译源码。至于IDE,我推荐使用Qt自带的QtCreator。
下载
Qt的官网地址是https://www.qt.io/
Qt release版本下载地址http://download.qt.io/official_releases/qt/
以Qt5.7.1版本为例
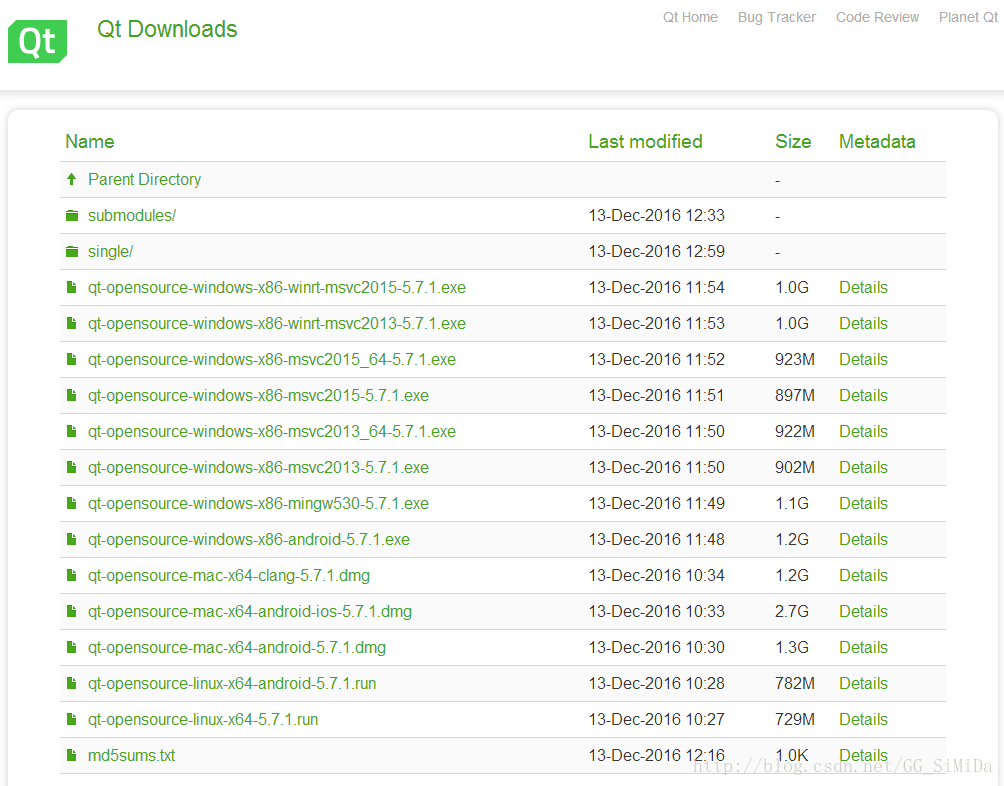
安装包就是已经编译打包好了的,选择对应的平台即可,注意Windows下分msvc和mingw两个版本,如果需要webengine模块的请使用mingw版本。
源码包在single文件夹下qt-everywhere-opensource-src-5.7.1.zip
直接安装
直接安装的方式很简单,就是下载对应的安装包,运行,按照步骤一步步的安装,其中有一步是让你选择所需要安装的模块,最好按下图勾选。(TP是Technology Preview技术预览的意思,表示尚在开发完善中,Deprecated表示已经过时的模块)
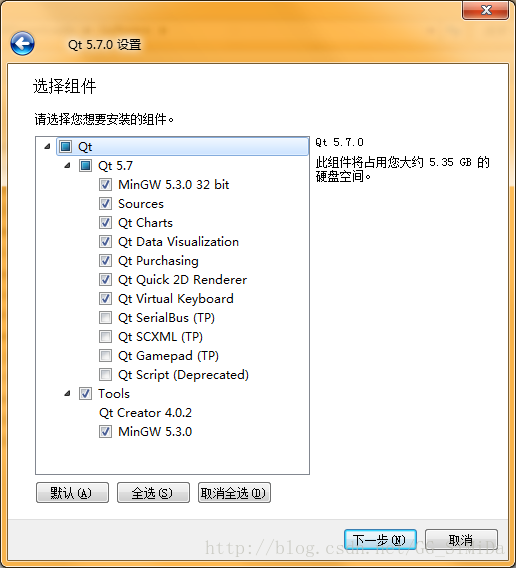
直接安装是Qt库(动态库)和QtCreator一体的,安装后即可运行QtCreator。
因为后续会进行源码赏析,所以将Source也勾选上。
编译安装
编译安装自己要下载源码包,编译步骤可以参考解压后的README文件.
准备工具
Windows编译需要准备如下工具:
- Python 2.7及以上版本,下载地址https://www.python.org/downloads/
- Perl 5.12 以上版本,下载地址https://www.activestate.com/activeperl/downloads
- 支持C++11的编译器,MSVC2012以上版本或者MinGW4.9以上版本
注意:安装时选择“建立环境变量”选项,否则需要自己添加环境变量
安装完成后最好在终端中python -v和perl -v看看是否可以调用到命令
步骤
1、cd到Qt源码目录(注意解压后重新命名文件夹名称简短一点的,以免后面编译时因为路径名过长导致错误),可以看到里面有configure文件
使用 ./configure -h 可以看到可配置的参数,太多了这里只列举几个比较常设置的:
 -release              Compile and link Qt with debugging turned off.
 -debug                Compile and link Qt with debugging turned on.
 -nomake tests         Disable building of tests to speed up compilation
 -nomake examples      Disable building of examples to speed up compilation
 -confirm-license      Automatically acknowledge the LGPL 2.1 license.
2、以编译静态库为例
Windows:
msvc版
./configure -confirm-license -opensource -platform win32-msvc -debug-and-release -static -static-runtime -force-debug-info -opengl dynamic -prefix "./build" -qt-sqlite -qt-pcre -qt-zlib -qt-libpng -qt-libjpeg -opengl desktop -qt-freetype -nomake tests -no-compile-examples -nomake examples
mingw版
./configure -confirm-license -opensource -platform win32-g++ -debug-and-release -static -static-runtime -force-debug-info -opengl dynamic -prefix "./build" -qt-sqlite -qt-pcre -qt-zlib -qt-libpng -qt-libjpeg -opengl desktop -qt-freetype -nomake tests -no-compile-examples -nomake examples
Linux:
./configure -confirm-license -opensource -debug-and-release -static -static-runtime -force-debug-info -opengl dynamic -prefix "./build" -qt-sqlite -qt-pcre -qt-zlib -qt-libpng -qt-libjpeg -opengl desktop -qt-freetype -nomake tests -no-compile-examples -nomake examples
3、 使用对应平台下的编译工具nmake/mingw32-make/make
此过程比较长,大概一个小时以上
4、 nmake/mingw32-make/make install
安装成功后,应该可以在./build目录下看到如下文件夹:

如果是静态编译,在lib中可以看到.a库,动态的则是.dll或者.so库
测试
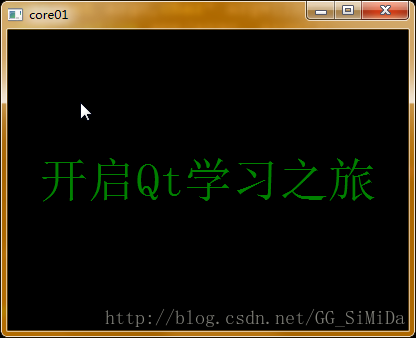
打开QtCreator,新建一个Qt Widgets Application项目,在main函数中输入如下:
#include <QApplication>
#include <QLabel>

int main(int argc,char* argv[]){
    QApplication app(argc, argv);

    QLabel label("开启Qt学习之旅");
    QFont font = label.font();
    font.setPixelSize(48);
    label.setFont(font);
    label.setAlignment(Qt::AlignCenter);
    label.setStyleSheet("background-color: black; color: green;");
    label.setGeometry(200,200,400,300);
    label.show();

    app.exec();
}
编译运行结果


 224
224


 被折叠的 条评论
为什么被折叠?
被折叠的 条评论
为什么被折叠?
 到【灌水乐园】发言


