


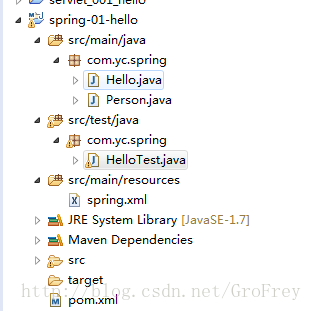
1.创建一个名为spring-01-hello的Maven项目,结构如下
2.引入依赖jar包,代码如下
<project xmlns="http://maven.apache.org/POM/4.0.0" xmlns:xsi="http://www.w3.org/2001/XMLSchema-instance"
  xsi:schemaLocation="http://maven.apache.org/POM/4.0.0 http://maven.apache.org/xsd/maven-4.0.0.xsd">
  <modelVersion>4.0.0</modelVersion>

  <groupId>com.yc</groupId>
  <artifactId>spring-01-hello</artifactId>
  <version>0.0.1-SNAPSHOT</version>
  <packaging>jar</packaging>

  <name>spring-01-hello</name>
  <url>http://maven.apache.org</url>

  <properties>
    <project.build.sourceEncoding>UTF-8</project.build.sourceEncoding>
  </properties>

  <dependencies>
    <dependency>
      <groupId>junit</groupId>
      <artifactId>junit</artifactId>
      <version>4.12</version>
      <scope>test</scope>
    </dependency>
    <!-- 引入spring框架的依赖 -->
    <dependency>
      <groupId>org.springframework</groupId>
      <artifactId>spring-context</artifactId>
      <version>4.3.2.RELEASE</version>
      <scope>runtime</scope>
    </dependency>
  </dependencies>
</project>
3.创建实体类Hello.java和Person.java
package com.yc.spring;

import org.springframework.beans.factory.annotation.Autowired;
import org.springframework.context.annotation.Scope;
import org.springframework.stereotype.Component;

@Component("hello") //创建一个Hello这个类的对象,交给spring容器管理,对象名为hello
@Scope("prototype")//原型对象,默认为单例对象
public class Hello {
    private String name="无名氏";
    @Autowired  //自动注入对象
    private Person person;
    public Hello() {
            System.out.println("我是Hello的无参构造方法....");
    }
    public String getName() {
        return name;
    }

    public void setName(String name) {
        this.name = name;
    }

    public Person getPerson() {
        return person;
    }
    public void setPerson(Person person) {
        this.person = person;
    }
    public void sayHello(){
        System.out.println(String.format("%s 对 %s说 你好帅!!", name,person.getName()));
    }
    @Override
    public String toString() {
        return "Hello [name=" + name + "]";
    }
}
package com.yc.spring;

import org.springframework.stereotype.Component;

@Component("person")
public class Person {
        private String name="帅哥";

        public String getName() {
            return name;
        }

        public void setName(String name) {
            this.name = name;
        }

        @Override
        public String toString() {
            return "Person [name=" + name + "]";
        }

}
4.创建Spring配置文件spring.xml,代码如下
<?xml version="1.0" encoding="UTF-8"?>
<beans xmlns="http://www.springframework.org/schema/beans"
    xmlns:xsi="http://www.w3.org/2001/XMLSchema-instance" xmlns:p="http://www.springframework.org/schema/p"
    xmlns:util="http://www.springframework.org/schema/util" xmlns:context="http://www.springframework.org/schema/context"
    xmlns:aop="http://www.springframework.org/schema/aop" xmlns:tx="http://www.springframework.org/schema/tx"
    xsi:schemaLocation="http://www.springframework.org/schema/beans
        http://www.springframework.org/schema/beans/spring-beans.xsd
        http://www.springframework.org/schema/util
        http://www.springframework.org/schema/util/spring-util.xsd
        http://www.springframework.org/schema/context
        http://www.springframework.org/schema/context/spring-context.xsd
        http://www.springframework.org/schema/aop
        http://www.springframework.org/schema/aop/spring-aop.xsd
        http://www.springframework.org/schema/tx
        http://www.springframework.org/schema/tx/spring-tx.xsd">

    <!-- 扫描bean包  就是由spring容器创建好的对象-->
    <!-- 制定可以作为spring容器管理的对象的包 -->
    <context:component-scan base-package="com.yc.spring" />
</beans>
5.创建测试类HelloTest.java,代码如下
package com.yc.spring;

import org.junit.Test;
import org.springframework.context.ApplicationContext;
import org.springframework.context.support.ClassPathXmlApplicationContext;

public class HelloTest {
    @Test
    public void testIOC() {
        Hello h=new Hello();
        System.out.println(h);
    }

    @Test
    public void testIOC02() {
        ApplicationContext cxt=new ClassPathXmlApplicationContext("spring.xml");
        System.out.println("======================");
        Hello h01=(Hello) cxt.getBean("hello");
        System.out.println(h01);
        h01.sayHello();
        System.out.println("======================");
        Hello h=(Hello) cxt.getBean("hello");
        System.out.println(h);
        h.sayHello();

        if (h01==h) {
            System.out.println("同一对象");
        }else {
            System.out.println("不同对象");
        }
    }

}


 52万+
52万+


 被折叠的 条评论
为什么被折叠?
被折叠的 条评论
为什么被折叠?
 到【灌水乐园】发言


