


###前言:
项目源码GitHub地址:https://github.com/hlk-1135/SSH_PersonInformation
(如果喜欢,请给我点个Star,欢迎一起交流,共同进步!)
功能模块:登录,注册,个人信息管理,通讯录管理,日程安排,文件管理。
要求:
(1) 登录及注册页面要有输入校验,采取struts2的校验框架实现,即-validation.xml配置文件的形式。
(2) 通讯录的查询功能必须支持模糊查询。
注意:注册需采用模型驱动的形式。
这是老师给出的要求,其实目前的实验,一直处于Struts2的小案例,逻辑不是很复杂,功能模块单一,类似于上次的图书管理系统,如果想要完善,后续的工作量还是很大的,由于一直采用Jdbc进行数据库的操纵,在这个项目中,决定使用Spring+Struts2+Hibernate。
####功能模块:
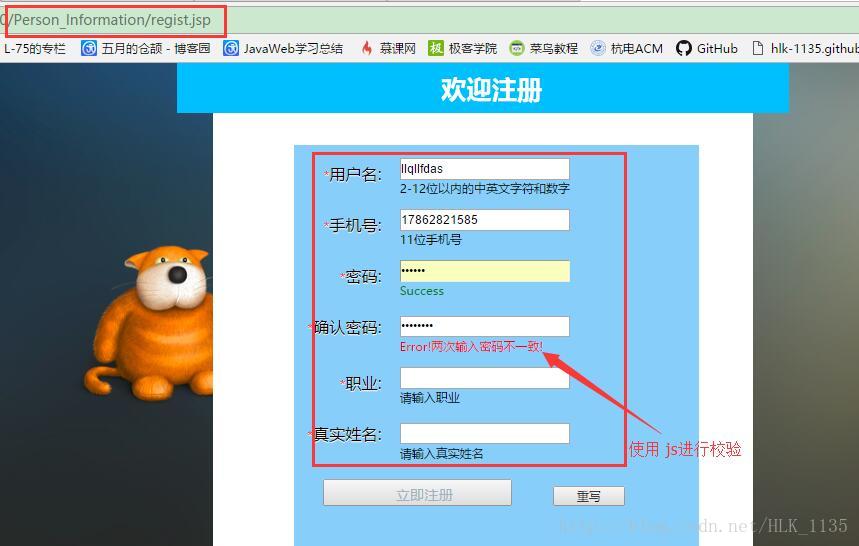
- 个人用户的登录及注册,注册信息时使用js进行校验。(其中使用了拦截器,只有登录后才可以进行联系人、文件等相关操作,否则只能访问主页。)
- 对通讯录中联系人的增删改查,支持通过姓名或者手机号进行模糊查询。(更新:完成了好友的批量删除)
- 对日程安排的增删改查。(和联系人增删改查没区别,所以没实现)
- 对文件的管理(上传文件,并将文件信息保存到数据库中)
####一、环境搭建:
使用MyEclipsel。后端框架使用Struts2+Spring+Hibernate,前端框架使用BootStrap。
####1、数据库:
user表以及friends表的创建以及数据的插入:
SET FOREIGN_KEY_CHECKS=0;

-- ----------------------------
-- Table structure for `user`
-- ----------------------------
DROP TABLE IF EXISTS `user`;
CREATE TABLE `user` (
  `userId` int(100) NOT NULL AUTO_INCREMENT,
  `userName` varchar(100) NOT NULL,
  `password` varchar(100) NOT NULL,
  `work` varchar(100) NOT NULL,
  `realName` varchar(100) NOT NULL,
  `phone` varchar(100) NOT NULL,
  PRIMARY KEY (`userId`)
) ENGINE=InnoDB AUTO_INCREMENT=2 DEFAULT CHARSET=utf8;

-- ----------------------------
-- Table structure for `friends`
-- ----------------------------
DROP TABLE IF EXISTS `friends`;
CREATE TABLE `friends` (
  `friendId` int(100) NOT NULL AUTO_INCREMENT,
  `userId` int(100) NOT NULL,
  `friendName` varchar(100) NOT NULL,
  `friendPhone` varchar(100) NOT NULL,
  `friendCompany` varchar(100) NOT NULL,
  `friendQQ` varchar(100) NOT NULL,
  PRIMARY KEY (`friendId`),
  KEY `user_id` (`userId`),
  CONSTRAINT `user_id` FOREIGN KEY (`userId`) REFERENCES `user` (`userId`) ON DELETE CASCADE ON UPDATE CASCADE
) ENGINE=InnoDB AUTO_INCREMENT=4 DEFAULT CHARSET=utf8;

-- ----------------------------
-- Records of user
-- ----------------------------
INSERT INTO `user` VALUES ('1', 'hlk1135', '123456', '学生', '王五', '17862828631');

-- ----------------------------
-- Records of friends
-- ----------------------------
INSERT INTO `friends` VALUES ('1', '1', '张三', '17862821111', '阿里巴巴', '862186722');
INSERT INTO `friends` VALUES ('2', '1', '李四', '17862821111', '百度', '111111111');
####2、项目结构搭建:
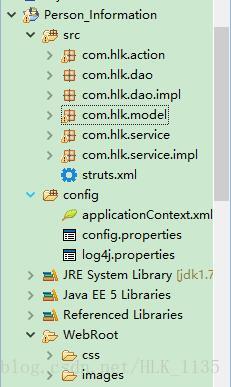
最初搭建SSH环境的时候,使用了Myeclipse中的Add自行自动导入,但是由于jar包之间的冲突,改为自己全部手动导入。给大家一个SSH整合之后的jar包,虽然有几个jar包是多余的,但是我可以保证绝对没有冲突,而且绝对的可以使SSH项目很好的跑起来。
Struts2+Spring3+Hibernate4整合jar包下载
1)web.xml:
<?xml version="1.0" encoding="UTF-8"?>
<web-app version="2.5"
	xmlns="http://java.sun.com/xml/ns/javaee"
	xmlns:xsi="http://www.w3.org/2001/XMLSchema-instance"
	xsi:schemaLocation="http://java.sun.com/xml/ns/javaee
	http://java.sun.com/xml/ns/javaee/web-app_2_5.xsd">
  <display-name></display-name>
  <welcome-file-list>
    <welcome-file>index.jsp</welcome-file>
  </welcome-file-list>
  <!-- 配置Spring的监听器,用于初始化ApplicationContext对象 -->
  <listener>
    <listener-class>org.springframework.web.context.ContextLoaderListener</listener-class>
  </listener>
  <context-param>
    <param-name>contextConfigLocation</param-name>
    <param-value>/WEB-INF/classes/applicationContext.xml</param-value>
  </context-param>
  <filter>
  	<filter-name>struts2</filter-name>
  	<filter-class>
  		org.apache.struts2.dispatcher.ng.filter.StrutsPrepareAndExecuteFilter
  	</filter-class>
    <!-- 自动扫描action -->
    <init-param>
      <param-name>actionPackages</param-name>
      <param-value>com.hlk.action</param-value>
    </init-param>
  </filter>
  <filter-mapping>
  	<filter-name>struts2</filter-name>
  	<url-pattern>/*</url-pattern>
  </filter-mapping>
 </web-app>
注:如果这里xml文件的contextConfigLocation使用classpath: 报类似于如下的错误:
org.springframework.beans.factory.BeanDefinitionStoreException: IOException parsing XML document from ServletContext resource [/WEB-INF/beans.xml]; nested exception is java.io.FileNotFoundException: Could not open ServletContext resource [/WEB-INF/beans.xml]
Caused by: java.io.FileNotFoundException: Could not open ServletContext resource [/WEB-INF/beans.xml]
最后经过不断的测试,调整,得到了如下结论,仅供参考:
<!-- needed for ContextLoaderListener -->
 <!-- 指定spring配置文件的位置 -->
 <context-param>
  <param-name>contextConfigLocation</param-name>
  <!-- 可以成功加载配置文件 -->
  <!-- <param-value>/WEB-INF/classes/beans.xml,/WEB-INF/classes/action-beans.xml</param-value> -->
  <!-- 不能成功加载配置文件 -->
  <!-- <param-value>/WEB-INF/beans.xml,/WEB-INF/action-beans.xml</param-value> -->
  <!-- 可以成功加载配置文件 -->
  <!-- <param-value>classpath:*beans.xml</param-value> -->
  <!-- 不能成功加载配置文件 -->
  <!-- <param-value>classpath:beans.xml,action-beans.xml</param-value> -->
  <!-- 可以成功加载配置文件 -->
  <param-value>classpath:beans.xml,classpath:action-beans.xml</param-value>
 </context-param>
 <!-- Bootstraps the root web application context before servlet initialization -->
 <listener>
  <listener-class>org.springframework.web.context.ContextLoaderListener</listener-class>
 </listener>
Do not use classpath. This may cause problems with different ClassLoaders (container vs. application). WEB-INF is always the better choice.
2)applicationContext.xml:(Spring的配置文件)
<?xml version="1.0" encoding="UTF-8"?>
<beans xmlns="http://www.springframework.org/schema/beans"
    xmlns:xsi="http://www.w3.org/2001/XMLSchema-instance" xmlns:context="http://www.springframework.org/schema/context"
    xmlns:tx="http://www.springframework.org/schema/tx"
    xsi:schemaLocation="http://www.springframework.org/schema/beans http://www.springframework.org/schema/beans/spring-beans-3.1.xsd
                http://www.springframework.org/schema/context http://www.springframework.org/schema/context/spring-context-3.1.xsd
                http://www.springframework.org/schema/tx http://www.springframework.org/schema/tx/spring-tx-3.1.xsd">

    <!-- 自动扫描dao和service包(自动注入) -->
	<context:component-scan base-package="com.hlk.dao,com.hlk.service"/>
	<!-- 引入属性文件 -->
	<context:property-placeholder location="/WEB-INF/classes/config.properties"/>
	<!-- 配置数据源 -->
	<bean name="dataSource" class="com.alibaba.druid.pool.DruidDataSource" init-method="init" destroy-method="close">
		<!-- 数据源驱动类可不写,Druid默认会自动根据URL识别DriverClass -->
		<property name="driverClassName" value="${driverClassName}" />
		<!-- 基本属性 url、user、password -->
		<property name="url" value="${jdbc_url}" />
		<property name="username" value="${jdbc_username}" />
		<property name="password" value="${jdbc_password}" />
		<!-- 配置初始化大小、最小、最大 -->
		<property name="initialSize" value="3" />
		<property name="minIdle" value="3" />
		<property name="maxActive" value="20" />
		<!-- 配置获取连接等待超时的时间 -->
		<property name="maxWait" value="60000" />
		<!-- 配置间隔多久才进行一次检测,检测需要关闭的空闲连接,单位是毫秒 -->
		<property name="timeBetweenEvictionRunsMillis" value="60000" />
		<!-- 配置一个连接在池中最小生存的时间,单位是毫秒 -->
		<property name="minEvictableIdleTimeMillis" value="300000" />
		<property name="validationQuery" value="${validationQuery}" />
		<property name="testWhileIdle" value="true" />
		<property name="testOnBorrow" value="false" />
		<property name="testOnReturn" value="false" />
		<!-- 配置监控统计拦截的filters -->
		<property name="filters" value="stat" />
	</bean>
	<!-- 配置hibernate session工厂 -->
	<bean id="sessionFactory"
		class="org.springframework.orm.hibernate4.LocalSessionFactoryBean">
		<property name="dataSource">
			<ref bean="dataSource" />
		</property>
		<property name="hibernateProperties">
			<props>
				<prop key="hibernate.hbm2ddl.auto">update</prop>
				<prop key="hibernate.dialect">org.hibernate.dialect.MySQLDialect</prop>
				<prop key="hibernate.show_sql">true</prop>
				<prop key="hibernate.format_sql">true</prop>
			</props>
		</property>
		<!--自动扫描注解方式配置的hibernate类文件  -->
        <property name="packagesToScan">
        	<list>
				<value>com.hlk.model</value>
			</list>
        </property>
	</bean>
	<!-- 用注解来实现事务管理 -->
    <bean id="txManager" name="txManager" class="org.springframework.orm.hibernate4.HibernateTransactionManager">
        <property name="sessionFactory" ref="sessionFactory"></property>
    </bean>
    <!-- 注解方式配置事物 -->
    <tx:annotation-driven transaction-manager="txManager"/>
</beans>
这里使用了druid数据库连接池,代码注释很详细,这里不再做介绍。
3)属性文件config.properties:
hibernate.dialect=org.hibernate.dialect.MySQLDialect
driverClassName=com.mysql.jdbc.Driver
validationQuery=SELECT 1
jdbc_url=jdbc:mysql://127.0.0.1:3306/information?useUnicode=true&characterEncoding=UTF-8&zeroDateTimeBehavior=convertToNull&useSSL=false
jdbc_username=root
jdbc_password=

hibernate.hbm2ddl.auto=update
hibernate.show_sql=true
hibernate.format_sql=true
4)struts2的配置文件struts.xml:
<?xml version="1.0" encoding="UTF-8" ?>
<!DOCTYPE struts PUBLIC "-//Apache Software Foundation//DTD Struts Configuration 2.1//EN" "http://struts.apache.org/dtds/struts-2.1.dtd">
<struts>

	<!-- 指定由spring负责action对象的创建 -->
	<constant name="struts.objectFactory" value="spring" />
	<!-- 是否启用开发模式 -->
	<constant name="struts.devMode" value="true" />
	<!-- struts配置文件改动后,是否重新加载 -->
	<constant name="struts.configuration.xml.reload" value="true" />
	<!-- 设置浏览器是否缓存静态内容 -->
	<constant name="struts.serve.static.browserCache" value="false" />
	<!-- 请求参数的编码方式 -->
	<constant name="struts.i18n.encoding" value="utf-8" />
	<!-- 每次HTTP请求系统都重新加载资源文件,有助于开发 -->
	<constant name="struts.i18n.reload" value="true" />
	<!-- 文件上传最大值 -->
	<constant name="struts.multipart.maxSize" value="104857600" />
	<!-- 让struts2支持动态方法调用 -->
	<constant name="struts.enable.DynamicMethodInvocation" value="true" />
	<!-- Action名称中是否还是用斜线 -->
	<constant name="struts.enable.SlashesInActionNames" value="false" />
	<!-- 允许标签中使用表达式语法 -->
	<constant name="struts.tag.altSyntax" value="true" />
	<!-- 对于WebLogic,Orion,OC4J此属性应该设置成true -->
	<constant name="struts.dispatcher.parametersWorkaround" value="false" />
</struts>
4)Hibernate反向工程生成User和Friends两个Java实体类。
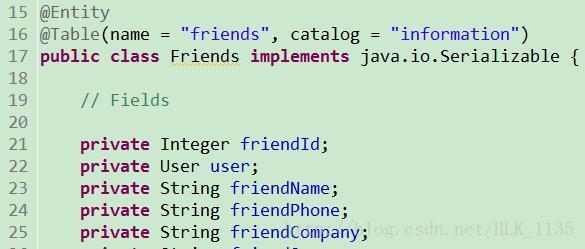

我不会使用MyEclipse中的Hibernate反向工程怎么办?没问题!请点击这里!
点击这个告诉你!!!
####好啦,以上这些工作都搞定,那么我们就可以敲代码来实现我们的需求啦。
####二、各模块功能的实现:
1、用户模块
1)用户登录
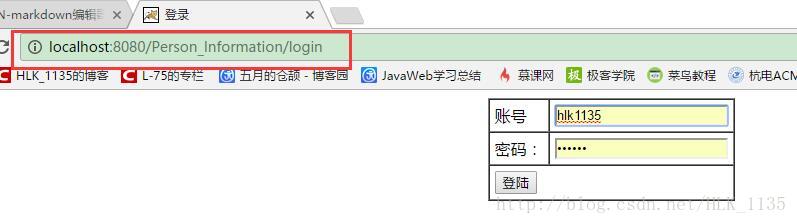
登录拦截:
获取我们url执行的操作,如果不是login,则查看session中是否有登录的用户对象,如果为null,则返回到登录页面。
public class UserInterceptor extends AbstractInterceptor{
	@Override
	public String intercept(ActionInvocation invocation) throws Exception {
		//获取当前执行的方法
		String methodName = invocation.getProxy().getMethod();
		ActionContext ac = invocation.getInvocationContext();
		//从session中获取登录的用户对象
		Object obj = ac.getSession().get("userInfo");

		if(!"login".equals(methodName)) {
			if(obj == null) { //如果session中userInfo对象为null
				return "login";
			} else {
				return invocation.invoke();//允许执行操作
			}
		}
		return invocation.invoke();
	}
}
2)用户注册(使用js进行校验)
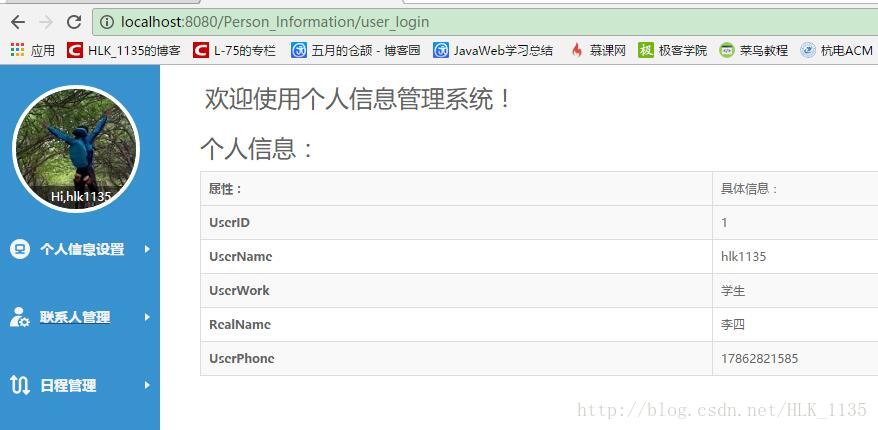
2、登录成功主页面
登录成功后将登录信息存入session中,方便进行显示以及后续其它模块中的查找。
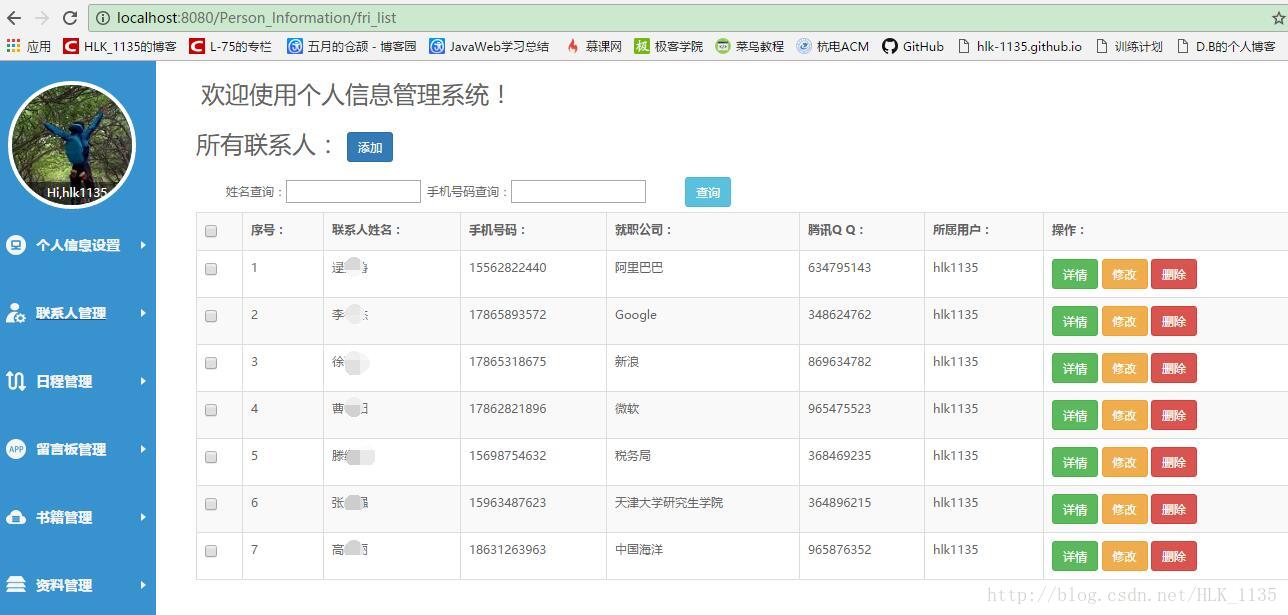
3、联系人管理模块
由于user表的id为friends表的外键,所以在这里只显示和查询登录用户的联系人,不可对其它用户的联系人进行操作。因此上面将user存入session则起到了作用。
1)添加联系人
这里要注意一个问题是,我们添加联系人时,一条联系人的记录,还包括了userId,因此我们需要先查出user对象,将其设置到联系人对象中,再保存联系人。
	public String save() {
		//先根据userId,查出user对象;再设置到联系人对象中
		User user = userService.findUserById(userId);
		friends.setUser(user);
		// 调用Service,保存联系人
		friendService.save(friends);
		return "frilistAction";
	}

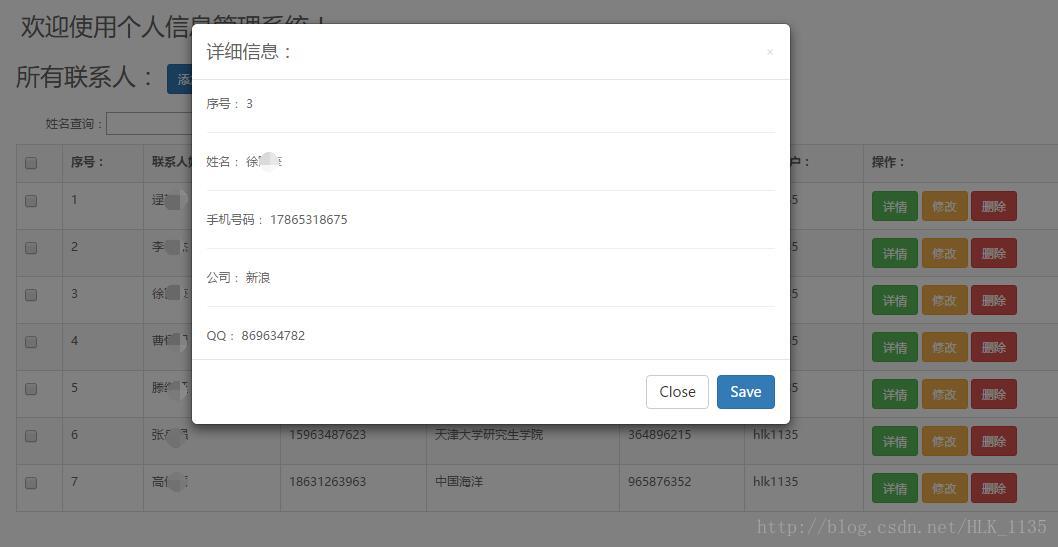
2)查看联系人详细信息
这里再次使用了BootStrap的模态框,具体操作,可以借鉴一下上个小Demo中的具体介绍。------Struts2简单的图书管理系统
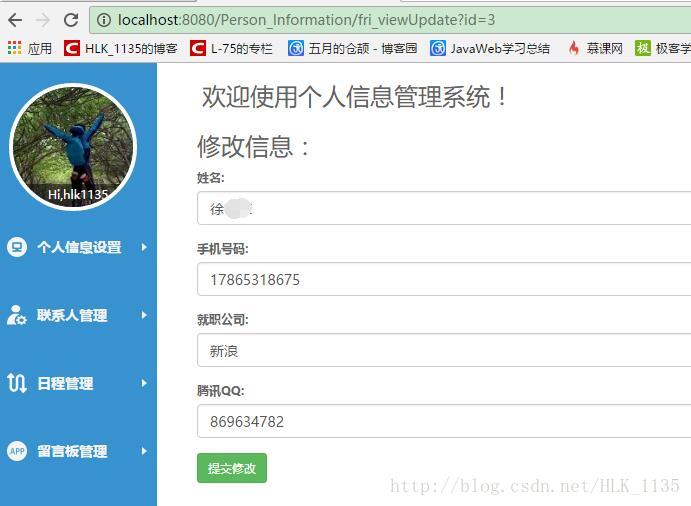
3)修改联系人信息
4)通过姓名和手机号进行模糊查询
这里的模糊查询支持 只使用手机号、只使用姓名、两者都使用。
	/**
	 * 根据姓名和手机号模糊查询
	 */
	@Override
	public List<Friends> getAll(String friendName, String friendPhone) {
		HttpServletRequest request = ServletActionContext.getRequest();
		User user = (User)request.getSession().getAttribute("userInfo");
		int uid = user.getUserId();
		return this.getCurrentSession()
				.createQuery("from Friends where friendName like ? and friendPhone like ? and userId=?")
				.setParameter(0, "%" + friendName + "%")
				.setParameter(1, "%" + friendPhone + "%")
				.setInteger(2, uid)
				.list();
	}
输入查询信息:

查询结果:

5)批量删除联系人
复选框的获取;将拼接的字符串进行分割;for循环执行删除操作
<input type="checkbox" name="checkboxes" value="<s:property value="#friend.friendId"/>"/>
function delchecked() {
		var ids="";
		var obj=$("input[name='checkboxes']");

		for(var i=0;i<obj.length;i++) {
			if(obj[i].checked)
				if(ids=="") {
					ids += obj[i].value;
				} else {
					ids += "," + obj[i].value;
				}
		}
		alert(ids);
		if(ids == ""){
			alert("请勾选要删除的项");
			return false;
		}
		if(confirm("你确定要删除选定项?"))
			location.href="fri_deletemany?ids=" + ids;	//跳转到action
}
FriendAction.java:
public String deletemany() {
		//获取出需要删除的联系人的id
		String str = ServletActionContext.getRequest().getParameter("ids");
		String[] s = str.trim().split(",");
		for (int i = 0; i < s.length; i++) {
			int id = Integer.parseInt(s[i]);
			Friends f = friendService.findById(id);
			friendService.delete(f);
		}
		return "frilistAction";
	}
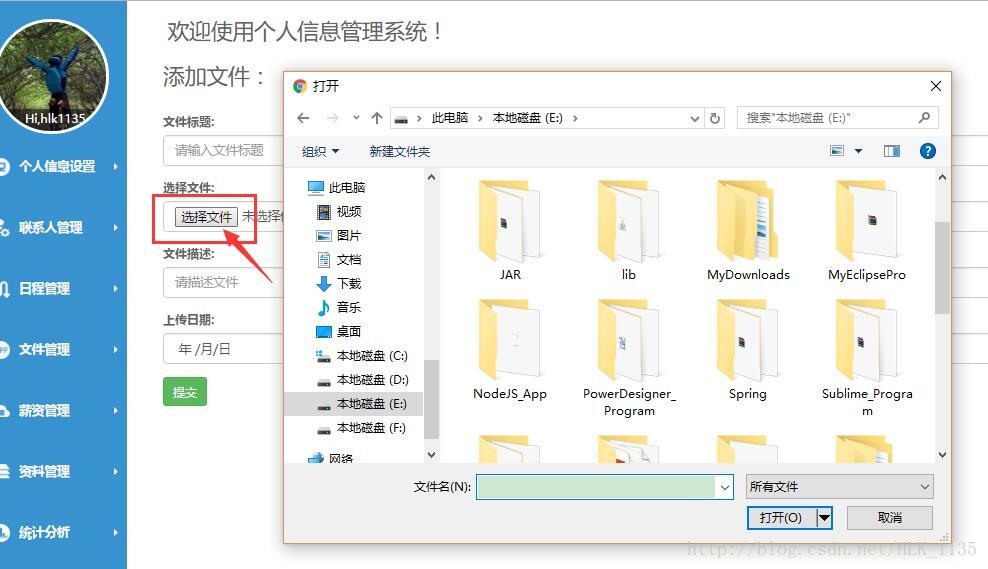
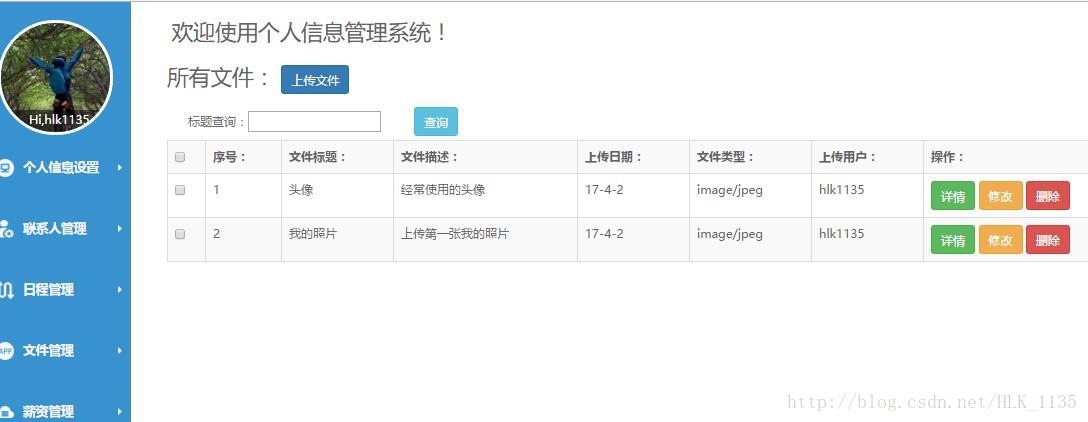
4、文件管理模块
1)上传文件
2)文件列表显示
###后续功能模块继续完善中,代码更新后会整理上传到Github。


 1860
1860

 被折叠的 条评论
为什么被折叠?
被折叠的 条评论
为什么被折叠?
 到【灌水乐园】发言


