转自:Android scrollTo() scrollBy() Scroller讲解及应用
scrollTo() 、scrollBy()及 Scroller在视图滑动中经常使用到,比如最常见的Launcher就是用这种方式实现。为了更加明了的理解,还是去看一下源码。在View类中,scrollTo的代码如下:
/** * Set the scrolled position of your view. This will cause a call to * {@link #onScrollChanged(int, int, int, int)} and the view will be * invalidated. * @param x the x position to scroll to * @param y the y position to scroll to */ public void scrollTo(int x, int y) { if (mScrollX != x || mScrollY != y) { int oldX = mScrollX ; int oldY = mScrollY ; mScrollX = x ; mScrollY = y ; invalidateParentCaches(); onScrollChanged(mScrollX, mScrollY, oldX, oldY); if (!awakenScrollBars()) { postInvalidateOnAnimation(); } } }
在注释中说到,该方法用于设置滚动视图的位置,然后会调用onScrollChanged(int, int, int, int)方法,最后视图会被刷新。那它是如何让视图滚动的呢?首先注意到在这个方法中有两个变量:mScrollX、mScrollY。这两个变量是在View类中定义的,
/** * The offset, in pixels, by which the content of this view is scrolled * horizontally. * {@hide} */ @ViewDebug.ExportedProperty(category = "scrolling" ) protected int mScrollX; /** * The offset, in pixels, by which the content of this view is scrolled * vertically. * {@hide} */ @ViewDebug.ExportedProperty(category = "scrolling" ) protected int mScrollY;
这两个变量分别是视图在水平和垂直方向的偏移量,
mScrollX: 该视图内容相当于视图起始坐标的偏移量, X轴方向 mScrollY:该视图内容相当于视图起始坐标的偏移量, Y轴方向
分别通过getScrollX() 和getScrollY()方法获得。
我们知道Android的坐标体系是这样的:
(ps:相对于父类视图的左上角坐标为坐标原点(0,0),而不是整体ViewGroup的左上角为原点。)
scrollTo()方法就是将一个视图移动到指定位置,偏移量 mScrollX、mScrollY就是视图初始位置的距离,默认是情况下当然是0。如果视图要发生移动,比如要移动到(x,y),首先要检查这个点的坐标是否和偏移量一样,因为 scrollTo()是移动到指定的点,如果这次移动的点的坐标和上次偏移量一样,也就是说这次移动和上次移动的坐标是同一个,那么就没有必要进行移动了。这也是这个方法为什么进行 if (mScrollX != x || mScrollY != y) {这样一个判断的原因。接下来再看一下scrollBy()的源码,
/** * Move the scrolled position of your view. This will cause a call to * {@link #onScrollChanged(int, int, int, int)} and the view will be * invalidated. * @param x the amount of pixels to scroll by horizontally * @param y the amount of pixels to scroll by vertically */ public void scrollBy(int x, int y) { scrollTo(mScrollX + x, mScrollY + y); }
很简单,就是直接调用了scrollTo方法,但是从这个方法的实现机制可以看出,它是一个累加减的过程,不断的将当前视图内容继续偏移(x , y)个单位。比如第一次 scrollBy(10,10),第二次 scrollBy(10,10),那么最后的结果就相当于scrollTo(20,20)。
理解这两个方法的实现机制之后,还有一个重要的问题,就是关于移动的方向。比如一个位于原点的视图,如果调用了scrollTo(0,20)方法,如果你认为是垂直向下移动20像素就错了,其实是向上移动了20个像素。在上图中,我已经给出了一个十字坐标,正负代表坐标的正负以及相应的方向。为什么会是这样的情况呢?按坐标系的认知来说,不应该是这个结果的,所以必须研究一下究竟为何。
线索当然还是要分析源码,在scrollTo(x, y)中,x和y分别被赋值给了mScrollX和mScrollY,最后调用了postInvalidateOnAnimation()方法。之后这个方法会通知View进行重绘。所以就去看一下draw()方法的源码,因为这个方法比较长,基于篇幅就不全部列出,直说重点。先列出方法的前几行,
public void draw(Canvas canvas) { if (mClipBounds != null) { canvas.clipRect(mClipBounds); } final int privateFlags = mPrivateFlags ; final boolean dirtyOpaque = (privateFlags & PFLAG_DIRTY_MASK) == PFLAG_DIRTY_OPAQUE && (mAttachInfo == null || !mAttachInfo.mIgnoreDirtyState); mPrivateFlags = (privateFlags & ~PFLAG_DIRTY_MASK) | PFLAG_DRAWN; /* * Draw traversal performs several drawing steps which must be executed * in the appropriate order: * * 1. Draw the background * 2. If necessary, save the canvas' layers to prepare for fading * 3. Draw view's content * 4. Draw children * 5. If necessary, draw the fading edges and restore layers * 6. Draw decorations (scrollbars for instance) */ // Step 1, draw the background, if needed int saveCount;
在注释中可以看到这个方法的步骤,第六步6就是绘制scrollbars,而scrollbars就是由于scroll引起的,所以先定位到这里。在方法的最后,看到了
// Step 6, draw decorations (scrollbars) onDrawScrollBars(canvas);
然后看一下onDrawScrollBars(canvas)方法,
protected final void onDrawScrollBars(Canvas canvas) { // scrollbars are drawn only when the animation is running final ScrollabilityCache cache = mScrollCache ; if (cache != null) { int state = cache .state; if (state == ScrollabilityCache.OFF) { return; } boolean invalidate = false ; if (state == ScrollabilityCache.FADING) { // We're fading -- get our fade interpolation if (cache.interpolatorValues == null) { cache.interpolatorValues = new float[1]; } float[] values = cache .interpolatorValues; // Stops the animation if we're done if (cache.scrollBarInterpolator.timeToValues(values) == Interpolator.Result.FREEZE_END) { cache.state = ScrollabilityCache .OFF; } else { cache.scrollBar.setAlpha(Math.round(values[0])); } // This will make the scroll bars inval themselves after // drawing. We only want this when we're fading so that // we prevent excessive redraws invalidate = true ; } else { // We're just on -- but we may have been fading before so // reset alpha cache.scrollBar.setAlpha(255); } final int viewFlags = mViewFlags ; final boolean drawHorizontalScrollBar = (viewFlags & SCROLLBARS_HORIZONTAL) == SCROLLBARS_HORIZONTAL; final boolean drawVerticalScrollBar = (viewFlags & SCROLLBARS_VERTICAL) == SCROLLBARS_VERTICAL && !isVerticalScrollBarHidden(); if (drawVerticalScrollBar || drawHorizontalScrollBar) { final int width = mRight - mLeft; final int height = mBottom - mTop; final ScrollBarDrawable scrollBar = cache .scrollBar; final int scrollX = mScrollX ; final int scrollY = mScrollY ; final int inside = (viewFlags & SCROLLBARS_OUTSIDE_MASK) == 0 ? ~0 : 0; int left; int top; int right; int bottom; if (drawHorizontalScrollBar) { int size = scrollBar .getSize(false); if (size < = 0) { size = cache .scrollBarSize; } scrollBar.setParameters(computeHorizontalScrollRange(), computeHorizontalScrollOffset(), computeHorizontalScrollExtent(), false); final int verticalScrollBarGap = drawVerticalScrollBar ? getVerticalScrollbarWidth() : 0; top = scrollY + height - size - (mUserPaddingBottom & inside); left = scrollX + (mPaddingLeft & inside); right = scrollX + width - (mUserPaddingRight & inside) - verticalScrollBarGap; bottom = top + size; onDrawHorizontalScrollBar(canvas, scrollBar, left, top, right, bottom); if (invalidate) { invalidate(left, top, right, bottom); } } if (drawVerticalScrollBar) { int size = scrollBar .getSize(true); if (size < = 0) { size = cache .scrollBarSize; } scrollBar.setParameters(computeVerticalScrollRange(), computeVerticalScrollOffset(), computeVerticalScrollExtent(), true); int verticalScrollbarPosition = mVerticalScrollbarPosition ; if (verticalScrollbarPosition == SCROLLBAR_POSITION_DEFAULT) { verticalScrollbarPosition = isLayoutRtl () ? SCROLLBAR_POSITION_LEFT : SCROLLBAR_POSITION_RIGHT; } switch (verticalScrollbarPosition) { default: case SCROLLBAR_POSITION_RIGHT: left = scrollX + width - size - (mUserPaddingRight & inside); break; case SCROLLBAR_POSITION_LEFT: left = scrollX + (mUserPaddingLeft & inside); break; } top = scrollY + (mPaddingTop & inside); right = left + size; bottom = scrollY + height - (mUserPaddingBottom & inside); onDrawVerticalScrollBar(canvas, scrollBar, left, top, right, bottom); if (invalidate) { invalidate(left, top, right, bottom); } } } } }
这个方法分别绘制水平和垂直方向的ScrollBar,最后都会调用invalidate(left, top, right, bottom)方法。
public void invalidate(int l, int t, int r, int b) { if (skipInvalidate()) { return; } if ((mPrivateFlags & (PFLAG_DRAWN | PFLAG_HAS_BOUNDS)) == (PFLAG_DRAWN | PFLAG_HAS_BOUNDS) || (mPrivateFlags & PFLAG_DRAWING_CACHE_VALID) == PFLAG_DRAWING_CACHE_VALID || (mPrivateFlags & PFLAG_INVALIDATED) != PFLAG_INVALIDATED) { mPrivateFlags &= ~PFLAG_DRAWING_CACHE_VALID; mPrivateFlags |= PFLAG_INVALIDATED; mPrivateFlags |= PFLAG_DIRTY; final ViewParent p = mParent ; final AttachInfo ai = mAttachInfo ; //noinspection PointlessBooleanExpression,ConstantConditions if (!HardwareRenderer.RENDER_DIRTY_REGIONS) { if (p != null && ai != null && ai.mHardwareAccelerated) { // fast-track for GL-enabled applications; just invalidate the whole hierarchy // with a null dirty rect, which tells the ViewAncestor to redraw everything p.invalidateChild(this, null); return; } } if (p != null && ai != null && l < r && t < b ) { final int scrollX = mScrollX ; final int scrollY = mScrollY ; final Rect tmpr = ai .mTmpInvalRect; tmpr.set(l - scrollX, t - scrollY, r - scrollX, b - scrollY); p.invalidateChild(this, tmpr); } } }
在这个方法的最后,可以看到 tmpr.set(l - scrollX, t - scrollY, r - scrollX, b - scrollY),真相终于大白,相信也都清楚为什么会是反方向的了。也会明白当向右移动视图时候,为什么getScrollX()返回值会是负的了。下面做一个测试的demo,来练习一下这两个方法的使用。
Activity:
package com.kince.scrolldemo; import android.app.Activity; import android.os.Bundle; import android.view.View; import android.view.View.OnClickListener; import android.widget.Button; import android.widget.TextView; public class MainActivity extends Activity implements OnClickListener { private Button mButton1; private Button mButton2; private Button mButton3; private TextView mTextView; @Override protected void onCreate(Bundle savedInstanceState) { super.onCreate(savedInstanceState); setContentView(R.layout.activity_main); mTextView = (TextView) this.findViewById(R.id.tv); mButton1 = (Button) this.findViewById(R.id.button_scroll1); mButton2 = (Button) this.findViewById(R.id.button_scroll2); mButton3 = (Button) this.findViewById(R.id.button_scroll3); mButton1.setOnClickListener(this); mButton2.setOnClickListener(this); mButton3.setOnClickListener(this); } @Override public void onClick(View v) { // TODO Auto-generated method stub switch (v.getId()) { case R.id.button_scroll1: mTextView.scrollTo(-10, -10); break; case R.id.button_scroll2: mTextView.scrollBy(-2, -2); break; case R.id.button_scroll3: mTextView.scrollTo(0, 0); break; default: break; } } }
xml:
< LinearLayout xmlns:android = "http://schemas.android.com/apk/res/android" xmlns:tools = "http://schemas.android.com/tools" android:layout_width = "match_parent" android:layout_height = "match_parent" android:orientation = "vertical" > < RelativeLayout android:layout_width = "match_parent" android:layout_height = "400dp" android:background = "@android:color/holo_green_light" > < TextView android:id = "@+id/tv" android:layout_width = "wrap_content" android:layout_height = "wrap_content" android:layout_centerInParent = "true" android:background = "@android:color/holo_blue_dark" android:textSize = "20sp" android:text = "SCROLL" /> </ RelativeLayout > < LinearLayout android:layout_width = "match_parent" android:layout_height = "wrap_content" android:gravity = "center_horizontal" android:orientation = "horizontal" > < Button android:id = "@+id/button_scroll1" android:layout_width = "wrap_content" android:layout_height = "wrap_content" android:text = "SCROLL_TO" /> < Button android:id = "@+id/button_scroll2" android:layout_width = "wrap_content" android:layout_height = "wrap_content" android:text = "SCROLL_BY" /> < Button android:id = "@+id/button_scroll3" android:layout_width = "wrap_content" android:layout_height = "wrap_content" android:text = "复位" /> </ LinearLayout > </ LinearLayout >
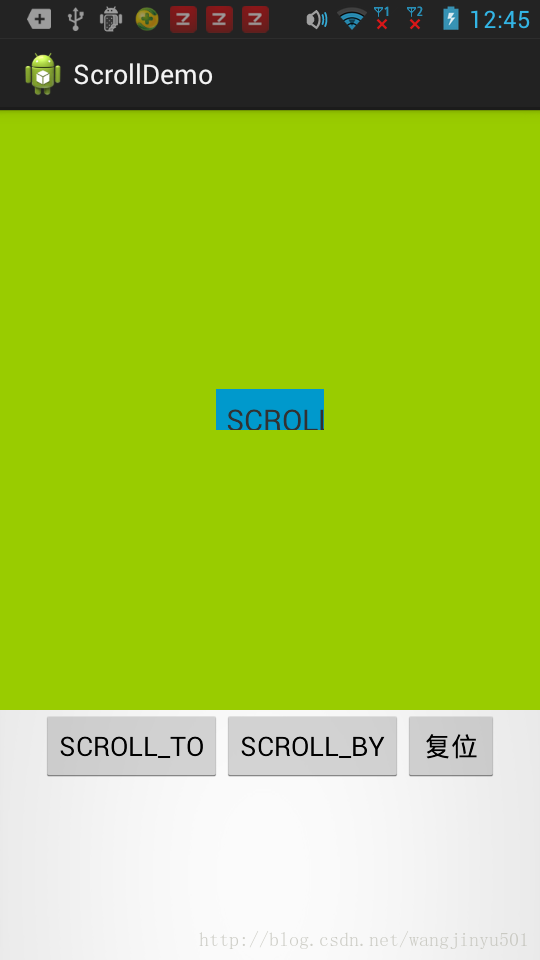
点击SCROLL_TO按钮,TxtView移动后显示如下:
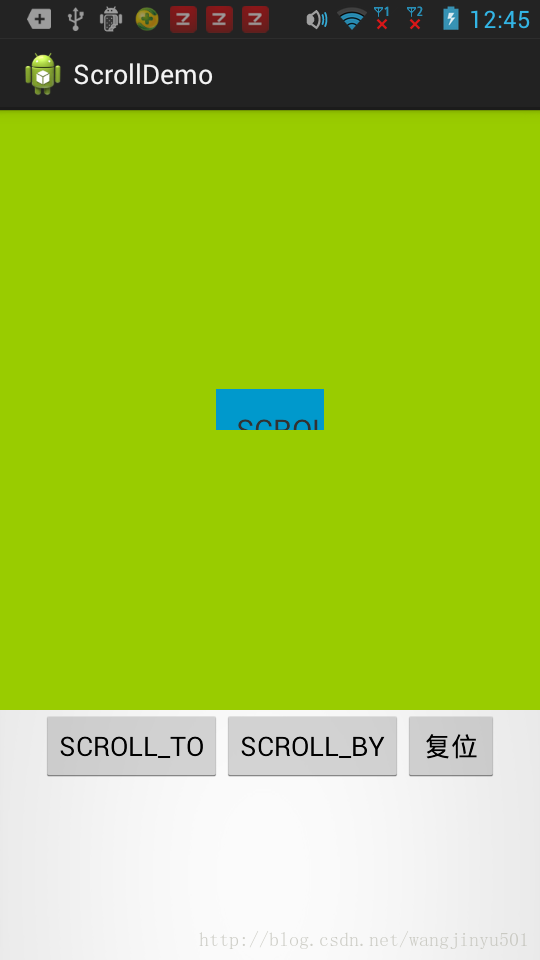
然后,不断按SCROLL_BY按钮,显示如下:
可以看到,TextView逐渐向下移动,直到看不到文字(还会继续移动)。看到这样的结果,可能会与之前预想的有些出入。我之前以为TextView会在它的父类容器控件中移动,也就是图中绿黄色的区域。结果却是视图相对于自身的移动,其实还是对于这个方法包括 mScrollX、mScrollY的理解不全面,回过头来再看一下
protected int mScrollX; //The offset, in pixels, by which the content of this view is scrolled
重点就是the content of this view,视图的内容的偏移量,而不是视图相对于其他容器或者视图的偏移量。也就是说,移动的是视图里面的内容,从上面的例子也可以看出,TextView的文字移动了,而背景色一直没变化,说明不是整个视图在移动。
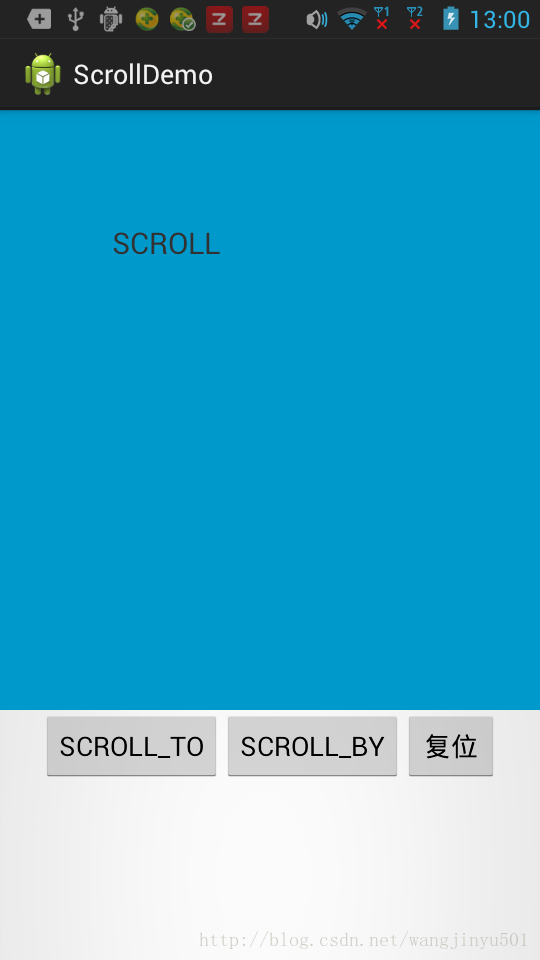
接着,改一下代码,在xml文件中将TextView的宽高设置成填充父容器。再看一下效果,
这下看的效果就仿佛是在父容器中移动,但是其实还是TextView本身的内容在移动。那这两个方法在实际开发中是如何运用的呢?光凭上面的例子是看不出什么作用的,但是就像文章开头部分说的那样,在视图滑动的情况下,这两个方法发挥了巨大的作用。以类似Launcher左右滑屏为例,
先自定义一个View继承于ViewGroup,如下:
/** * */ package com.kince.scrolldemo; import android.content.Context; import android.util.AttributeSet; import android.view.MotionEvent; import android.view.View; import android.view.ViewGroup; /** * @author kince * * */ public class CusScrollView extends ViewGroup { private int lastX = 0 ; private int currX = 0 ; private int offX = 0 ; /** * @param context */ public CusScrollView(Context context) { this(context, null); // TODO Auto-generated constructor stub } /** * @param context * @param attrs */ public CusScrollView(Context context, AttributeSet attrs) { this(context, attrs, 0); // TODO Auto-generated constructor stub } /** * @param context * @param attrs * @param defStyle */ public CusScrollView(Context context, AttributeSet attrs, int defStyle) { super(context, attrs, defStyle); // TODO Auto-generated constructor stub } /* * (non-Javadoc) * * @see android.view.ViewGroup#onLayout(boolean, int, int, int, int) */ @Override protected void onLayout(boolean changed, int l, int t, int r, int b) { // TODO Auto-generated method stub for (int i = 0 ; i < getChildCount (); i++) { View v = getChildAt (i); v.layout(0 + i * getWidth(), 0, getWidth() + i * getWidth(), getHeight()); } } @Override public boolean onTouchEvent(MotionEvent event) { // TODO Auto-generated method stub switch (event.getAction()) { case MotionEvent.ACTION_DOWN: // 只考虑水平方向 lastX = (int) event.getX(); return true; case MotionEvent.ACTION_MOVE: currX = (int) event.getX(); offX = currX - lastX; scrollBy(-offX, 0); break; case MotionEvent.ACTION_UP: scrollTo(0, 0); break; } invalidate(); return super.onTouchEvent(event); } }
这个控件用于水平滑动里面的视图,Activity代码如下:
package com.kince.scrolldemo; import android.app.Activity; import android.app.ActionBar; import android.app.Fragment; import android.os.Bundle; import android.view.LayoutInflater; import android.view.Menu; import android.view.MenuItem; import android.view.View; import android.view.ViewGroup; import android.view.ViewGroup.LayoutParams; import android.widget.ImageView; import android.widget.ImageView.ScaleType; import android.os.Build; public class LauncherActivity extends Activity { private int[] images = { R.drawable.jy1, R.drawable.jy2, R.drawable.jy3, R.drawable.jy4, R.drawable.jy5, }; private CusScrollView mCusScrollView; @Override protected void onCreate(Bundle savedInstanceState) { super.onCreate(savedInstanceState); setContentView(R.layout.activity_launcher); mCusScrollView = (CusScrollView) this.findViewById(R.id.CusScrollView); for (int i = 0 ; i < images.length ; i++) { ImageView mImageView = new ImageView(this); mImageView.setScaleType(ScaleType.FIT_XY); mImageView.setBackgroundResource(images[i]); mImageView.setLayoutParams(new LayoutParams( LayoutParams.MATCH_PARENT, LayoutParams.MATCH_PARENT)); mCusScrollView.addView(mImageView); } } }
在Activity中为CusScrollView添加5个ImageView用于显示图片,xml如下:
< LinearLayout xmlns:android = "http://schemas.android.com/apk/res/android" xmlns:tools = "http://schemas.android.com/tools" android:layout_width = "match_parent" android:layout_height = "match_parent" android:orientation = "vertical" > < com.kince.scrolldemo.CusScrollView android:id = "@+id/CusScrollView" android:layout_width = "match_parent" android:layout_height = "match_parent" > </ com.kince.scrolldemo.CusScrollView > </ LinearLayout >
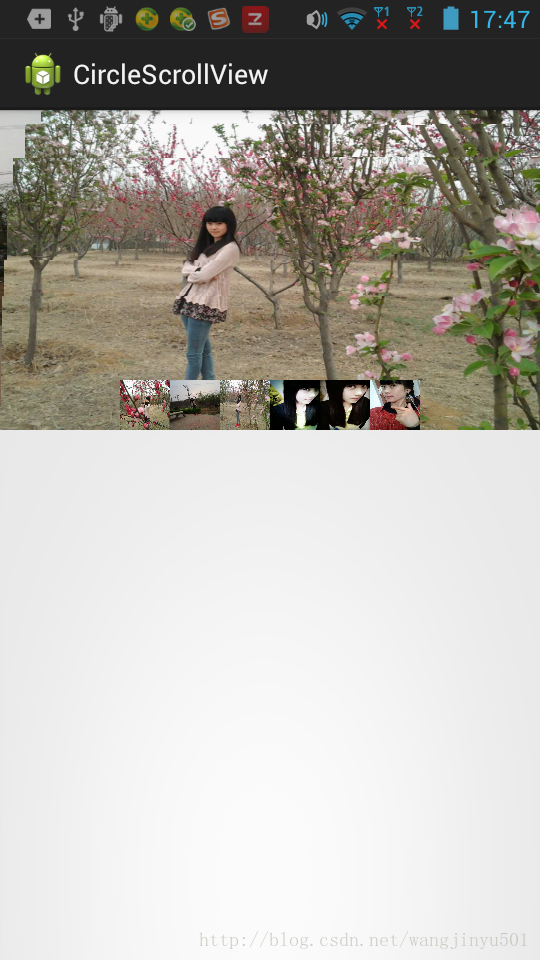
这个例子对CusScrollView里面的图片进行左右滑动,在 onTouchEvent(MotionEvent event)的MotionEvent.ACTION_MOVE中对图片进行移动,使用的是 scrollBy()方法,因为手指每次移动都会产生差值,利用 scrollBy()方法就可以跟随手指进行左右滑动。在MotionEvent.ACTION_UP事件中,也就是手指抬起时候,直接使用scrollTo()方法让视图回到初始位置。再强调一遍,注意不管是scrollBy()还是scrollTo()方法,都是对CusScrollView内容视图进行移动。效果如下:
至此,就大体完成了对 scrollBy()、 scrollTo()这两个方法的介绍。不过通过上面的例子,发现一个问题就是滑动速度很快,尤其是scrollTo()方法,几乎是瞬间移动到指定位置。这样倒不能说是缺点,不过在某些情况下,是希望可以缓慢的移动或者有一个明显的移动效果,就像侧滑菜单那样,仿佛有一个移动的动画。这时候Scroller闪亮登场了。
Scroller类是滚动的一个封装类,可以实现View的平滑滚动效果,还可以使用插值器先加速后减速,或者先减速后加速等等效果,而不是瞬间的移动的效果。那是如何实现带动画效果平滑移动的呢?除了Scroller这个类之外,还需要使用View类的computeScroll()方法来配合完成这个过程。看一下这个方法的源码:
/** * Called by a parent to request that a child update its values for mScrollX * and mScrollY if necessary. This will typically be done if the child is * animating a scroll using a {@link android.widget.Scroller Scroller} * object. */ public void computeScroll() { }
从注释中了解到当子视图使用Scroller滑动的时候会调用这个方法,之后View类的mScrollX和mScrollY的值会相应发生变化。并且在绘制View时,会在draw()过程调用该方法。可以看到这个方法是一个空的方法,因此需要子类去重写该方法来实现逻辑,那该方法在何处被触发呢?继续看看View的draw()方法,上面说到会在子视图中调用该方法,也就是说绘制子视图的时候,那么在draw()等等的第四部,
// Step 4, draw the children dispatchDraw(canvas);
正是绘制子视图,然后看一下这个方法,
/** * Called by draw to draw the child views. This may be overridden * by derived classes to gain control just before its children are drawn * (but after its own view has been drawn). * @param canvas the canvas on which to draw the view */ protected void dispatchDraw(Canvas canvas) { }
也是一个空方法,但是我们知道这个方法是ViewGroup用来绘制子视图的方法,所以找到View的子类ViewGroup来看看该方法的具体实现逻辑 ,基于篇幅只贴部分代码。
@Override protected void dispatchDraw(Canvas canvas) { ... ... ... if ((flags & FLAG_USE_CHILD_DRAWING_ORDER) == 0) { for (int i = 0 ; i < count ; i++) { final View child = children [i]; if ((child.mViewFlags & VISIBILITY_MASK) == VISIBLE || child.getAnimation() != null) { more |= drawChild(canvas, child, drawingTime); } } } else { for (int i = 0 ; i < count ; i++) { final View child = children [getChildDrawingOrder(count, i)]; if ((child.mViewFlags & VISIBILITY_MASK) == VISIBLE || child.getAnimation() != null) { more |= drawChild(canvas, child, drawingTime); } } } // Draw any disappearing views that have animations if (mDisappearingChildren != null) { final ArrayList< View > disappearingChildren = mDisappearingChildren ; final int disappearingCount = disappearingChildren .size() - 1; // Go backwards -- we may delete as animations finish for (int i = disappearingCount ; i > = 0; i--) { final View child = disappearingChildren .get(i); more |= drawChild(canvas, child, drawingTime); } } ... ... ... } }
可以看到,在dispatchDraw方法中调用了drawChild(canvas, child, drawingTime)方法,再看一下其代码:
protected boolean drawChild(Canvas canvas, View child, long drawingTime) { ... ... ... if (!concatMatrix && canvas.quickReject(cl, ct, cr, cb, Canvas.EdgeType.BW) && (child.mPrivateFlags & DRAW_ANIMATION) == 0) { return more; } child.computeScroll(); final int sx = child .mScrollX; final int sy = child .mScrollY; boolean scalingRequired = false ; Bitmap cache = null ; ... ... ... }
果然, child.computeScroll(),在这里调用的。也就是ViewGroup在分发绘制自己的孩子的时候,会对其子View调用computeScroll()方法。
回过头来再看一下Scroller,还是先看一下源码(简化),
public class Scroller { private int mMode; private int mStartX; private int mStartY; private int mFinalX; private int mFinalY; private int mMinX; private int mMaxX; private int mMinY; private int mMaxY; private int mCurrX; private int mCurrY; private long mStartTime; private int mDuration; private float mDurationReciprocal; private float mDeltaX; private float mDeltaY; private boolean mFinished; private Interpolator mInterpolator; private float mVelocity; private float mCurrVelocity; private int mDistance; private float mFlingFriction = ViewConfiguration .getScrollFriction(); private static final int DEFAULT_DURATION = 250 ; private static final int SCROLL_MODE = 0 ; private static final int FLING_MODE = 1 ; /** * Create a Scroller with the default duration and interpolator. */ public Scroller(Context context) { this(context, null); } /** * Create a Scroller with the specified interpolator. If the interpolator is * null, the default (viscous) interpolator will be used. "Flywheel" behavior will * be in effect for apps targeting Honeycomb or newer. */ public Scroller(Context context, Interpolator interpolator) { this(context, interpolator, context.getApplicationInfo().targetSdkVersion > = Build.VERSION_CODES.HONEYCOMB); } /** * Create a Scroller with the specified interpolator. If the interpolator is * null, the default (viscous) interpolator will be used. Specify whether or * not to support progressive "flywheel" behavior in flinging. */ public Scroller(Context context, Interpolator interpolator, boolean flywheel) { mFinished = true ; mInterpolator = interpolator ; mPpi = context .getResources().getDisplayMetrics().density * 160.0f; mDeceleration = computeDeceleration (ViewConfiguration.getScrollFriction()); mFlywheel = flywheel ; mPhysicalCoeff = computeDeceleration (0.84f); // look and feel tuning } /** * Call this when you want to know the new location. If it returns true, * the animation is not yet finished. */ public boolean computeScrollOffset() { if (mFinished) { return false; } int timePassed = (int)(AnimationUtils.currentAnimationTimeMillis() - mStartTime); if (timePassed < mDuration ) { switch (mMode) { case SCROLL_MODE: float x = timePassed * mDurationReciprocal; if (mInterpolator == null) x = viscousFluid (x); else x = mInterpolator .getInterpolation(x); mCurrX = mStartX + Math.round(x * mDeltaX); mCurrY = mStartY + Math.round(x * mDeltaY); break; case FLING_MODE: final float t = (float) timePassed / mDuration; final int index = (int) (NB_SAMPLES * t); float distanceCoef = 1 .f; float velocityCoef = 0 .f; if (index < NB_SAMPLES ) { final float t_inf = (float) index / NB_SAMPLES; final float t_sup = (float) (index + 1) / NB_SAMPLES; final float d_inf = SPLINE_POSITION [index]; final float d_sup = SPLINE_POSITION [index + 1]; velocityCoef = (d_sup - d_inf) / (t_sup - t_inf); distanceCoef = d_inf + (t - t_inf) * velocityCoef; } mCurrVelocity = velocityCoef * mDistance / mDuration * 1000.0f; mCurrX = mStartX + Math.round(distanceCoef * (mFinalX - mStartX)); // Pin to mMinX < = mCurrX < = mMaxX mCurrX = Math .min(mCurrX, mMaxX); mCurrX = Math .max(mCurrX, mMinX); mCurrY = mStartY + Math.round(distanceCoef * (mFinalY - mStartY)); // Pin to mMinY < = mCurrY < = mMaxY mCurrY = Math .min(mCurrY, mMaxY); mCurrY = Math .max(mCurrY, mMinY); if (mCurrX == mFinalX && mCurrY == mFinalY) { mFinished = true ; } break; } } else { mCurrX = mFinalX ; mCurrY = mFinalY ; mFinished = true ; } return true; } /** * Start scrolling by providing a starting point and the distance to travel. * The scroll will use the default value of 250 milliseconds for the * duration. * * @param startX Starting horizontal scroll offset in pixels. Positive * numbers will scroll the content to the left. * @param startY Starting vertical scroll offset in pixels. Positive numbers * will scroll the content up. * @param dx Horizontal distance to travel. Positive numbers will scroll the * content to the left. * @param dy Vertical distance to travel. Positive numbers will scroll the * content up. */ public void startScroll(int startX, int startY, int dx, int dy) { startScroll(startX, startY, dx, dy, DEFAULT_DURATION); } /** * Start scrolling by providing a starting point, the distance to travel, * and the duration of the scroll. * * @param startX Starting horizontal scroll offset in pixels. Positive * numbers will scroll the content to the left. * @param startY Starting vertical scroll offset in pixels. Positive numbers * will scroll the content up. * @param dx Horizontal distance to travel. Positive numbers will scroll the * content to the left. * @param dy Vertical distance to travel. Positive numbers will scroll the * content up. * @param duration Duration of the scroll in milliseconds. */ public void startScroll(int startX, int startY, int dx, int dy, int duration) { mMode = SCROLL_MODE ; mFinished = false ; mDuration = duration ; mStartTime = AnimationUtils .currentAnimationTimeMillis(); mStartX = startX ; mStartY = startY ; mFinalX = startX + dx; mFinalY = startY + dy; mDeltaX = dx ; mDeltaY = dy ; mDurationReciprocal = 1 .0f / (float) mDuration; } /** * Start scrolling based on a fling gesture. The distance travelled will * depend on the initial velocity of the fling. * * @param startX Starting point of the scroll (X) * @param startY Starting point of the scroll (Y) * @param velocityX Initial velocity of the fling (X) measured in pixels per * second. * @param velocityY Initial velocity of the fling (Y) measured in pixels per * second * @param minX Minimum X value. The scroller will not scroll past this * point. * @param maxX Maximum X value. The scroller will not scroll past this * point. * @param minY Minimum Y value. The scroller will not scroll past this * point. * @param maxY Maximum Y value. The scroller will not scroll past this * point. */ public void fling(int startX, int startY, int velocityX, int velocityY, int minX, int maxX, int minY, int maxY) { // Continue a scroll or fling in progress if (mFlywheel && !mFinished) { float oldVel = getCurrVelocity (); float dx = (float) (mFinalX - mStartX); float dy = (float) (mFinalY - mStartY); float hyp = FloatMath .sqrt(dx * dx + dy * dy); float ndx = dx / hyp; float ndy = dy / hyp; float oldVelocityX = ndx * oldVel; float oldVelocityY = ndy * oldVel; if (Math.signum(velocityX) == Math.signum(oldVelocityX) && Math.signum(velocityY) == Math.signum(oldVelocityY)) { velocityX += oldVelocityX; velocityY += oldVelocityY; } } mMode = FLING_MODE ; mFinished = false ; float velocity = FloatMath .sqrt(velocityX * velocityX + velocityY * velocityY); mVelocity = velocity ; mDuration = getSplineFlingDuration (velocity); mStartTime = AnimationUtils .currentAnimationTimeMillis(); mStartX = startX ; mStartY = startY ; float coeffX = velocity == 0 ? 1.0f : velocityX / velocity; float coeffY = velocity == 0 ? 1.0f : velocityY / velocity; double totalDistance = getSplineFlingDistance (velocity); mDistance = (int) (totalDistance * Math.signum(velocity)); mMinX = minX ; mMaxX = maxX ; mMinY = minY ; mMaxY = maxY ; mFinalX = startX + (int) Math.round(totalDistance * coeffX); // Pin to mMinX < = mFinalX < = mMaxX mFinalX = Math .min(mFinalX, mMaxX); mFinalX = Math .max(mFinalX, mMinX); mFinalY = startY + (int) Math.round(totalDistance * coeffY); // Pin to mMinY < = mFinalY < = mMaxY mFinalY = Math .min(mFinalY, mMaxY); mFinalY = Math .max(mFinalY, mMinY); } }
Scroller有三个构造方法,其中二、三可以使用动画插值器。除了构造方法外,Scroller还有以下几个重要方法:computeScrollOffset()、startScroll(int startX, int startY, int dx, int dy, int duration)、 fling(int startX, int startY, int velocityX, int velocityY,
int minX, int maxX, int minY, int maxY) 等。
startScroll(int startX, int startY, int dx, int dy, int duration)从方法名字来看应该是滑动开始的地方,事实上我们在使用的时候也是先调用这个方法的,它的作用是:(startX , startY)在duration时间内前进(dx,dy)个单位,即到达坐标为(startX+dx , startY+dy) 但是从源码来看,
public void startScroll(int startX, int startY, int dx, int dy, int duration) { mMode = SCROLL_MODE ; mFinished = false ; mDuration = duration ; mStartTime = AnimationUtils .currentAnimationTimeMillis(); mStartX = startX ; mStartY = startY ; mFinalX = startX + dx; mFinalY = startY + dy; mDeltaX = dx ; mDeltaY = dy ; mDurationReciprocal = 1 .0f / (float) mDuration; }
这个方法更像是一个构造方法用来初始化赋值的,比如设置滚动模式、开始时间,持续时间、起始坐标、结束坐标等等,并没有任何对View的滚动操作,当然还有一个重要的变量:mDurationReciprocal。因为这个变量要在接下来介绍的computeScrollOffset()方法使用,computeScrollOffset()方法主要是根据当前已经消逝的时间来计算当前的坐标点,并且保存在mCurrX和mCurrY值中,那这个消逝的时间就是如何计算出来的呢?之前在startScroll()方法的时候获取了当前的动画毫秒并赋值给了mStartTime,在computeScrollOffset()中再一次调用AnimationUtils.currentAnimationTimeMillis()来获取动画毫秒减去mStartTime就是消逝时间了。然后进去if判断,如果动画持续时间小于设置的滚动持续时间mDuration,则是SCROLL_MODE,再根据Interpolator来计算出在该时间段里面移动的距离,移动的距离是根据这个消逝时间乘以mDurationReciprocal,就得到一个相对偏移量,再进行Math.round(x * mDeltaX)计算,就得到最后的偏移量,然后赋值给mCurrX, mCurrY,所以mCurrX、 mCurrY 的值也是一直变化的。总结一下该方法的作用就是,计算在0到mDuration时间段内滚动的偏移量,并且判断滚动是否结束,true代表还没结束,false则表示滚动结束了。
之前说到是Scroller配合computeScroll()方法来实现移动的,那是如何配合的呢?
1、首先调用Scroller的startScroll()方法来进行一些滚动的初始化设置,
scroller.startScroll(getScrollX(), 0, distance, 0);
2、然后调用View的invalidate()或postInvalidate()进行重绘。
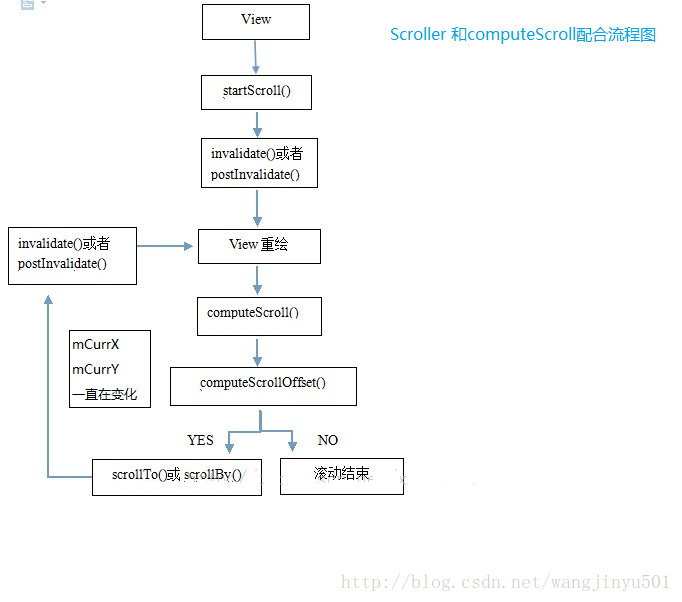
3、绘制View的时候会触发computeScroll()方法,接着重写computeScroll(),在computeScroll()里面先调用Scroller的computeScrollOffset()方法来判断滚动是否结束,如果滚动没有结束就调用scrollTo()方法来进行滚动。
@Override blic void computeScroll() { if (scroller.computeScrollOffset()) { scrollTo(scroller.getCurrX(), 0); }
4、scrollTo()方法虽然会重新绘制View,但是还是要手动调用下invalidate()或者postInvalidate()来触发界面重绘,重新绘制View又触发computeScroll(),所以就进入一个递归循环阶段,这样就实现在某个时间段里面滚动某段距离的一个平滑的滚动效果。
@Override public void computeScroll() { if (scroller.computeScrollOffset()) { scrollTo(scroller.getCurrX(), 0); invalidate(); } }
具体流程图如下:
了解完Scroller之后,我们就对之前的例子进行一下改进,不直接使用scrollTo()、ScrollBy()方法了,而是使用Scroller来实现一个平滑的移动效果。只需把代码稍微改一下就可以了,如下:
/** * */ package com.kince.scrolldemo; import android.content.Context; import android.util.AttributeSet; import android.view.MotionEvent; import android.view.View; import android.view.ViewGroup; import android.widget.Scroller; /** * @author kince * * */ public class CusScrollView extends ViewGroup { private int lastX = 0 ; private int currX = 0 ; private int offX = 0 ; private Scroller mScroller; /** * @param context */ public CusScrollView(Context context) { this(context, null); // TODO Auto-generated constructor stub } /** * @param context * @param attrs */ public CusScrollView(Context context, AttributeSet attrs) { this(context, attrs, 0); // TODO Auto-generated constructor stub } /** * @param context * @param attrs * @param defStyle */ public CusScrollView(Context context, AttributeSet attrs, int defStyle) { super(context, attrs, defStyle); // TODO Auto-generated constructor stub mScroller = new Scroller(context); } /* * (non-Javadoc) * * @see android.view.ViewGroup#onLayout(boolean, int, int, int, int) */ @Override protected void onLayout(boolean changed, int l, int t, int r, int b) { // TODO Auto-generated method stub for (int i = 0 ; i < getChildCount (); i++) { View v = getChildAt (i); v.layout(0 + i * getWidth(), 0, getWidth() + i * getWidth(), getHeight()); } } @Override public boolean onTouchEvent(MotionEvent event) { // TODO Auto-generated method stub switch (event.getAction()) { case MotionEvent.ACTION_DOWN: // 只考虑水平方向 lastX = (int) event.getX(); return true; case MotionEvent.ACTION_MOVE: currX = (int) event.getX(); offX = currX - lastX; // scrollBy(-offX, 0); mScroller.startScroll(getScrollX(), 0, -offX, 0); break; case MotionEvent.ACTION_UP: // scrollTo(0, 0); mScroller.startScroll(getScrollX(), 0, -100, 0); break; } invalidate(); return super.onTouchEvent(event); } @Override public void computeScroll() { // TODO Auto-generated method stub if (mScroller.computeScrollOffset()) { scrollTo(mScroller.getCurrX(), 0); invalidate(); } } }
这样就实现了一个平滑的移动效果。关于scrollTo() 、scrollBy()、 Scroller讲解就进行到这里。之后会更新两篇关于这方面的UI效果开发,一篇是模仿Zaker的开门效果;另一篇是首页推荐图片轮播效果。


 1万+
1万+


 被折叠的 条评论
为什么被折叠?
被折叠的 条评论
为什么被折叠?
 到【灌水乐园】发言


