


1、最近项目中新改进的需求,要把登录界面中输入验证码的样式修改成下面的样式,想了半天也有了思路,先上个图:
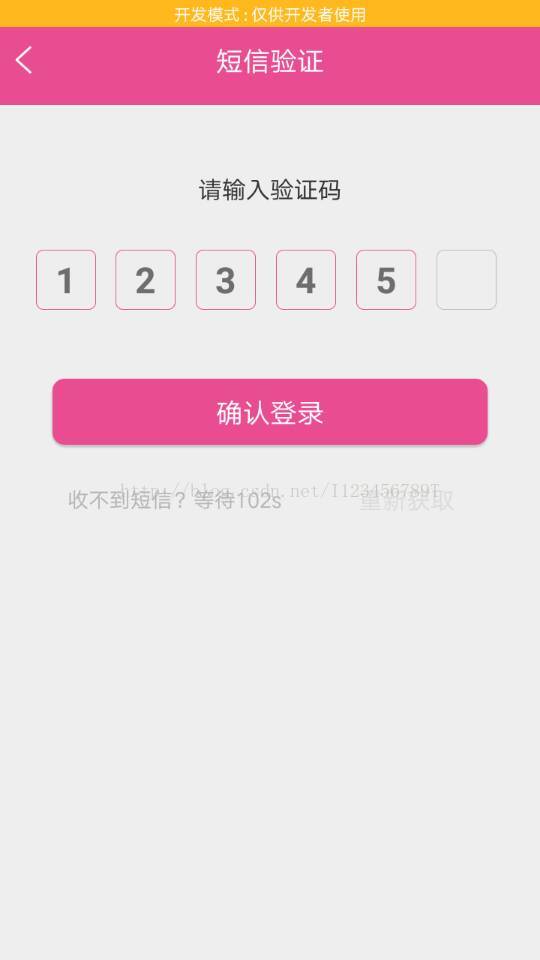
,相信很多人看到了后,肯定也见过不少这个的,下面就来告诉大家这个怎么实现的:
2、首先这个肯定要自定义一个这种控件才行!
1):首先呢,我先把需要的资源图片发出来,小伙伴们,需要的直接右键保存下载就行了,


2):上面是需要的背景图片,UI给的!我一般把图片资源放在res资源文件下的mipmap文件夹下,小伙伴的位置随意,只能值找到就行,
下面就来给出一个values文件夹下的styles.xml文件的一个style样式代码:
<style name="text_editStyle" >
    <item name="android:layout_height">40dp</item>
    <item name="android:layout_width">40dp</item>
    <item name="android:gravity">center</item>
    <item name="android:background">@mipmap/rect_no</item>
    <item name="android:textSize">24sp</item>
    <item name="android:layout_marginRight">10dp</item>
    <item name="android:textStyle">bold</item>
</style>
上面,我把给出的背景图片的命名为 :rect_no 和 rect_ok ,不用说,小伙伴们应该知道哪个是哪个的名字吧?rect_no为未输入内容时的背景图片,反之同理
3):下面就开始自定义控件了,来先写layout中的xml样式布局代码:
view_customer_code.xml
<?xml version="1.0" encoding="utf-8"?> <RelativeLayout xmlns:android="http://schemas.android.com/apk/res/android" android:layout_width="match_parent" android:layout_height="wrap_content"> <LinearLayout android:layout_width="wrap_content" android:layout_height="45dp" android:orientation="horizontal"> <TextView android:id="@+id/item_iv1" style="@style/text_editStyle" /> <View android:layout_width="0dp" android:layout_height="1dp" android:layout_weight="1" /> <TextView android:id="@+id/item_iv2" style="@style/text_editStyle" /> <View android:layout_width="0dp" android:layout_height="1dp" android:layout_weight="1" /> <TextView android:id="@+id/item_iv3" style="@style/text_editStyle" /> <View android:layout_width="0dp" android:layout_height="1dp" android:layout_weight="1" /> <TextView android:id="@+id/item_iv4" style="@style/text_editStyle" /> <View android:layout_width="0dp" android:layout_height="1dp" android:layout_weight="1" /> <TextView android:id="@+id/item_iv5" style="@style/text_editStyle" /> <View android:layout_width="0dp" android:layout_height="1dp" android:layout_weight="1" /> <TextView android:id="@+id/item_iv6" style="@style/text_editStyle" /> </LinearLayout> <EditText android:id="@+id/et" android:layout_width="match_parent" android:layout_height="46dp" android:background="@android:color/transparent" android:inputType="number" /> </RelativeLayout>上面的代码直接赋值就行4):下面就直接创建一个类,我这里命名为CustomerCodeViwe.class,下面给出代码:import android.content.Context; import android.text.Editable; import android.text.TextWatcher; import android.util.AttributeSet; import android.view.KeyEvent; import android.view.View; import android.widget.EditText; import android.widget.RelativeLayout; import android.widget.TextView; /** * Created by wwy on 17/1/28. */ public class CustomerCodeView extends RelativeLayout { private EditText editText; private TextView[] TextViews; private StringBuffer stringBuffer = new StringBuffer(); private int count = 6;// 这里的6是因为我的验证码是6位的(小伙伴根据验证码位数自己改)private String inputContent;public CustomerCodeView(Context context) {this(context, null);}public CustomerCodeView(Context context, AttributeSet attrs) {this(context, attrs, 0);}public CustomerCodeView(Context context, AttributeSet attrs, int defStyleAttr) {super(context, attrs, defStyleAttr);TextViews = new TextView[6];View.inflate(context, R.layout.view_customer_code, this);editText = (EditText) findViewById(R.id.et);TextViews[0] = (TextView) findViewById(R.id.item_iv1);TextViews[1] = (TextView) findViewById(R.id.item_iv2);TextViews[2] = (TextView) findViewById(R.id.item_iv3);TextViews[3] = (TextView) findViewById(R.id.item_iv4);TextViews[4] = (TextView) findViewById(R.id.item_iv5);TextViews[5] = (TextView) findViewById(R.id.item_iv6);editText.setCursorVisible(false);//将光标隐藏setListener();}private void setListener() {editText.addTextChangedListener(new TextWatcher() {@Overridepublic void beforeTextChanged(CharSequence charSequence, int i, int i1, int i2) {}@Overridepublic void onTextChanged(CharSequence charSequence, int i, int i1, int i2) {}@Overridepublic void afterTextChanged(Editable editable) {//如果字符不为""时才进行操作if (!editable.toString().equals("")) {if (stringBuffer.length() > 5) {//当文本长度大于5位时editText置空,(这里的5根据小伙伴的验证码位数xiugai)editText.setText("");return;} else {//将文字添加到StringBuffer中stringBuffer.append(editable);editText.setText("");//添加后将EditText置空count = stringBuffer.length();inputContent = stringBuffer.toString();if (stringBuffer.length() == 6) {//文字长度位6 则调用完成输入的监听//这里的6是因为我的验证码是6位的(小伙伴根据验证码位数自己改)if (inputCompleteListener != null) {inputCompleteListener.inputComplete();}}}for (int i = 0; i < stringBuffer.length(); i++) {TextViews[i].setText(String.valueOf(inputContent.charAt(i)));TextViews[i].setBackgroundResource(R.mipmap.rect_ok);}}}});editText.setOnKeyListener(new OnKeyListener() {@Overridepublic boolean onKey(View v, int keyCode, KeyEvent event) {if (keyCode == KeyEvent.KEYCODE_DEL&& event.getAction() == KeyEvent.ACTION_DOWN) {if (onKeyDelete()) return true;return true;}return false;}});}public boolean onKeyDelete() {if (count == 0) {count = 6; // 这里的6是因为我的验证码是6位的(小伙伴根据验证码位数自己改)return true;}if (stringBuffer.length() > 0) {//删除相应位置的字符stringBuffer.delete((count - 1), count);count--;inputContent = stringBuffer.toString();TextViews[stringBuffer.length()].setText("");TextViews[stringBuffer.length()].setBackgroundResource(R.mipmap.rect_no);if (inputCompleteListener != null)inputCompleteListener.deleteContent(true);//有删除就通知manger}return false;}/** * 清空输入内容 */public void clearEditText() {stringBuffer.delete(0, stringBuffer.length());inputContent = stringBuffer.toString();for (int i = 0; i < TextViews.length; i++) {TextViews[i].setText("");TextViews[i].setBackgroundResource(R.mipmap.rect_no);}}@Overridepublic boolean onKeyDown(int keyCode, KeyEvent event) {return super.onKeyDown(keyCode, event);}private InputCompleteListener inputCompleteListener;public void setInputCompleteListener(InputCompleteListener inputCompleteListener) {this.inputCompleteListener = inputCompleteListener;}public interface InputCompleteListener {void inputComplete();void deleteContent(boolean isDelete);}/** * 获取输入文本 * * @return */public String getEditContent() {return inputContent;}}5):下面就简单了,开始把这个控件加入到你的布局中就行了,我这边测试的xml就不写了,比较简单,布局中就一个自定义的控件<com.wwy.widget.CustomerCodeView android:id="@+id/edit_code" android:layout_width="match_parent" android:layout_height="wrap_content" android:layout_marginLeft="40dp" android:layout_marginRight="40dp" android:layout_marginTop="30dp" android:gravity="center_horizontal" />6):下面就是一个测试的activity了:import android.app.Activity; import android.graphics.Color; import android.os.Bundle; import android.widget.TextView; import android.widget.Toast; public class MainActivity extends Activity implements CustomerCodeView.InputCompleteListener { private CustomerCodeView editText; @Override protected void onCreate(Bundle savedInstanceState) { super.onCreate(savedInstanceState); setContentView(R.layout.activity_main);editText = (CustomerCodeView) findViewById(R.id.edit_code);editText.setInputCompleteListener(this);}// 这个是监听自定义的输入框的回调,当输入验证码的位数符合后,会自动调用此方法,小伙伴们把要请求接口的方法写这就可以自动进行请求了@Overridepublic void inputComplete() {if (!editText.getEditContent().equals("123456")) {Toast.makeText(getApplicationContext(), "验证码失败", Toast.LENGTH_LONG).show();}}@Overridepublic void deleteContent(boolean isDelete) { }}到这里就结束了,小伙伴们注意,我开头给的样式图并不是这里写的哦,那是我自己的项目中的样式,大家只看重点,,


 1545
1545


 被折叠的 条评论
为什么被折叠?
被折叠的 条评论
为什么被折叠?
 到【灌水乐园】发言


