


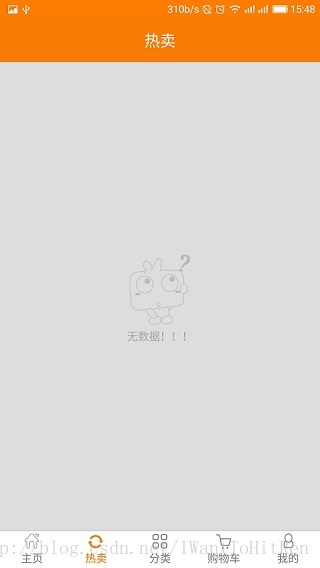
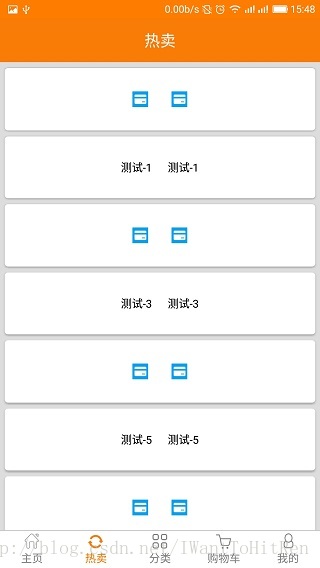
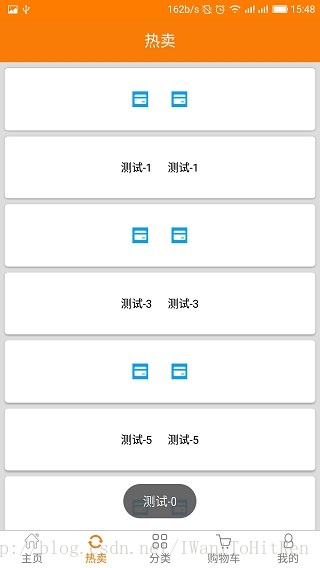
前言: 使用RecyclerView和CardView已经好久了,写一个小程序来回顾和梳理一下知识点。RecyclerView和CardView的介绍和优势,我这里就不再赘述了,网上有很多好的文章,例如:我刚开始学习的时候,是看着鸿洋大神写的Android RecyclerView 使用完全解析 体验艺术般的控件 学习的。小程序主要包括(1)无数据情况处理,(2)列表中存在两种布局,(3)点击处理。先来看一下小程序运行的效果,如下图
首先, 来看一下RecyclerView和CardView的布局以及RecyclerView初始化,使用RecyclerView的布局,如下fragment_hot.xml
<?xml version="1.0" encoding="utf-8"?>
<LinearLayout xmlns:android="http://schemas.android.com/apk/res/android"
    android:orientation="vertical"
    android:layout_width="match_parent"
    android:layout_height="match_parent"
    android:gravity="center">

    <android.support.v7.widget.RecyclerView
        android:id="@+id/hot_fragment_rcv"
        android:layout_width="match_parent"
        android:layout_height="match_parent">
    </android.support.v7.widget.RecyclerView>

</LinearLayout>
RecyclerView初始化工作如下HotFragment.java
public class HotFragment extends Fragment {

    private View mView;
    private RecyclerView mRecyclerView;
    private HotFgListAdapter mAdapter;
    private List<HotListDataBean> mDatas;
    @Nullable
    @Override
    public View onCreateView(LayoutInflater inflater, @Nullable ViewGroup container, @Nullable Bundle savedInstanceState) {

        mView = inflater.inflate(R.layout.fragment_hot, null);
        return mView;
    }

    @Override
    public void onActivityCreated(@Nullable Bundle savedInstanceState) {
        super.onActivityCreated(savedInstanceState);

        mRecyclerView = (RecyclerView) mView.findViewById(R.id.hot_fragment_rcv);
        /*1,设置管理器*/
        mRecyclerView.setLayoutManager(new LinearLayoutManager(this.getContext()));
        /*2,设置适配器*/
        initListData();
        mAdapter = new HotFgListAdapter(mDatas);
        mRecyclerView.setAdapter(mAdapter);
        /*3,添加item的添加和移除动画, 这里我们使用系统默认的动画*/
        mRecyclerView.setItemAnimator(new DefaultItemAnimator());
        /*4,添加分割线,自定义分割线,分割线必须要自己定义,系统没有默认分割线*/
        mRecyclerView.addItemDecoration(new HotFgItemDecoration());

        /*设置条目点击事件*/
        mAdapter.setOnItemClickListener(new HotFgListAdapter.OnItemClickListener() {
            @Override
            public void OnItemClick(View v, int position) {
                Toast.makeText(getContext(), mDatas.get(position).getTitle(), Toast.LENGTH_SHORT).show();
            }
        });

    }

    /**
     * 初始化列表数据
     */
    private void initListData() {
//        mDatas = new ArrayList<HotListDataBean>(); //测试无数据情况
        mDatas = new ArrayList<HotListDataBean>(10);
        for(int i=0; i<10; i++){
            HotListDataBean dataBean = new HotListDataBean("测试-"+i, R.drawable.bankcard);
            mDatas.add(dataBean);
        }
    }
}
列表的点击事件,不是adapter自带的,是我们自己实现的。下面看一下适配器Adapter的实现,HotFgListAdapter.java
public class HotFgListAdapter extends RecyclerView.Adapter<RecyclerView.ViewHolder> {

    private List<HotListDataBean> mDatas;
    private LayoutInflater mInflater;
    private OnItemClickListener onItemClickListener;
    private final int NO_DATA = 0, IMAGE_VIEW = 1, TEXT_VIEW = 2;//无数据,图布局,字布局

    public HotFgListAdapter(List<HotListDataBean> mDatas) {
        this.mDatas = mDatas;
    }

    /**
     * 确定使用哪一种item
     * @param position
     * @return
     */
    @Override
    public int getItemViewType(int position) {
        if(mDatas.size() <= 0){ //无数据情况处理
            return NO_DATA;
        }
        if(position % 2 == 0){
            return IMAGE_VIEW;
        }
        return TEXT_VIEW;
    }

    @Override
    public RecyclerView.ViewHolder onCreateViewHolder(ViewGroup parent, int viewType) {

        mInflater = LayoutInflater.from(parent.getContext());
        RecyclerView.ViewHolder mHolder = null;
        switch (viewType){
            case NO_DATA:
                mHolder = new ImageViewHolder(mInflater.inflate(R.layout.item_no_data, parent, false));
                break;
            case IMAGE_VIEW:
                mHolder = new ImageViewHolder(mInflater.inflate(R.layout.item_hot_fg_list, parent, false));
                break;
            case TEXT_VIEW:
                mHolder = new TextViewHolder(mInflater.inflate(R.layout.item_hot_fg_list2, parent, false));
                break;
        }
        return mHolder;
    }

    @Override
    public void onBindViewHolder(RecyclerView.ViewHolder holder, final int position) {
        if(mDatas.size() <= 0){ //无数据的情况
            return;
        }
        switch (getItemViewType(position)){
            case IMAGE_VIEW:
                ImageViewHolder imageViewHolder = (ImageViewHolder) holder;
                imageViewHolder.mIvIcon.setImageResource(mDatas.get(position).getIcon());
                imageViewHolder.mIvIcon2.setImageResource(mDatas.get(position).getIcon());
                imageViewHolder.mIvIcon.setOnClickListener(new View.OnClickListener() {
                    @Override
                    public void onClick(View v) {
                        if(onItemClickListener != null){
                            onItemClickListener.OnItemClick(v, position);
                        }
                    }
                });
                break;
            case TEXT_VIEW:
                TextViewHolder textViewHolder = (TextViewHolder) holder;
                textViewHolder.mTvTitle.setText(mDatas.get(position).getTitle());
                textViewHolder.mTvTitle2.setText(mDatas.get(position).getTitle());
                break;
        }

    }

    @Override
    public int getItemCount() {
        return mDatas.size()>0 ? mDatas.size() : 1; //这里在数据为空的情况下返回1,为了显示无数据的布局
    }

    public void setOnItemClickListener(OnItemClickListener onItemClickListener) {
        this.onItemClickListener = onItemClickListener;
    }

    /**
     * 图片item的holder
     */
    class ImageViewHolder extends RecyclerView.ViewHolder{

        private ImageView mIvIcon, mIvIcon2;
        public ImageViewHolder(View itemView) {
            super(itemView);
            mIvIcon = (ImageView) itemView.findViewById(R.id.hot_fg_item_icon);
            mIvIcon2 = (ImageView) itemView.findViewById(R.id.hot_fg_item_icon2);
        }
    }

    /**
     * 文字item的holder
     */
    class TextViewHolder extends RecyclerView.ViewHolder{

        private TextView mTvTitle, mTvTitle2;
        public TextViewHolder(View itemView) {
            super(itemView);
            mTvTitle = (TextView) itemView.findViewById(R.id.hot_fg_item_tv);
            mTvTitle2 = (TextView) itemView.findViewById(R.id.hot_fg_item_tv2);
        }
    }

    /**
     * 适配器的点击事件接口
     */
    public interface OnItemClickListener{
        void OnItemClick(View v, int position);
    }
}
自定义简单的分割线HotFgItemDecoration.java
public class HotFgItemDecoration extends RecyclerView.ItemDecoration{

    @Override
    public void onDraw(Canvas c, RecyclerView parent, RecyclerView.State state) {
        super.onDraw(c, parent, state);
    }

    @Override
    public void onDrawOver(Canvas c, RecyclerView parent, RecyclerView.State state) {
        super.onDrawOver(c, parent, state);
    }

    @Override
    public void getItemOffsets(Rect outRect, View view, RecyclerView parent, RecyclerView.State state) {
        /*item距离上20px,距离左右各16px*/
        outRect.top = 20;
        outRect.right = 16;
        outRect.left = 16;
    }
}
重点: 这个Adapter已经显示了我今天要说的所有重点了。两个item布局,使用两个继承ViewHolder的holder对item的子控件进行复用。通过getItemViewType(int position)来区分显示哪一个布局的Item。对于无数据这种情况,getItemCount()这个方法必须在mDatas数据为空的情况下,返回1,这样才会执行onCreateViewHolder(…)方法来创建Item,无数据的情况,我们只是希望显示出无数据的图标即可,无需绑定数据。所以创建完item后,执行onBindViewHolder(…)方法时一定要做如下处理:
if(mDatas.size() <= 0){ //无数据情况处理
      return ;
}
对于Item的点击事件处理,可以理解为,把Item中的子控件的点击事件传递出去处理,一般套路如下:(1)定义一个接口,内部定义一个方法,该方法就是对点击事件的具体处理。
public interface OnItemClickListener{
        void OnItemClick(View v, int position);
    }
(2)声明一个该接口的作为Adapter的成员变量并实现它的set方法。
private OnItemClickListener onItemClickListener;
public void setOnItemClickListener(OnItemClickListener onItemClickListener) {
        this.onItemClickListener = onItemClickListener;
    }
(3)在Item的子控件的点击事件的处理中,电泳我们定义接口的内部方法
imageViewHolder.mIvIcon2.setImageResource(mDatas.get(position).getIcon());
                imageViewHolder.mIvIcon.setOnClickListener(new View.OnClickListener() {
                    @Override
                    public void onClick(View v) {
                        if(onItemClickListener != null){
                            onItemClickListener.OnItemClick(v, position);
                        }
                    }
                });
这里我把图片Item布局的第一个图片的点击事件传递出去做了处理,所以我只有店家图片布局item的第一个图片时,才会弹出toast对话框。以此类推,如果想给其他item的子控件添加点击事件也是如此。
下面是两个item的布局
图片布局item_hot_fg_list.xml
<?xml version="1.0" encoding="utf-8"?>
<android.support.v7.widget.CardView xmlns:android="http://schemas.android.com/apk/res/android"
    xmlns:app="http://schemas.android.com/apk/res-auto"
    android:layout_width="match_parent"
    android:layout_height="wrap_content"
    app:cardBackgroundColor="@color/white"
    app:cardCornerRadius="4dp"
    app:contentPadding="10dp"
    >

    <LinearLayout
        android:layout_width="match_parent"
        android:layout_height="wrap_content"
        android:paddingBottom="20dp"
        android:paddingTop="20dp"
        android:gravity="center"
        android:orientation="horizontal">
        <ImageView
            android:id="@+id/hot_fg_item_icon"
            android:layout_width="wrap_content"
            android:layout_height="wrap_content"
            android:src="@drawable/bankcard"
            android:layout_marginRight="30dp"/>

        <ImageView
            android:id="@+id/hot_fg_item_icon2"
            android:layout_width="wrap_content"
            android:layout_height="wrap_content"
            android:src="@drawable/bankcard"/>
    </LinearLayout>

</android.support.v7.widget.CardView>
文字布局item_hot_fg_list2.xml
<android.support.v7.widget.CardView xmlns:android="http://schemas.android.com/apk/res/android"
    xmlns:app="http://schemas.android.com/apk/res-auto"
    android:layout_width="match_parent"
    android:layout_height="wrap_content"
    app:cardBackgroundColor="@color/white"
    app:cardCornerRadius="4dp"
    app:contentPadding="10dp"
    >

    <LinearLayout
        android:layout_width="match_parent"
        android:layout_height="wrap_content"
        android:gravity="center"
        android:paddingBottom="20dp"
        android:paddingTop="20dp"
        android:orientation="horizontal">

        <TextView
            android:id="@+id/hot_fg_item_tv"
            android:layout_width="wrap_content"
            android:layout_height="wrap_content"
            android:layout_marginRight="20dp"
            android:textColor="@android:color/black" />

        <TextView
            android:id="@+id/hot_fg_item_tv2"
            android:layout_width="wrap_content"
            android:layout_height="wrap_content"
            android:gravity="center"
            android:textColor="@android:color/black" />

    </LinearLayout>

</android.support.v7.widget.CardView>
如果项目中没有CardView这个控件,需要在build.gradle中导入,例如我这里使用的是
compile 'com.android.support:cardview-v7:24.1.1'无数据的布局文件如下
item_no_data.xml
<?xml version="1.0" encoding="utf-8"?>
<LinearLayout xmlns:android="http://schemas.android.com/apk/res/android"
    android:layout_width="match_parent"
    android:layout_height="match_parent"
    android:gravity="center"
    android:orientation="vertical">

        <ImageView
            android:layout_width="wrap_content"
            android:layout_height="wrap_content"
            android:layout_gravity="center_horizontal"
            android:src="@drawable/home_no_data"/>

        <TextView
            android:layout_width="wrap_content"
            android:layout_height="wrap_content"
            android:layout_marginTop="5dp"
            android:textColor="@android:color/darker_gray"
            android:text="无数据!!!"/>
</LinearLayout>
到此,文章就结束了,文章是我在写完整个小程序运行之后写的,没有徐徐渐进的去实现每一步,讲解每一步.。有写得不对的地方,欢迎指导^_^


 6883
6883


 被折叠的 条评论
为什么被折叠?
被折叠的 条评论
为什么被折叠?
 到【灌水乐园】发言


