


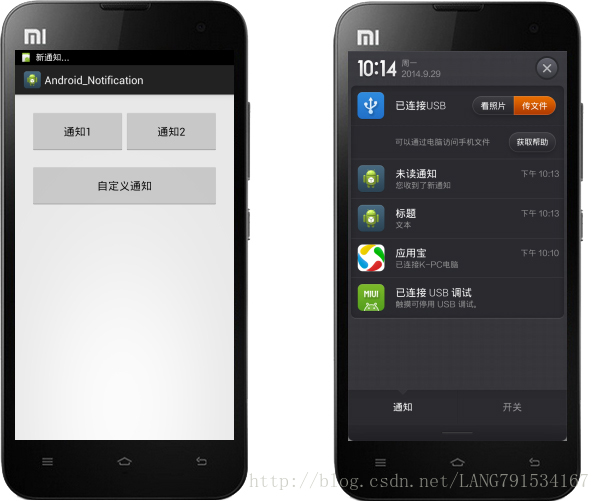
顶部通知 Notification:
(一)、简介:
显示在手机状态栏的通知。Notification所代表的是一种具有全局效果的通知,程序一般通过NotificationManager服务来发送Notification。
Android3.0增加了Notification.Builder类,该类可以轻松地创建Notification对象。
(二)、Notification.Builder类中提供的方法:
builder.setAutoCancel(); 设置点击通知后,状态栏自动删除通知。
builder.setSmallIcon(R.drawable.alert); 设置通知小图标
builder.setLargeIcon(R.drawable.alert2); 设置通知大图标
builder.setContentTitle("标题"); 设置通知标题
builder.setContentText("文本"); 设置通知内容
builder.setDefaults(Notification.DEFAULT_SOUND
| Notification.DEFAULT_VIBRATE); 设置通知的音乐、振动、LED等。
builder.setSound(); 设置通知的音乐
builder.setTick(); 设置通知在状态栏的提示文本
builder.setContentIntent(); 设置点击通知后将要启动的程序组件对应的PendingIntent
(三)、发送Notification的步骤:(四部曲)
1、调用getSystemService(NOTIFICATION_SERVICE)方法获取系统的NotificationManager服务,它是一个重要的系统服务。应用程序可以通过NotificationManager 向系统发送全局通知;
2、构造Notification.Builder对象;
3、设置Notification.Builder对象的各种属性;
4、通过NotificationManager 的notify()方法发送Notification。
(四)、示例代码:
核心代码如下:
NotificationManager  manager = (NotificationManager) getSystemService(NOTIFICATION_SERVICE);
builder = new Notification.Builder(this);
builder.setAutoCancel(true);
builder.setSmallIcon(R.drawable.alert);
builder.setContentTitle("标题");
builder.setContentText("文本");
builder.setDefaults(Notification.DEFAULT_SOUND| Notification.DEFAULT_VIBRATE);
Intent intent = new Intent(this, SecondActivity.class);
PendingIntent pIntent = PendingIntent.getActivity(this, 1, intent,PendingIntent.FLAG_ONE_SHOT);
builder.setContentIntent(pIntent);
manager.notify(0, builder.build());
(五)、PendingIntent:
1、PendingIntent字面意义:等待的,悬而未决的Intent;
2、得到一个 PendingIntent 对象,使用方法类的静态方法 getActivity(Context, int, Intent, int);
3、PendingIntent是一种特殊的Intent。主要的区别在于Intent是立刻执行,而 PendingIntent 的执行不是立刻,而是当条件满足后才发送企图,而且PendingIntent 可以取消;
4、PendingIntent执行的操作实质上是参数传进来的Intent的操作,使用 PendingIntent 的目的在于它所包含的Intent的操作的执行是需要满足某些条件的。
5、主要的使用的地方和例子:通知Notificatio的发送,短消息SmsManager的发送和警报器AlarmManager的执行等。
(六)、Intent和PendingIntent的区别:
- Intent是立即使用的,而PendingIntent可以等到事件发生后触发,PendingIntent可以cancel;
- Intent在程序结束后即终止,而PendingIntent在程序结束后依然有效;
- PendingIntent自带Context,而Intent需要在某个Context内运行;
- Intent在原task中运行,PendingIntent在新的task中运行。
(七)、PendingIntent的几个常量:(getActivity(Context, int, Intent, int)方法中的第四个参数)
- FLAG_ONE_SHOT : 这个PendingIntent只能使用一次,点击通知后自动消失
- FLAG_NO_CREATE : 如果被描述的PendingIntent不存在,那么简单地返回null,而不是创建它。
- FLAG_CANCEL_CURRENT : 如果被描述的PendingIntent已经存在,在即将生成一个新的PendingIntent前,当前的一个要被取消。
- FLAG_UPDATE_CURRENT :如果被描述的PendingIntent已经存在,那么继续保持它,但它其中的数据会因为新Intent而更新。
/**
 * 弹出通知
 */
private void sendNotification() {
	// 通过NotificationManager发送通知
	NotificationManager myNotiManager = (NotificationManager) getSystemService(NOTIFICATION_SERVICE);
	Intent notifyIntent = new Intent(context, SecondActivity.class);
	// 设置新打开activity的启动方式
	notifyIntent.setFlags(Intent.FLAG_ACTIVITY_NEW_TASK);
	/* 创建PendingIntent作为设置递延运行的Activity */
	PendingIntent appIntent = PendingIntent.getActivity(context, 0,
			notifyIntent, PendingIntent.FLAG_ONE_SHOT);
	/* 创建Notication,并设置相关参数 */
	Notification myNoti = new Notification();
	/* 设置statusbar显示的icon */
	myNoti.icon = R.drawable.ic_launcher;
	/* 设置statusbar显示的文字信息 */
	myNoti.tickerText = "新通知";
	/* 设置notification发生时同时发出默认声音 */
	myNoti.defaults = Notification.DEFAULT_SOUND;
	/* 设置Notification留言条的参数 */
	myNoti.setLatestEventInfo(context, "未读通知", "您收到了新通知", appIntent);
	// 设置自动清除
	myNoti.ledARGB = 0xff00ff00;
	myNoti.ledOnMS = 300;
	myNoti.ledOffMS = 1000;
	myNoti.flags |= Notification.FLAG_AUTO_CANCEL
			| Notification.FLAG_SHOW_LIGHTS;
	// 设置默认铃声/震动
	myNoti.defaults |= Notification.DEFAULT_SOUND
			| Notification.DEFAULT_VIBRATE;
	/* 送出Notification */
	myNotiManager.notify(11, myNoti);
}

@SuppressLint("NewApi")
private void sendNotification2() {
	NotificationManager manager = (NotificationManager) getSystemService(NOTIFICATION_SERVICE);
	// Android3.0增加了Notification.Builder类,该类可以轻松地创建Notification对象。
	Builder builder = new Notification.Builder(this);
	// 设置通知自动消失
	builder.setAutoCancel(true);
	builder.setSmallIcon(R.drawable.icon);
	// 状态栏弹出显示文字,如果不设置则顶部通知看不到该通知的任何内容,需要下拉后才能看到通知
	builder.setTicker("新通知...");
	// 通知的内容和标题
	builder.setContentTitle("标题");
	builder.setContentText("文本");
	// 设置通知的默认铃声和震动
	builder.setDefaults(Notification.DEFAULT_SOUND
			| Notification.DEFAULT_VIBRATE);
	// 点击通知的跳转意图
	Intent intent = new Intent(this, SecondActivity.class);
	PendingIntent pIntent = PendingIntent.getActivity(this, 1, intent,
			PendingIntent.FLAG_ONE_SHOT);
	builder.setContentIntent(pIntent);
	Notification notification = builder.build();
	manager.notify(0, notification);
}自定义通知栏的使用, 上面例子中演示了系统Notification的使用,但有时候系统的通知栏不能满足我们的需求,就需要在使用自定义的通知栏
1.自定义通知栏可以根据需求自定义xml布局文件
首先我们要了解的是 自定义布局文件支持的控件类型:Notification的自定义布局是RemoteViews,因此,它仅支持FrameLayout、LinearLayout、RelativeLayout三种布局控件,同时支持AnalogClock、Chronometer、Button、ImageButton、ImageView、ProgressBar、TextView、ViewFlipper、ListView、GridView、StackView和AdapterViewFlipper这些UI控件。
2.将自定义通知布局xml加载进来,此时需要使用到一个RemoteViews来加载制定布局文件,RemoteViews :不在activity里面的视图(widget\notification),运行在其他进程中的远程视图,当activity关闭时,依然可以显示
3.绑定自定义通知布局中控件的监听事件:由于自定义通知布局在远程视图RemoteViews中,需要使用setOnClickPendingIntent来设置点击事件,功能等同于普通控件的
android.view.View.setOnClickListener
/**
 * 弹出一个自定义通知
 */
private void sendMyNotification() {
	NotificationManager mManager = (NotificationManager) getSystemService(Context.NOTIFICATION_SERVICE);
	Notification.Builder builder = new Notification.Builder(context);
	builder.setSmallIcon(R.drawable.icon);
	builder.setTicker("收到一条自定义通知");
	// 设置通知的默认铃声和震动
	builder.setDefaults(Notification.DEFAULT_SOUND
			| Notification.DEFAULT_VIBRATE);
	// 初始化自定义通知
	// RemoteViews 类是一个可以运行在其他进程中的视图
	// RemoteViews这个等级视图是由xml资源文件填充,该类提供了一些基本的方法来修改布局中的视图
	// 两个参数:1.应用程序的包名 2.填充通知布局的xml资源文件
	RemoteViews remoteViews = new RemoteViews(context.getPackageName(),
			R.layout.my_notification);
	Notification notification = builder.build();
	// 设置通知显示内容为自定义通知的布局
	notification.contentView = remoteViews;

	// 点击通知的跳转意图
	Intent intent = new Intent(this, SecondActivity.class);
	PendingIntent pIntent = PendingIntent.getActivity(this, 1, intent,
			PendingIntent.FLAG_ONE_SHOT);
	// 点击通知栏自定义按钮的跳转意图:发送广播
	Intent clickIntent = new Intent("ON_NOTIFICATION_BTN_CLICK");
	PendingIntent pClickIntent = PendingIntent.getBroadcast(this, 1,
			clickIntent, 0);
	// 绑定监听事件
	remoteViews.setOnClickPendingIntent(R.id.btn_quit, pClickIntent);

	builder.setContentIntent(pIntent);
	mManager.notify(10, notification);
}
注意:别忘了广播的注册
/**
 * 注册广播 接受自定义通知中按钮点击事件
 */
private void registerReceiver() {
	IntentFilter intentFilter = new IntentFilter();
	intentFilter.addAction("ON_NOTIFICATION_BTN_CLICK");
	notificationBtnClickReceiver = new NotificationBtnClickReceiver();
	registerReceiver(notificationBtnClickReceiver, intentFilter);
}public class NotificationBtnClickReceiver extends BroadcastReceiver {
@Override
public void onReceive(Context context, Intent intent) {
if (intent.getAction().equals("ON_NOTIFICATION_BTN_CLICK")) {
Log.i("NotificationBtnClickReceiver", "接收到通知栏中关闭按钮事件");
// TODO
}
}
}


 1680
1680

 被折叠的 条评论
为什么被折叠?
被折叠的 条评论
为什么被折叠?
 到【灌水乐园】发言


