


1.自定义标题栏
在日常开发中有时候会感觉系统自带的效果不足以满足开发需要的时候,这个时候就可能需要自定义控件来实现了,这里我们简单实现一个自定义的标题栏,新建一个项目UICustomViews,新建一个类如下:
public class TitleLayout extends LinearLayout{

    public TitleLayout(Context context, AttributeSet attrs) {
        super(context, attrs);
        LayoutInflater.from(context).inflate(R.layout.title,this);
        Button titleBack =(Button)findViewById(R.id.back);
        Button titleEdit =(Button)findViewById(R.id.edit);
        titleBack.setOnClickListener(new OnClickListener() {
            @Override
            public void onClick(View v) {
                ((Activity)getContext()).finish();
            }
        });
        titleEdit.setOnClickListener(new OnClickListener() {
            @Override
            public void onClick(View v) {
                Toast.makeText(getContext(),"666",Toast.LENGTH_LONG).show();
            }
        });
    }
}
<?xml version="1.0" encoding="utf-8"?>
<LinearLayout xmlns:android="http://schemas.android.com/apk/res/android"
    android:id="@+id/activity_main"
    android:layout_width="match_parent"
    android:layout_height="wrap_content">

    <Button
        android:id="@+id/back"
        android:layout_width="wrap_content"
        android:layout_height="wrap_content"
        android:layout_gravity="center"
        android:layout_margin="5dip"
        android:text="Back"
        android:textColor="#fff"/>
    <TextView
        android:layout_width="0dip"
        android:layout_height="wrap_content"
        android:layout_gravity="center"
        android:layout_weight="1"
        android:text="Title Text"
        android:gravity="center"
        android:textColor="#fff"
        android:textSize="24sp"/>

    <Button
        android:id="@+id/edit"
        android:layout_width="wrap_content"
        android:layout_height="wrap_content"
        android:layout_gravity="center"
        android:layout_margin="5dip"
        android:text="Edit"
        android:textColor="#fff"/>
</LinearLayout>
在需要用到的地方加入:
    <com.example.administrator.uicustomviews.TitleLayout
        android:layout_width="match_parent"
        android:layout_height="wrap_content"
></com.example.administrator.uicustomviews.TitleLayout>com.example.administrator.uicustomviews.TitleLayout就是包名,是不是很简单~
2.Nine-Patch图片
先看一下不使用Nine-Patch的效果,xml代码:
<LinearLayout
           android:layout_width="match_parent"
           android:layout_height="wrap_content"
           android:background="@drawable/message_left"></LinearLayout>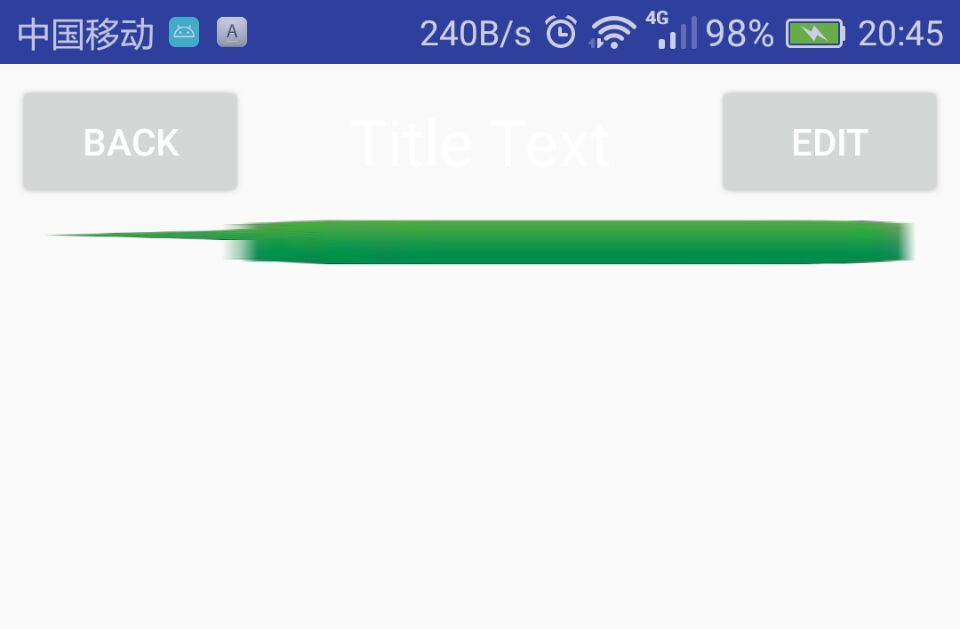
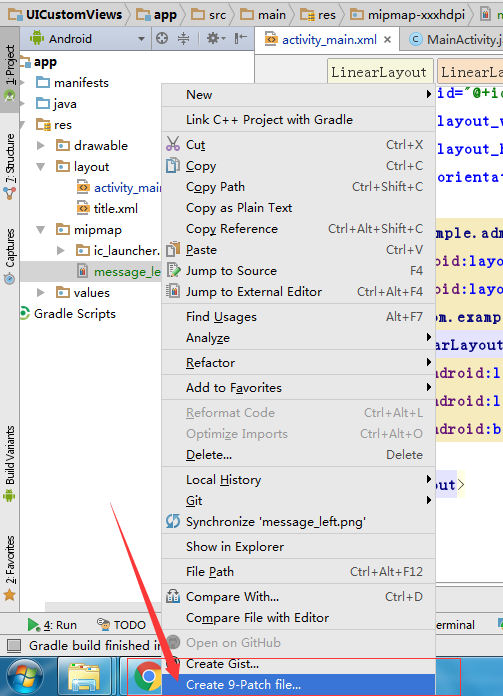
这时候就需要用9patch图片了,把需要拉伸的地方让他拉伸,其他不需要拉伸的地方就不会拉伸,以下是android studio 中将普通图片修改成.9.png图片,
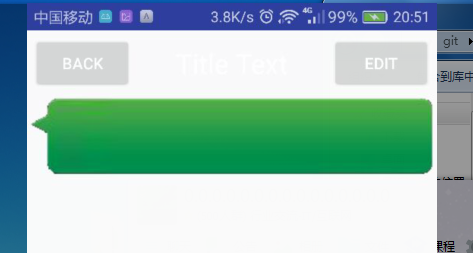
 最后做成下面的效果:


 369
369


 被折叠的 条评论
为什么被折叠?
被折叠的 条评论
为什么被折叠?
 到【灌水乐园】发言


