


使用的sdk版本: V2.2.2(发布日期:2014.3.17)
因为,开发SDK的版本更新比较快,阅读的童鞋注意点吧。
开工前期的准备:
1.建议你首先去下载最新的SDK,那里面除了有案例外,还有必须的jar包。
2.最好在qq的开发平台自己注册个账号,那样移植起来更容易点。
给个链接吧:
配置清单:
1.添加权限:
- <uses-permission android:name="android.permission.INTERNET" />
- <uses-permission android:name="android.permission.ACCESS_NETWORK_STATE" />
2.添加活动:
- <activity
- android:name="com.tencent.tauth.AuthActivity"
- android:launchMode="singleTask"
- android:noHistory="true" >
- <intent-filter>
- <action android:name="android.intent.action.VIEW" />
- <category android:name="android.intent.category.DEFAULT" />
- <category android:name="android.intent.category.BROWSABLE" />
- <data android:scheme="tencent222222" /> <!-- 100380359 100381104 222222 -->
- </intent-filter>
- </activity>
- <activity
- android:name="com.tencent.connect.common.AssistActivity"
- android:screenOrientation="portrait"
- android:theme="@android:style/Theme.Translucent.NoTitleBar" />
顺便提醒一句,在这个版本中要导入两个jar包。
布局:
- <?xml version="1.0" encoding="utf-8"?>
- <LinearLayout xmlns:android="http://schemas.android.com/apk/res/android"
- android:layout_width="match_parent"
- android:layout_height="match_parent"
- android:orientation="vertical" >
- <TextView
- android:id="@+id/user_nickname"
- android:layout_width="wrap_content"
- android:layout_height="wrap_content"
- android:text="昵称" />
- <ImageView
- android:id="@+id/user_logo"
- android:layout_width="wrap_content"
- android:layout_height="wrap_content" />
- <Button
- android:id="@+id/new_login_btn"
- android:layout_width="match_parent"
- android:layout_height="wrap_content"
- android:text="登录" />
- <TextView
- android:id="@+id/user_callback"
- android:layout_width="wrap_content"
- android:layout_height="wrap_content"
- android:text="返回消息" />
活动的详细代码:
- /**
- * 测试qq第三方登录功能
- *
- */
- public class TestQQ extends Activity implements OnClickListener {
- private TextView mUserInfo;
- private ImageView mUserLogo;
- private Button mNewLoginButton;
- private TextView backInfo;
- private UserInfo mInfo;
- private Tencent mTencent;
- public QQAuth mQQAuth;
- // 申请的id
- public String mAppid = "222222";
- @Override
- protected void onCreate(Bundle savedInstanceState) {
- super.onCreate(savedInstanceState);
- setContentView(R.layout.acy_testqq);
- initView();
- }
- public void initView() {
- mUserInfo = (TextView) findViewById(R.id.user_nickname);
- mUserLogo = (ImageView) findViewById(R.id.user_logo);
- mNewLoginButton = (Button) findViewById(R.id.new_login_btn);
- mNewLoginButton.setOnClickListener(this);
- backInfo = (TextView) findViewById(R.id.user_callback);
- // Tencent类是SDK的主要实现类,通过此访问腾讯开放的OpenAPI。
- mQQAuth = QQAuth.createInstance(mAppid, this.getApplicationContext());
- // 实例化
- mTencent = Tencent.createInstance(mAppid, this);
- }
- Handler mHandler = new Handler() {
- @Override
- public void handleMessage(Message msg) {
- if (msg.what == 0) {
- mUserInfo.setVisibility(android.view.View.VISIBLE);
- mUserInfo.setText(msg.getData().getString("nickname"));
- } else if (msg.what == 1) {
- Bitmap bitmap = (Bitmap) msg.obj;
- mUserLogo.setImageBitmap(bitmap);
- mUserLogo.setVisibility(android.view.View.VISIBLE);
- }
- }
- };
- private void updateUserInfo() {
- if (mQQAuth != null && mQQAuth.isSessionValid()) {
- IUiListener listener = new IUiListener() {
- @Override
- public void onError(UiError e) {
- // TODO Auto-generated method stub
- }
- @Override
- public void onComplete(final Object response) {
- JSONObject json = (JSONObject) response;
- // 昵称
- Message msg = new Message();
- String nickname = null;
- try {
- nickname = ((JSONObject) response)
- .getString("nickname");
- } catch (JSONException e) {
- // TODO Auto-generated catch block
- e.printStackTrace();
- }
- msg.getData().putString("nickname", nickname);
- msg.what = 0;
- mHandler.sendMessage(msg);
- // 头像
- String path;
- try {
- path = json.getString("figureurl_qq_2");
- MyImgThread imgThread = new MyImgThread(path);
- Thread thread = new Thread(imgThread);
- thread.start();
- } catch (JSONException e1) {
- // TODO Auto-generated catch block
- e1.printStackTrace();
- }
- }
- @Override
- public void onCancel() {
- // TODO Auto-generated method stub
- }
- };
- // MainActivity.mTencent.requestAsync(Constants.GRAPH_SIMPLE_USER_INFO,
- // null,
- // Constants.HTTP_GET, requestListener, null);
- mInfo = new UserInfo(this, mQQAuth.getQQToken());
- mInfo.getUserInfo(listener);
- } else {
- // mUserInfo.setText("");
- // mUserInfo.setVisibility(android.view.View.GONE);
- // mUserLogo.setVisibility(android.view.View.GONE);
- }
- }
- /**
- * 开启线程 获取头像
- */
- class MyImgThread implements Runnable {
- private String imgPath;
- private Bitmap bitmap;
- public MyImgThread(String imgpath) {
- this.imgPath = imgpath;
- }
- @Override
- public void run() {
- // TODO Auto-generated method stub
- bitmap = getImgBitmap(imgPath);
- Message msg = new Message();
- msg.obj = bitmap;
- msg.what = 1;
- mHandler.sendMessage(msg);
- }
- }
- /**
- * 根据头像的url 获取bitmap
- */
- public Bitmap getImgBitmap(String imageUri) {
- // 显示网络上的图片
- Bitmap bitmap = null;
- HttpURLConnection conn = null;
- InputStream is = null;
- try {
- URL myFileUrl = new URL(imageUri);
- conn = (HttpURLConnection) myFileUrl.openConnection();
- conn.setDoInput(true);
- conn.connect();
- is = conn.getInputStream();
- bitmap = BitmapFactory.decodeStream(is);
- is.close();
- } catch (IOException e) {
- e.printStackTrace();
- return null;
- } finally {
- try {
- conn.disconnect();
- is.close();
- is.reset();
- } catch (IOException e) {
- // TODO Auto-generated catch block
- e.printStackTrace();
- }
- }
- return bitmap;
- }
- public void onClickLogin() {
- // 登录
- if (!mQQAuth.isSessionValid()) {
- // 实例化回调接口
- IUiListener listener = new BaseUiListener() {
- @Override
- protected void doComplete(JSONObject values) {
- updateUserInfo();
- // updateLoginButton();
- if (mQQAuth != null) {
- mNewLoginButton.setTextColor(Color.BLUE);
- mNewLoginButton.setText("登录");
- }
- }
- };
- // "all": 所有权限,listener: 回调的实例
- // mQQAuth.login(this, "all", listener);
- // 这版本登录是使用的这种方式,后面的几个参数是啥意思 我也没查到
- mTencent.loginWithOEM(this, "all", listener, "10000144",
- "10000144", "xxxx");
- } else {
- // 注销登录
- mQQAuth.logout(this);
- updateUserInfo();
- // updateLoginButton();
- mNewLoginButton.setTextColor(Color.RED);
- mNewLoginButton.setText("退出帐号");
- }
- }
- /**
- * 调用SDK封装好的借口,需要传入回调的实例 会返回服务器的消息
- */
- private class BaseUiListener implements IUiListener {
- /**
- * 成功
- */
- @Override
- public void onComplete(Object response) {
- backInfo.setText(response.toString());
- doComplete((JSONObject) response);
- }
- /**
- * 处理返回的消息 比如把json转换为对象什么的
- *
- * @param values
- */
- protected void doComplete(JSONObject values) {
- }
- @Override
- public void onError(UiError e) {
- Toast.makeText(TestQQ.this, e.toString(), 1000).show();
- }
- @Override
- public void onCancel() {
- Toast.makeText(TestQQ.this, "cancel", 1000).show();
- }
- }
- @Override
- public void onClick(View v) {
- // TODO Auto-generated method stub
- // 当点击登录按钮
- if (v == mNewLoginButton) {
- onClickLogin();
- }
- }
- }
测试:
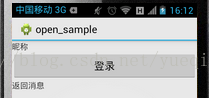
1.运行的开始界面:
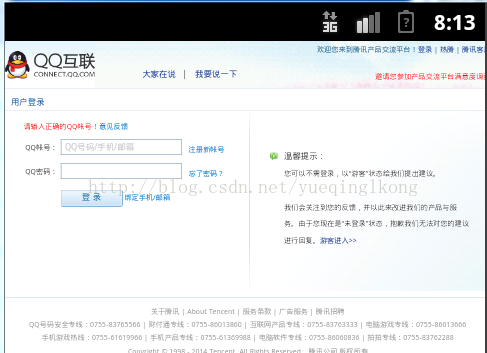
2.当你的手机没用安装qq的时候,会跳转到网页qq注册界面:
3.如果手机上有qq客户端:

4.获取成功:

注意:
1.因为我使用的是腾讯给的测试接口id,如果你也是使用的测试接口的话,那么记得把应用的名字改为: “open_sample”。
2.在进行登录的时候,可以进行判断是否适合sso登录。
- // 是否支持sso登录
- if (mTencent.isSupportSSOLogin(this)) {
- onClickLogin();
- }


 6366
6366


 被折叠的 条评论
为什么被折叠?
被折叠的 条评论
为什么被折叠?
 到【灌水乐园】发言


