


 本文介绍如何使用Maven创建ActiveMQ项目,并演示了简单的消息发送与接收流程。通过具体代码示例,展示了如何配置连接工厂、创建连接及会话,以及如何通过生产者和消费者进行消息的发送与接收。
一、创建工程
所需要的依赖有:
    <dependencies>
        <dependency>
            <groupId>org.apache.activemq</groupId>
            <artifactId>activemq-all</artifactId>
            <version>5.15.2</version>
        </dependency>
        <!-- https://mvnrepository.com/artifact/org.apache.xbean/xbean-spring -->
        <dependency>
            <groupId>org.apache.xbean</groupId>
            <artifactId>xbean-spring</artifactId>
            <version>4.6</version>
        </dependency>
    </dependencies>
这里推荐大家创建工程的时候就使用Maven,使用后你就知道有多好用了。
二、发送者(生产者)
这里只简单展示ActiveMQ的使用,所以使用一个简单的发送者程序,这里就直接上代码好了:
import org.apache.activemq.ActiveMQConnectionFactory;
import javax.jms.*;
/**
 * Created with IntelliJ IDEA.
 * User: Roy
 * Date: 2017/12/6 0006
 * Time: 15:31
 * Description:
 */
public class JmsSender {
    public static void main(String args[]) throws Exception{
        Session session = null;
        Connection con = null;
        try{
            //通过工厂模式获取链接
            ConnectionFactory connectionFactory = new ActiveMQConnectionFactory("tcp://192.168.28.128:61616");
            con = connectionFactory.createConnection();
            con.start();
            //创建会话(是否使用事务,消息确认机制)
            session = con.createSession(Boolean.TRUE,Session.AUTO_ACKNOWLEDGE);
            //创建目的地(消息队列名称)
            Destination destination = session.createQueue("my-queue");
            //创建生产者(消息发送器)
            MessageProducer producer = session.createProducer(destination);
            //发送消息
            for(int i=0;i<3;i++){
                TextMessage message = session.createTextMessage("message--"+i);
                Thread.sleep(1000);
                producer.send(message);
            }
            session.commit();
        }catch (Exception e){
            e.printStackTrace();
        }finally {
            session.close();
            con.close();
        }
    }
}
直接运行,如果没有报错的话,我们可以在ActiveMQ的控制台中看到刚才发的三条消息
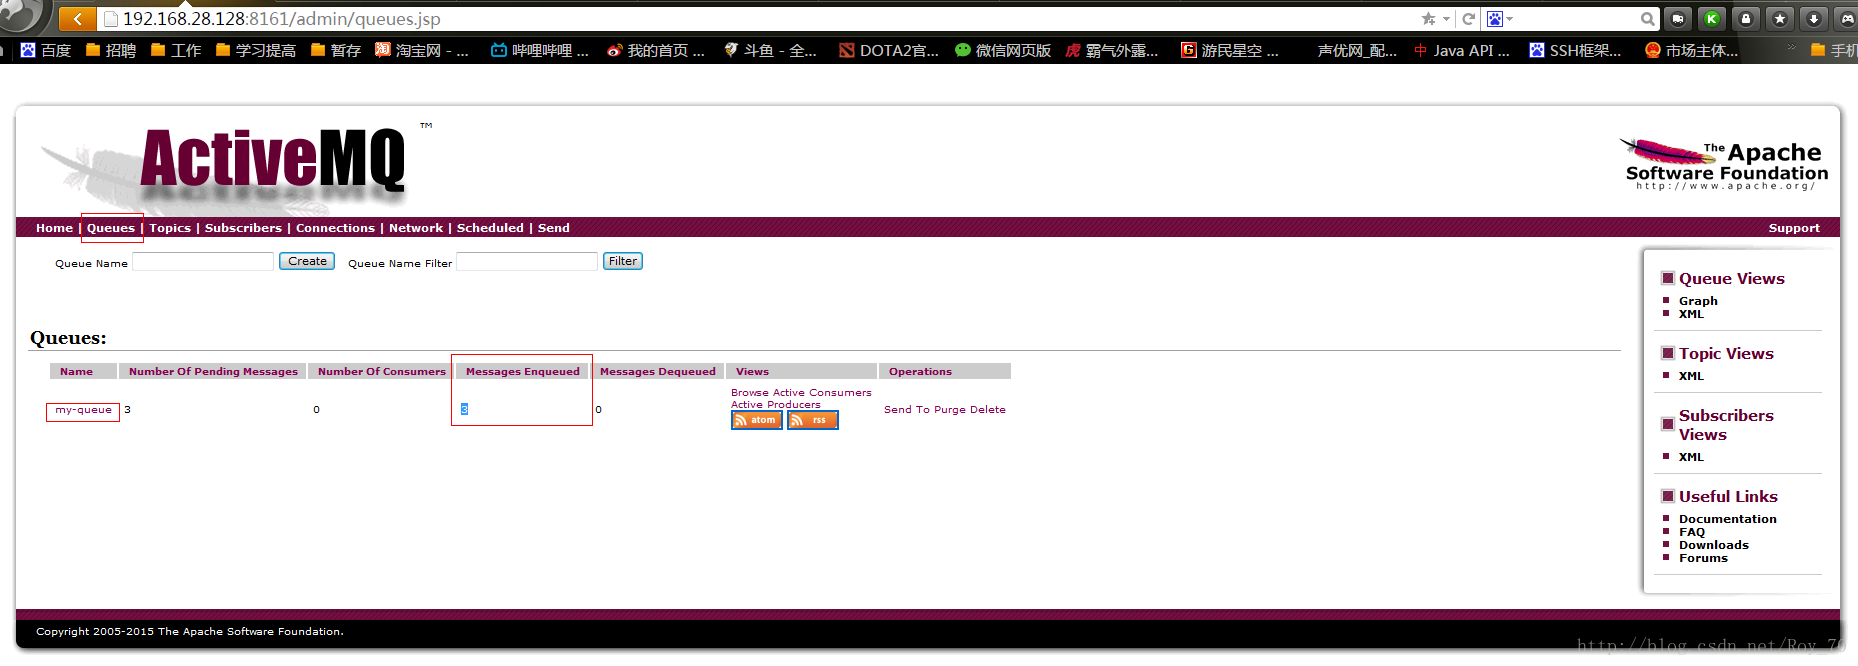
其中看到my-queue这个队列中有三条消息,就是我们刚才发的三条。而Messages Enqueued代表在队列中,可以使用的消息数,也是三条。
那么接下来我们就来写消费者。
三、接收者(消费者)
这里也是话不多说,直接上代码:
import org.apache.activemq.ActiveMQConnectionFactory;
import javax.jms.*;
/**
 * Created with IntelliJ IDEA.
 * User: Roy
 * Date: 2017/12/6 0006
 * Time: 15:56
 * Description:
 */
public class JmsReciver {
    public static void main(String args[]) throws Exception{
        Session session = null;
        Connection con = null;
        try{
            //通过工厂模式获取链接
            ConnectionFactory connectionFactory = new ActiveMQConnectionFactory("tcp://192.168.28.128:61616");
            con = connectionFactory.createConnection();
            con.start();
            //创建会话(是否使用事务,消息确认机制)
            session = con.createSession(Boolean.TRUE,Session.AUTO_ACKNOWLEDGE);
            //创建目的地(消息队列名称)
            Destination destination = session.createQueue("my-queue");
            //创建消费者(消息接收器)
            MessageConsumer consumer = session.createConsumer(destination);
            //接收消息
            for(int i=0;i<3;i++){
                TextMessage message = (TextMessage)consumer.receive();
                session.commit();
                System.out.println("接收消息:"+message.getText());
            }
        }catch (Exception e){
            e.printStackTrace();
        }finally {
            session.close();
            con.close();
        }
    }
}
执行结果是:
接收消息:message--0
接收消息:message--1
接收消息:message--2
可以看到消息都接收到了,再去管理台看一下
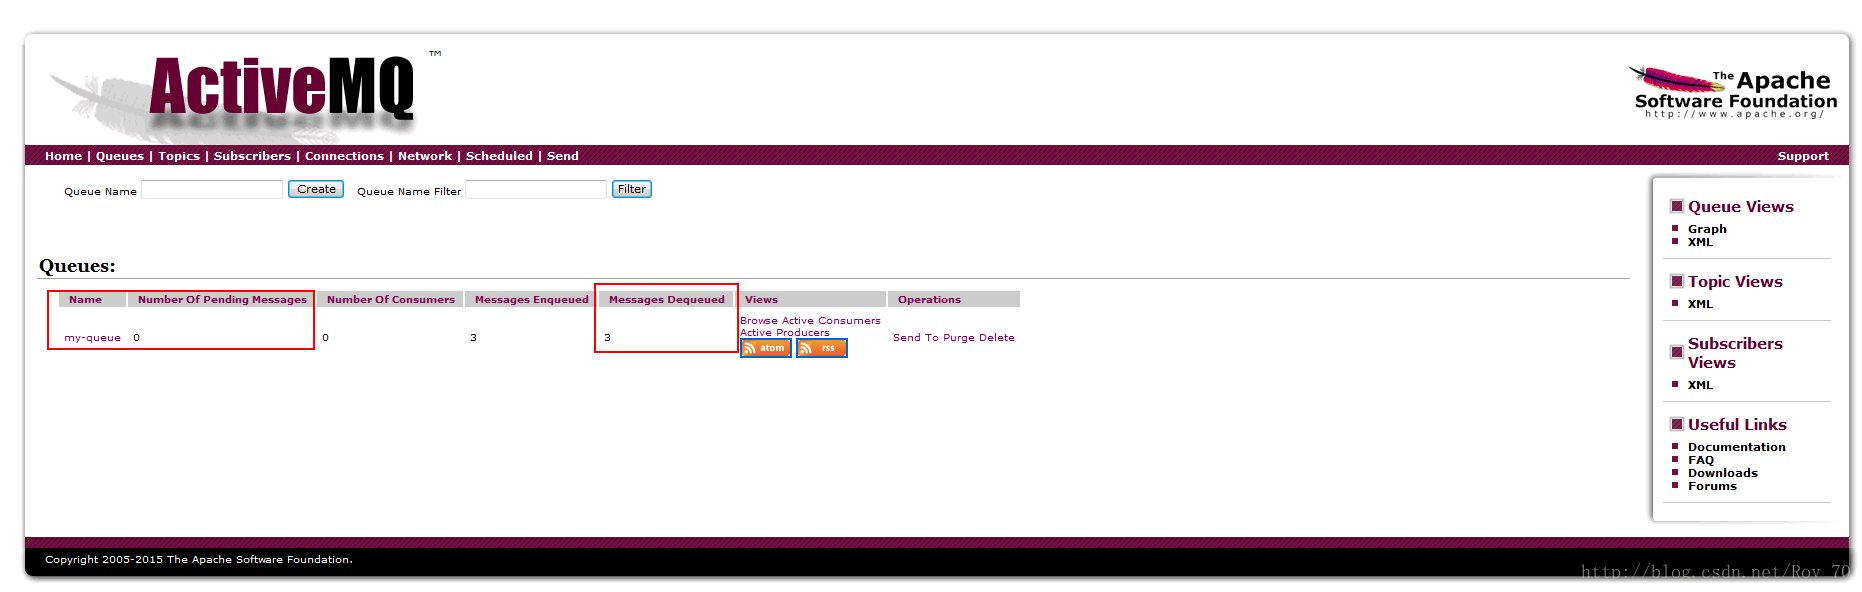
发现Messages Dequeued中有了3条数据,代表已经使用了3条。
需要注意的是ActiveMQ是异步通信,发送者发送完消息后,接收者甚至可以还没启动,当它启动后再去获取消息。


 4739
4739

 被折叠的 条评论
为什么被折叠?
被折叠的 条评论
为什么被折叠?
 到【灌水乐园】发言


