


写在前面的话
感谢ZXing团队,项目下载地址:https://github.com/zxing/zxing,项目下载后,Android条码扫描主要用到三个模块:android,android-core,core。zxing项目解压后目录结构如图所示:
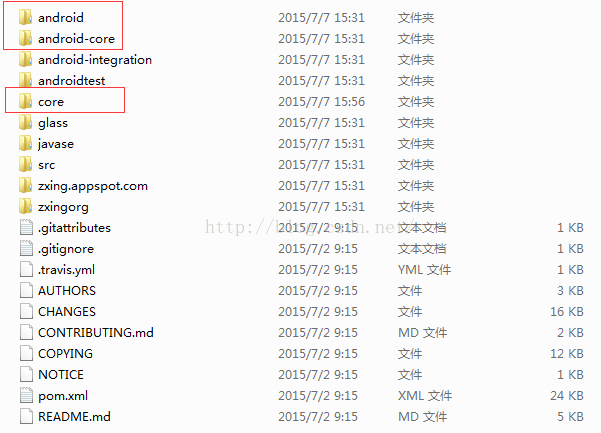
android是ZXing提供的条码扫描器apk客户端源码,android-core和core是需要的类库。本文提供的zxing竖屏扫描解决方案采用的android版本号versionName为4.7.4,versionCode为104,zxing类库版本号为3.2.0,理论上4.7.x通用。
zxing类库无法直接导入Eclipse,笔者采用的方式是新建工程ZXLib后,将android-core,core中的java代码拷贝进去,注意android-core中只有一个CameraConfigurationUtils.java类,主要类库是core,CameraConfigurationUtils.java的包名:com.google.zxing.client.android.camera,拷贝进去时需要与core类库的相应包名对应,最后别忘记将这个工程设置为library。
友情提示:本文提供解决方案,类库源码不进行任何修改,以下提到的修改部分均为客户端源码。
更新于2016.6.10笔者已经将改好后的zxing项目portraitzxing上传到github了,类库基于zxinglib v3.2.1,客户端源码基于zxingclient v4.7.6。
项目特色:1.竖屏扫描二维码客户端;2.向下兼容至Android api 9(android 2.3);3.portraitzxing兼顾Eclipse和Android Studio IDE使用者,分为Eclipse版和Android Studio版。是您zxing竖屏扫描二维码的最优解决方案。
竖屏zxing链接:PortraitZXing:https://github.com/xiong-it/PortraitZXing
zxing如何竖屏扫描
将zxing源码android导入Eclipse后,关联ZXLib,也就是刚才新建的ZXing类库。运行后可直接使用条码扫描功能,可是默认是横屏,笔者项目中需要使用竖屏方式扫描,于是需要将zxing条码扫描改成竖屏方式扫描。步骤写的有些细致,请耐心阅读。
第一步:修改AndroidManifest工程清单,AndroidManifest中CaptureActivity的screenOrientation属性改为portrait:
- <activity android:name=“.CaptureActivity”
- android:screenOrientation=“portrait”
- android:clearTaskOnLaunch=“true”
- android:stateNotNeeded=“true”
- android:theme=“@style/CaptureTheme”
- android:windowSoftInputMode=“stateAlwaysHidden”>
<activity android:name=".CaptureActivity"
              android:screenOrientation="portrait"
              android:clearTaskOnLaunch="true"
              android:stateNotNeeded="true"
              android:theme="@style/CaptureTheme"
              android:windowSoftInputMode="stateAlwaysHidden">
第二步:删除CaptureActivity中把onResume方法中的无用代码:
- // if (prefs.getBoolean(PreferencesActivity.KEY_DISABLE_AUTO_ORIENTATION, true)) {
- // setRequestedOrientation(getCurrentOrientation());
- // } else {
- // setRequestedOrientation(ActivityInfo.SCREEN_ORIENTATION_SENSOR_LANDSCAPE);
- // }
//    if (prefs.getBoolean(PreferencesActivity.KEY_DISABLE_AUTO_ORIENTATION, true)) {
//      setRequestedOrientation(getCurrentOrientation());
//    } else {
//      setRequestedOrientation(ActivityInfo.SCREEN_ORIENTATION_SENSOR_LANDSCAPE);
//    }
第三步:在CaptureActivity中把onCreate方法结尾处添加代码:
- if (getResources().getConfiguration().orientation == Configuration.ORIENTATION_PORTRAIT) {
- setRequestedOrientation(ActivityInfo.SCREEN_ORIENTATION_PORTRAIT);
- } else {
- setRequestedOrientation(ActivityInfo.SCREEN_ORIENTATION_LANDSCAPE);
- }
经过前三步,条码扫描器已经竖屏了,相信很多人也改到这里就出现问题了,zxing条码扫描器相机预览方向旋转了90度,并且容易拉伸,我们需要纠正相机预览方向。if (getResources().getConfiguration().orientation == Configuration.ORIENTATION_PORTRAIT) { setRequestedOrientation(ActivityInfo.SCREEN_ORIENTATION_PORTRAIT); } else { setRequestedOrientation(ActivityInfo.SCREEN_ORIENTATION_LANDSCAPE); }
第四步:在CameraConfigurationManager的setDesiredCameraParameters方法中添加代码:
- camera.setDisplayOrientation(90);//add 这句代码作用是旋转镜头90度,使相机预览方向正确显示
- camera.setParameters(parameters);
相机预览正常了,也没有拉伸,可是二维码识别却慢了许多,并且一维条码识别不出来,需要横屏扫描才可以识别,而且条码成像仍然是横向的,下面步骤将解决这个问题。camera.setDisplayOrientation(90);//add 这句代码作用是旋转镜头90度,使相机预览方向正确显示 camera.setParameters(parameters);
第五步:修改CameraManager中getFramingRectInPreview方法:
- // rect.left = rect.left * cameraResolution.x / screenResolution.x;
- // rect.right = rect.right * cameraResolution.x / screenResolution.x;
- // rect.top = rect.top * cameraResolution.y / screenResolution.y;
- // rect.bottom = rect.bottom * cameraResolution.y / screenResolution.y;
- rect.left = rect.left * cameraResolution.y / screenResolution.x;
- rect.right = rect.right * cameraResolution.y / screenResolution.x;
- rect.top = rect.top * cameraResolution.x / screenResolution.y;
- rect.bottom = rect.bottom * cameraResolution.x / screenResolution.y;
//      rect.left = rect.left * cameraResolution.x / screenResolution.x;
//      rect.right = rect.right * cameraResolution.x / screenResolution.x;
//      rect.top = rect.top * cameraResolution.y / screenResolution.y;
//      rect.bottom = rect.bottom * cameraResolution.y / screenResolution.y;

        rect.left = rect.left * cameraResolution.y / screenResolution.x;
        rect.right = rect.right * cameraResolution.y / screenResolution.x;
        rect.top = rect.top * cameraResolution.x / screenResolution.y;
        rect.bottom = rect.bottom * cameraResolution.x / screenResolution.y;
第六步:修改DecodeHandler中的decode(byte[] data, int width, int height)方法:
- PlanarYUVLuminanceSource source = activity.getCameraManager().buildLuminanceSource(data, width, height);
前添加代码PlanarYUVLuminanceSource source = activity.getCameraManager().buildLuminanceSource(data, width, height);
- byte[] rotatedData = new byte[data.length];
- for (int y = 0; y < height; y++) {
- for (int x = 0; x < width; x++)
- rotatedData[x * height + height - y - 1] = data[x + y * width];
- }
- int tmp = width;
- width = height;
- height = tmp;
- data = rotatedData;
    byte[] rotatedData = new byte[data.length];
    for (int y = 0; y < height; y++) {
        for (int x = 0; x < width; x++)
            rotatedData[x * height + height - y - 1] = data[x + y * width];
    }
    int tmp = width;
    width = height;
    height = tmp;
    data = rotatedData;
更新
更新于2016.6.10笔者已经将改好后的zxing项目上传到github了,类库基于zxinglib v3.2.1,客户端源码基于zxingclient v4.7.6。
项目特色:客户端向下兼容至Android api 9(Android 2.3),竖屏扫描二维码。绝对是您zxing竖屏扫描解决最优方案。
竖屏zxing链接:PortraitZXing:https://github.com/xiong-it/PortraitZXing
结束语
只进行了第五步,而没有第六步,会在zxing类库的CameraConfigurationUtils 283行抛出异常
- IllegalStateException(“Parameters contained no preview size!”);
如果只进行了第六步,而没有第五步,则无法正常识别条码。IllegalStateException("Parameters contained no preview size!");好了,经过以上六步,zxing条码扫描器已经可以正常竖屏扫描了,剩下的工作就是精简代码了,祝大家顺利完成项目。
转载请注明作者xiong_it和原文出处:http://blog.csdn.net/xiong_it/article/details/46983293,谢谢!
小米4c变形,导致扫不出来
首先高宽比计算公式没有修改,
小米4c的摄像头存在多种分辨率,使用的默认分辨率的高宽比,与屏幕的高宽比不一致,差异较大,导致屏幕扭曲,所以修改以下代码可以完成,也可以直接强制直接使用屏幕的分辨率,不去遍历最高的分辨率
findBestPreviewSizeValue的功能就是寻找最合适的camara分辨率,要满足两个条件,最高像素+高宽比接近屏幕的高宽比
CameraConfigurationUtils
findBestPreviewSizeValue的
double screenAspectRatio = (double) screenResolution.x / (double) screenResolution.y;
改为double screenAspectRatio = (double) screenResolution.y / (double) screenResolution.x;(纵向的高宽比需要调换过来)
并且把private static final double MAX_ASPECT_DISTORTION = 0.15;值改为0.1(小米4c的最高2048/1080-1920/1080 = 0.12 < 0.15,使用2048*1080分辨率的话一维码还是扫不出来,所以改为了0.1)


 476
476

 被折叠的 条评论
为什么被折叠?
被折叠的 条评论
为什么被折叠?
 到【灌水乐园】发言


