HTML5调用手机摄像拍照、相册等功能<input[type=file]>样式美化及demo

最近用MUI做了个移动端项目,设计中涉及到调用手机摄像头拍照等功能需求,然而在PLUS环境下才能直接调用,这就让人有点头疼了,后经查询资料学习了解到有一个很简单的方法就是input:file标签,不需要复杂代码操作就能实现调用拍照、相册等功能。

//capture -- 设置选择需要调用的功能
//camera -- 照相机
//camcorder -- 摄像机
//microphone -- 录音 
//accept -- 直接打开系统文件目录 

<input type="file" accept="image/*" capture="camera">
<input type="file" accept="video/*" capture="camcorder">
<input type="file" accept="audio/*" capture="microphone">

//input:file标签还有一个属性multiple 用来支持多选 直接呼出原生选项
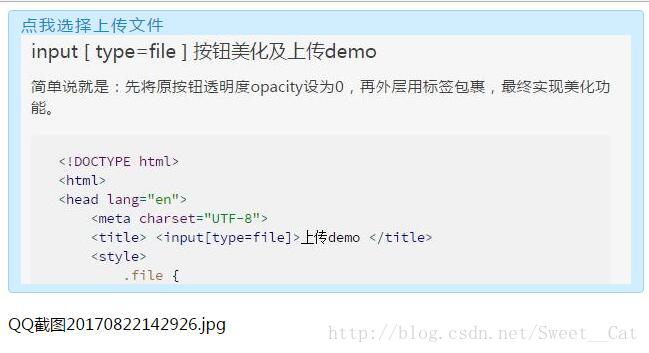
<input type="file" accept="image/*" multiple>
input [ type=file ] 按钮美化及上传demo

简单说就是:先将原按钮透明度opacity设为0,再外层用标签包裹,最终实现美化功能。

<!DOCTYPE html>
<html>
<head lang="en">
    <meta charset="UTF-8">
    <title> <input[type=file]>上传demo </title>
    <style>
        .file {
            position: relative;
            display: inline-block;
            background: #D0EEFF;
            border: 1px solid #99D3F5;
            border-radius: 4px;
            padding: 4px 12px;
            overflow: hidden;
            color: #1E88C7;
            text-decoration: none;
            text-indent: 0;
            line-height: 20px;
        }
        .file input {
            position: absolute;
            font-size: 100px;
            right: 0;
            top: 0;
            opacity: 0;
        }
        .file:hover {
            background: #AADFFD;
            border-color: #78C3F3;
            color: #004974;
            text-decoration: none;
        }
        p.bottomTitlt{
            margin: 0;
            letter-spacing: 2px;
            padding:  0;
        }
    </style>
</head>
<body>

<a href="javaScript:;" class="file">
    <p class="bottomTitlt">身份证正面</p>
    <img src="" alt=""/>
    <input type="file"  placeholder="身份证正面"  >
</a>
<p class="showFileName"></p>


<script src="https://code.jquery.com/jquery-3.2.0.min.js"></script>

<script type="text/javascript">
    $(".file").on("change","input[type='file']",function(){
        var filePath=$(this).val();
        var fr= new FileReader();
        var imgObj = this.files[0];
        fr.readAsDataURL(imgObj);
        var obj = $(this).prev()[0];
        if(filePath.indexOf("jpg")!=-1 || filePath.indexOf("JPG")!=-1 || filePath.indexOf("PNG")!=-1 || filePath.indexOf("png")!=-1){
            var arr = filePath.split('\\');
            var fileName = arr[arr.length-1];
            $(this).parent().next().html(fileName);
            fr.onload=function( ){
                obj.src=this.result;
            };
        }else{
            $(this).parent().next().html("您未上传文件,或者您上传文件类型有误!").css("color","red");
            return false
        }
    });
</script>

</body>
</html>

input[type=file]样式美化后效果图:

按钮美化效果

图片上传后效果图:

上传文件效果

  • 2
    点赞
  • 12
    收藏
    觉得还不错? 一键收藏
  • 0
    评论
如果你想在保留`contenteditable="true"`和`oninput="filterTable(1)"`属性的同时实现表单提交功能,你可以使用JavaScript来处理表单提交。 首先,在`<form>`标签中添加一个`onsubmit`事件处理程序,用于在表单提交时执行自定义的JavaScript函数。例如: ```html <form action="insert.php" method="POST" onsubmit="submitForm(event)"> <table> <tr> <td contenteditable="true"><input type="text" oninput="filterTable(1)" placeholder="aoiStep"></td> <td contenteditable="true"><input type="text" oninput="filterTable(2)" placeholder="defectType"></td> <td contenteditable="true"><input type="text" oninput="filterTable(3)" placeholder="layerCode"></td> <td contenteditable="true"><input type="text" oninput="filterTable(4)" placeholder="type"></td> <td contenteditable="true"><input type="text" oninput="filterTable(5)" placeholder="dpet"></td> <td contenteditable="true"><input type="text" oninput="filterTable(6)" placeholder="subcode"></td> <td contenteditable="true"><input type="text" placeholder="codeDescription"></td> <td contenteditable="true">image1</td> <td contenteditable="true">image2</td> <td contenteditable="true">image3</td> <td contenteditable="true">image4</td> <td contenteditable="true">image5</td> <td contenteditable="true"><input type="text" placeholder="determination_rule"></td> </tr> </table> <input type="submit" value="Submit"> </form> ``` 接下来,创建一个JavaScript函数`submitForm(event)`来处理表单的提交事件。在该函数中,你可以阻止表单的默认提交行为,并获取表单中的数据进行处理。例如: ```javascript function submitForm(event) { event.preventDefault(); // 阻止表单的默认提交行为 var form = event.target; // 获取表单元素 // 获取表单中的数据 var aoiStep = form.querySelector('[placeholder="aoiStep"]').value; var defectType = form.querySelector('[placeholder="defectType"]').value; var layerCode = form.querySelector('[placeholder="layerCode"]').value; var type = form.querySelector('[placeholder="type"]').value; var dpet = form.querySelector('[placeholder="dpet"]').value; var subcode = form.querySelector('[placeholder="subcode"]').value; var codeDescription = form.querySelector('[placeholder="codeDescription"]').value; var determinationRule = form.querySelector('[placeholder="determination_rule"]').value; // 执行你想要的数据处理操作 // ... // 提交表单 form.submit(); } ``` 在上述代码中,我们首先使用`event.preventDefault()`来阻止表单的默认提交行为。然后,通过`event.target`获取到提交事件所在的表单元素。 接下来,我们使用`form.querySelector`方法来获取到每个输入字段的值,并将其存储在相应的变量中。 最后,你可以在`submitForm`函数中执行你想要的数据处理操作,例如验证、发送AJAX请求等。 最后,我们调用`form.submit()`方法来提交表单。 通过以上步骤,你可以在保留`contenteditable="true"`和`oninput="filterTable(1)"`属性的同时实现表单提交功能。 希望这个解决方案对你有帮助。如有任何疑问,请随时提问。

“相关推荐”对你有帮助么?

  • 非常没帮助
  • 没帮助
  • 一般
  • 有帮助
  • 非常有帮助
提交
评论
添加红包

请填写红包祝福语或标题

红包个数最小为10个

红包金额最低5元

当前余额3.43前往充值 >
需支付:10.00
成就一亿技术人!
领取后你会自动成为博主和红包主的粉丝 规则
hope_wisdom
发出的红包
实付
使用余额支付
点击重新获取
扫码支付
钱包余额 0

抵扣说明:

1.余额是钱包充值的虚拟货币,按照1:1的比例进行支付金额的抵扣。
2.余额无法直接购买下载,可以购买VIP、付费专栏及课程。

余额充值