


如有错误,望大家指出!
1 训练过程见之前写的两篇博客:
http://blog.csdn.net/weiguanqun/article/details/78754898
http://blog.csdn.net/weiguanqun/article/details/78765502
之后的测试过程是基于之前的训练过程的。
2 本文的测试程序是在源码 https://github.com/dBeker/Faster-RCNN-TensorFlow-Python3.5的基础之上进行改进。
测试程序为:demo.py
3 修改demo中的部分程序适应自己的程序:
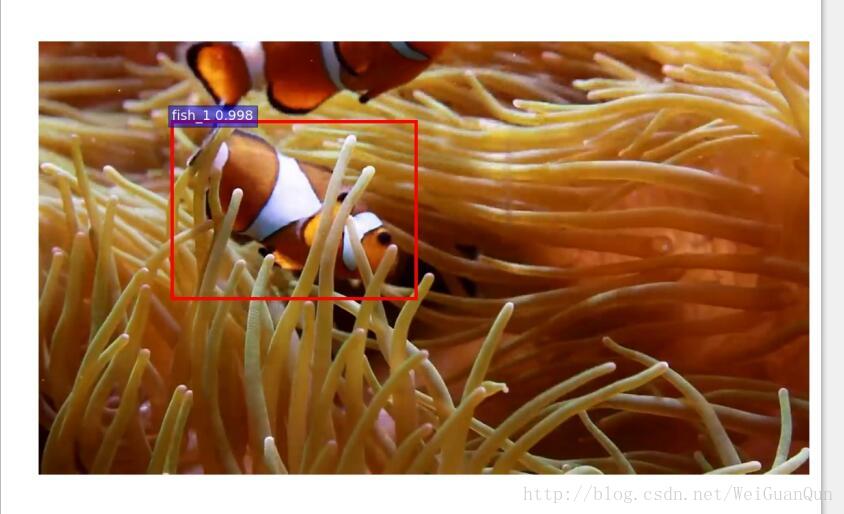
我把图像的结果保存了下来
修改一:
修改了类的个数:3
if demonet == 'vgg16':
        net = vgg16(batch_size=1)
    # elif demonet == 'res101':
        # net = resnetv1(batch_size=1, num_layers=101)
    else:
        raise NotImplementedError
    net.create_architecture(sess, "TEST", 3, tag='default', anchor_scales=[8, 16, 32])
    saver = tf.train.Saver()
    saver.restore(sess, tfmodel)
修改二:
弃用了vis_detections函数,把vis_detections函数的东西直接写到了demo中进行画图
save_jpg :为存储路径
def demo(sess, net, image_name):
# Load the demo image
im_file = os.path.join(cfg.FLAGS2["data_dir"], 'test', image_name)
im = cv2.imread(im_file)
# Detect all object classes and regress object bounds
timer = Timer()
timer.tic()
scores, boxes = im_detect(sess, net, im)
timer.toc()
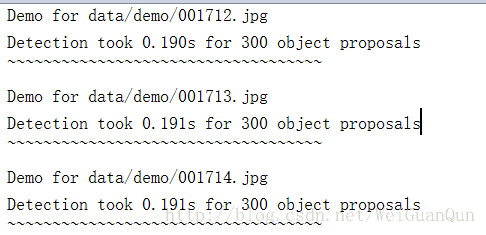
print('Detection took {:.3f}s for {:d} object proposals'.format(timer.total_time, boxes.shape[0]))
save_jpg = os.path.join('E:\\WGQ\\TF-fasterRcnn\\Faster-RCNN-TensorFlow-Python3.5-master\\data\\save_test',
image_name)
# Visualize detections for each class
CONF_THRESH = 0.1
NMS_THRESH = 0.1
fig, ax = plt.subplots(figsize=(12, 12))
im = im[:, :, (2, 1, 0)]
ax.imshow(im, aspect='equal')
plt.axis('off')
plt.tight_layout()
for cls_ind, cls in enumerate(CLASSES[1:]):
cls_ind += 1 # because we skipped background
cls_boxes = boxes[:, 4 * cls_ind:4 * (cls_ind + 1)]
cls_scores = scores[:, cls_ind]
dets = np.hstack((cls_boxes,
cls_scores[:, np.newaxis])).astype(np.float32)
keep = nms(dets, NMS_THRESH)
dets = dets[keep, :]
#vis_detections(im, cls, dets,image_name, thresh=CONF_THRESH)
inds = np.where(dets[:, -1] >= 0.5)[0]
#print('Detected {:d} BoundingBox'.format(len(inds)))
if len(inds) != 0:
#print('Detected {:d} BoundingBox'.format(len(inds)))
#im = im[:, :, (2, 1, 0)]
for i in inds:
bbox = dets[i, :4]
score = dets[i, -1]
ax.add_patch(
plt.Rectangle((bbox[0], bbox[1]),
bbox[2] - bbox[0],
bbox[3] - bbox[1], fill=False,
edgecolor='red', linewidth=3.5)
)
ax.text(bbox[0], bbox[1] - 2,
'{:s} {:.3f}'.format(cls, score),
bbox=dict(facecolor='blue', alpha=0.5),
fontsize=14, color='white')
# ax.set_title(('{} detections with '
# 'p({} | box) >= {:.1f}').format(class_name, class_name,
# thresh),
# fontsize=14)
plt.draw()
#im = im[:, :, (2, 1, 0)]
#fig, ax = plt.subplots(figsize=(12, 12))
#ax.imshow(im, aspect='equal')
#plt.axis('off')
#plt.tight_layout()
#plt.savefig(save_jpg)
# cv2.imwrite(save_jpg,im)
#return
# else:
# im = im[:, :, :]
# fig, ax = plt.subplots(figsize=(12, 12))
# ax.imshow(im, aspect='equal')
# plt.axis('off')
# plt.tight_layout()
plt.savefig(save_jpg)“`
4 出现的错误基本上都是路径错误,在此不再贴出,贴出实验结果与截图:
速度:
结果:


 3281
3281


 被折叠的 条评论
为什么被折叠?
被折叠的 条评论
为什么被折叠?
 到【灌水乐园】发言


