


ssh简介
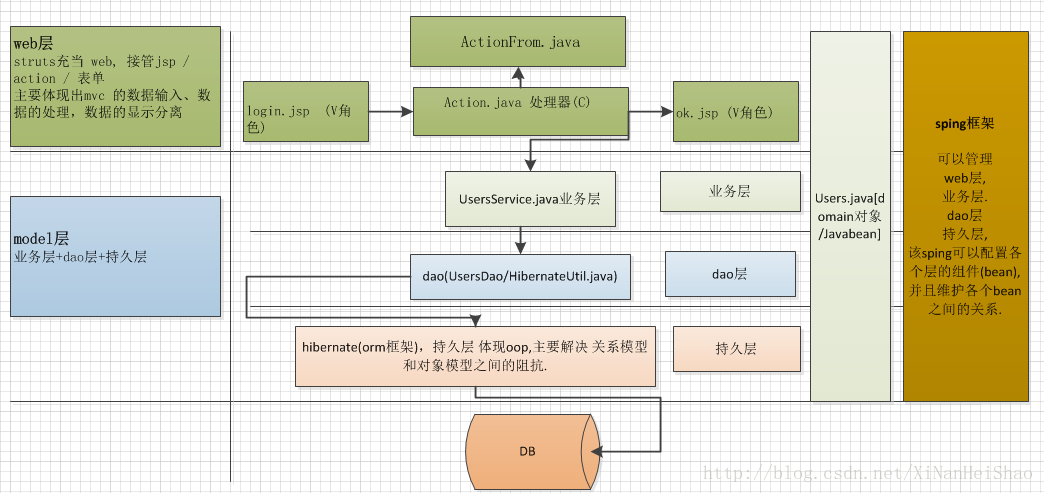
ssh(struts+spring+hibernate) 三大框架配合使用来开发项目,是目前java ee 最流行的开发方式.
ssh项目架构
一步步搭建ssh框架
step
1、创建一个web项目
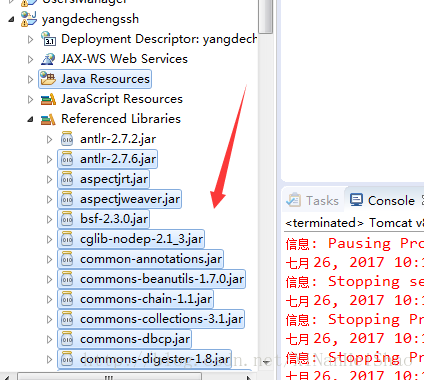
2、导入struts、spring、hibernate相关的jar包
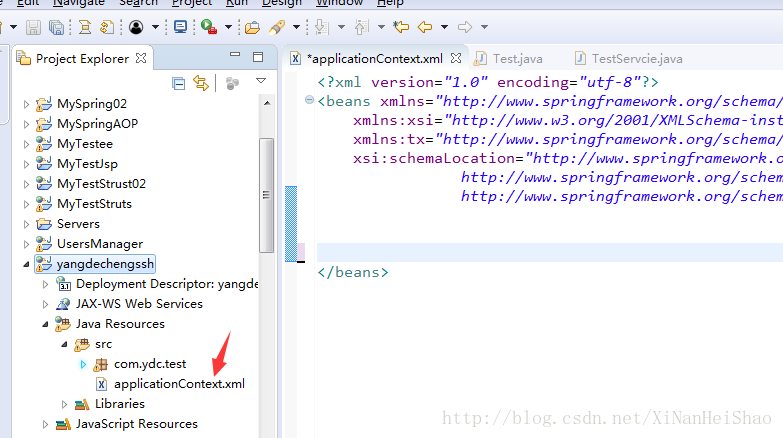
3、先搭建spring框架。
如果还对spring陌生的同志,可以先阅读spring快速入门
3-1、创建spring核心配置文件applicationContext.xml
3-2、新建一个测试类
public class TestServcie {

    private String name;

    public String getName() {
        return name;
    }

    public void setName(String name) {
        this.name = name;
    }
}
3-3、配置测试类bean
<?xml version="1.0" encoding="utf-8"?>
<beans xmlns="http://www.springframework.org/schema/beans"
    xmlns:xsi="http://www.w3.org/2001/XMLSchema-instance" xmlns:context="http://www.springframework.org/schema/context"
    xmlns:tx="http://www.springframework.org/schema/tx"
    xsi:schemaLocation="http://www.springframework.org/schema/beans http://www.springframework.org/schema/beans/spring-beans-2.5.xsd
                http://www.springframework.org/schema/context http://www.springframework.org/schema/context/spring-context-2.5.xsd
                http://www.springframework.org/schema/tx http://www.springframework.org/schema/tx/spring-tx-2.5.xsd">


    <!-- 配置和一个testService对象 -->
    <bean id="testServcie" class="com.ydc.test.TestServcie">
        <property name="name" value="test" />
    </bean>
</beans>
3-4、测试运行
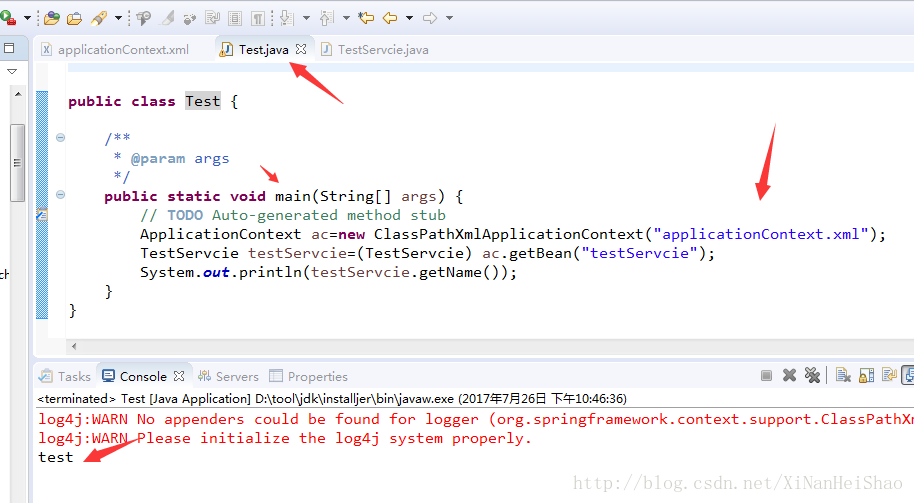
ok,到目前为止sping框架已经能够正常工作啦
4、再搭建hibernate框架
因为我们是ssh,所以我们hibernate的核心,就被spring接管了.hibernate.cfg.xml 文件对象映射文件,SessionFactory在spring的文件中配置即可。
如果还对hibernate陌生的同志,可以先阅读hibernate快速入门
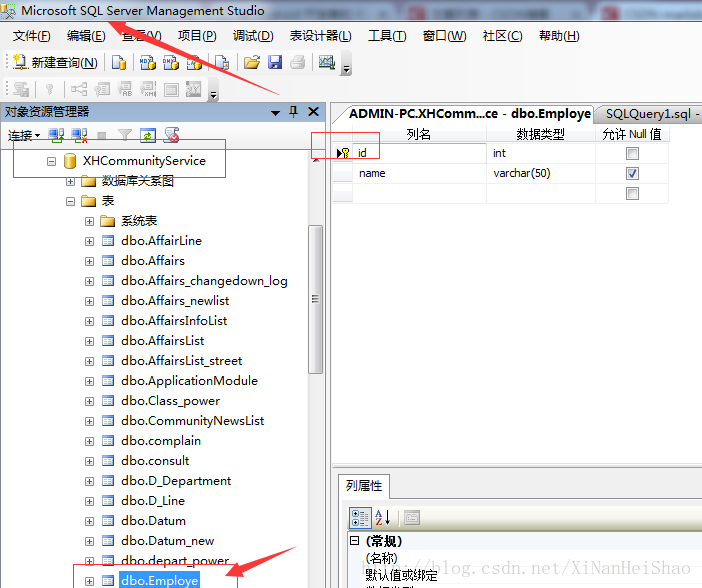
4-1、准备数据库和相关的表
4-2、在 applicationContext.xml中配置数据源
<!-- 配置数据源 -->
    <bean id="dataSource" class="org.apache.commons.dbcp.BasicDataSource"
        destroy-method="close">
        <property name="driverClassName" value="com.microsoft.sqlserver.jdbc.SQLServerDriver" />
        <property name="url"
            value="jdbc:sqlserver://localhost:1433;databasename=XHCommunityService" />
        <property name="username" value="sa" />
        <property name="password" value="123456" />
        <!-- 连接池启动时的初始值 -->
        <property name="initialSize" value="30" />
        <!-- 连接池的最大值 -->
        <property name="maxActive" value="500" />
        <!-- 最大空闲值.当经过一个高峰时间后,连接池可以慢慢将已经用不到的连接慢慢释放一部分,一直减少到maxIdle为止 -->
        <property name="maxIdle" value="2" />
        <!-- 最小空闲值.当空闲的连接数少于阀值时,连接池就会预申请去一些连接,以免洪峰来时来不及申请 -->
        <property name="minIdle" value="1" />
    </bean>
4-3、新建Employe模型类
public class Employe implements Serializable{


    public int getId() {
        return id;
    }
    public void setId(int id) {
        this.id = id;
    }
    public String getName() {
        return name;
    }
    public void setName(String name) {
        this.name = name;
    }
    private static final long serialVersionUID = 1L;
    private int id;
    private String name;

}
4-4、新建模型映射文件Employe.hbm.xml
<?xml version="1.0" encoding="UTF-8"?>
<!DOCTYPE hibernate-mapping PUBLIC
    "-//Hibernate/Hibernate Mapping DTD 3.0//EN"
    "http://hibernate.sourceforge.net/hibernate-mapping-3.0.dtd">
<hibernate-mapping package="com.ydc.domain">
    <class name="Employe" table="Employe">
        <!-- id元素用于指定主键属性 -->
        <id name="id" column="id" type="java.lang.Integer">
            <!-- 该元素用于指定主键值生成策略hilo native increment sequence uuid -->
            <generator class="increment"></generator>
        </id>
        <!-- 对其它属性还有配置 -->
        <property name="name" type="java.lang.String">
            <column name="name" not-null="false" />
        </property>

    </class>

</hibernate-mapping>
4-3、配置SessionFactory对象
<?xml version="1.0" encoding="utf-8"?>
<beans xmlns="http://www.springframework.org/schema/beans"
    xmlns:xsi="http://www.w3.org/2001/XMLSchema-instance" xmlns:context="http://www.springframework.org/schema/context"
    xmlns:tx="http://www.springframework.org/schema/tx"
    xsi:schemaLocation="http://www.springframework.org/schema/beans http://www.springframework.org/schema/beans/spring-beans-2.5.xsd
                http://www.springframework.org/schema/context http://www.springframework.org/schema/context/spring-context-2.5.xsd
                http://www.springframework.org/schema/tx http://www.springframework.org/schema/tx/spring-tx-2.5.xsd">


    <!-- 配置和一个testService对象 -->
    <bean id="testServcie" class="com.ydc.test.TestServcie">
        <property name="name" value="test" />
    </bean>

    <!-- 配置数据源 -->
    <bean id="dataSource" class="org.apache.commons.dbcp.BasicDataSource"
        destroy-method="close">
        <property name="driverClassName" value="com.microsoft.sqlserver.jdbc.SQLServerDriver" />
        <property name="url"
            value="jdbc:sqlserver://localhost:1433;databasename=XHCommunityService" />
        <property name="username" value="sa" />
        <property name="password" value="123456" />
        <!-- 连接池启动时的初始值 -->
        <property name="initialSize" value="30" />
        <!-- 连接池的最大值 -->
        <property name="maxActive" value="500" />
        <!-- 最大空闲值.当经过一个高峰时间后,连接池可以慢慢将已经用不到的连接慢慢释放一部分,一直减少到maxIdle为止 -->
        <property name="maxIdle" value="2" />
        <!-- 最小空闲值.当空闲的连接数少于阀值时,连接池就会预申请去一些连接,以免洪峰来时来不及申请 -->
        <property name="minIdle" value="1" />
    </bean>

    <!-- 配置会话工厂() -->
    <bean id="sessionFactory"
        class="org.springframework.orm.hibernate3.LocalSessionFactoryBean">
        <!-- 设置数据源 -->
        <property name="dataSource" ref="dataSource" />
        <!-- 接管了hibernate对象映射文件 -->
        <property name="mappingResources">
            <list>
                <value>com/ydc/domain/Employe.hbm.xml</value>
            </list>
        </property>
        <property name="hibernateProperties">
            <value>
                hibernate.dialect=org.hibernate.dialect.SQLServerDialect
                hibernate.hbm2ddl.auto=update
                hibernate.show_sql=true
                hibernate.cache.use_second_level_cache=true
                hibernate.cache.provider_class=org.hibernate.cache.EhCacheProvider
                hibernate.generate_statistics=true
            </value>
        </property>
    </bean>
</beans>
4-4、导入数据库驱动包sqljdbc4.jar
4-5、测试运行

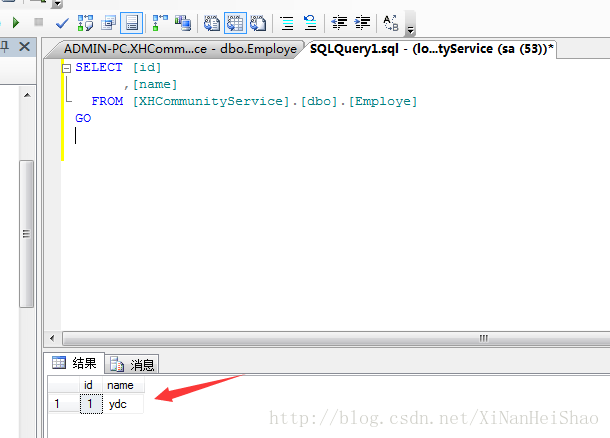
ok,到目前为止hibernate框架已经正常工作啦!
4-6、使用事务管理器来统一管理事务
4-6-1、新建一个接口
public interface EmployeeServiceInter {

    public void addEmployee(Employe e);

}
4-6-2、新建一个接口实现类
//这里配置@Transactional用处是让spring的事务管理器接管该 Service的事务.
@Transactional
public class EmployeeService implements EmployeeServiceInter {
private SessionFactory sessionFactory;
public SessionFactory getSessionFactory() {
return sessionFactory;
}
public void setSessionFactory(SessionFactory sessionFactory) {
this.sessionFactory = sessionFactory;
}
@Override
public void addEmployee(Employe e) {
sessionFactory.getCurrentSession().save(e);
}
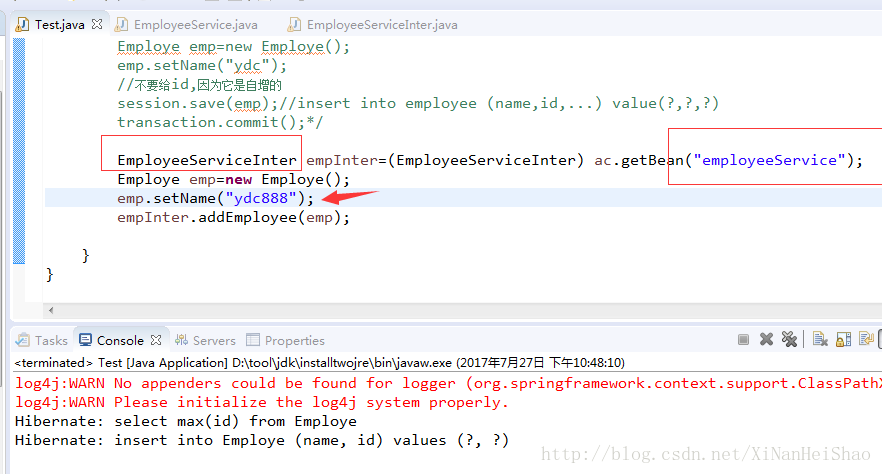
}4-6-3、 配置EmployeeService对象
<!-- 配置EmployeeService对象 -->

    <bean id="employeeService" class="com.ydc.service.imp.EmployeeService">
        <property name="sessionFactory" ref="sessionFactory" />
    </bean>
4-6-4、 配置事务管理器,统一管理sessionFactory的事务
    <!-- 配置事务管理器,统一管理sessionFactory的事务 -->
    <bean id="txManager"
        class="org.springframework.orm.hibernate3.HibernateTransactionManager">
        <property name="sessionFactory" ref="sessionFactory" />
    </bean>
    <!-- 启用事务注解 -->
    <tx:annotation-driven transaction-manager="txManager" />
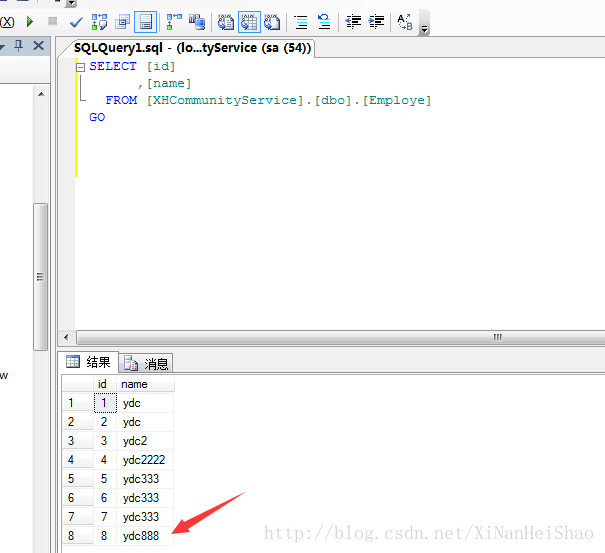
4-6-5、测试运行
报错:

原因是相关jar包和jdk版本不匹配导致
解决方法:
把jdk1.8降低到jdk1.7。
重新运行
5、最后搭建struts框架
如果对struts还陌生的同志,可以先阅读struts快速入门
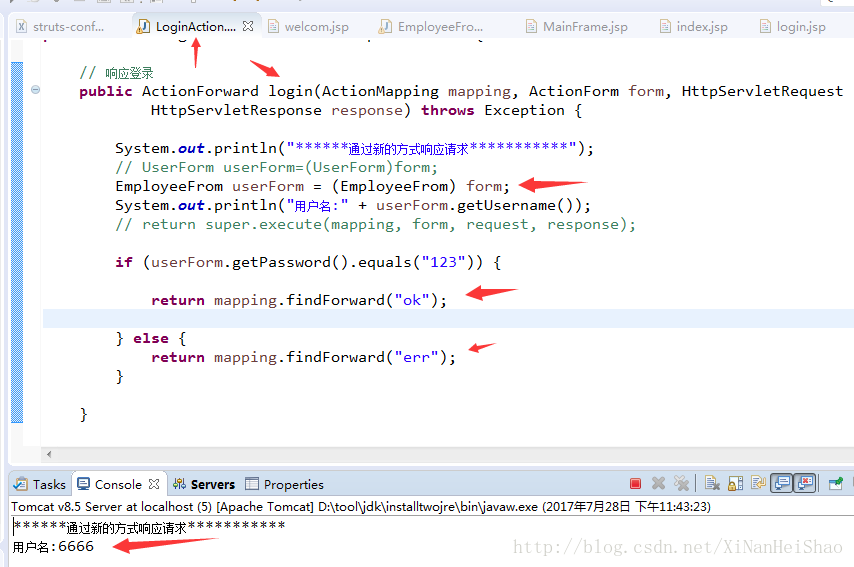
5-1、新建一个LoginAction
public class LoginAction extends DispatchAction {

    // 响应登录
    public ActionForward login(ActionMapping mapping, ActionForm form, HttpServletRequest request,
            HttpServletResponse response) throws Exception {

        System.out.println("******通过新的方式响应请求***********");
        // UserForm userForm=(UserForm)form;
        EmployeeFrom userForm = (EmployeeFrom) form;
        System.out.println("用户名:" + userForm.getUsername());
        // return super.execute(mapping, form, request, response);

        if (userForm.getPassword().equals("123")) {

            return mapping.findForward("ok");

        } else {
            return mapping.findForward("err");
        }

    }

}
5-2、新建一个EmployeeFrom
public class EmployeeFrom extends ActionForm {
// 定义属性[定义属性名字的时候,应该和jsp页面的组件名称一致,
// 其实只要getUsername和setPassword后半分和组件名一致即可,变量名不一定要一致]
private String username;
public String getUsername() {
return username;
}
public void setUsername(String username) {
this.username = username;
}
public String getPassword() {
return password;
}
public void setPassword(String password) {
this.password = password;
}
private String password;
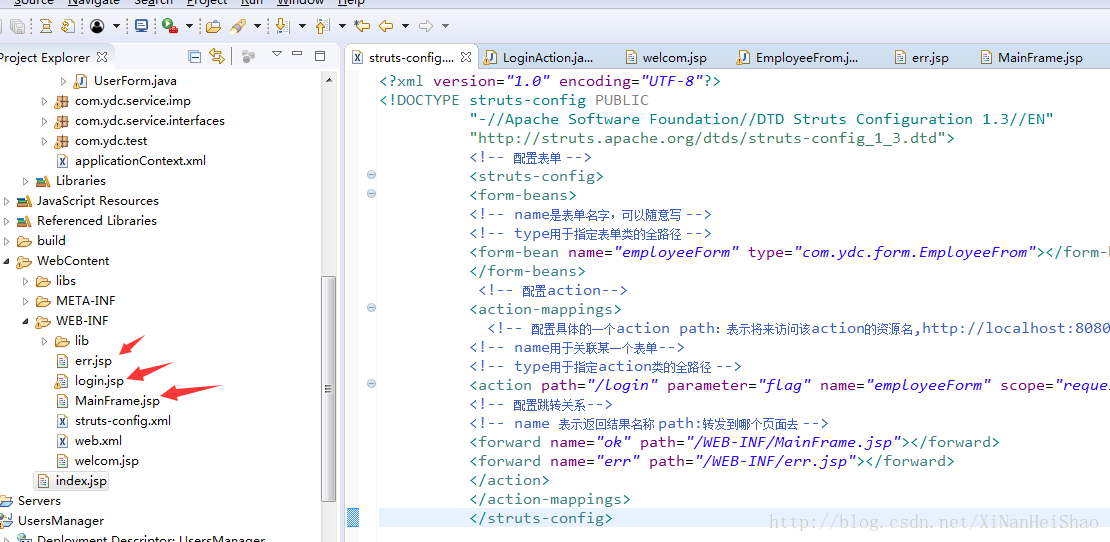
}5-3、新建struts-config.xml并配置
<?xml version="1.0" encoding="UTF-8"?>
<!DOCTYPE struts-config PUBLIC
          "-//Apache Software Foundation//DTD Struts Configuration 1.3//EN"
          "http://struts.apache.org/dtds/struts-config_1_3.dtd">
          <!-- 配置表单 -->
          <struts-config>
          <form-beans>
          <!-- name是表单名字,可以随意写 -->
          <!-- type用于指定表单类的全路径 -->
          <form-bean name="employeeForm" type="com.ydc.form.EmployeeFrom"></form-bean>
          </form-beans>
           <!-- 配置action-->
          <action-mappings>
            <!-- 配置具体的一个action path:表示将来访问该action的资源名,http://localhost:8080/MyTestStruts/path?-->
          <!-- name用于关联某一个表单-->
          <!-- type用于指定action类的全路径 -->
          <action path="/login" parameter="flag" name="employeeForm" scope="request" type="com.ydc.actions.LoginAction">
          <!-- 配置跳转关系-->
          <!-- name 表示返回结果名称 path:转发到哪个页面去 -->
          <forward name="ok" path="/WEB-INF/MainFrame.jsp"></forward>
          <forward name="err" path="/WEB-INF/err.jsp"></forward>
          </action>
          </action-mappings>
          </struts-config>
5-4、新建web.xml并配置
<?xml version="1.0" encoding="UTF-8"?>
<web-app xmlns:xsi="http://www.w3.org/2001/XMLSchema-instance" xmlns="http://xmlns.jcp.org/xml/ns/javaee" xsi:schemaLocation="http://xmlns.jcp.org/xml/ns/javaee http://xmlns.jcp.org/xml/ns/javaee/web-app_3_1.xsd" id="WebApp_ID" version="3.1">
  <servlet>
    <servlet-name>action</servlet-name>
    <servlet-class>org.apache.struts.action.ActionServlet</servlet-class>
    <init-param>
      <param-name>config</param-name>
      <param-value>/WEB-INF/struts-config.xml</param-value>
    </init-param>
    <load-on-startup>0</load-on-startup>
  </servlet>
  <!-- 配置过滤器 -->
  <filter>
  <filter-name>MyFilter1</filter-name>
   <filter-class>com.ydc.filters.MyFilter1</filter-class>
  </filter>
  <filter-mapping>
  <filter-name>MyFilter1</filter-name>
  <url-pattern>/*</url-pattern>
  </filter-mapping>

  <servlet-mapping>
    <servlet-name>action</servlet-name>
    <url-pattern>*.do</url-pattern>
  </servlet-mapping>
  <welcome-file-list>
    <welcome-file>/index.jsp</welcome-file>
  </welcome-file-list>
</web-app>
5-5、新建几个jsp文件
5-6、login.jsp内容
<%@ page language="java" contentType="text/html; charset=UTF-8"
pageEncoding="UTF-8"%>
<!DOCTYPE html PUBLIC "-//W3C//DTD HTML 4.01 Transitional//EN" "http://www.w3.org/TR/html4/loose.dtd">
<html>
<head>
<meta http-equiv="Content-Type" content="text/html; charset=ISO-8859-1">
<title>Insert title here</title>
</head>
<body>
<h1>用户登录</h1>
<form action='/MyTestStruts/login.do?flag=login' method='post'>
用户名:<input type='text' name='username' /><br /> 密   码:<input
type='password' name='password' /><br /> <input type='submit'
value='登录' /><br />
</form>
</body>
</html>5-7、测试运行
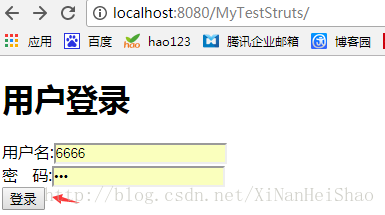
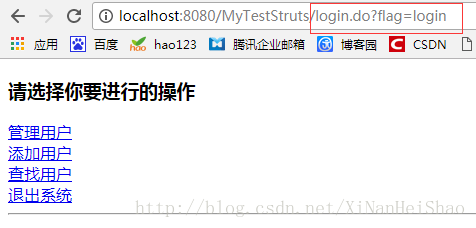
ok,到目前为止struts框架可以正常工作啦,不过此时的struts还是孤立运行的。
6、让struts与sping、hibernate逐渐融合
让web层通过到数据库验证登录。
6-1、EmployeeServiceInter接口增加登录验证方法
public Employe checkEmploye(Employe e);6-2、EmployeeService登录验证方法
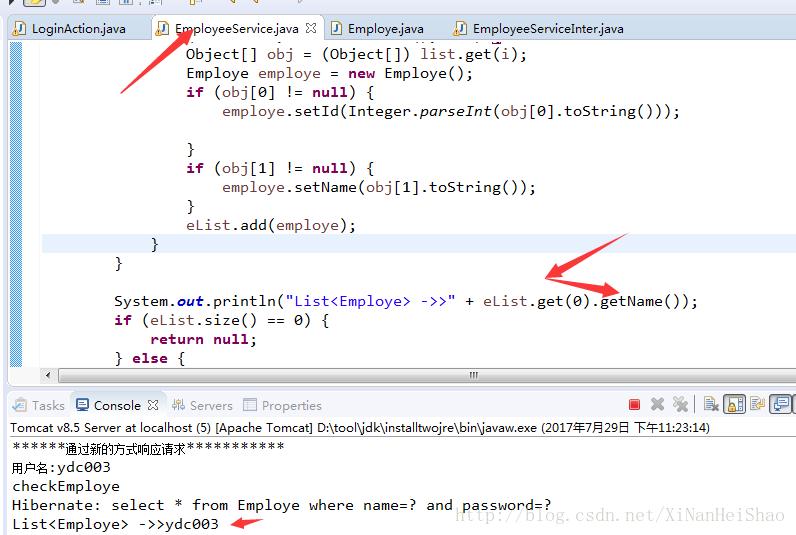
public Employe checkEmploye(Employe e) {
// TODO Auto-generated method stub
System.out.println("checkEmploye");
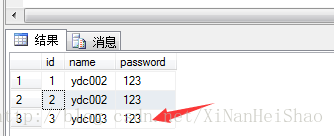
String hql = "select * from Employe where name=? and password=?";
// Object[] parameters = { e.getName(), e.getPassword() };
List list = this.sessionFactory.getCurrentSession().createSQLQuery(hql).setString(0, e.getName())
.setString(1, e.getPassword()).list();
List<Employe> eList = new ArrayList<Employe>();
if (list != null && list.size() > 0) {
for (int i = 0; i < list.size(); i++) {
Object[] obj = (Object[]) list.get(i);
Employe employe = new Employe();
if (obj[0] != null) {
employe.setId(Integer.parseInt(obj[0].toString()));
}
if (obj[1] != null) {
employe.setName(obj[1].toString());
}
eList.add(employe);
}
}
System.out.println("List<Employe> ->>" + eList.get(0).getName());
if (eList.size() == 0) {
return null;
} else {
return eList.get(0);
}
}6-3、在web.xml对Spring容器进行实例化
<!-- 指定spring的配置文件,默认从web根目录寻找配置文件,我们可以通过spring提供的classpath:前缀指定从类路径下寻找 -->
    <context-param>
        <param-name>contextConfigLocation</param-name>
        <param-value>classpath:applicationContext.xml</param-value>
    </context-param>
    <!-- 对Spring容器进行实例化 -->
    <listener>
        <listener-class>org.springframework.web.context.ContextLoaderListener</listener-class>
    </listener>
6-4、login方法改造
public class LoginAction extends DispatchAction {

    // 响应登录
    public ActionForward login(ActionMapping mapping, ActionForm form, HttpServletRequest request,
            HttpServletResponse response) throws Exception {

        System.out.println("******通过新的方式响应请求***********");

        WebApplicationContext ac = WebApplicationContextUtils
                .getWebApplicationContext((this.getServlet().getServletContext()));
        EmployeeServiceInter empInter = (EmployeeServiceInter) ac.getBean("employeeService");
        EmployeeFrom userForm = (EmployeeFrom) form;
        System.out.println("用户名:" + userForm.getUsername());
        // return super.execute(mapping, form, request, response);
        Employe employe = new Employe();
        employe.setName(userForm.getUsername());
        employe.setPassword(userForm.getPassword());
        employe = empInter.checkEmploye(employe);
        if (employe != null) {
            request.getSession().setAttribute("loginuser", employe);
            return mapping.findForward("ok");
        } else {
            return mapping.findForward("err");
        }

    }
}
6-5、测试运行
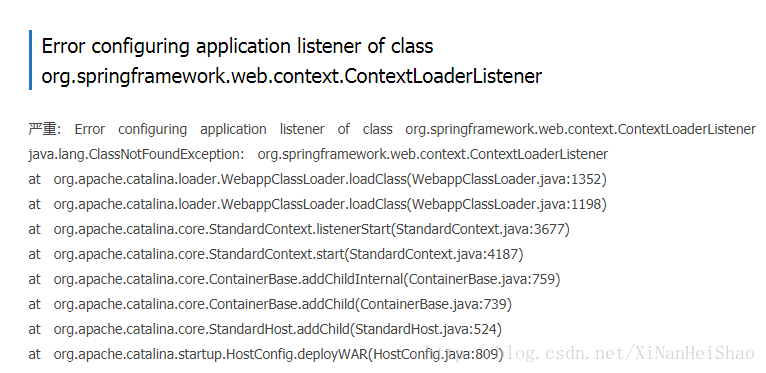
错误信息:
SEVERE: Error configuring application listener of class org.springframework.web.context.ContextLoaderListener
解决方法:
- 打开工程属性对话框,到Deployment Assembly页面,点击Add
- 选择Jave Build Path Entries
- 把程序用于的Library加入进来
6-6、重新运行

ok,到目前为止ssh框架已搭建完毕。
7、 让spring接管我们的struts(action控件)
7-1、在struts-config.xml文件中添加如下代码配置:
<!-- 配置代理请求处理 DelegatingRequestProcessor ,它的用户是 -->
    <controller>
    <set-property property="processorClass" value="org.springframework.web.struts.DelegatingRequestProcessor"/>
    </controller>
7-2、修改在action中的获取spring容器对象的方式
原来是这样获取的
WebApplicationContext ac = WebApplicationContextUtils
                .getWebApplicationContext((this.getServlet().getServletContext()));
现在是这样直接注入的
public class LoginAction extends DispatchAction {

    EmployeeServiceInter employeeServiceInter;

    public EmployeeServiceInter getEmployeeServiceInter() {
        return employeeServiceInter;
    }

    public void setEmployeeServiceInter(EmployeeServiceInter employeeServiceInter) {
        System.out.println("setEmployeeServiceInter方法被调用了");
        this.employeeServiceInter = employeeServiceInter;
    }

    // 响应登录
    public ActionForward login(ActionMapping mapping, ActionForm form, HttpServletRequest request,
            HttpServletResponse response) throws Exception {

        System.out.println("******通过新的方式响应请求***********");

        /*WebApplicationContext ac = WebApplicationContextUtils
                .getWebApplicationContext((this.getServlet().getServletContext()));
        EmployeeServiceInter empInter = (EmployeeServiceInter) ac.getBean("employeeService");*/
        EmployeeFrom userForm = (EmployeeFrom) form;
        System.out.println("用户名:" + userForm.getUsername());
        // return super.execute(mapping, form, request, response);
        Employe employe = new Employe();
        employe.setName(userForm.getUsername());
        employe.setPassword(userForm.getPassword());
        employe = employeeServiceInter.checkEmploye(employe);
        if (employe != null) {
            request.getSession().setAttribute("loginuser", employe);
            return mapping.findForward("ok");
        } else {
            return mapping.findForward("err");
        }

    }
}
7-3、在applicationcontext.xml文件中配置我们的action路径
<!-- 配置action -->
    <bean name="/login"  class="com.ydc.actions.LoginAction">
    <property name="employeeServiceInter" ref="employeeService"/>
    </bean>
action路径已经配置到spring配置文件中了,struts-config.xml的action路径可以去除了。
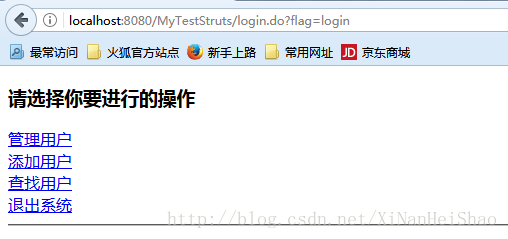
7-4、测试运行

看见没,到目前为止spring已经接管了一切,这就是spring容器的责任和存在的意义。
意义:
1、这样一来可以通过spring容器来获取action,和配置action的一些属性.
2、通过使用sping来接管我们的action,还有一个好处,可以解决action 是单例的问题.通过在applicationContext.xml文件中配置属性
/**
 * Servlet implementation class MyFilter1
 */
@WebServlet("/MyFilter1")
public class MyFilter1 extends HttpServlet implements Filter {
    private static final long serialVersionUID = 1L;

    @Override
    public void doFilter(ServletRequest arg0, ServletResponse arg1, FilterChain arg2)
            throws IOException, ServletException {
        System.out.println("******请求乱码被这里过滤***********");
        arg0.setCharacterEncoding("utf-8");//设置接收编码
        arg2.doFilter(arg0, arg1);
        arg1.setContentType("text/html;charset=UTF-8");

    }

    @Override
    public void init(FilterConfig arg0) throws ServletException {
        // TODO Auto-generated method stub

    }

}
8-2、在web.xml中配置过滤器
<!-- 配置过滤器 -->
    <filter>
        <filter-name>MyFilter1</filter-name>
        <filter-class>com.ydc.filters.MyFilter1</filter-class>
    </filter>
    <filter-mapping>
        <filter-name>MyFilter1</filter-name>
        <url-pattern>/*</url-pattern>
    </filter-mapping>
8-3、测试运行
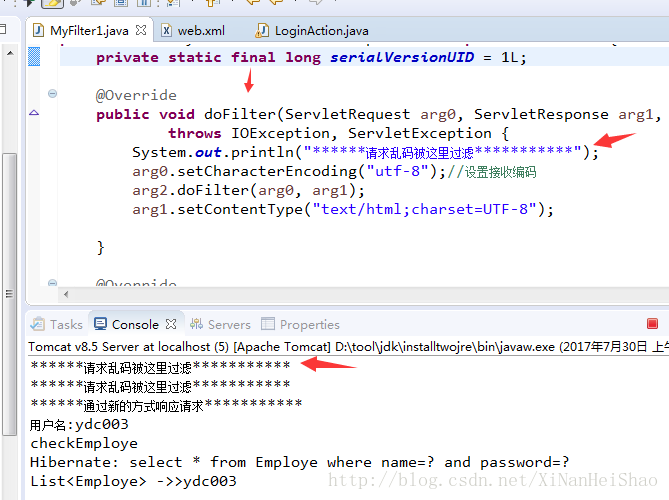
看见没,当请求被action拦截时,首先调执行了过滤器。
也可以使用spring框架提供的处理中文乱码的过滤器
<filter>
    <filter-name>encoding</filter-name>
    <filter-class>org.springframework.web.filter.CharacterEncodingFilter</filter-class>
    <init-param>
        <param-name>encoding</param-name>
        <param-value>UTF-8</param-value>
    </init-param>
</filter>
<filter-mapping>
    <filter-name>encoding</filter-name>
    <url-pattern>/*</url-pattern>
</filter-mapping>
如果对你有所帮助的话,赏我1元奶粉钱吧,多谢!
微信:

支付宝:


 2717
2717


 被折叠的 条评论
为什么被折叠?
被折叠的 条评论
为什么被折叠?
 到【灌水乐园】发言


