


最近几天发现好多朋友都在说Retrofit,在网上找了一些资料研究了一下,参考一些博客写了一个demo。记下来方便自己。
参考:
http://www.open-open.com/lib/view/open1453552147323.html
http://www.devwiki.net/2016/03/02/Retrofit-Use-Course-1/
感谢以上的作者对Retrofit的讲解
根据我自己的使用情况把步骤汇总一下,不做介绍,需要了解的自行查找。
使用步骤:
1.设置
(1)权限:首先确保在AndroidMainfest.xml中添加了请求网络的权限:
<uses-permission android:name="android.permission.INTERNET" />
(2)添加依赖:Android studio用户在app/build.gradle文件中添加如下代码:
dependencies {
    compile 'com.squareup.retrofit2:retrofit:2.0.0-beta4'
    compile 'com.squareup.okhttp3:okhttp:3.2.0'
    compile 'com.squareup.okio:okio:1.7.0'
}
注意:1.Retrofit必须使用okhttp请求了,如果项目中没有okhttp的依赖的话,定会出错。
2.okhttp内部依赖okio也需要添加
2.使用
demo使用的一个查询手机归属地的API来进行测试
使用的是百度的API Store提供的API,地址在此:手机号码归属地__API服务_API服务_API Store.

该接口的API主机地址为:http://apis.baidu.com,资源地址为:/apistore/mobilenumber/mobilenumber
需要一个key等于apikey的Header和一个key等于phone的查询关键字,而且该请求为GET请求.
所以我们需要构造一个GET请求,添加一个Header,添加一个Query关键字,访问该API返回的数据格式如下:
1 2 3 4 5 6 7 8 9 10 11 12 | { "errNum": 0, "retMsg": "success", "retData": { "phone": "15210011578", "prefix": "1521001", "supplier": "移动", "province": "北京", "city": "北京", "suit": "152卡" } } |
根据返回结果我们创建数据对象PhoneResult,如下:
1 2 3 4 5 6 7 8 9 10 11 12 13 14 15 16 17 18 19 20 21 22 23 24 25 26 27 28 29 30 31 32 33 34 35 36 37 38 39 40 41 42 43 44 45 46 47 48 49 50 51 52 53 54 55 56 57 58 59 60 61 62 63 64 65 66 67 68 69 70 71 72 73 74 75 76 77 78 79 80 81 82 83 84 85 86 87 88 89 90 91 92 93 94 95 96 97 98 99 | public class PhoneResult { /** * errNum : 0 * retMsg : success * retData : {"phone":"15210011578","prefix":"1521001","supplier":"移动","province":"北京","city":"北京","suit":"152卡"} */ private int errNum; private String retMsg; /** * phone : 15210011578 * prefix : 1521001 * supplier : 移动 * province : 北京 * city : 北京 * suit : 152卡 */ private RetDataEntity retData; public void setErrNum(int errNum) { this.errNum = errNum; } public void setRetMsg(String retMsg) { this.retMsg = retMsg; } public void setRetData(RetDataEntity retData) { this.retData = retData; } public int getErrNum() { return errNum; } public String getRetMsg() { return retMsg; } public RetDataEntity getRetData() { return retData; } public static class RetDataEntity { private String phone; private String prefix; private String supplier; private String province; private String city; private String suit; public void setPhone(String phone) { this.phone = phone; } public void setPrefix(String prefix) { this.prefix = prefix; } public void setSupplier(String supplier) { this.supplier = supplier; } public void setProvince(String province) { this.province = province; } public void setCity(String city) { this.city = city; } public void setSuit(String suit) { this.suit = suit; } public String getPhone() { return phone; } public String getPrefix() { return prefix; } public String getSupplier() { return supplier; } public String getProvince() { return province; } public String getCity() { return city; } public String getSuit() { return suit; } } } |
3.使用
构建好接口以后,可以使用了!
使用分为四步:
- 创建Retrofit对象
- 创建访问API的请求
- 发送请求
- 处理结果
代码如下所示:
public class MainActivity extends AppCompatActivity implements View.OnClickListener {
    private static final String TAG = "MainActivity";
    private EditText mEdtPhone;
    private Button mBtnQuery;
    private TextView mTvResult;
    public static final String BASE_URL = "http://apis.baidu.com";
    public static final String API_KEY = "3f985c1fabe75d7c77f836f95a17e230";

    @Override
    protected void onCreate(Bundle savedInstanceState) {
        super.onCreate(savedInstanceState);
        setContentView(R.layout.activity_main);
        initView();
    }

    private void initView() {
        mEdtPhone = (EditText) findViewById(R.id.edt_phone);
        mBtnQuery = (Button) findViewById(R.id.btn_query);
        mTvResult = (TextView) findViewById(R.id.tv_result);

        mBtnQuery.setOnClickListener(this);
    }

    @Override
    public void onClick(View v) {
        query();
    }

    private void query() {
        //1.创建Retrofit对象
        Retrofit retrofit = new Retrofit.Builder()
                .addConverterFactory(GsonConverterFactory.create())//解析方法必须把Gson Converter 作为一个独立的依赖添加
                .baseUrl(BASE_URL)
                .build();

        //2.创建访问api的请求
        PhoneService service = retrofit.create(PhoneService.class);
        Call<PhoneResult> call = service.getResult(API_KEY,mEdtPhone.getText().toString().trim());


        //3.发送请求
        call.enqueue(new Callback<PhoneResult>() {
            @Override
            public void onResponse(Call<PhoneResult> call, Response<PhoneResult> response) {
                //4.处理结果
                if(response.isSuccessful()) {
                    PhoneResult result = response.body();
                    if(result != null) {
                        PhoneResult.RetDataBean entity = result.getRetData();
                        mTvResult.setText("省份:" + entity.getProvince()+ " --- 城市:" + entity.getCity());
                    }
                }
            }

            @Override
            public void onFailure(Call<PhoneResult> call, Throwable t) {

            }
        });
    }
}
可能会有疑问:第一步中的解析方法
GsonConverterFactory.create()
是个啥?
这个是解析Gson数据用的;如果你想接收json 结果并解析成DAO,你必须把Gson Converter 作为一个独立的依赖添加进来。
compile 'com.google.code.gson:gson:2.6.2'
compile 'com.squareup.retrofit2:converter-gson:2.0.2'
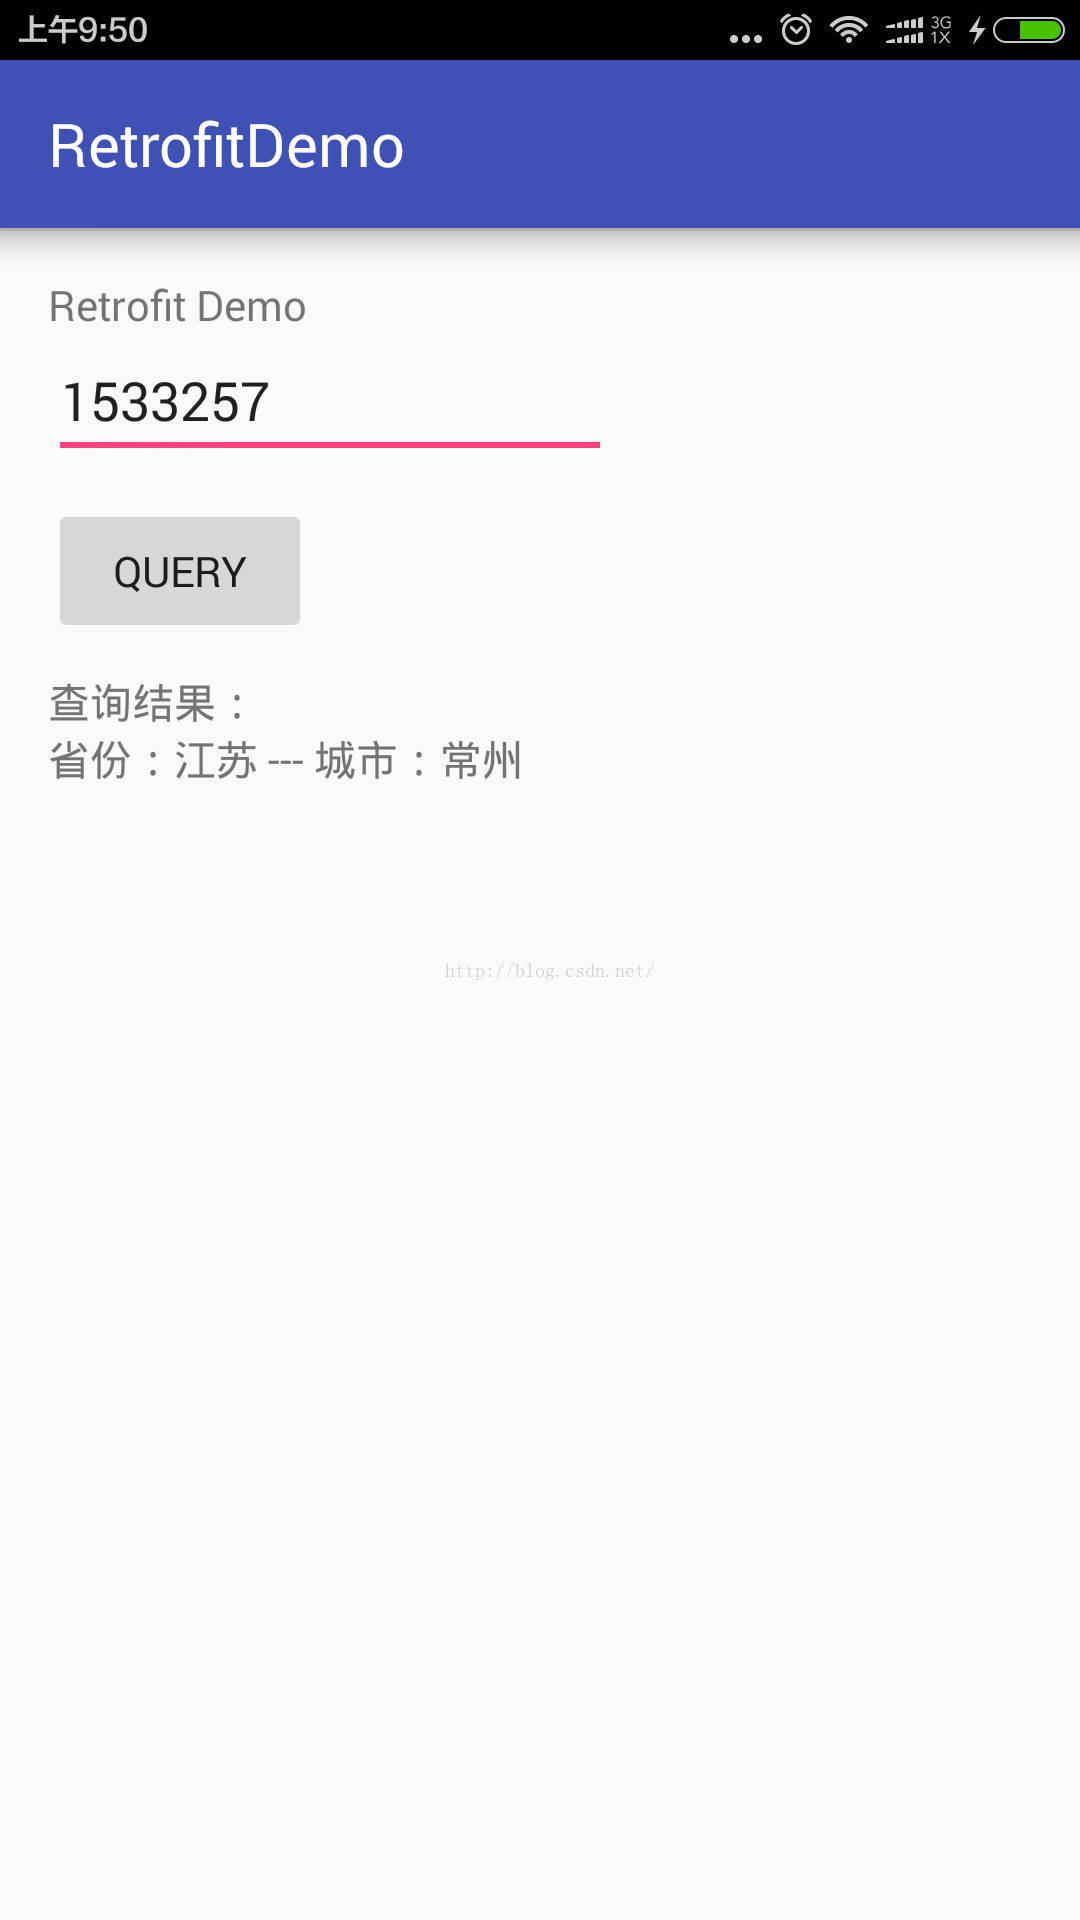
4.效果:


 1502
1502

 被折叠的 条评论
为什么被折叠?
被折叠的 条评论
为什么被折叠?
 到【灌水乐园】发言


