作者:马宁
前边介绍Push Notification时,其实已经谈到了Tile Notification。在Windows Phone 7.1中,Smart Tile得到了极大的提高。我们不但可以控制Tile的动画显示、内容和背景切换,而且还能够为同一个应用提供两个Tile,比如一个天气预报的应用程序,就可以在手机的首页上显示多个Tile,一个是北京的天气,另一个是上海的天气等。
实现Application Tile
MSDN上的文章写的又臭又长,其实挺简单的事情,弄得那么复杂。我试着改写了一下例子,加入到应用的一个Button点击事件里:
            // Application Tile is always the first Tile, even if it is not pinned to Start.
            ShellTile TileToFind = ShellTile.ActiveTiles.First();

            // Set the properties to update for the Application Tile.
            // Empty strings for the text values and URIs will result in the property being cleared.
            StandardTileData NewTileData = new StandardTileData
            {
                Title = "Title",
                BackgroundImage = new Uri("Background.png", UriKind.Relative),
                Count = 2,
                BackTitle = "Back Tilte",
                BackBackgroundImage = new Uri("Background2.png", UriKind.Relative),
                BackContent = "This is BackContent"
            };

            // Update the Application Tile
            TileToFind.Update(NewTileData);
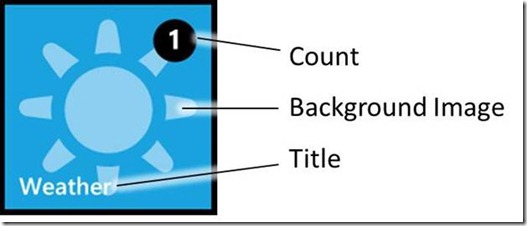
首先,我们要引用Microsoft.Phone.Shell命名空间,然后通过ShellTile.ActiveTiles.First()方法来获取应用最主要的ShellTile.每个应用至少会有一个Tile,所以不用担心该对象为空。然后我们创建一个StandardTileData对象,为其中的属性赋值。属性分为两组,每组都会有背景图片、标题和内容,显示位置如下图所示。如果设置两组Tile属性,则Tile在显示一段时间后会自动切换。最后,我们调用ShellTile对象的Update方法,将StandardTileData对象传递进去,就完成了新Tile的设置。BackgroundImage和BackBackgroundImage指定的是图片的URI,可以是本地的图片,也可以是来自网络的图片。我们使用的两个图片,都是以Content方式加入到工程中的图片。
当我们将程序部署到设备或模拟器上时,首先会在Application List里出现对应的图标。我们长按图标,会出现一个菜单,选择Pin to start,会将应用程序的图标显示到手机首页上。
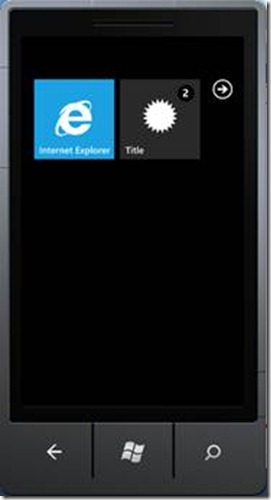
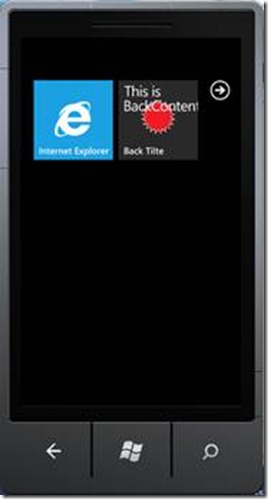
运行应用程序,点击Button后,Tile会被更新成新的式样。两张背景和内容会交替显示,显示效果如下图所示:
实现 Secondary Tile
在完成了Application Tile的显示之后,我们接下来要实现更复杂的Secondary Tile,当然,我们可以添加多个Tile。在实现Secondary Tile时,有两个技术点需要实现,一个是Tile的添加与显示;另一个则是,程序启动时如何区分是由哪个Tile点击启动应用的。
首先,我们来看如何添加Secondary Tile的代码:
            // Look to see whether the Tile already exists and if so, don't try to create it again.
            ShellTile TileToFind = ShellTile.ActiveTiles.FirstOrDefault(x => x.NavigationUri.ToString().Contains("DefaultTitle=FromTile"));

            // Create the Tile if we didn't find that it already exists.
            if (TileToFind == null)
            {
                // Create the Tile object and set some initial properties for the Tile.
                // The Count value of 12 shows the number 12 on the front of the Tile. Valid values are 1-99.
                // A Count value of 0 indicates that the Count should not be displayed.
                StandardTileData NewTileData = new StandardTileData
                {
                    BackgroundImage = new Uri("Background.png", UriKind.Relative),
                    Title = "Secondary Tile",
                    Count = 12,
                    BackTitle = "Back of Tile",
                    BackContent = "Welcome to the back of the Tile",
                    BackBackgroundImage = new Uri("Background2.png", UriKind.Relative)
                };

                // Create the Tile and pin it to Start. This will cause a navigation to Start and a deactivation of our application.
                ShellTile.Create(new Uri("/MainPage.xaml?DefaultTitle=FromTile", UriKind.Relative), NewTileData);
            }
            else
            {
                TileToFind.Delete();
            }
首先调用ShellTile.ActiveTiles.FirstOrDefault方法,获取在NavigationUri属性中包含“DefaultTitle=FromTile”字样的ShellTile对象,如果获取到的ShellTile对象为空,则创建Secondary Tile,否则调用ShellTile的Delete方法,删除这个Tile。
创建Secondary Tile的过程,首先创建StandardTileData对象,将显示的各个参数进行赋值,这一步与Application Tile相同;然后,调用ShellTile的Create方法,第一个参数是URI,即点击该Tile后,调用Page的命令行,可以包含参数,第二个参数是StandardTileData对象,用于指定显示式样。
需要注意的是,如果Page命令行指定不对,会引起用户点击Tile时,应用直接退出,由于无法调试,第一次接触这个问题时,会找不到具体的原因。
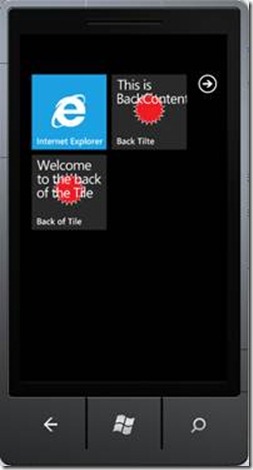
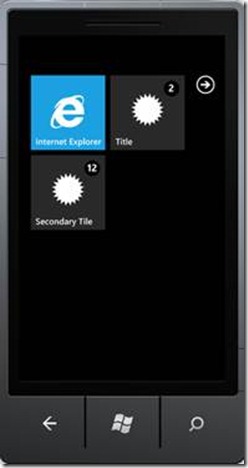
Secondary Tile显示效果如下:
接下来,我们就要处理区分不同Tile点击的事件了,需要重载MainForm的OnNavigatedTo方法:
        protected override void OnNavigatedTo(System.Windows.Navigation.NavigationEventArgs e)
        {
            string value = null;

            if (this.NavigationContext.QueryString != null)
            {
                this.NavigationContext.QueryString.TryGetValue("DefaultTitle", out value);
                if (value != null)
                {
                    textBoxTitle.Text = value;
                }
                else
                {
                    textBoxTitle.Text = "FromMain";
                }
            }

            base.OnNavigatedTo(e);
        }
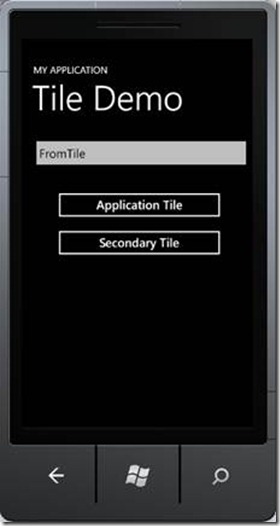
通过NavigationContext.QueryString的TryGetValue方法来获取DefaultTitle参数的值,如果无法获取到该值,则认为该点击来自第一个Tile,相反则来自第二个Tile。我们将参数显示在主页面的文本框里,当然,实际应用中可以有更加复杂的业务逻辑。界面显示效果如下:
到这里,我们简单介绍了如何添加Tile、修改Tile内容,除此之外,还有如何修改Tile的初始值,指定Tile更新的时间间隔等。在这里,我们就不介绍了,大家可以参考又臭又长的MSDN文档,这部分不长,我可以保证。
写在最后
好了,到这里,我们正式将Windows Phone 7.1中的Tile编程的内容介绍完了。Windows Phone采用的是HUB方式,对于功能进行分类,所以,就要求Tile具备更丰富的显示方式和展现形式。而且,多个应用可以对应于一个Tile,同样一个应用也可以对应多个Tile,这样极大提高了主页与应用之间交互的丰富程度。
当然,具体的Tile,还要在实际的开发中使用,才能真正了解其优缺点。
OpenXLive杯Windows Phone游戏开发大赛
OpenXLive杯Windows Phone游戏开发大赛,是由OpenXLive联合国内知名的开发者社区:DevDiv、智机网、WPMind、Silverlight银光中国和XNA游戏世界,一起举办的针对Windows Phone游戏开发的比赛。





 5092
5092


 被折叠的 条评论
为什么被折叠?


