


Xamarin官网介绍了五种不同的页面,分别为:
- ContentPage
- MasterDetailPage
- NavigationPage
- CarouselPage
- TabbedPage
下面我们对这几个页面进行一一介绍。
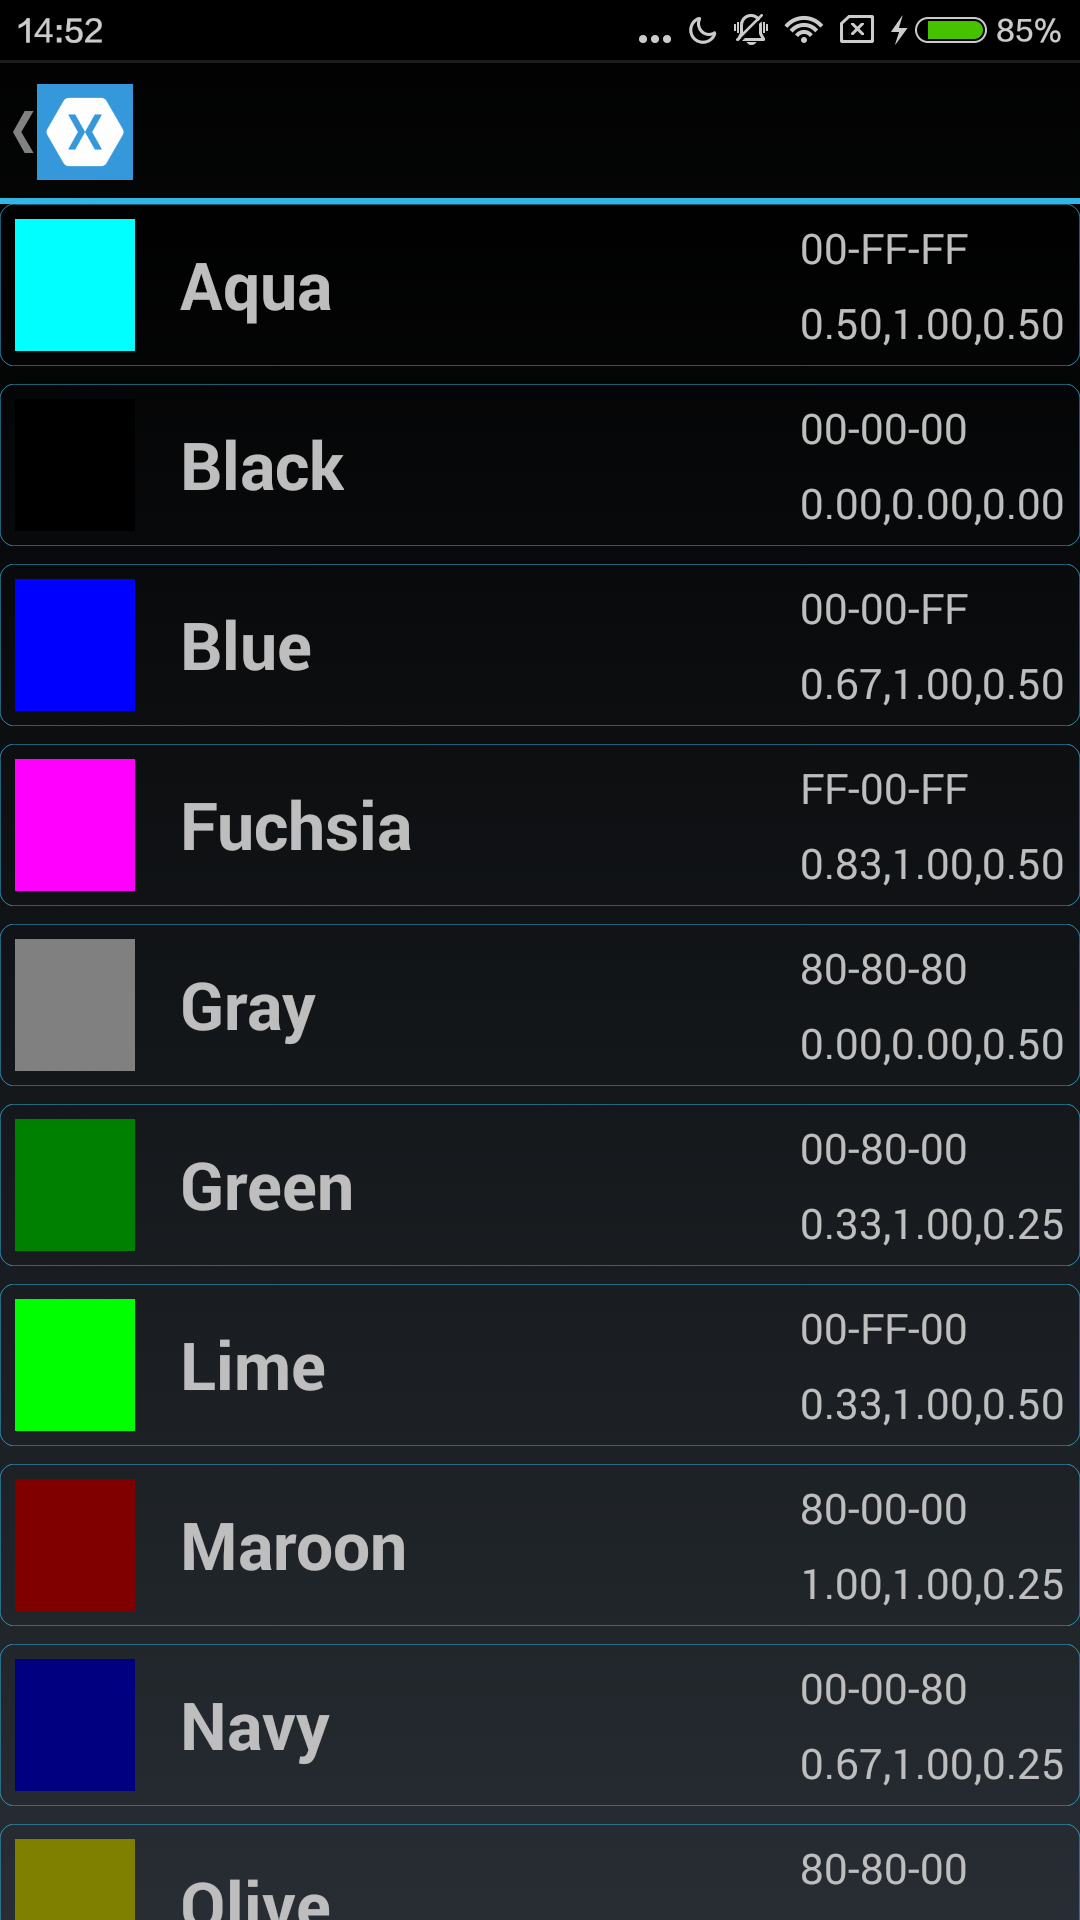
1、Contentpage
A Page that displays a single view.
ContentPage是一个显示一个单一的View的页面,是最简单的一种page。我们用一个简单的例子来说明:
新建一个工程test1,在test1.cs中增加如下代码:
namespace test4
{
class PageA : ContentPage
{

    View CreateColorView(Color color , string name)
    {
        return new Frame
        {
            OutlineColor = Color.Accent,
            Padding = new Thickness(5),
            Content = new StackLayout
            {
                Orientation = StackOrientation.Horizontal,
                Spacing = 15,
                Children =
                {
                    new BoxView
                    {
                        Color = color
                    },
                    new Label
                    {
                        Text = name,
                        FontSize = Device.GetNamedSize(NamedSize.Large,typeof(Label)),
                        FontAttributes = FontAttributes.Bold,
                        VerticalOptions = LayoutOptions.Center,
                        HorizontalOptions = LayoutOptions.StartAndExpand
                    },

                    new StackLayout
                    {
                        Children =
                        {
                        new Label
                        {
                            Text = String.Format("{0:X2}-{1:X2}-{2:X2}",
                                (int)(255*color.R),
                                (int)(255*color.G),
                                (int)(255*color.B)),
                            VerticalOptions = LayoutOptions.CenterAndExpand,
                            IsVisible = color!=Color.Default
                        },

                        new Label
                        {
                            Text = String.Format("{0:F2},{1:F2},{2:F2}",
                                color.Hue,
                                color.Saturation,
                                color.Luminosity),
                            VerticalOptions = LayoutOptions.CenterAndExpand,
                            IsVisible = color != Color.Default
                        }

                    },
                    HorizontalOptions = LayoutOptions.End
                    }
                }
            }
        };
    }
    public PageA ()
    {

        Content = new ScrollView
        {
            Orientation = ScrollOrientation.Vertical,
            Content = new StackLayout
            {
                Children =
                {
                    CreateColorView(Color.Aqua,"Aqua"),
                    CreateColorView(Color.Black,"Black"),
                    CreateColorView(Color.Blue,"Blue"),
                    CreateColorView(Color.Fuchsia,"Fuchsia"),
                    CreateColorView(Color.Gray,"Gray"),
                    CreateColorView(Color.Green,"Green"),
                    CreateColorView(Color.Lime,"Lime"),
                    CreateColorView(Color.Maroon,"Maroon"),
                    CreateColorView(Color.Navy,"Navy"),
                    CreateColorView(Color.Olive,"Olive"),
                    CreateColorView(Color.Pink,"Pink"),
                    CreateColorView(Color.Purple,"Purple"),
                    CreateColorView(Color.Red,"Red"),
                    CreateColorView(Color.Silver,"Silver"),
                    CreateColorView(Color.Teal,"Teal"),
                    CreateColorView(Color.White,"White"),
                    CreateColorView(Color.Yellow,"Yellow"),

                }
            }
        };
    }
}
public class App : Application
{
    public App ()
    {
        MainPage = new PageA();
    }

    protected override void OnStart ()
    {
        // Handle when your app starts
    }

    protected override void OnSleep ()
    {
        // Handle when your app sleeps
    }

    protected override void OnResume ()
    {
        // Handle when your app resumes
    }
}
}
通过上面的例子我们可以看出:
我们新建了一个继承于ContentPage 的 PageA, PageA包含了一个用于滑动的ScrollView,ScrollView 内包含一个StackLayout,里面的孩子通过CreateColorView()这一方法来创建。每一个Child里有一个BoxView用来表示颜色,一个Label用于显示颜色名称,以及另外两个小的Label用于显示颜色的RGB值,色相,饱和度等。
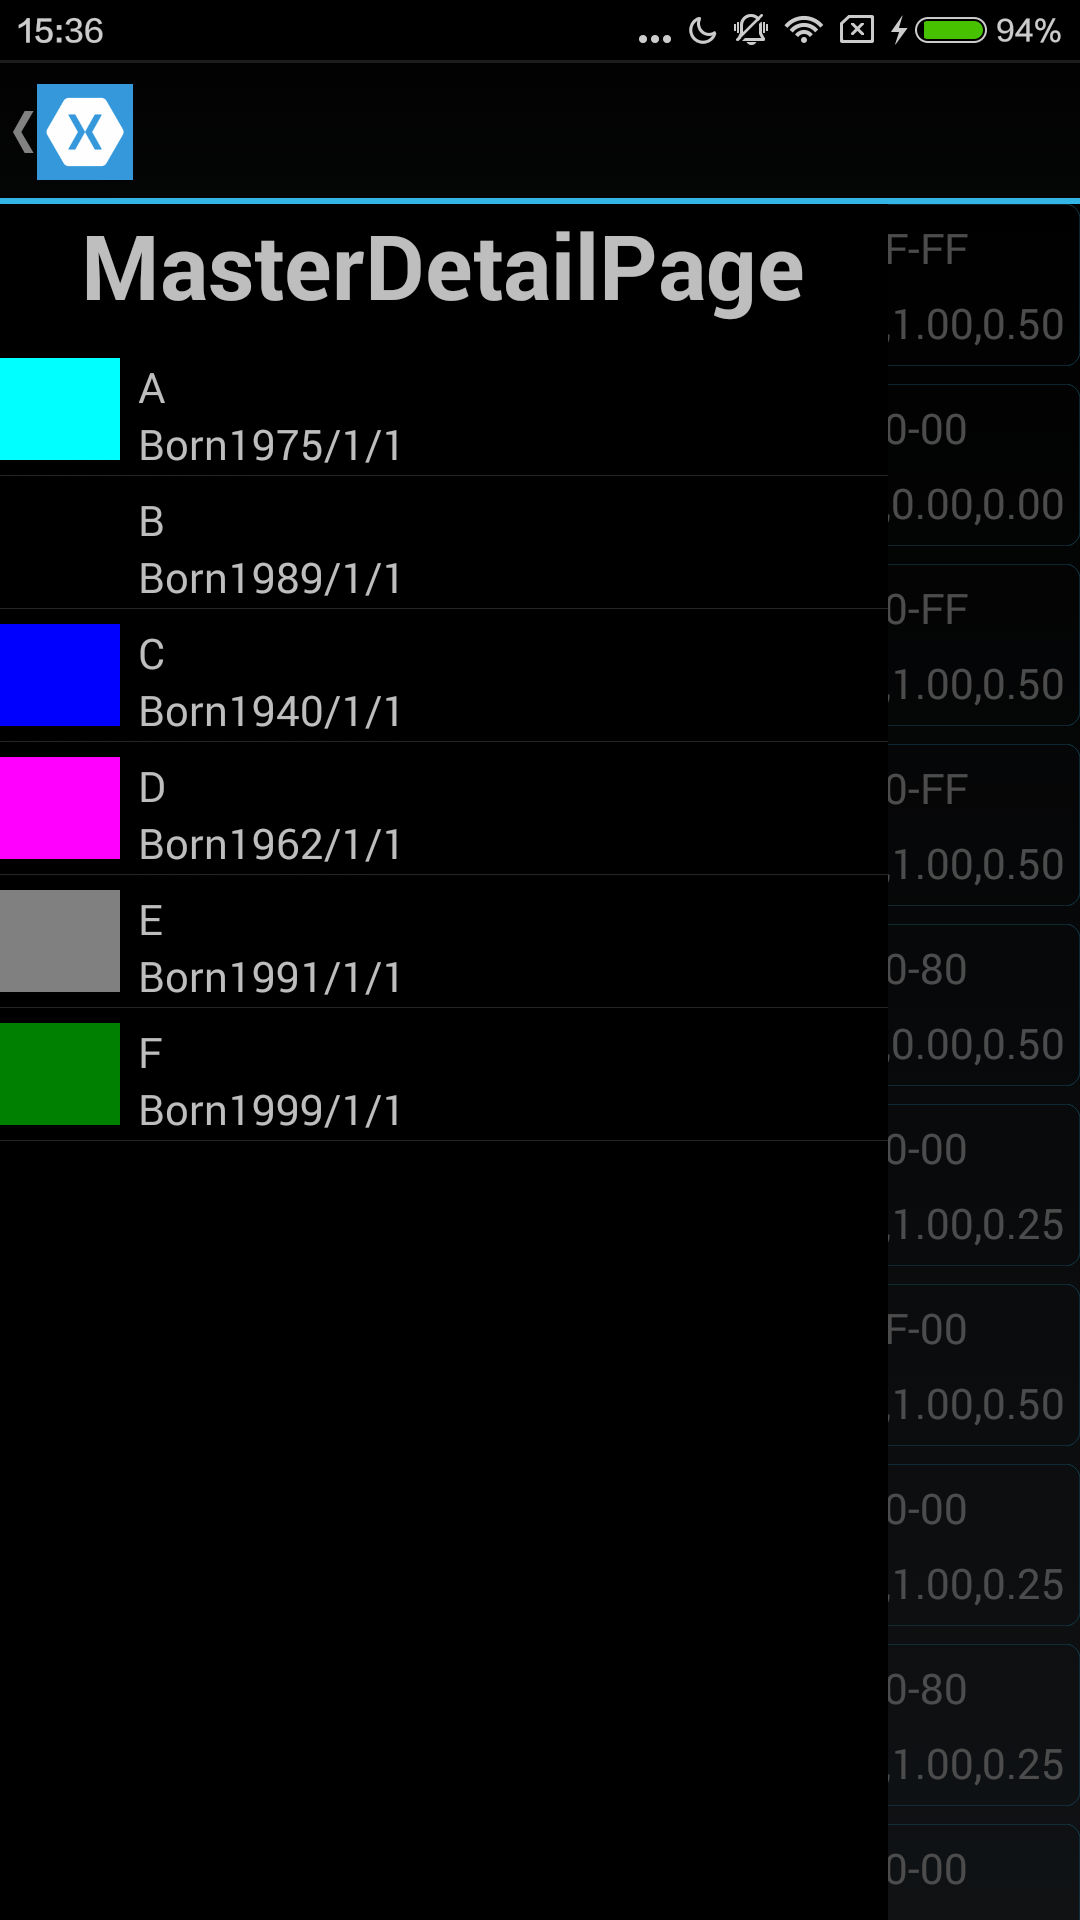
2、MasterDetailPage
A Page that manages two panes of information: A master page that presents data at a high level, and a detail page that displays low-level details about information in the master.
页面同事管理着两个不同的信息窗格,一个页面master显示主要的更高级别的数据,一个detail页面显示低级别的,关于master页面的具体信息。
我们还是给个例子。
在刚才的test.cs文件中,我们增加一个PageB:
完整代码如下:
using System;
using System.Reflection;
using System.Collections.Generic;

using Xamarin.Forms;

namespace test4
{
class PageA : ContentPage
{

    View CreateColorView(Color color , string name)
    {
        return new Frame
        {
            OutlineColor = Color.Accent,
            Padding = new Thickness(5),
            Content = new StackLayout
            {
                Orientation = StackOrientation.Horizontal,
                Spacing = 15,
                Children =
                {
                    new BoxView
                    {
                        Color = color
                    },
                    new Label
                    {
                        Text = name,
                        FontSize = Device.GetNamedSize(NamedSize.Large,typeof(Label)),
                        FontAttributes = FontAttributes.Bold,
                        VerticalOptions = LayoutOptions.Center,
                        HorizontalOptions = LayoutOptions.StartAndExpand
                    },

                    new StackLayout
                    {
                        Children =
                        {
                        new Label
                        {
                            Text = String.Format("{0:X2}-{1:X2}-{2:X2}",
                                (int)(255*color.R),
                                (int)(255*color.G),
                                (int)(255*color.B)),
                            VerticalOptions = LayoutOptions.CenterAndExpand,
                            IsVisible = color!=Color.Default
                        },

                        new Label
                        {
                            Text = String.Format("{0:F2},{1:F2},{2:F2}",
                                color.Hue,
                                color.Saturation,
                                color.Luminosity),
                            VerticalOptions = LayoutOptions.CenterAndExpand,
                            IsVisible = color != Color.Default
                        }

                    },
                    HorizontalOptions = LayoutOptions.End
                    }
                }
            }
        };
    }
    public PageA ()
    {

        Content = new ScrollView
        {
            Orientation = ScrollOrientation.Vertical,
            Content = new StackLayout
            {
                Children =
                {
                    CreateColorView(Color.Aqua,"Aqua"),
                    CreateColorView(Color.Black,"Black"),
                    CreateColorView(Color.Blue,"Blue"),
                    CreateColorView(Color.Fuchsia,"Fuchsia"),
                    CreateColorView(Color.Gray,"Gray"),
                    CreateColorView(Color.Green,"Green"),
                    CreateColorView(Color.Lime,"Lime"),
                    CreateColorView(Color.Maroon,"Maroon"),
                    CreateColorView(Color.Navy,"Navy"),
                    CreateColorView(Color.Olive,"Olive"),
                    CreateColorView(Color.Pink,"Pink"),
                    CreateColorView(Color.Purple,"Purple"),
                    CreateColorView(Color.Red,"Red"),
                    CreateColorView(Color.Silver,"Silver"),
                    CreateColorView(Color.Teal,"Teal"),
                    CreateColorView(Color.White,"White"),
                    CreateColorView(Color.Yellow,"Yellow"),
                    CreateColorView(Color.Aqua,"Aqua"),
                    CreateColorView(Color.Black,"Black"),
                    CreateColorView(Color.Blue,"Blue"),
                    CreateColorView(Color.Fuchsia,"Fuchsia"),
                    CreateColorView(Color.Gray,"Gray"),
                    CreateColorView(Color.Green,"Green"),
                    CreateColorView(Color.Lime,"Lime"),
                    CreateColorView(Color.Maroon,"Maroon"),
                    CreateColorView(Color.Navy,"Navy"),
                    CreateColorView(Color.Olive,"Olive"),
                    CreateColorView(Color.Pink,"Pink"),
                    CreateColorView(Color.Purple,"Purple"),
                    CreateColorView(Color.Red,"Red"),
                    CreateColorView(Color.Silver,"Silver"),
                    CreateColorView(Color.Teal,"Teal"),
                    CreateColorView(Color.White,"White"),
                    CreateColorView(Color.Yellow,"Yellow"),

                }
            }
        };
    }
}

class PageB : MasterDetailPage
{
    class Person
    {


        public Person(String name , DateTime birthday , Color favoriteColor)
        {
            this.Name = name;
            this.Birthday = birthday;
            this.FavoriteColor = favoriteColor;
        }

        public String Name{ private set; get;}
        public DateTime Birthday{ private set; get;}
        public Color FavoriteColor{ private set; get;}

    }

    public PageB()
    {
        Label header = new Label {
            Text = "MasterDetailPage",
            Font = Font.SystemFontOfSize (30,FontAttributes.Bold),
            HorizontalOptions = LayoutOptions.Center
        };
//          int[] a = new int[]{ 1, 2, 3, 4, 5, 6, 7, 8, 9, 0, 11, 12, 13, 14 };
        List<Person> people = new List<Person>
        {
            new Person("A",new DateTime(1975 , 1, 1),Color.Aqua),
            new Person("B",new DateTime(1989 , 1, 1),Color.Black),
            new Person("C",new DateTime(1940 , 1, 1),Color.Blue),
            new Person("D",new DateTime(1962 , 1, 1),Color.Fuchsia),
            new Person("E",new DateTime(1991 , 1, 1),Color.Gray),
            new Person("F",new DateTime(1999 , 1, 1),Color.Green),
        };

        ListView listView = new ListView {
            ItemsSource = people,
            ItemTemplate = new DataTemplate(() =>
                {
                    Label nameLable = new Label();
                    nameLable.SetBinding(Label.TextProperty , "Name");
                    Label birthdayLable = new Label();
                    birthdayLable.SetBinding(Label.TextProperty, new Binding("Birthday",BindingMode.OneWay,null,null,"Born{0:d}"));

                    BoxView boxView = new BoxView();
                    boxView.SetBinding(BoxView.ColorProperty,"FavoriteColor");

                    return new ViewCell
                    {
                        View = new StackLayout
                        {
                            Padding = new Thickness(0,5),
                            Orientation = StackOrientation.Horizontal,
                            Children =
                            {
                                boxView,
                                new StackLayout
                                {
                                    VerticalOptions = LayoutOptions.Center,
                                    Spacing = 0 ,
                                    Children =
                                    {
                                        nameLable,
                                        birthdayLable
                                    }
                                }
                            }
                        }
                    };
                })
        };
        Master = new ContentPage {
            Title = header.Text,
            Content = new StackLayout {
                Children = {
                    header,
                    listView
                }
            }
        };
        Detail = new NavigationPage (new PageA ());


        listView.ItemSelected += (sender, args) =>
        {
            this.Detail.BindingContext = args.SelectedItem;
            this.IsPresented = false;
        };
    }
}
public class App : Application
{
    public App ()
    {
        MainPage = new PageB();
    }

    protected override void OnStart ()
    {
        // Handle when your app starts
    }

    protected override void OnSleep ()
    {
        // Handle when your app sleeps
    }

    protected override void OnResume ()
    {
        // Handle when your app resumes
    }
}
}
这一次我们把主页面指向了PageB
在PageB中我们用一个Label做了一个header,一个listView用于masterPage,DetailPage我们用了之前的PageA加了一个标题栏。
效果如下:
效果如下:
3、NavigationPage
A Page that manages the navigation and user-experience of a stack of other pages.
简单的理解是加了一个标题栏或导航栏的页面。在上一个页面我们已经使用过了。这里就不在举例子了。
4、CarouselPage
A Page that users can swipe from side to side to display pages of content, like a gallery.
这个页面可以像照片查看器那样从左边滑倒右边看上下文的内容
我们还是举一个简单的栗子。
public class App : Application
{
    public App ()
    {
        List<ContentPage> pages = new List<ContentPage>(0);
        Color[] colors = { Color.Red, Color.Green, Color.Blue };
        foreach (Color c in colors)
        {
            pages.Add(new ContentPage
                {
                    Content = new StackLayout
                    {
                        Children =
                        {
                            new Label
                            {
                                Text = c.ToString ()
                            },
                            new BoxView
                            {
                                Color = c,
                                VerticalOptions = LayoutOptions.CenterAndExpand
                            }
                        }
                        }
                });
        }

        MainPage = new CarouselPage
        {
            Children =
            {
                pages [0],
                pages [1],
                pages [2]
            }
            };
    }
5、TabbedPage
class PageC:TabbedPage
{
public PageC()
{
this.Title = “TabbedPage”;
this.Children.Add(new ContentPage
{
Title = “Blue”,
Content = new BoxView
{
Color = Color.Blue,
HeightRequest = 100f,
VerticalOptions = LayoutOptions.Center
},
}
);
this.Children.Add(new ContentPage
{
Title = “Blue and Red”,
Content = new StackLayout
{
Children = {
new BoxView { Color = Color.Blue },
new BoxView { Color = Color.Red}
}
}
});
}
}


 347
347


 被折叠的 条评论
为什么被折叠?
被折叠的 条评论
为什么被折叠?
 到【灌水乐园】发言


