


转自:http://blog.csdn.net/wangkuifeng0118/article/details/7023642
ContentProvider简介
我们说Android应用程序的四个核心组件是:Activity、Service、BroadcastReceiver和ContentProvider。在Android中,应用程序彼此之间相互独立的,它们都运行在自己独立的虚拟机中。ContentProvider提供了程序之间共享数据的方法,一个程序可以使用ContentProvider定义一个URI,提供统一的操作接口,其他程序可以通过此URI访问指定的数据,进行数据的增、删、改、查。
废话不多说,下面来看一个ContentProvider访问联系人信息的demo,
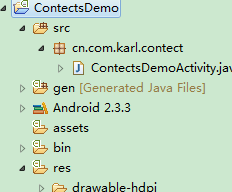
首先建立一个ContectsDemo的android项目:
接下来看一下main.xml:
- <?xml version="1.0" encoding="utf-8"?>
- <LinearLayout xmlns:android="http://schemas.android.com/apk/res/android"
- android:layout_width="fill_parent"
- android:layout_height="fill_parent"
- android:orientation="vertical" >
- <TextView
- android:id="@+id/text"
- android:layout_width="fill_parent"
- android:layout_height="wrap_content"
- android:text="@string/hello" />
- <Button
- android:id="@+id/button1"
- android:layout_width="wrap_content"
- android:layout_height="wrap_content"
- android:text="获取联系人信息" />
- </LinearLayout>
然后看一下主程序:
- public class ContectsDemoActivity extends Activity {
- /** Called when the activity is first created. */
- private Button button1;
- private TextView text;
- @Override
- public void onCreate(Bundle savedInstanceState) {
- super.onCreate(savedInstanceState);
- setContentView(R.layout.main);
- text=(TextView) this.findViewById(R.id.text);
- button1=(Button) this.findViewById(R.id.button1);
- button1.setOnClickListener(new View.OnClickListener() {
- public void onClick(View v) {
- // TODO Auto-generated method stub
- StringBuilder sb=getContacts();
- text.setText(sb.toString());
- }
- });
- }
- private StringBuilder getContacts() {
- StringBuilder sbLog = new StringBuilder();
- // 得到ContentResolver对象
- ContentResolver cr = this.getContentResolver();
- // 取得电话本中开始一项的光标,主要就是查询"contacts"表
- Cursor cursor = cr.query(ContactsContract.Contacts.CONTENT_URI, null, null, null, null);
- if(!cursor.moveToFirst()){
- sbLog.append("获取内容为空!");
- return sbLog;
- }
- if(cursor.moveToFirst())
- {
- // 取得联系人名字 (显示出来的名字),实际内容在 ContactsContract.Contacts中
- int nameIndex = cursor.getColumnIndex(ContactsContract.Contacts.DISPLAY_NAME);
- String name = cursor.getString(nameIndex);
- sbLog.append("name=" + name + ";");
- // 取得联系人ID
- String contactId = cursor.getString(cursor.getColumnIndex(ContactsContract.Contacts._ID));
- // 根据联系人ID查询对应的电话号码
- Cursor phoneNumbers = cr.query(ContactsContract.CommonDataKinds.Phone.CONTENT_URI, null, ContactsContract.CommonDataKinds.Phone.CONTACT_ID + " = "
- + contactId, null, null);
- // 取得电话号码(可能存在多个号码)
- while (phoneNumbers.moveToNext())
- {
- String strPhoneNumber = phoneNumbers.getString(phoneNumbers.getColumnIndex(ContactsContract.CommonDataKinds.Phone.NUMBER));
- sbLog.append("Phone=" + strPhoneNumber + ";");
- }
- phoneNumbers.close();
- // 根据联系人ID查询对应的email
- Cursor emails = cr.query(ContactsContract.CommonDataKinds.Email.CONTENT_URI, null, ContactsContract.CommonDataKinds.Email.CONTACT_ID + " = "
- + contactId, null, null);
- // 取得email(可能存在多个email)
- while (emails.moveToNext())
- {
- String strEmail = emails.getString(emails.getColumnIndex(ContactsContract.CommonDataKinds.Email.DATA));
- sbLog.append("Email=" + strEmail + ";");
- }
- emails.close();
- }
- cursor.close();
- Log.e("-------------------", sbLog.toString());
- return sbLog;
- }
- }
最后不要忘了加访问权限:
- <uses-permission android:name="android.permission.READ_CONTACTS" />
- <uses-permission android:name="android.permission.WRITE_CONTACTS" />
最后运行,看一下效果:
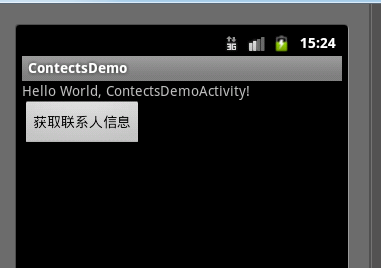
点击获取联系人按钮看有什么效果:
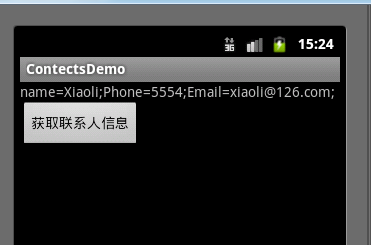
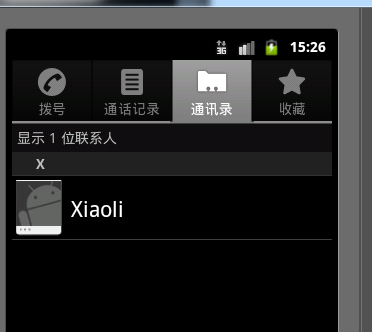
这样就得到了我们联系人的名字,电话号和email了。为了证明让我们看一下我模拟器里的通讯录信息:
OK! cursor.moveToNext() 可以获取多条 ,在这里我就不多附属了,而且既然可以读联系人信息,就可以通过ContentProvider添加联系人信息,以后慢慢复述。


 1603
1603


 被折叠的 条评论
为什么被折叠?
被折叠的 条评论
为什么被折叠?
 到【灌水乐园】发言


