


 本文通过实例详细讲解Maven的依赖关系和继承关系。首先介绍准备工作,包括操作系统、开发工具和环境配置。然后,逐步创建"user-parent"、"user-entity"和"user-web"工程,展示如何在pom文件中配置依赖。在"user-web"中创建并测试UserController,当部署到Tomcat后,用户登录验证成功,展示了依赖关系的实际应用。
[工欲善其事,必先利其器]
上文中,我们简单介绍了依赖关系的基本理论与配置方式。但是由于这个知识点在我们日后的开发过程中会经常使用到,因此,我们在本篇中通过演示实例来说明依赖关系,请各位看官一定跟着步骤,亲自尝试一番。仔细观察通过这种方式对我们程序架构造成的影响。
特别的,这里以一份已经调试完成的工程为例,因此,与前文说的工程命名不一致,敬请谅解。
准备工作:
a.操作系统:win7 x64
b.开发工具:eclipse mars j2ee版本,maven3.2.2,jdk7
c.请读者参照。Maven简明教程(3)---在eclipse中创建工程与基本命令介绍。创建user-parent工程,并配置其pom文件
-------------------------------------------------------------------------------------------------------------------------------------
正文开始:
1.1以maven创建uesr-entity工程,工程类型为quickstart。具体请参照Maven简明教程(3)---在eclipse中创建工程与基本命令介绍。建立的工程结构如下图所示:
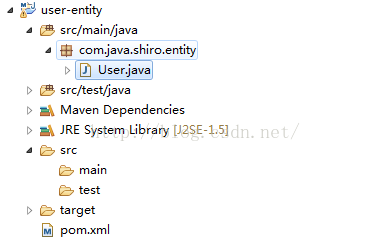
1.2作为演示,在user-entity工程中只创建一个实体类User.java,具体内容如下:
package com.java.shiro.entity;

public class User {

	private Integer id; // 编号
	private String userName; // 用户名
	private String password; // 密码

	//由于篇幅关系,set、get方法请读者自行完成
}
<project xmlns="http://maven.apache.org/POM/4.0.0" xmlns:xsi="http://www.w3.org/2001/XMLSchema-instance"
	xsi:schemaLocation="http://maven.apache.org/POM/4.0.0 http://maven.apache.org/xsd/maven-4.0.0.xsd">
	<modelVersion>4.0.0</modelVersion>
	<parent>
		<groupId>com.java.shiro</groupId>
		<artifactId>user-parent</artifactId>
		<version>0.0.1-SNAPSHOT</version>
		<relativePath>../user-parent/pom.xml</relativePath>
	</parent>
	<artifactId>user-entity</artifactId>
	<packaging>jar</packaging>
	<properties>
		<project.build.sourceEncoding>UTF-8</project.build.sourceEncoding>
	</properties>
	<dependencies>
		<dependency>
			<groupId>junit</groupId>
			<artifactId>junit</artifactId>
			<scope>test</scope>
		</dependency>
	</dependencies>
</project>
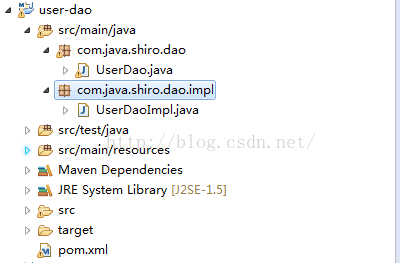
2.2创建接口UserDao.java,具体内容如下:
package com.java.shiro.dao;

import com.java.shiro.entity.User;

public interface UserDao {
	public User login(User user);
}
2.3创建接口实现类UserDaoImpl.java,具体内容如下:
package com.java.shiro.dao.impl;

import org.springframework.stereotype.Repository;
import com.java.shiro.dao.UserDao;
import com.java.shiro.entity.User;

@Repository
public class UserDaoImpl implements UserDao{
//	作为演示,我们省略数据方面的知识
	public User login(User user) {
		System.out.println("查询当前用户");
		User u = new User(1,"Tom","1234");
		return u;
	}
}
<project xmlns="http://maven.apache.org/POM/4.0.0" xmlns:xsi="http://www.w3.org/2001/XMLSchema-instance"
	xsi:schemaLocation="http://maven.apache.org/POM/4.0.0 http://maven.apache.org/xsd/maven-4.0.0.xsd">
	<modelVersion>4.0.0</modelVersion>

	<parent>
		<groupId>com.java.shiro</groupId>
		<artifactId>user-parent</artifactId>
		<version>0.0.1-SNAPSHOT</version>
		<relativePath>../user-parent/pom.xml</relativePath>
	</parent>


	<properties>
		<project.build.sourceEncoding>UTF-8</project.build.sourceEncoding>
	</properties>

	<dependencies>
		<dependency>
			<groupId>log4j</groupId>
			<artifactId>log4j</artifactId>
		</dependency>
		<dependency>
			<groupId>junit</groupId>
			<artifactId>junit</artifactId>
			<scope>test</scope>
		</dependency>
		<dependency>
			<groupId>com.java.shiro</groupId>
			<artifactId>user-entity</artifactId>
			<version>0.0.1-SNAPSHOT</version>
		</dependency>
		<dependency>
			<groupId>org.springframework</groupId>
			<artifactId>spring-context</artifactId>
			<version>4.1.7.RELEASE</version>
		</dependency>
	</dependencies>
</project>
3.2创建接口UserService.java,具体内容如下:

package com.java.shiro.service;

import com.java.shiro.entity.User;

public interface UserService {
	public User login(User user);
}
package com.java.shiro.service.impl;

import org.springframework.beans.factory.annotation.Autowired;
import org.springframework.stereotype.Service;

import com.java.shiro.dao.UserDao;
import com.java.shiro.entity.User;
import com.java.shiro.service.UserService;

@Service
public class UserServiceImpl implements UserService{

	@Autowired
	private UserDao userDao;

	public User login(User user) {
		return userDao.login(user);
	}
}
3.4修改pom文件,具体内容如下:点击保存之后,请在项目的pom文件上点击右键--->run as--->maven install。将项目安装到的本地仓库
<project xmlns="http://maven.apache.org/POM/4.0.0" xmlns:xsi="http://www.w3.org/2001/XMLSchema-instance"
  xsi:schemaLocation="http://maven.apache.org/POM/4.0.0 http://maven.apache.org/xsd/maven-4.0.0.xsd">
  <modelVersion>4.0.0</modelVersion>

  <parent>
  	<groupId>com.java.shiro</groupId>
    <artifactId>user-parent</artifactId>
    <version>0.0.1-SNAPSHOT</version>
    <relativePath>../user-parent/pom.xml</relativePath>
  </parent>

  <artifactId>user-service</artifactId>
  <packaging>jar</packaging>


  <properties>
    <project.build.sourceEncoding>UTF-8</project.build.sourceEncoding>
  </properties>

  <dependencies>

  	<dependency>
  		<groupId>org.springframework</groupId>
  		<artifactId>spring-core</artifactId>
  	</dependency>
  	<dependency>
  		<groupId>org.springframework</groupId>
  		<artifactId>spring-beans</artifactId>
  	</dependency>
  	<dependency>
         <groupId>org.springframework</groupId>
         <artifactId>spring-tx</artifactId>
        </dependency>
  	<dependency>
  		<groupId>org.springframework</groupId>
  		<artifactId>spring-context</artifactId>
  	</dependency>
  	<dependency>
  		<groupId>org.springframework</groupId>
  		<artifactId>spring-context-support</artifactId>
  	</dependency>
  	<dependency>
		<groupId>org.springframework</groupId>
		<artifactId>spring-web</artifactId>
	</dependency>

  	<dependency>
		<groupId>org.springframework</groupId>
		<artifactId>spring-webmvc</artifactId>
	</dependency>

	<dependency>
		<groupId>org.springframework</groupId>
		<artifactId>spring-aop</artifactId>
	</dependency>


	<dependency>
		<groupId>org.springframework</groupId>
		<artifactId>spring-aspects</artifactId>
	</dependency>

    <dependency>
      <groupId>junit</groupId>
      <artifactId>junit</artifactId>
      <scope>test</scope>
    </dependency>

    <dependency>
    	<groupId>com.java.shiro</groupId>
    	<artifactId>user-dao</artifactId>
    	<version>0.0.1-SNAPSHOT</version>
    </dependency>
  </dependencies>
</project>
4.1以maven创建user-web工程,工程类型为webapp。具体请参照前文。具体请参照Maven简明教程(3)---在eclipse中创建工程与基本命令介绍。建立的工程结构如下图所示:

4.2创建UserController.java文件,具体内容如下:
package com.java.shiro.web.controller;

import javax.servlet.http.HttpServletRequest;
import javax.servlet.http.HttpSession;

import org.springframework.beans.factory.annotation.Autowired;
import org.springframework.stereotype.Controller;
import org.springframework.web.bind.annotation.RequestMapping;

import com.java.shiro.entity.User;
import com.java.shiro.service.UserService;

@Controller
@RequestMapping("/user")
public class UserController {

	@Autowired
	private UserService userService;

	/**
	 * 用户登录
	 * @param user
	 * @param request
	 * @return
	 */
	@RequestMapping("/login")
	public String login(User user,HttpServletRequest request){
		User resultUser=userService.login(user);
		if(resultUser==null){
			System.out.println("用户名或密码错误!");
			return "index";
		}else{
			HttpSession session=request.getSession();
			session.setAttribute("currentUser", resultUser);
			return "redirect:/success.jsp";
		}
	}
}
<?xml version="1.0" encoding="UTF-8"?>
<beans xmlns="http://www.springframework.org/schema/beans"
       xmlns:xsi="http://www.w3.org/2001/XMLSchema-instance"
       xmlns:context="http://www.springframework.org/schema/context"
       xmlns:aop="http://www.springframework.org/schema/aop" xmlns:tx="http://www.springframework.org/schema/tx"
       xsi:schemaLocation="http://www.springframework.org/schema/beans http://www.springframework.org/schema/beans/spring-beans-4.0.xsd
		http://www.springframework.org/schema/context http://www.springframework.org/schema/context/spring-context-4.0.xsd
		http://www.springframework.org/schema/tx http://www.springframework.org/schema/tx/spring-tx-4.0.xsd
		http://www.springframework.org/schema/aop http://www.springframework.org/schema/aop/spring-aop-4.0.xsd"
       default-lazy-init="true">

    <description>Spring公共配置</description>

    <!-- 使用annotation 自动注册bean, 并保证@Required、@Autowired的属性被注入 -->
    <context:component-scan base-package="com.java.shiro">
        <context:exclude-filter type="annotation"
                                expression="org.springframework.stereotype.Controller"/>
        <context:exclude-filter type="annotation"
                                expression="org.springframework.web.bind.annotation.ControllerAdvice"/>
    </context:component-scan>
</beans>
4.4创建spring-mvc.xml文件,具体内容如下:
<?xml version="1.0" encoding="UTF-8"?>
<beans xmlns="http://www.springframework.org/schema/beans"
    xmlns:xsi="http://www.w3.org/2001/XMLSchema-instance"
    xmlns:p="http://www.springframework.org/schema/p"
    xmlns:aop="http://www.springframework.org/schema/aop"
    xmlns:context="http://www.springframework.org/schema/context"
    xmlns:jee="http://www.springframework.org/schema/jee"
    xmlns:tx="http://www.springframework.org/schema/tx"
    xsi:schemaLocation="
        http://www.springframework.org/schema/aop http://www.springframework.org/schema/aop/spring-aop-4.0.xsd
        http://www.springframework.org/schema/beans http://www.springframework.org/schema/beans/spring-beans-4.0.xsd
        http://www.springframework.org/schema/context http://www.springframework.org/schema/context/spring-context-4.0.xsd
        http://www.springframework.org/schema/jee http://www.springframework.org/schema/jee/spring-jee-4.0.xsd
        http://www.springframework.org/schema/tx http://www.springframework.org/schema/tx/spring-tx-4.0.xsd">

	<!-- 使用注解的包,包括子集 -->
	<context:component-scan base-package="com.java.shiro" />

	<!-- 视图解析器 -->
	<bean id="viewResolver"
		class="org.springframework.web.servlet.view.InternalResourceViewResolver">
		<property name="prefix" value="/" />
		<property name="suffix" value=".jsp"></property>
	</bean>

</beans> <?xml version="1.0" encoding="UTF-8"?>
<web-app xmlns:xsi="http://www.w3.org/2001/XMLSchema-instance"
xmlns="http://java.sun.com/xml/ns/javaee"
xsi:schemaLocation="http://java.sun.com/xml/ns/javaee http://java.sun.com/xml/ns/javaee/web-app_2_5.xsd"
id="WebApp_ID" version="2.5">
<welcome-file-list>
<welcome-file>index.jsp</welcome-file>
</welcome-file-list>
<!-- Spring配置文件 -->
<context-param>
<param-name>contextConfigLocation</param-name>
<param-value>classpath:applicationContext.xml</param-value>
</context-param>
<!-- 编码过滤器 -->
<filter>
<filter-name>encodingFilter</filter-name>
<filter-class>org.springframework.web.filter.CharacterEncodingFilter</filter-class>
<async-supported>true</async-supported>
<init-param>
<param-name>encoding</param-name>
<param-value>UTF-8</param-value>
</init-param>
</filter>
<filter-mapping>
<filter-name>encodingFilter</filter-name>
<url-pattern>/*</url-pattern>
</filter-mapping>
<!-- Spring监听器 -->
<listener>
<listener-class>org.springframework.web.context.ContextLoaderListener</listener-class>
</listener>
<!-- 添加对springmvc的支持 -->
<servlet>
<servlet-name>springMVC</servlet-name>
<servlet-class>org.springframework.web.servlet.DispatcherServlet</servlet-class>
<init-param>
<param-name>contextConfigLocation</param-name>
<param-value>/WEB-INF/spring-mvc.xml</param-value>
</init-param>
<load-on-startup>1</load-on-startup>
<async-supported>true</async-supported>
</servlet>
<servlet-mapping>
<servlet-name>springMVC</servlet-name>
<url-pattern>*.do</url-pattern>
</servlet-mapping>
</web-app>4.5修改index.jsp文件,具体内容如下:
<%@ page language="java" contentType="text/html; charset=UTF-8"
    pageEncoding="UTF-8"%>
<!DOCTYPE html PUBLIC "-//W3C//DTD HTML 4.01 Transitional//EN" "http://www.w3.org/TR/html4/loose.dtd">
<html>
<head>
<meta http-equiv="Content-Type" content="text/html; charset=UTF-8">
<title>Insert title here</title>
</head>
<body>
<form action="${pageContext.request.contextPath }/user/login.do" method="post">
	userName:<input type="text" name="userName" value="${user.userName }"/><br/>
	password:<input type="password" name="password" value="${user.password }"><br/>
	<input type="submit" value="login"/><font color="red">${errorMsg }</font>
</form>
</body>
</html>
4.6创建success.jsp文件,具体内容如下:
<%@ page language="java" contentType="text/html; charset=UTF-8"
    pageEncoding="UTF-8"%>
<!DOCTYPE html PUBLIC "-//W3C//DTD HTML 4.01 Transitional//EN" "http://www.w3.org/TR/html4/loose.dtd">
<html>
<head>
<meta http-equiv="Content-Type" content="text/html; charset=UTF-8">
<title>Insert title here</title>
</head>
<body>
欢迎:${currentUser.userName }
</body>
</html><project xmlns="http://maven.apache.org/POM/4.0.0" xmlns:xsi="http://www.w3.org/2001/XMLSchema-instance"
xsi:schemaLocation="http://maven.apache.org/POM/4.0.0 http://maven.apache.org/maven-v4_0_0.xsd">
<modelVersion>4.0.0</modelVersion>
<parent>
<groupId>com.java.shiro</groupId>
<artifactId>user-parent</artifactId>
<version>0.0.1-SNAPSHOT</version>
<relativePath>../user-parent/pom.xml</relativePath>
</parent>
<artifactId>user-web</artifactId>
<packaging>war</packaging>
<dependencies>
<!-- 添加Servlet支持 -->
<dependency>
<groupId>javax.servlet</groupId>
<artifactId>javax.servlet-api</artifactId>
</dependency>
<dependency>
<groupId>javax.servlet.jsp</groupId>
<artifactId>javax.servlet.jsp-api</artifactId>
</dependency>
<!-- 添加jtl支持 -->
<dependency>
<groupId>javax.servlet</groupId>
<artifactId>jstl</artifactId>
</dependency>
<!-- 添加Spring支持 -->
<dependency>
<groupId>org.springframework</groupId>
<artifactId>spring-core</artifactId>
</dependency>
<dependency>
<groupId>org.springframework</groupId>
<artifactId>spring-beans</artifactId>
</dependency>
<dependency>
<groupId>org.springframework</groupId>
<artifactId>spring-tx</artifactId>
</dependency>
<dependency>
<groupId>org.springframework</groupId>
<artifactId>spring-context</artifactId>
</dependency>
<dependency>
<groupId>org.springframework</groupId>
<artifactId>spring-asm</artifactId>
<classifier>sources</classifier>
</dependency>
<dependency>
<groupId>org.springframework</groupId>
<artifactId>spring-context-support</artifactId>
</dependency>
<dependency>
<groupId>org.springframework</groupId>
<artifactId>spring-web</artifactId>
</dependency>
<dependency>
<groupId>org.springframework</groupId>
<artifactId>spring-webmvc</artifactId>
</dependency>
<dependency>
<groupId>com.java.shiro</groupId>
<artifactId>user-service</artifactId>
<version>0.0.1-SNAPSHOT</version>
</dependency>
<dependency>
<groupId>junit</groupId>
<artifactId>junit</artifactId>
<scope>test</scope>
</dependency>
<dependency>
<groupId>org.aspectj</groupId>
<artifactId>aspectjrt</artifactId>
<version>1.8.8</version>
</dependency>
</dependencies>
<build>
<finalName>user-web</finalName>
</build>
</project>
测试方法:
将user-web项目部署在tomcat上,启动tomcat。在浏览器地址栏中输入http://localhost/user-web/,进入index.jsp页面,这里由于我们没有真正的验证用户的用户名,密码。因此,直接点击登陆按钮即可。紧接着,浏览器会提示我们tom已经成功登陆!
-------------------------------------------------------------------------------------------------------------------------------------至此,Maven简明教程(5)---依赖关系(实例篇)结束


 2980
2980

 被折叠的 条评论
为什么被折叠?
被折叠的 条评论
为什么被折叠?
 到【灌水乐园】发言


