


版权声明:如需转载,请标明出处:http://blog.csdn.net/shangmingchao【商明超的博客】
废话就不多说了,直接上代码:
服务器端:
①MySQL中建立一个数据库hello,建一张表tab_user,添加字段id,username,password。然后随便添加几条记录。
②新建Java Web工程HelloServer。
③在WEB-INF目录下的lib中引入mysql-connector-java-5.0.8-bin.jar与org.json.jar。
④新建Servlet类LoginServlet。
LoginServlet.java:
- package cn.domain.hello.servlet;
- import java.io.BufferedReader;
- import java.io.IOException;
- import java.io.InputStreamReader;
- import java.io.PrintWriter;
- import javax.servlet.ServletException;
- import javax.servlet.http.HttpServlet;
- import javax.servlet.http.HttpServletRequest;
- import javax.servlet.http.HttpServletResponse;
- import org.json.JSONArray;
- import org.json.JSONObject;
- import cn.domain.hello.bean.UserBean;
- import cn.domain.hello.dao.UserDao;
- public class LoginServlet extends HttpServlet {
- /**
- *
- */
- private static final long serialVersionUID = 1L;
- /**
- * The doGet method of the servlet. <br>
- *
- * This method is called when a form has its tag value method equals to get.
- *
- * @param request
- * the request send by the client to the server
- * @param response
- * the response send by the server to the client
- * @throws ServletException
- * if an error occurred
- * @throws IOException
- * if an error occurred
- */
- public void doGet(HttpServletRequest request, HttpServletResponse response)
- throws ServletException, IOException {
- doPost(request, response);
- }
- /**
- * The doPost method of the servlet. <br>
- *
- * This method is called when a form has its tag value method equals to
- * post.
- *
- * @param request
- * the request send by the client to the server
- * @param response
- * the response send by the server to the client
- * @throws ServletException
- * if an error occurred
- * @throws IOException
- * if an error occurred
- */
- public void doPost(HttpServletRequest request, HttpServletResponse response)
- throws ServletException, IOException {
- request.setCharacterEncoding("UTF-8");
- response.setContentType("text/json;charset=UTF-8");
- String reqMessage, respMessage;
- JSONArray reqObject = null;
- JSONArray respObject = null;
- try {
- BufferedReader br = new BufferedReader(new InputStreamReader(
- request.getInputStream(), "UTF-8"));
- StringBuffer sb = new StringBuffer("");
- String temp;
- while ((temp = br.readLine()) != null) {
- sb.append(temp);
- }
- br.close();
- reqMessage = sb.toString();
- System.out.println("请求报文:" + reqMessage);
- reqObject = new JSONArray(reqMessage);
- UserDao userDao = new UserDao();
- UserBean ub = userDao.getUserByName(reqObject.getJSONObject(0)
- .getString("username"));
- if (ub.getPassword() != null
- && ub.getPassword().equals(
- reqObject.getJSONObject(0).getString("password"))) {
- respObject = new JSONArray().put(new JSONObject().put("userId",
- ub.getId()));
- }
- } catch (Exception e) {
- e.printStackTrace();
- } finally {
- respMessage = respObject == null ? "" : respObject.toString();
- System.out.println("返回报文:" + respMessage);
- PrintWriter pw = response.getWriter();
- pw.write(respMessage);
- pw.flush();
- pw.close();
- }
- }
- }
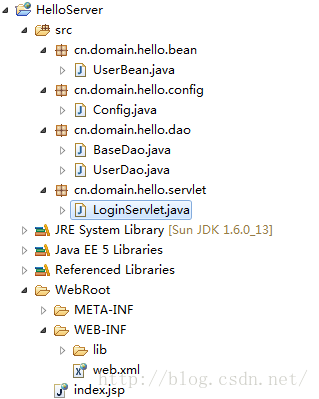
简单抽象出了数据访问层,并实现数据库的操作,目录结构如下,由于文件多,详细请下载下面的源码查看:
好了,到这里服务器端就已经建立完成了。客户端访问这个servlet的URL为:http://10.0.2.2:8080/HelloServer/servlet/LoginServlet。
记住,在Android中localhost指的是模拟器本身,而这里的10.0.2.2指你的计算机服务器本地测试IP,可改成内网或外网IP。
Android客户端端:
①新建一个android application:Hello。
②引入org.json.jar。
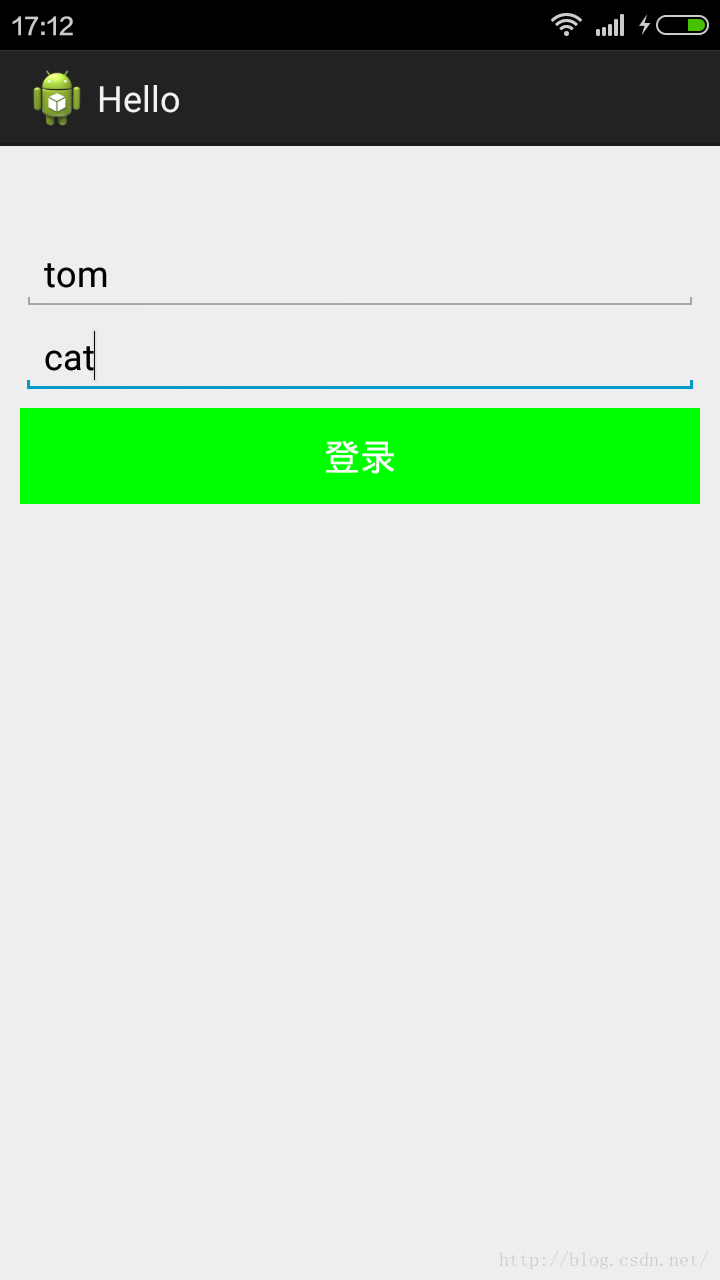
③在activity_main.xml布局文件中加入两个EditText,来输入用户名和密码,添加按钮来提交json数据。
④先封装一下访问网络的HTTP操作:
WebUtil.java:
- package cn.domain.hello.util;
- import org.apache.http.HttpResponse;
- import org.apache.http.client.HttpClient;
- import org.apache.http.client.methods.HttpPost;
- import org.apache.http.entity.StringEntity;
- import org.apache.http.impl.client.DefaultHttpClient;
- import org.apache.http.params.BasicHttpParams;
- import org.apache.http.params.HttpParams;
- import org.apache.http.util.EntityUtils;
- import org.json.JSONArray;
- import cn.domain.hello.config.Config;
- public class WebUtil {
- public static JSONArray getJSONArrayByWeb(String methodName,
- JSONArray params) {
- String returnValue = "";
- JSONArray result = null;
- HttpParams httpParams = new BasicHttpParams();
- httpParams.setParameter("charset", "UTF-8");
- HttpClient hc = new DefaultHttpClient(httpParams);
- HttpPost hp = new HttpPost(Config.SERVER_IP + "/HelloServer/servlet/"
- + methodName);
- try {
- hp.setEntity(new StringEntity(params.toString(), "UTF-8"));
- HttpResponse hr = hc.execute(hp);
- if (hr.getStatusLine().getStatusCode() == 200) {
- returnValue = EntityUtils.toString(hr.getEntity(), "UTF-8");
- result = new JSONArray(returnValue);
- }
- } catch (Exception e) {
- // TODO Auto-generated catch block
- e.printStackTrace();
- }
- if (hc != null) {
- hc.getConnectionManager().shutdown();
- }
- return result;
- }
- }
- package cn.domain.hello.activity;
- import org.json.JSONArray;
- import org.json.JSONException;
- import org.json.JSONObject;
- import cn.domain.hello.R;
- import cn.domain.hello.config.Config;
- import cn.domain.hello.util.WebUtil;
- import android.app.Activity;
- import android.os.AsyncTask;
- import android.os.Bundle;
- import android.util.Log;
- import android.view.View;
- import android.view.ViewStub;
- import android.view.View.OnClickListener;
- import android.view.ViewGroup;
- import android.widget.Button;
- import android.widget.EditText;
- import android.widget.TextView;
- import android.widget.Toast;
- public class MainActivity extends Activity {
- private EditText etUsername;
- private EditText etPassword;
- private Button btnLogin;
- private ViewGroup vsProgress;
- @Override
- protected void onCreate(Bundle savedInstanceState) {
- super.onCreate(savedInstanceState);
- setContentView(R.layout.activity_main);
- this.etUsername = (EditText) this.findViewById(R.id.etUsername);
- this.etPassword = (EditText) this.findViewById(R.id.etPassword);
- this.btnLogin = (Button) this.findViewById(R.id.btnLogin);
- this.btnLogin.setOnClickListener(new OnClickListener() {
- @Override
- public void onClick(View v) {
- // TODO Auto-generated method stub
- String username = MainActivity.this.etUsername.getText()
- .toString().trim();
- String password = MainActivity.this.etPassword.getText()
- .toString().trim();
- if ("".equals(username)) {
- Toast.makeText(MainActivity.this, "请填写用户名",
- Toast.LENGTH_SHORT).show();
- return;
- }
- if ("".equals(password)) {
- Toast.makeText(MainActivity.this, "请填写密码",
- Toast.LENGTH_SHORT).show();
- return;
- }
- //如果已经填写了用户名和密码,执行登录操作
- executeLogin(username, password);
- }
- });
- }
- private void executeLogin(String username, String password) {
- new LoginTask().execute(username, password);
- }
- private void onLoginComplete(Integer userId) {
- if (userId == null || userId == 0) {//如果没有获取到用户ID,说明登录失败
- Toast.makeText(MainActivity.this, "用户名或密码错误", Toast.LENGTH_SHORT)
- .show();
- if (vsProgress != null) {
- vsProgress.setVisibility(View.INVISIBLE);
- }
- return;
- }
- if (vsProgress != null) {
- vsProgress.setVisibility(View.INVISIBLE);
- }
- //如果成功获取到返回的用户ID,说明登录成功,跳转到HelloActivity
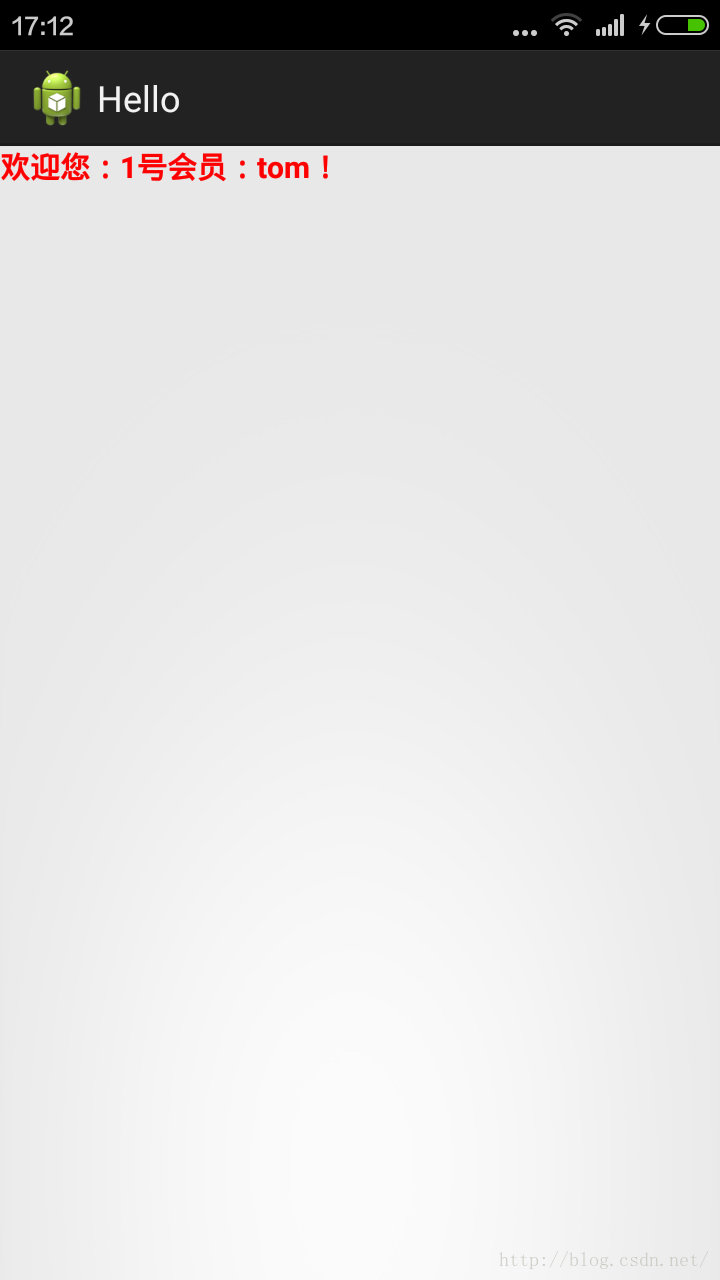
- Toast.makeText(MainActivity.this, "登陆成功", Toast.LENGTH_SHORT).show();
- HelloActivity.actionStart(MainActivity.this, userId, etUsername
- .getText().toString());
- }
- private class LoginTask extends AsyncTask<String, Void, Integer> {
- @Override
- protected void onPreExecute() {
- // TODO Auto-generated method stub
- super.onPreExecute();
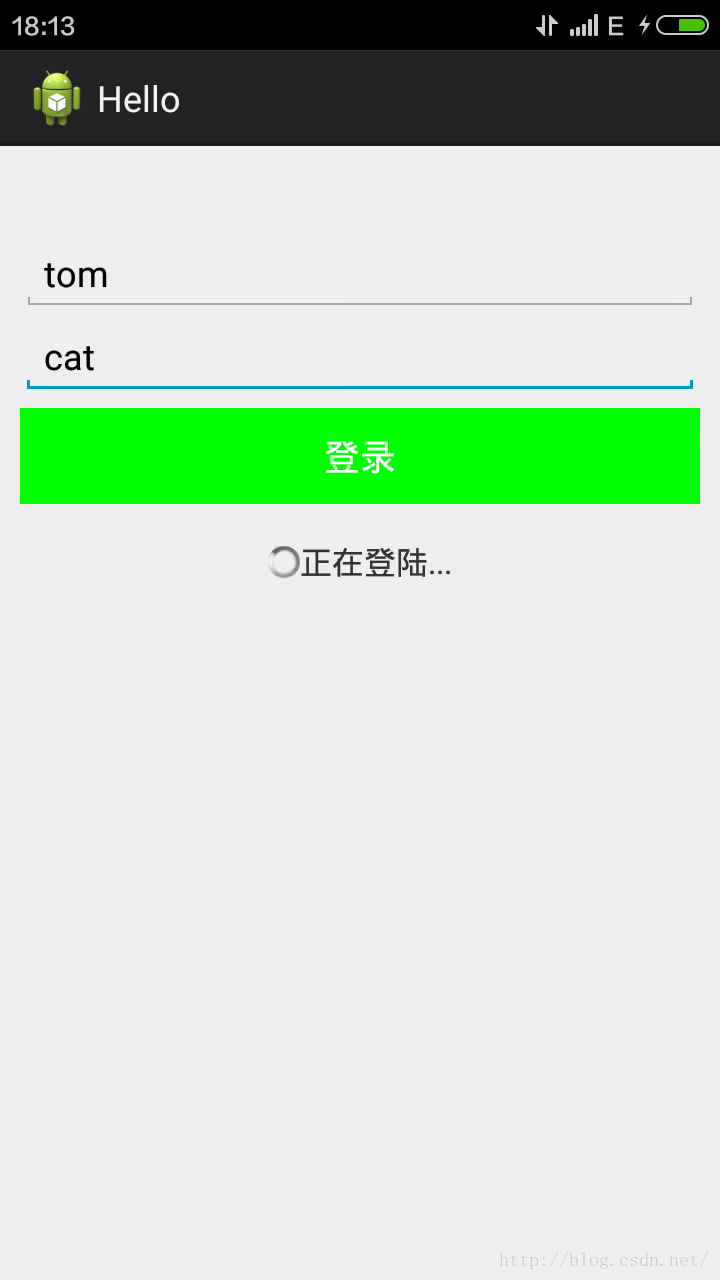
- //进行登录验证时,显示登录进度条
- if (vsProgress == null) {
- ViewStub vs = (ViewStub) findViewById(R.id.vsProgress);
- vsProgress = (ViewGroup) vs.inflate();
- } else {
- vsProgress.setVisibility(View.VISIBLE);
- }
- }
- @Override
- protected Integer doInBackground(String... params) {
- // TODO Auto-generated method stub
- Integer result = null;
- JSONArray reqValue;
- try {
- //将用户名和密码封装到JSONArray中,进行HTTP通信
- reqValue = new JSONArray().put(new JSONObject().put("username",
- params[0]).put("password", params[1]));
- JSONArray rec = WebUtil.getJSONArrayByWeb(Config.METHOD_LOGIN,
- reqValue);
- if (rec != null) {//如果成功获取用户ID
- result = rec.getJSONObject(0).getInt("userId");
- }
- } catch (JSONException e) {
- // TODO Auto-generated catch block
- e.printStackTrace();
- }
- return result;
- }
- @Override
- protected void onPostExecute(Integer result) {
- // TODO Auto-generated method stub
- super.onPostExecute(result);
- //回调
- onLoginComplete(result);
- }
- }
- }
- <uses-permission android:name="android.permission.INTERNET" />
好了,自己写写体验一下吧。代码不太符合架构规范,旨在展示Android与Web服务器的Json数据交互过程。写的不好还望各位大神指教。
源码免费下载:
源码下载


 3476
3476


 被折叠的 条评论
为什么被折叠?
被折叠的 条评论
为什么被折叠?
 到【灌水乐园】发言


