


物品的装备与卸下
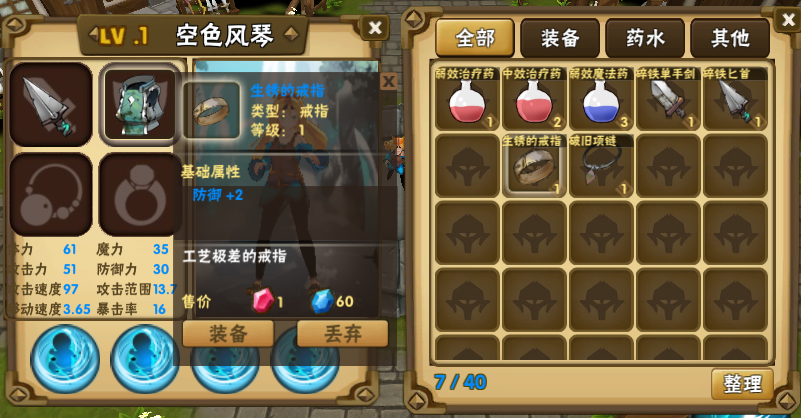
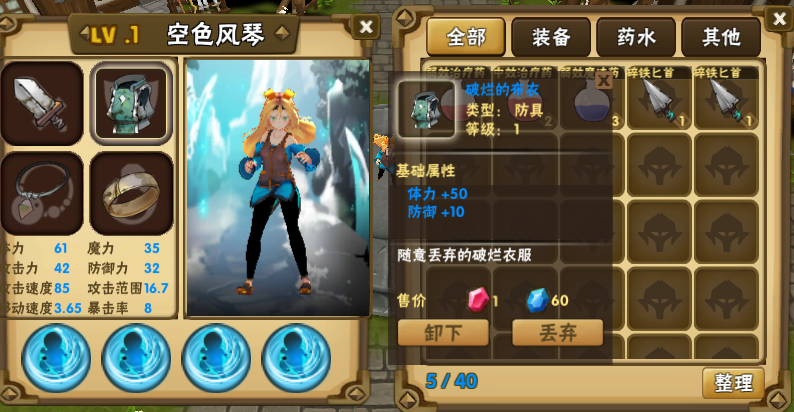
效果图
装备
卸下
实现功能
- 点击背包里的物品,属性弹出框将显示装备按钮
- 点击角色身上的物品,属性弹出框显示卸下按钮
- 点击装备后,所选物体将从背包中移除,角色相应装备栏将显示该装备,然后属性动态修改
- 点击卸下,所选物体将从角色装备栏移除,并将装备添加至背包
对象关系
背包
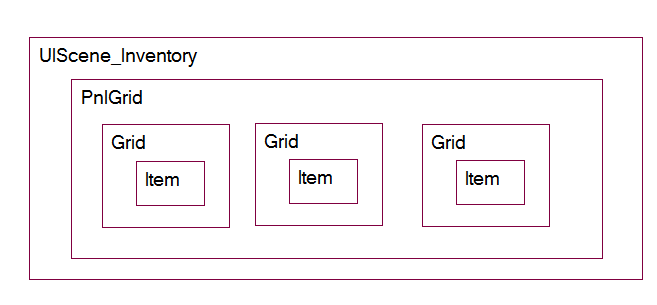
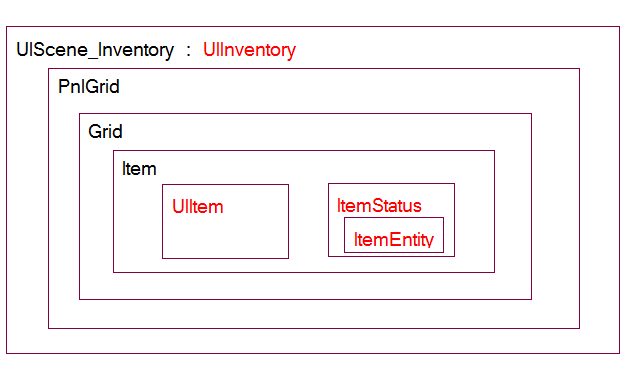
物理关系
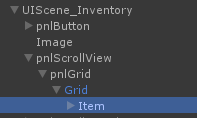
UIScene_Inventory 最外层
PnlGrid 背包格子的容器
Grid 背包的每一个格子
Item 格子中的物品
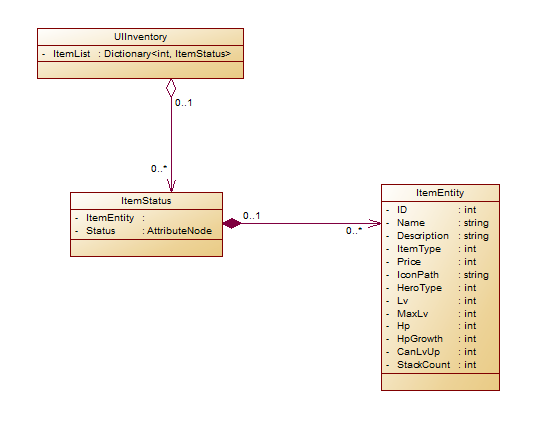
逻辑关系
红色为组件或类名
UIInventory:背包的管理组件,背包的初始化,物品的添加,物品的移除的具体逻辑实现
UIItem: 物品的控制显示类
ItemStatus : 物品的所要显示属性的封装,将属性封装为AttributeNode 用于计算
ItemEntity : 数据库传来的对象
类图
装备栏
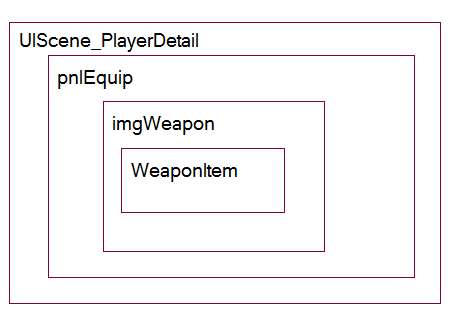
物理关系
装备栏与背包类似,不同的是格子和Item是固定的,卸下装备就是,把Item隐藏,替换就是更改Item的显示图片
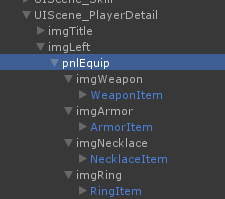
UIScene_PlayerDetail : 玩家信息界面最外层
PnlEquip:装备栏容器
imgWeapon:装备格子
WeaponItem:装备物品
逻辑关系
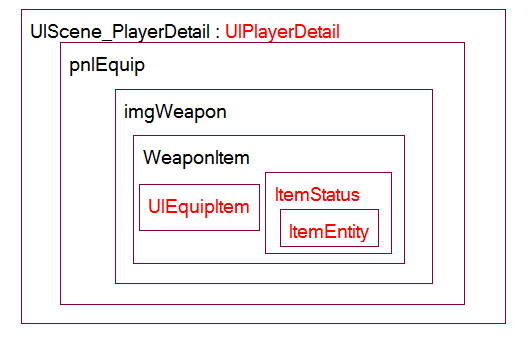
与背包基本相同
UIPlayerDetail:装备栏行为的具体逻辑实现
UIEquipItem:控制装备的显示
ItemStatus、ItemEntity:同背包
角色
PlayerController:角色控制器,角色行为的具体逻辑实现
PlayerStatus : 角色状态
弹出窗口
UIInventoryPopUp 物品详细属性显示及事件触发窗口
实现逻辑
四个主角都有了,装备栏,背包,弹出窗口,角色,现在分析实现步骤
装备物品
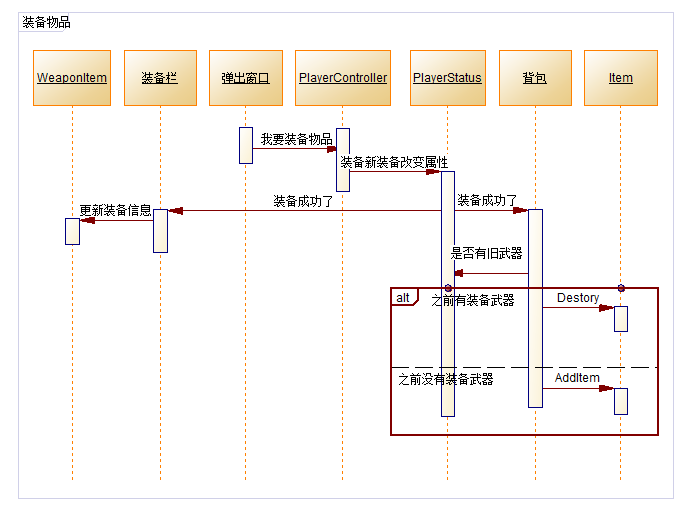
1.用户点击弹出窗口装备
2.弹出窗口调用PlayerController的装备物品的代码,并将ItemStatus传递
UIInventoryPopUp
 private void BtnDressOnPointerClick(PointerEventData obj)
    {
        if (this.m_ItemStatus.ItemType == ItemType.Potion)
        {//使用药水
            this.m_PlayerController.DrinkPotion(this.m_ItemStatus);
        }
        else
        {
            if (this.m_WindowType == WindowType.Inventory)
            {//装备
                if (this.m_ItemStatus.ItemType == ItemType.Armor
                    || this.m_ItemStatus.ItemType == ItemType.Necklace
                    || this.m_ItemStatus.ItemType == ItemType.Ring
                    || this.m_ItemStatus.ItemType == ItemType.Weapon)
                {
                    this.m_PlayerController.DressOnEquip(this.m_ItemStatus);
                }
            }
            else
            {//卸下
                if (this.m_ItemStatus.ItemType == ItemType.Armor
                    || this.m_ItemStatus.ItemType == ItemType.Necklace
                    || this.m_ItemStatus.ItemType == ItemType.Ring
                    || this.m_ItemStatus.ItemType == ItemType.Weapon)
                {
                    this.m_PlayerController.DropEquip(this.m_ItemStatus);
                }
            }
        }

        this.SetVisible(false);
    }
3.PlayerController,将ItemStatus传递给PlayerStatus,更改PlayerStatus的属性
PlayerStatus
 public void DressOnEquip(ItemStatus item)
    {
        //卸下当前装备
        DropEquip(item, false);
        //穿上新装备
        switch (item.ItemType)
        {
            case ItemType.Weapon:
                this.m_Weapon.Load(item.Item);
                this.m_Weapon.ChangeWhereType(WhereType.Body);
                break;
            case ItemType.Armor:
                this.m_Armor.Load(item.Item);
                this.m_Armor.ChangeWhereType(WhereType.Body);
                break;
            case ItemType.Necklace:
                this.Necklace.Load(item.Item);
                this.Necklace.ChangeWhereType(WhereType.Body);
                break;
            case ItemType.Ring:
                this.m_Ring.Load(item.Item);
                this.m_Ring.ChangeWhereType(WhereType.Body);
                break;
        }
        //通知背包移除穿上的装备
        UIManager.Instance.GetUI<UIInventory>(UIName.UIInventory).RemoveItem(item);
        EquipChanged(false);
    }
4.背包移除物品
UIInventory
public void RemoveItem(ItemStatus itemStatus)
    {
        itemStatus.Count -= 1;

        if (itemStatus.Count == 0)
        {//销毁物品
            DestroyImmediate(itemStatus.gameObject);
            this.m_ItemList.Remove(itemStatus.ItemID);
        }
        else
        {//更新数量显示
            itemStatus.gameObject.GetComponent<UIItem>().UpdateCount();
        }

        RefreshPartGrid();
    }
5.PlayerStatus触发装备更改事件
 private void EquipChanged(bool isChangeCur)
    {
        //更新装备数据
        InitStatusEquip();
        //更新角色数据
        status.Calculate(isChangeCur);
        //触发换装事件
        if (ChangedEquip != null)
        {
            ChangedEquip();
        }
    }
UIPlayerDetail
6.监听装备更换事件响应,重新刷新显示
 private void PlayerStatusChangedEquip()
    {
        InitData();
    }
UIInventory
7.监听装备更换事件响应,判断是否有老装备需要放进物品栏
   private void PlayerChangedEquip()
    {
        if (PlayerStatus.Instance.OldWeapon.ItemID != 0)
        {
            AddItem(PlayerStatus.Instance.OldWeapon.Item);
            PlayerStatus.Instance.OldWeapon = new ItemStatus();
        }
        if (PlayerStatus.Instance.OldArmor.ItemID != 0)
        {
            AddItem(PlayerStatus.Instance.OldArmor.Item);
            PlayerStatus.Instance.OldArmor = new ItemStatus();
        }
        if (PlayerStatus.Instance.OldRing.ItemID != 0)
        {
            AddItem(PlayerStatus.Instance.OldRing.Item);
            PlayerStatus.Instance.OldRing = new ItemStatus();
        }
        if (PlayerStatus.Instance.OldNecklace.ItemID != 0)
        {
            AddItem(PlayerStatus.Instance.OldNecklace.Item);
            PlayerStatus.Instance.OldNecklace = new ItemStatus();
        }
    }
卸载装备
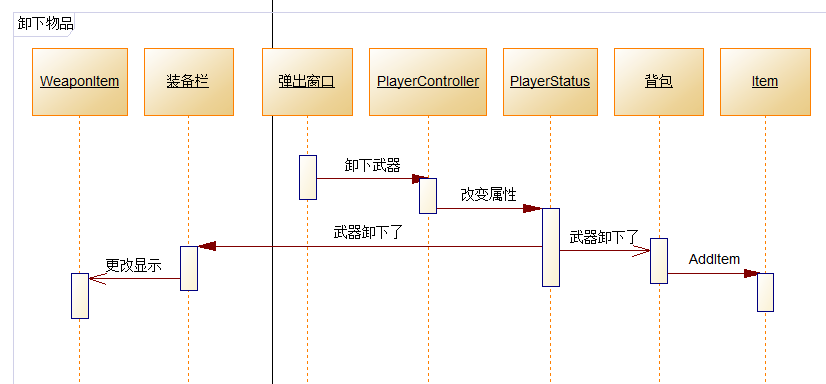
代码就不贴了。
重点
对象的传递
ItemStatus是类,就是引用类型,所有用“=”而没有”new”赋值的对象都指向了同一个内存地址。ItemStatus是挂在GameObject上的,而这个GameObject是可能被销毁的(移除物品栏),如果物品被销毁了,那所有的ItemStatus将变为null。
所以这里没有用ItemStatus直接传值,而是传递的ItemStatus中的ItemEntity,再在其他对象里面重新封装为ItemStatus,相当于进行了一次对象的深拷贝,所以即使有ItemStatus被销毁,也不会报空引用错误。
MonoBehaiver的Null
建了一个测试工程,里面包含了两个对象
GameObject 挂载 Test脚本
GameObject1 挂载 Test1脚本
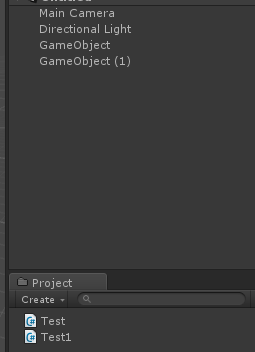
Test脚本里只有一个变量,ID;
public class Test : MonoBehaviour {
    public int ID;
}
在Test1脚本里进行如下测试
public class Test1 : MonoBehaviour {
// Use this for initialization
void Start () {
Test t = new Test();
t.ID = 2;
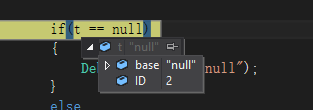
if(t == null)
{
Debug.Log("t is null");
}
else
{
Debug.Log("t is not null");
}
}
}按照常理应该输出“t is not null”。
但是
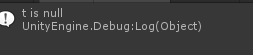
通过调试可以发现,t的base是null,但是他对象里是有值的,原因是这个继承与MonoBehavior的内,没有被挂在GameObject上,所以他的base置为了null。所以当用MonoBehavior的类来进行传递的时候,语句判断 is null 一定要小心。


 1575
1575


 被折叠的 条评论
为什么被折叠?
被折叠的 条评论
为什么被折叠?
 到【灌水乐园】发言


