


代码中设置UIView
#import "ViewController.h"
@interface ViewController ()
@end
@implementation ViewController
- (void)viewDidLoad {
[super viewDidLoad];
//修改颜色
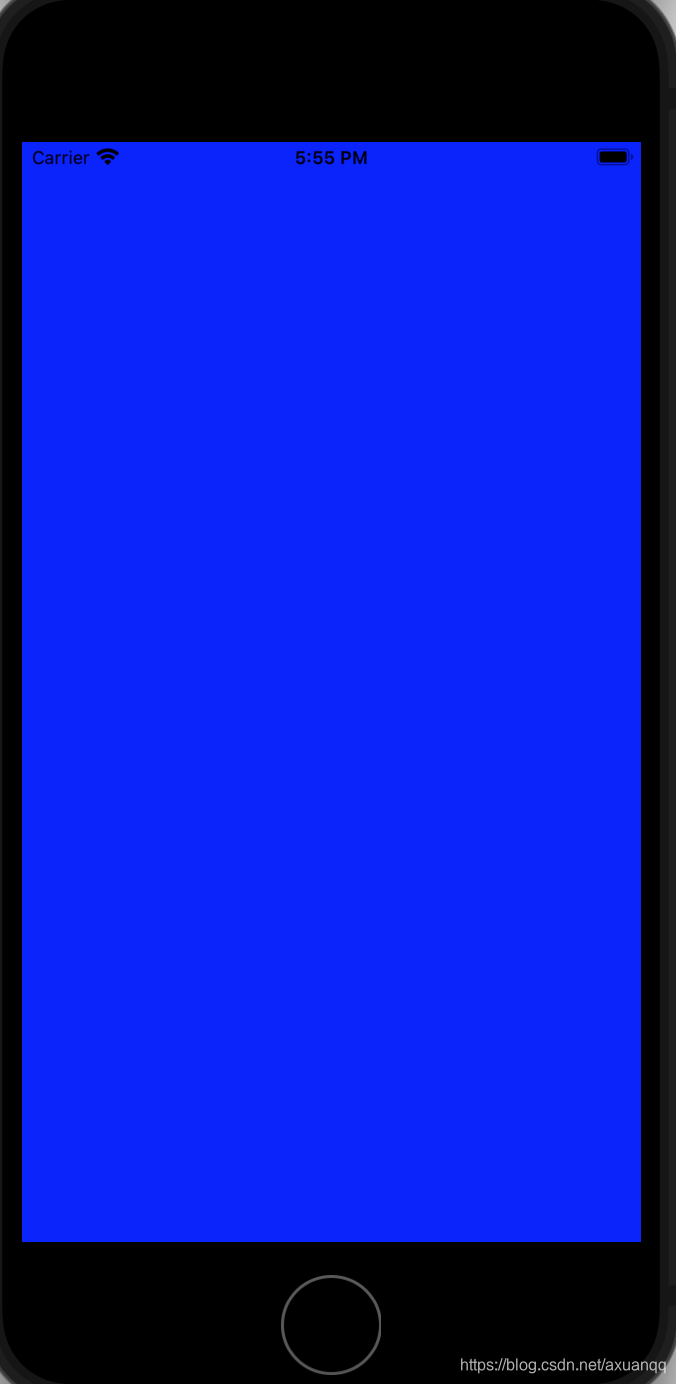
self.view.backgroundColor=UIColor.blueColor;
NSLog(@"======>viewDidLoad");
// Do any additional setup after loading the view.
}
@end从storybooard中可以知道viewcontroller默认会装载一个view 也就是这里的self.view

我们通过控制view的属性backgroundcolor 设置为蓝色,效果如下
UiView的属性
bounds属性:以自己左上角坐标原点定义控件所在矩形的位置和尺寸,它可以实现控件大小的定义
frame属性:以父控件的左上角为坐标原点定义控件的中点位置,他可以实现控件位置的定义
tag属性:可以定义控件的标识,它既可以定义控件的位置,也可以定义控件的大小
center属性:可以定义控件的中心点
例子如下:
- (void)viewDidLoad {
    [super viewDidLoad];

    //修改颜色
    self.view.backgroundColor=UIColor.systemYellowColor;


    //动态创建一个view
    UIView *myView=[[UIView alloc] init];
    [self.view addSubview:myView];
    myView.frame=CGRectMake(100,100, 100, 100);
    myView.backgroundColor=UIColor.blackColor;

    UIView *myView2=UIView.alloc.init;
    [self.view addSubview:myView2];
    myView2.frame=CGRectMake(200,200,100,100);
    myView2.backgroundColor=UIColor.greenColor;
    myView2.center=self.view.center;

    UIView *myView3= [self.view viewWithTag:101];
    myView3.backgroundColor=UIColor.systemGreenColor;

    NSLog(@"======>viewDidLoad");
    // Do any additional setup after loading the view.
}
可以看到viewwithtag可以查询到对应的view跟android findviewbyid异曲同工,但是ta只能是nsinteger类型,所以ios有iboutlet 可以以自定义字符命名来搭桥是实现findviewbyid(名字)
方式打开storyborad
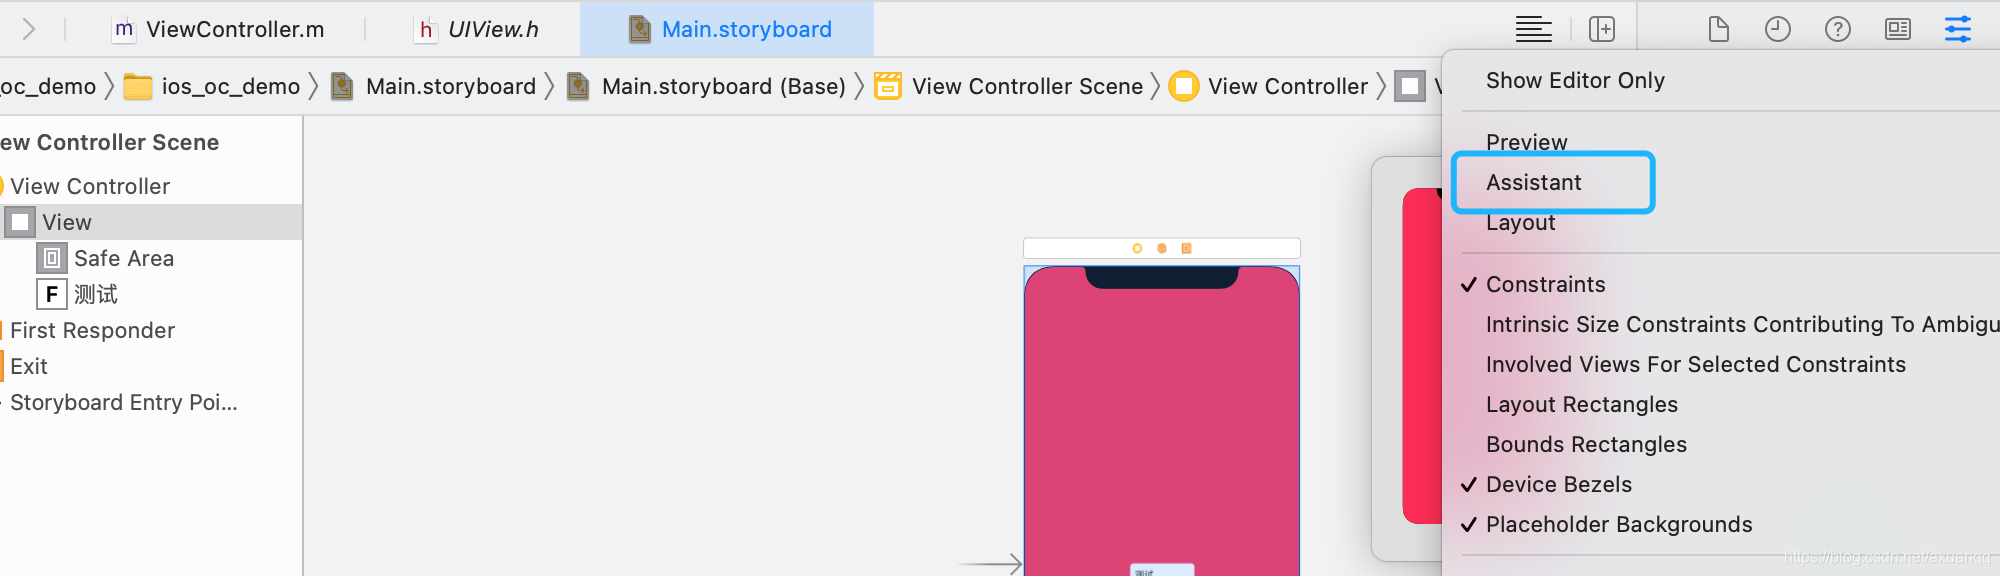
然后control 按住一个控件 拖动到到分栏代码的viewtrolle下面去 编辑器会自动弹出命名
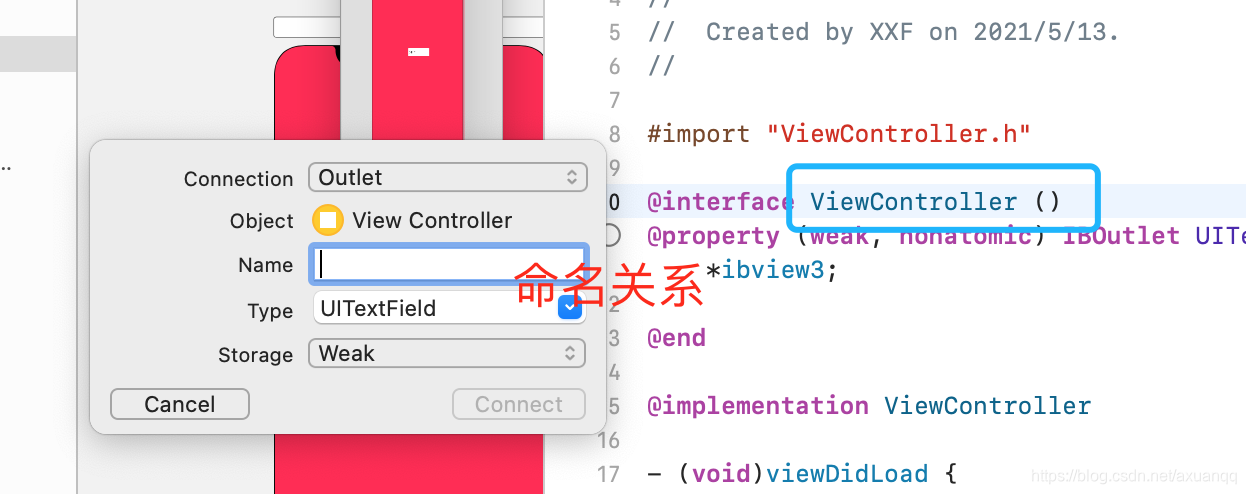
@interface ViewController ()
@property (weak, nonatomic) IBOutlet UITextField *ibview3;

@end
会建立这个一个属性
我们可以通过这个属性(就是storyboard中的刚才拖动的组件)来控制建立关系的组件
如: _ibview3.backgroundColor=UIColor.redColor;

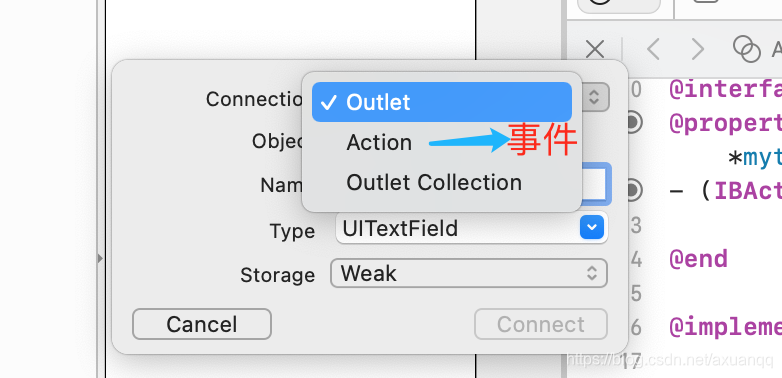
IBAction 意思就是动作监听类似 Android OnClickListener
链接动作跟IBoutlet一致 control+拖动 注意:只有部分组件才能有效果(应该是能点击的控件)

uilabel 组件 用于文本显示
- (void)viewDidLoad {
    [super viewDidLoad];
    // Do any additional setup after loading the view.
    UILabel *nameLabel=[[UILabel alloc] initWithFrame:CGRectMake(0, 0, 200, 100)];
    nameLabel.text=@"hello my name is\n 炫神";
    //设置多行显示
    nameLabel.numberOfLines=0;
    //设置文字颜色
    nameLabel.textColor=UIColor.blueColor;
    //设置字体大小
    nameLabel.font=[UIFont systemFontOfSize:30];
    [self.view addSubview:nameLabel];
}
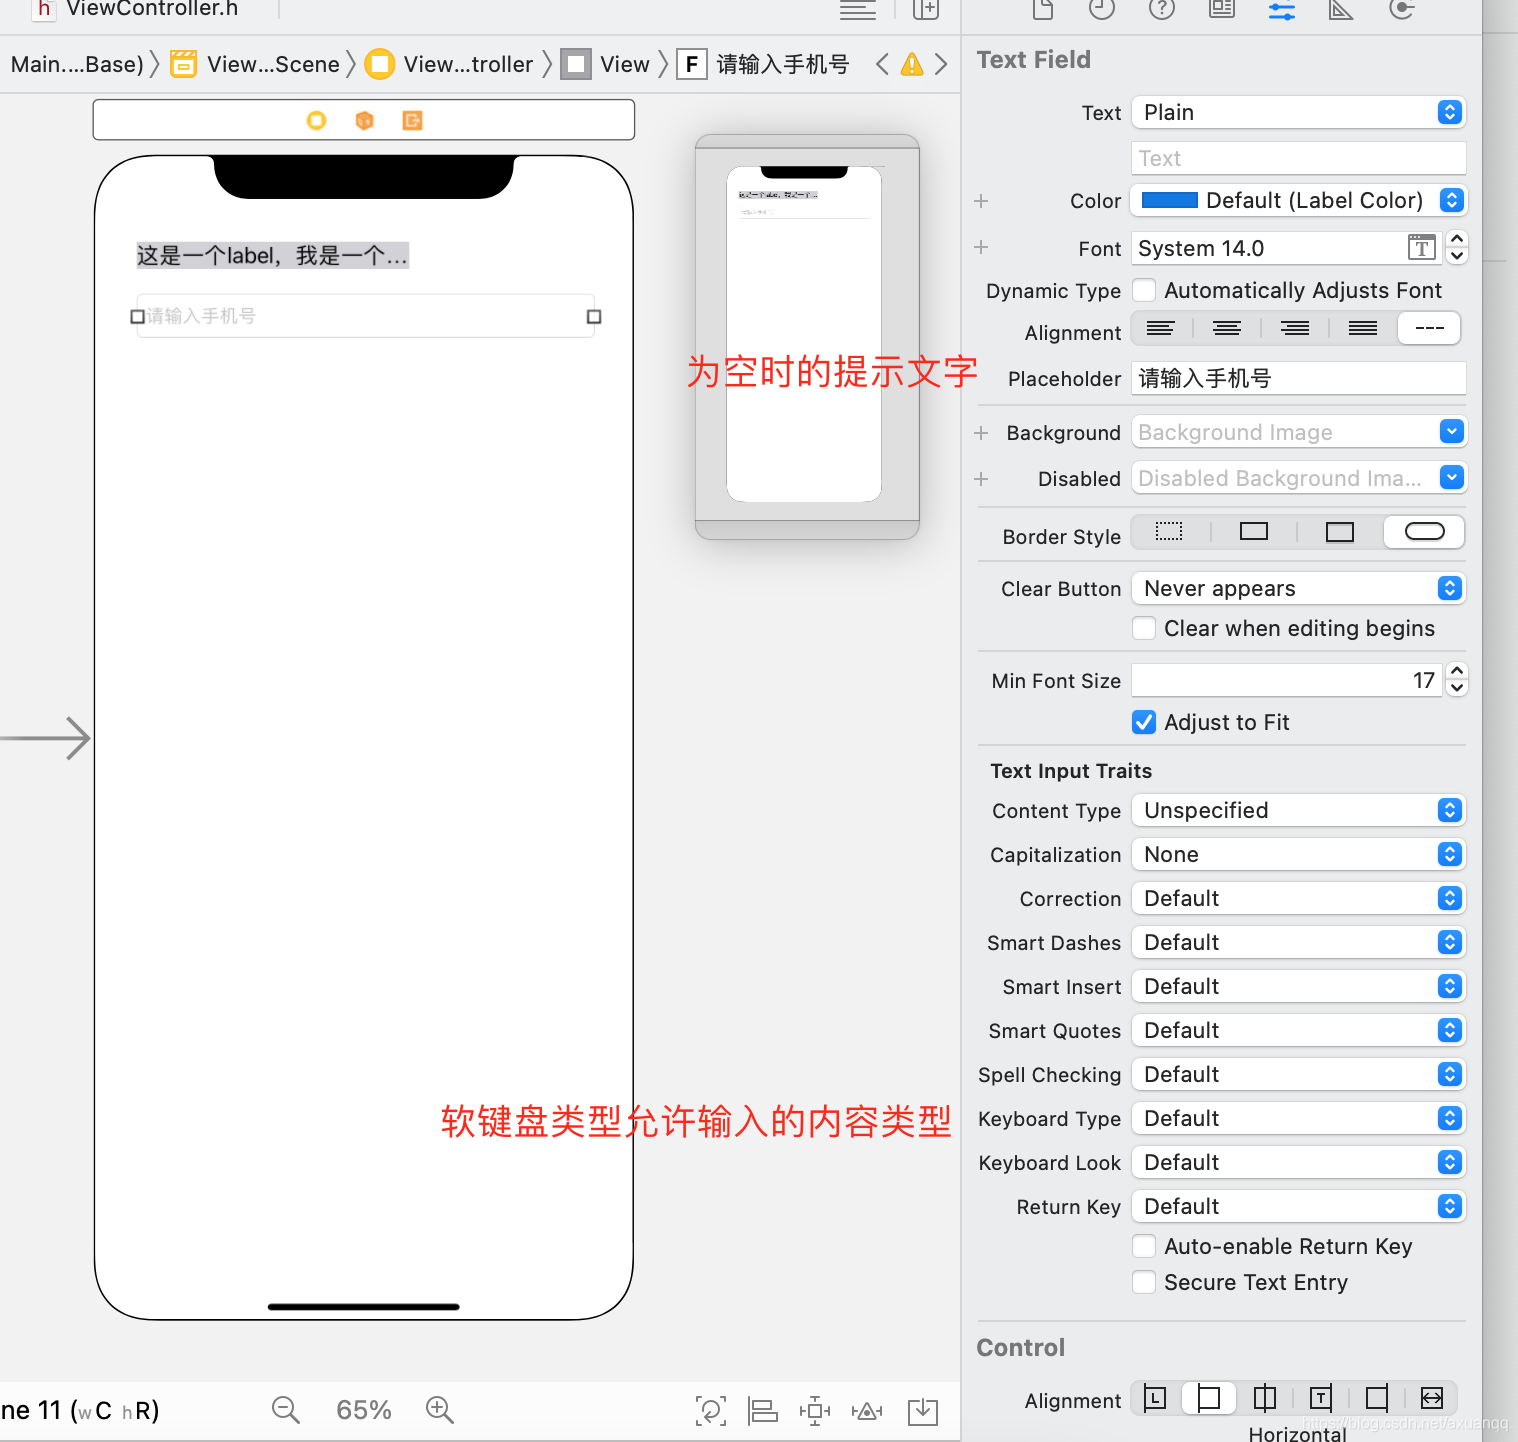
uitextfield 输入框组件
绑定uitextfield事件
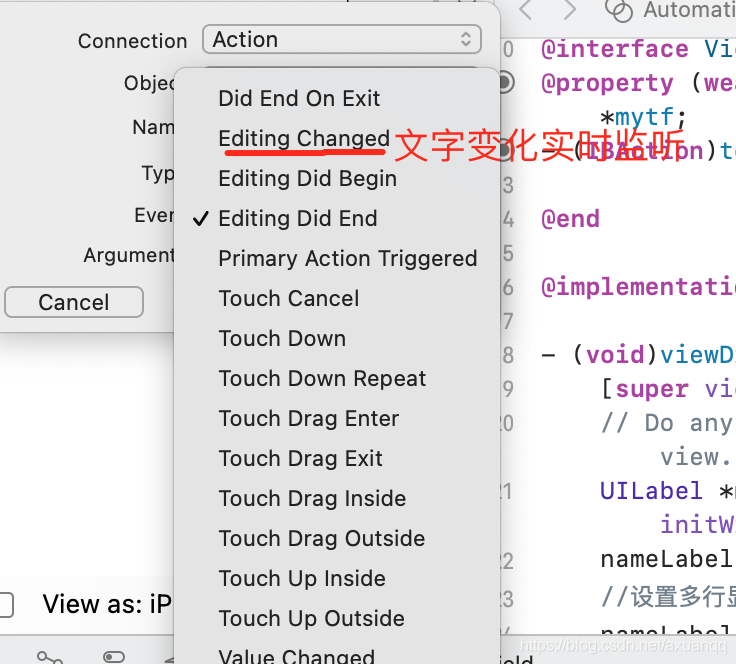
- (IBAction)textchange:(UITextField *)sender {
    UITextField *tf=sender;
    NSLog(@"===========>%@",tf.text);
}
这样我们输入框的文字都会实时调用这个方法
当软键盘弹出来的时候 我们发现点击空白区域并不能关闭软键盘 这样不利于交互,可以在系统touch函数上做关闭
/**
 空白区域的点击方法
 */
- (void)touchesBegan:(NSSet<UITouch *> *)touches withEvent:(UIEvent *)event{
    // 让整个view 去除编辑 也就是关闭软键盘
    [self.view endEditing:false];

    //或者  resign 是辞职释放的意 resignFirstResponder  意思是释放第一响应  其实就是关闭软键盘
   // [self.mytf resignFirstResponder];
}
UItextView
支持滚动 支持输入 支持多行

UIButton 按钮
按钮分为很多状态

我们可以分别对不同状态设置文本图标


运行效果就是点击一下 图标和按钮都有切换的状态
UIImage 图片组件
1. 通过名字获取image [UIImage imageNamed:@"名字"] 可以获取到一个UIimage对象
    UIImage *img=[UIImage imageNamed:@"zhengshuang.jpeg"];
    UIImageView *iv=[[UIImageView alloc] init];
    iv.frame=CGRectMake(0, 0, 100, 100);
    iv.backgroundColor=[UIColor yellowColor];
    iv.image=img;
    [self.view addSubview:iv];
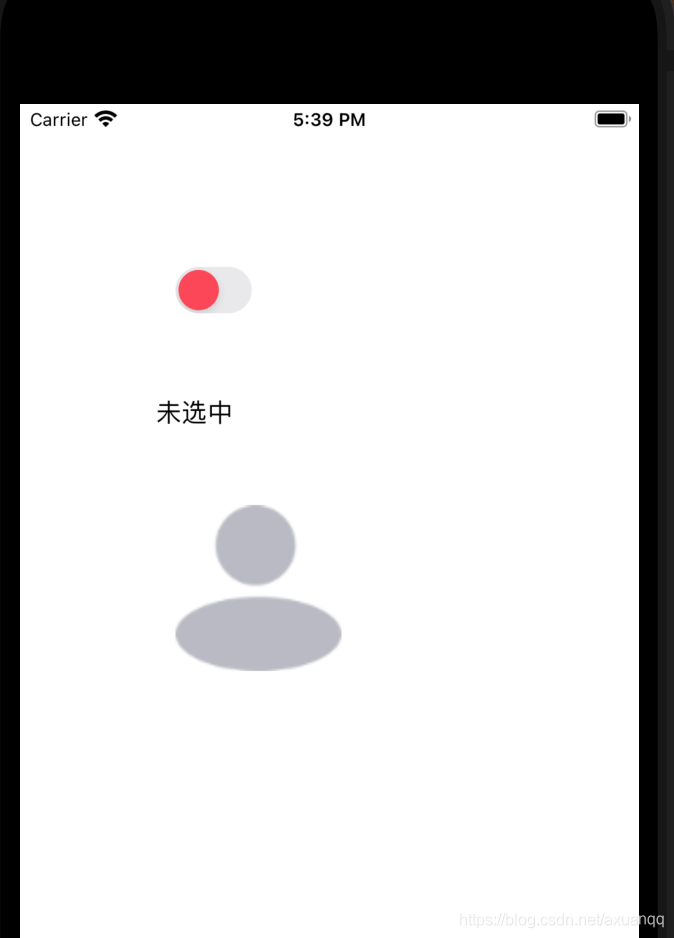
UIswitch 开关切换按钮
#import "ViewController.h"

@interface ViewController ()
@property (weak, nonatomic) IBOutlet UILabel *sexLabel;
@property (weak, nonatomic) IBOutlet UIImageView *sexImageVIEW;
- (IBAction)sexSwitchChange:(id)sender;

@end

@implementation ViewController

- (void)viewDidLoad {
    [super viewDidLoad];
    // Do any additional setup after loading the view.
}


- (IBAction)sexSwitchChange:(id)sender {
    UISwitch *sexSwitch=(UISwitch *)sender;
   if(sexSwitch.isOn){
       self.sexLabel.text=@"选中了";
       self.sexImageVIEW.image=[UIImage imageNamed:@"ic_menu_mine_select.png"];
   }else{
       self.sexLabel.text=@"未选中";
       self.sexImageVIEW.image=[UIImage imageNamed:@"ic_menu_mine.png"];
   }

}
@end

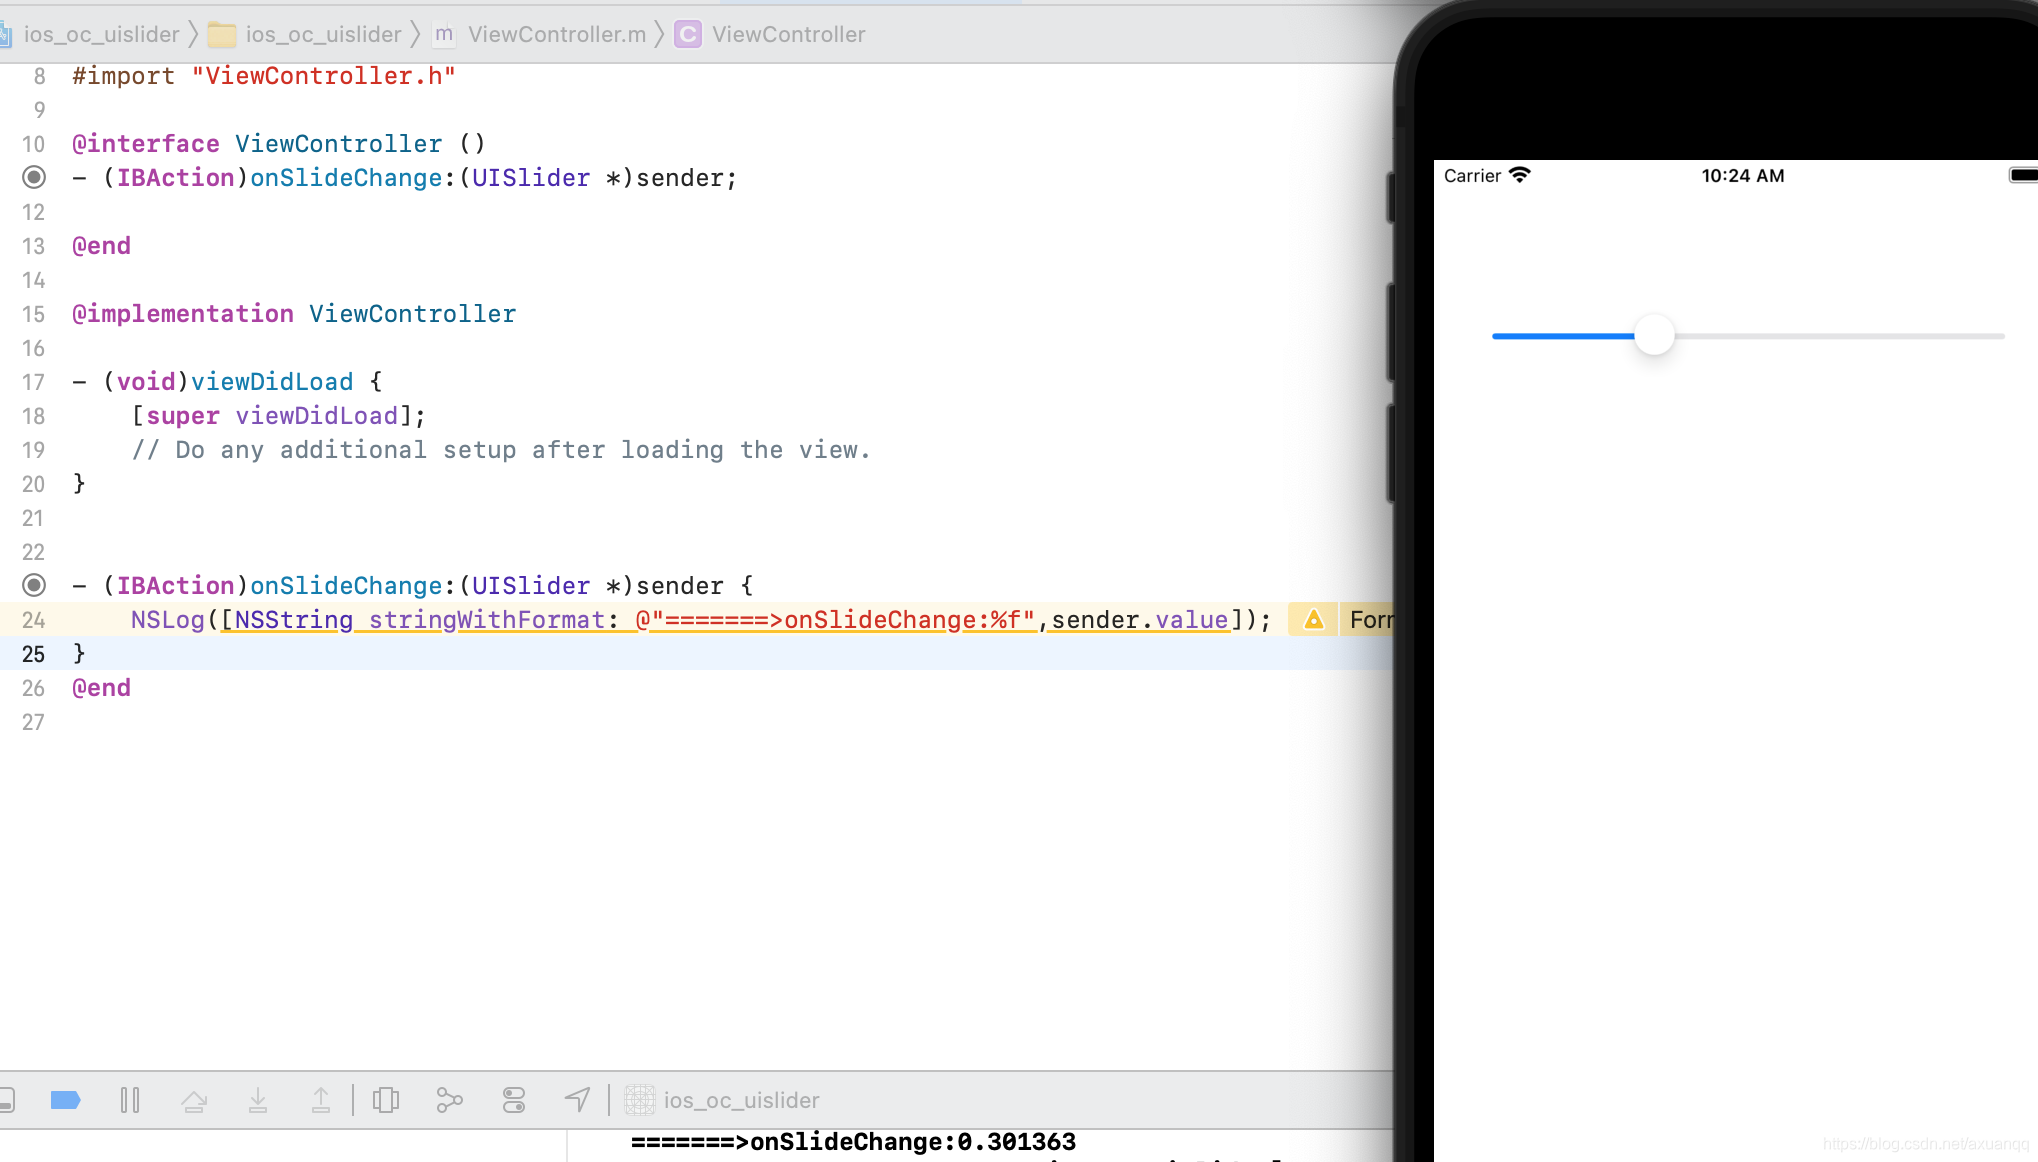
UISlider 滑块组件
UIStepper 步进控件。在商城下单数量这个地方很常用

UISegmentControl 选项卡组件 切换的时候可以监听 效果等同于单选按钮 只不过样式是这种

UIActivityIndicatorView loading组件 用于渲染加载中的组件

UIScrollView 滚动控件 这个组件比较常用
常用的3个属性:contentSize:滚动内容的大小
contentoffset:显示偏移量
contentinset:设置内容的边距


ios 实现页面间跳转
#import "ViewController.h"
#import "SecondViewController.h"

@interface ViewController ()
@property(nonatomic,strong)UIButton *btn;
@property(nonatomic,strong) UITextField *tf;
@end

@implementation ViewController

-(UIButton *)btn{
    if(_btn==NULL)
    {
        _btn=[[UIButton alloc] initWithFrame:CGRectMake(16, 100, 100, 40)];
        [_btn setTitle:@"跳转" forState:UIControlStateNormal];
        _btn.backgroundColor=[UIColor blueColor];
        [_btn addTarget:self action:@selector(btnClick) forControlEvents:UIControlEventTouchUpInside];
    }
    return _btn;
}
- (void)btnClick{
    //跳转到下一个页面
    SecondViewController *nextPage= [[SecondViewController alloc] init];
    [self presentViewController:nextPage animated:NO completion:nil];
}
- (void)viewDidLoad {
    [super viewDidLoad];
    [self.view addSubview:self.btn];
}


@end
ios 页面间传值
页面传值方式有
1.属性传值
2.单例传值
3.NSUserDefaults传值
4.代理传值
5.block传值
7. 通知传值
属性传值的意思 就是构建viewcontroller对象对的时候 将其中某些属性直接赋值 然后再压栈打开这个viewcontroller新页面
列表性控件 UITableView
UITableView 需要一个数据源(datasource)来显示数据
UITableView 会向数据源查询一共有多少航数据以及每一行显示什么数据
没有设置数据源的UITableView 只是一个空壳
凡是遵守UITableViewDataSource协议的OC对象,都可以是UITableView的数据源
storyBoard 和viewcontroller关联
1. 让veiwController直接实现<UITableViewDataSource> 数据源接口
2. 在storyBorad中control+拖动到


#import "ViewController.h"

@interface ViewController ()<UITableViewDataSource>

@end

@implementation ViewController

- (void)viewDidLoad {
    [super viewDidLoad];
    // Do any additional setup after loading the view.
}
- (nonnull UITableViewCell *)tableView:(nonnull UITableView *)tableView cellForRowAtIndexPath:(nonnull NSIndexPath *)indexPath {
    UITableViewCell *cell=[[UITableViewCell alloc] init];
    cell.textLabel.text=[NSString stringWithFormat:@"xxxxx:%d",indexPath.row];
    cell.textLabel.textColor=UIColor.redColor;
    return cell;
}

- (NSInteger)tableView:(nonnull UITableView *)tableView numberOfRowsInSection:(NSInteger)section {
    return 10;
}

- (NSInteger)numberOfSectionsInTableView:(UITableView *)tableView{
    return 1;
}

@end

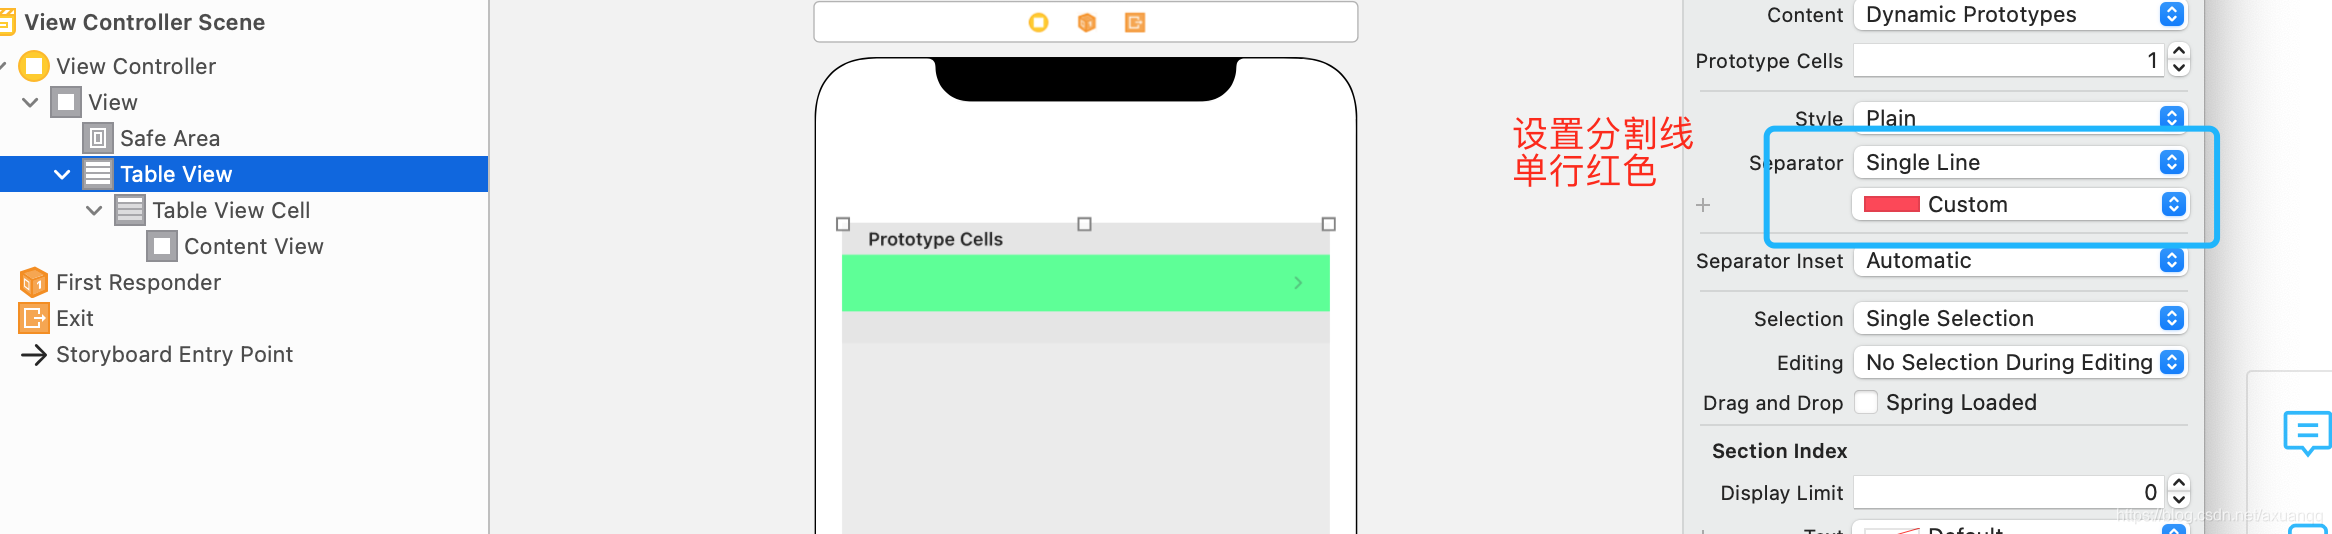
UITableView 属性
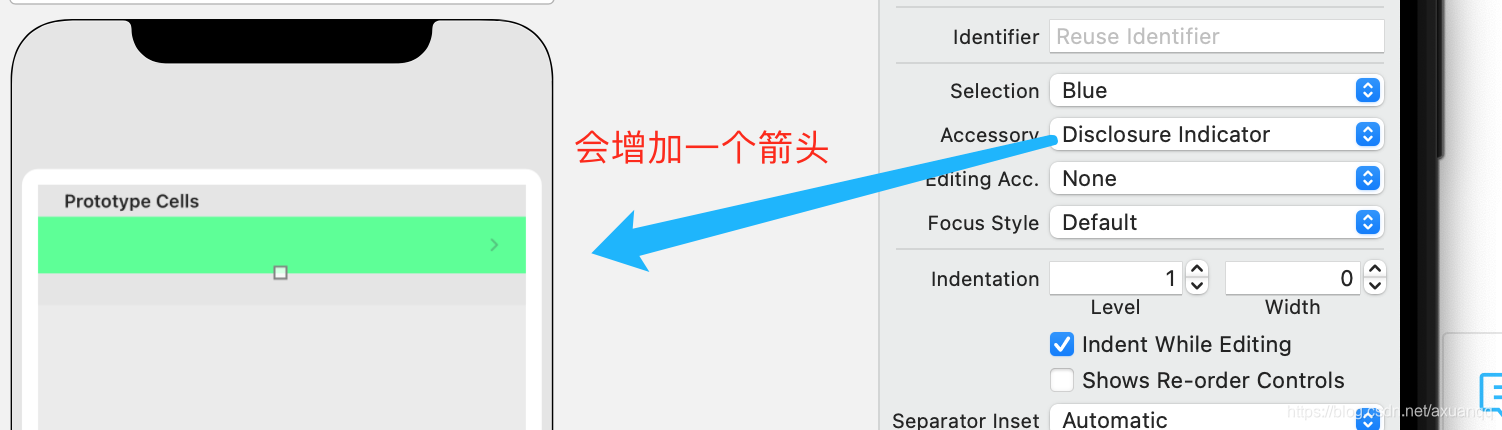

UITableViewCell的contentVIew
contentView默认有3个子视图
其中两个是uilabel(通过uitableViewCell的textlabel和detailTextLabel属性访问)
第三个是UIImageVIew(通过UITableViewCell的imageView属性访问)
UITableViewCell还有一个UITableVIewCellStyle属性 用于决定使用contentView的哪些子视图 以及这些子视图在contentView中的位置
basic 风格
subtitke风格:
rightDetails风格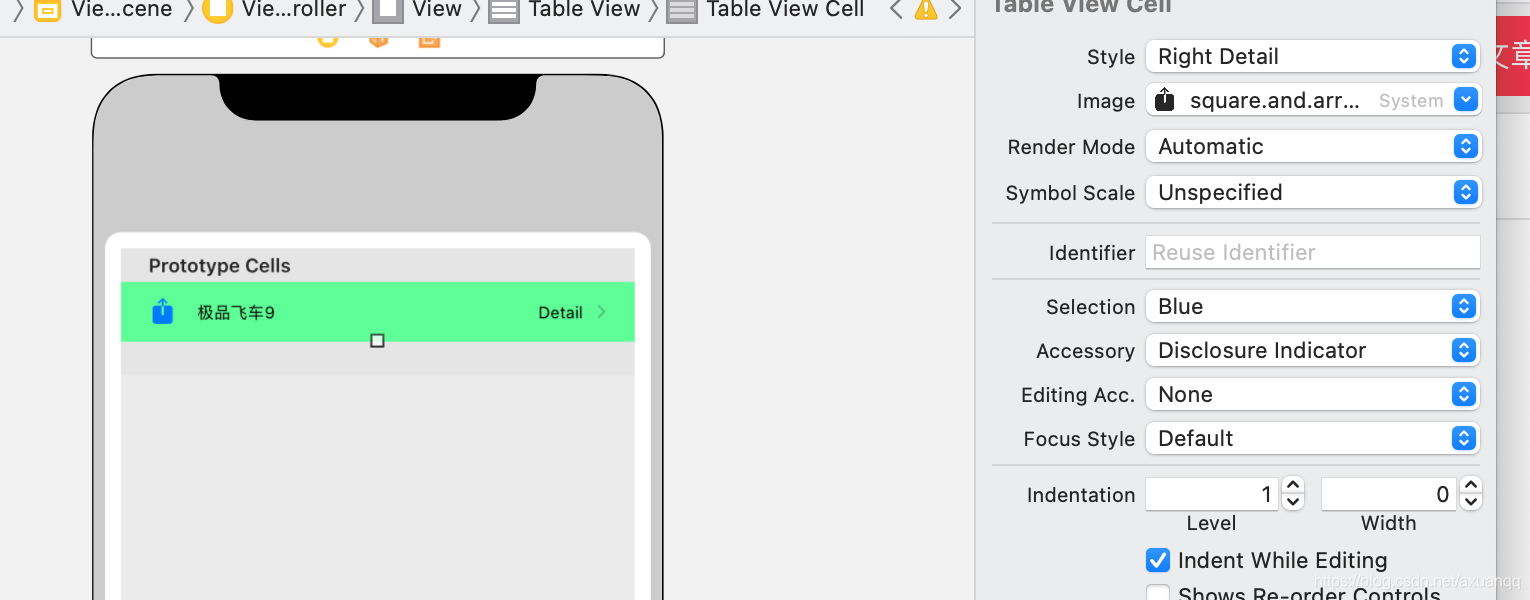
leftDetail风格:
UITableView 重用原理
是通过reuseIdentifier 标识来查找重用对象的
 UITableViewCell *cell=[tableView dequeueReusableCellWithIdentifier:@"abc"];
    if(cell==nil){
        cell=[[UITableViewCell alloc] initWithStyle:UITableViewCellStyleSubtitle reuseIdentifier:@"abc"];
    }
UITableView 数组作为数据源
#import "ViewController.h"

@interface ViewController ()<UITableViewDataSource>
@property(nonatomic,strong)NSArray *datas;
@end

@implementation ViewController

- (void)viewDidLoad {
    [super viewDidLoad];
    _datas=@[
        @"三星",@"华为",@"苹果",@"小米",@"OPPO",@"Vivo",@"LG",@"联想",@"酷派",@"索尼",@"洛基亚",@"朵唯",@"红米",@"荣耀"];
}
- (nonnull UITableViewCell *)tableView:(nonnull UITableView *)tableView cellForRowAtIndexPath:(nonnull NSIndexPath *)indexPath {
    UITableViewCell *cell=[tableView dequeueReusableCellWithIdentifier:@"abc"];
    if(cell==nil){
        cell=[[UITableViewCell alloc] initWithStyle:UITableViewCellStyleSubtitle reuseIdentifier:@"abc"];
    }
    //从对象池中查找
    NSLog(@"=====>obj  %ld :%p",(long)indexPath.row,cell);
    cell.textLabel.text=self.datas[indexPath.row];
    cell.textLabel.textColor=UIColor.redColor;


    cell.detailTextLabel.text=@"HELLO";
    cell.detailTextLabel.textColor=UIColor.redColor;


    cell.imageView.image=[UIImage imageNamed:@"filetype_default.png"];
    return cell;
}

- (NSInteger)tableView:(nonnull UITableView *)tableView numberOfRowsInSection:(NSInteger)section {
    return self.datas.count;
}


@end
UITableView 头部视图和尾部视图
- (NSString *)tableView:(UITableView *)tableView titleForHeaderInSection:(NSInteger)section{
    return @"头部XX";
}

- (NSString *)tableView:(UITableView *)tableView titleForFooterInSection:(NSInteger)section{
    return @"尾部视图";
}
UITableView 常见的代理方法
oc try catch finally
  @try
    {
        @throw [NSException exceptionWithName:@"异常" reason:@"模拟出现异常" userInfo:nil];
    }
    @catch(NSException *error)
    {
        NSLog(@"出现异常");
    }
    @finally{
        NSLog(@"最终执行");
    }
Object c 常见字符串处理
  NSString *str=@"我是中国人 我热爱中国";
    NSRange range=[str rangeOfString:@"中国人"];
    NSLog(@"=========>range:%lu,%lu",(unsigned long)range.location,(unsigned long)range.length);

    NSString *fileName=@"热爱.mp3";
    if([fileName hasSuffix:@".mp3"]){
        NSLog(@"=========>这是一个mp3文件");
    }

    NSString *url=@"http://www.baidu.com";
    if([url hasPrefix:@"http://"]){
        NSLog(@"这是一个网页");
    }

    NSString *subStr=[url substringFromIndex:6];
    NSLog(@"=====>截取字符串:%@",subStr);

    NSString *intStr=@"123";
    int value= [intStr intValue];
    NSLog(@"======>字符串转int %d",value);


    //字符串转大写
    NSString *sayLove=@"i love you";
    NSLog(@"=====>转换大写:%@",[sayLove uppercaseString]);

    NSString *sayLoveUpper=[sayLove uppercaseString];
    NSLog(@"=====>转换成小写:%@",[sayLoveUpper lowercaseString]);


    //依次判断unicode顺序
    NSComparisonResult result= [@"abc" compare:@"cde"];
    if(result==NSOrderedAscending)
    {
        NSLog(@"=======> 大于");
    }else if(result ==NSOrderedSame)
    {
        NSLog(@"=======> 等于");
    }else if(result==NSOrderedDescending)
    {
        NSLog(@"=======> 小于");
    }

    NSMutableString *mStr=[[NSMutableString alloc] initWithCapacity:20];
    [mStr appendString:@"hello"];
    [mStr appendString:@" world"];
    [mStr insertString:@"你好" atIndex:2];
    [mStr replaceCharactersInRange:NSMakeRange(3, 9) withString:@"替换"];
    NSLog(@"==========>可变字符串:%@",mStr);


 1360
1360


 被折叠的 条评论
为什么被折叠?
被折叠的 条评论
为什么被折叠?
 到【灌水乐园】发言


