


在重新布局之前,我们首先要弄清楚UIButton构成。
UIButton内部默认有个UIImageView、UILabel控件,可以分别用下面属性访问:
  @property(nonatomic,readonly,retain) UIImageView *imageView;
  @property(nonatomic,readonly,retain) UILabel     *titleLabel;

 UIButton之所以能显示文字,完全是因为它内部的titleLabel

 UIButton的setImage:forState:方法设置的图片显示到了内部的imageView上

注意
* 设置按钮的文字或文字颜色,必须用下面的方法
 - (void)setTitle:(NSString *)title forState:(UIControlState)state;
- (void)setTitleColor:(UIColor *)color forState:(UIControlState)state;
 #warnning 不能直接拿到titleLabel设置文字和文字颜色,比如下面的做法是错误的:
 button.titleLabel.text = @"12323";
 button.titleLabel.textColor = [UIColor redColor];

* 设置按钮内部的小图片,必须用下面的方法
 - (void)setImage:(UIImage *)image forState:(UIControlState)state;
 #warnning 不能直接拿到imageView设置图片,比如下面的做法是错误的:
 button.imageView.image = [UIImage imageNamed:@"abc.png"];
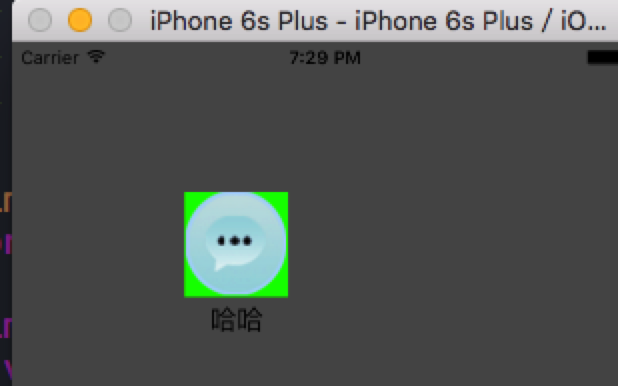
假设我们要得到这样的效果:
有两种方案:
1、完全自定义(View+button+Label)
2、对button 进行重新布局
在这里主要讲的是对button进行重新布局需要重写layoutSubviews方法。而该方法在什么时候进行触发呢:
1、 init初始化不会触发layoutSubviews
2、 addSubview会触发layoutSubviews
3、 设置view的Frame会触发layoutSubviews,当然前提是frame的值设置前后发生了变化
4、 滚动一个UIScrollView会触发layoutSubviews
5、 旋转Screen会触发父UIView上的layoutSubviews事件
6、 改变一个UIView大小的时候也会触发父UIView上的layoutSubviews事件
代码:
#import "LFCustomButton.h"
const double LFButtonScale =0.7;

@implementation LFCustomButton
-(void)layoutSubviews{//重写该方法
    [super layoutSubviews];
        //计算宽高
    float imgHeight = MIN(self.bounds.size.width, self.bounds.size.height*LFButtonScale);
    float imgWidth = imgHeight;
        //imageView的尺寸
    self.imageView.frame = CGRectMake((self.bounds.size.width - imgWidth)/2.0, 0,imgWidth, imgHeight);
        //titleLabel的尺寸
    self.titleLabel.frame = CGRectMake(0, self.bounds.size.height*LFButtonScale, self.bounds.size.width, self.bounds.size.height*(1-LFButtonScale));
    self.titleLabel.textAlignment = NSTextAlignmentCenter;
}
viewController.m
    self.view.backgroundColor = [UIColor darkGrayColor];

    LFCustomButton *btn = [LFCustomButton buttonWithType:UIButtonTypeCustom];
    btn.frame = CGRectMake(100, 100, 100, 100);
        //注意:在此不能使用[btn setBackgroundImage:[UIImage imageNamed:@"label_comment@3x"] forState:0],否则达不到想要的效果
    [btn setImage:[UIImage imageNamed:@"1111"] forState:0];
    [btn setTitle:@"哈哈" forState:0];
    [btn setTintColor:[UIColor redColor]];
    [btn setTitleColor:[UIColor blackColor] forState:0];
    [self.view addSubview:btn];
通过以上代码,就达到了我们想要的目的了。


 2688
2688


 被折叠的 条评论
为什么被折叠?
被折叠的 条评论
为什么被折叠?
 到【灌水乐园】发言


