


下面是通过一个实际例子来演示如何在Eclipse中安装RMI插件来编写RMIclient/server.
1) 下载RMI 插件到eclipse (luna R4.4.1)
从下面链接下载net.genady.rmi_2.5.1.zip
http://www.genady.net/rmi/v20/downloads.html
2) 解压这个zip文件,把里面的features 和 plugins 拷贝到 eclipse的运行目录如 (D:\tools\ecllipse\install package\luna\eclipse)下面去。
3)重新启动eclipse,你就可以看到这个界面
注意上面新建的位于中间的Control RMI图标。
下面就用过实际代码来演示如何建立在同一个pc上来运行server and client,例子过程见这里
http://www.genady.net/rmi/v20/demos/
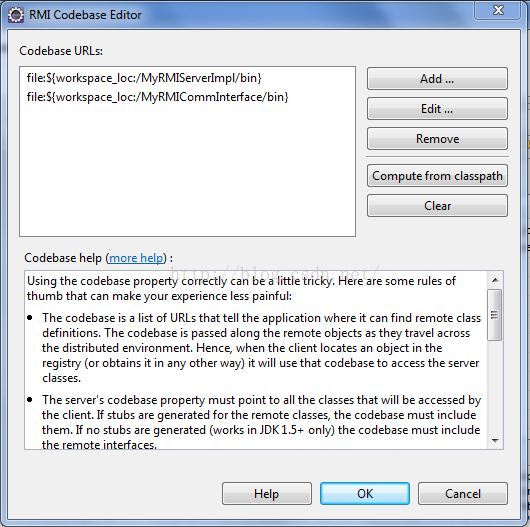
注意,如果client and server运行在the same server,则client必须也要增加codebase,正如如下图示一样,而上面page的那个例子却没有这步,你会碰到client找到不stub的错误,折腾好久才知道,codebase的含义,请见我的另外一篇文章说codebase的含义。
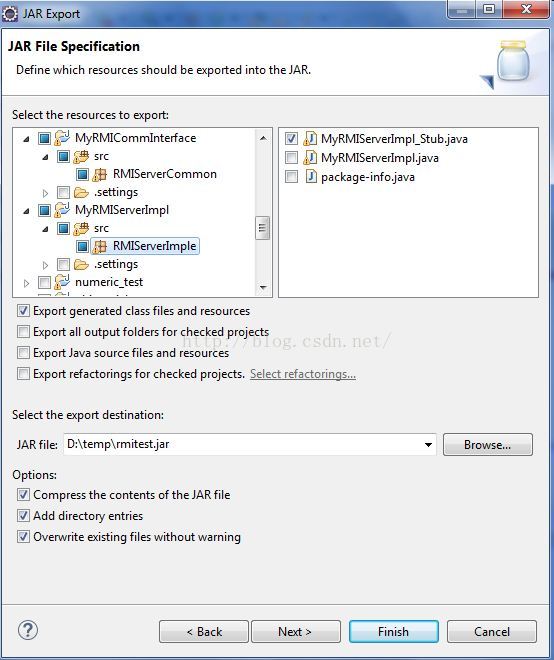
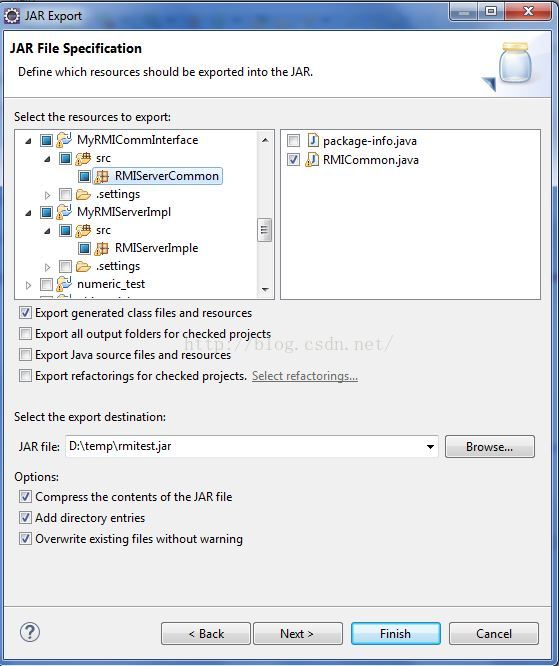
1)把server的stub和common interface以jar文件方式输出到本地的一个目录下面。如下所示。
2. 然后在client中,增加codebase来指向这个存放Jar的目录。
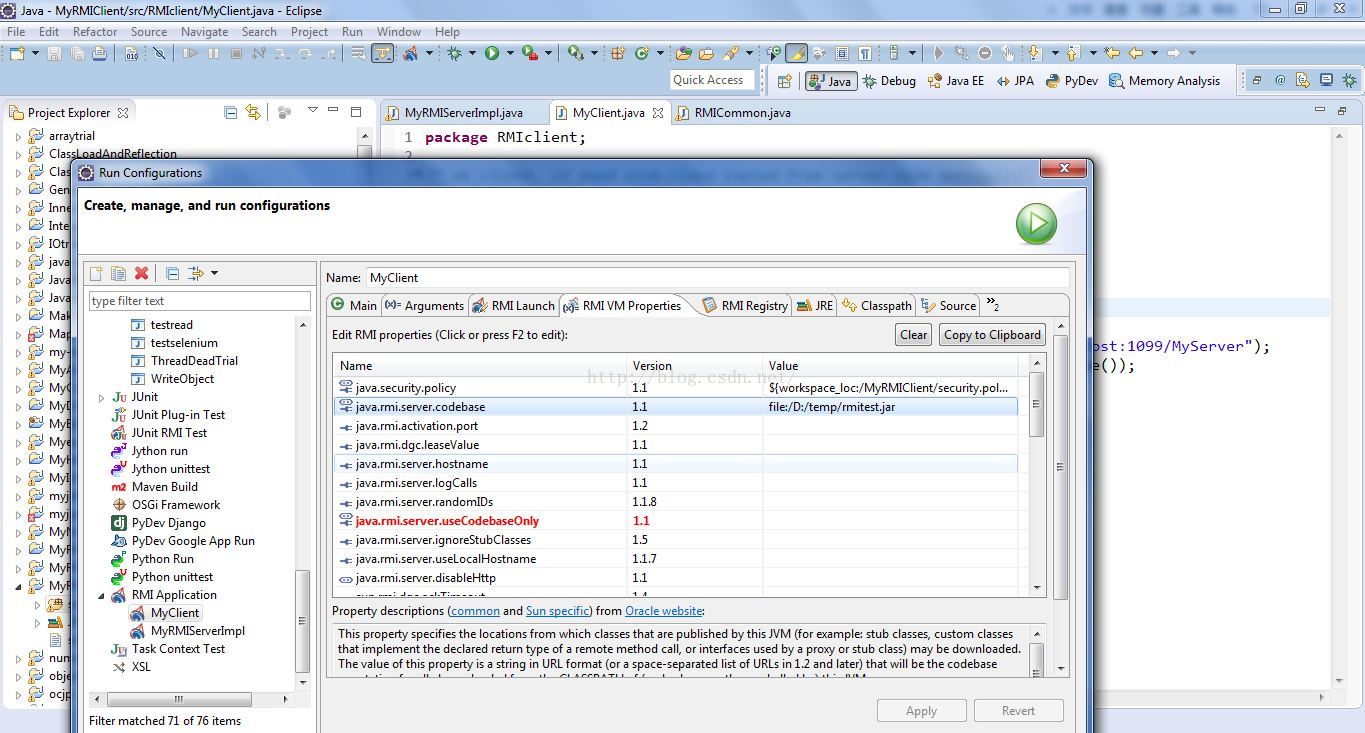
3)server的codebase设置如下:
4)然后先运行rmi registry on 1099(单击RMI Control按钮就可以了)
5)运行server
6)启动client,就可以看到输出了。
这个例子具体的步骤就看 http://www.genady.net/rmi/v20/demos/ 里面那个“Running both on the same machine ”例子,注意上面的不同就可以了(即client必须要设置codebase)
代码如下:
common.java
==================================================
package RMIServerCommon;
import java.io.Serializable;
import java.rmi.Remote;
import java.rmi.RemoteException;
public interface RMICommon extends Remote{
/** This is a sample method. Delete it and add one of your own. */
public String getName() throws RemoteException;
}
server.java
===============================
package RMIServerImple;
import java.rmi.RemoteException;
import java.rmi.server.UnicastRemoteObject;
import java.rmi.registry.*;
import java.rmi.Naming;
import RMIServerCommon.*;
public class MyRMIServerImpl extends UnicastRemoteObject implements RMICommon {
String mysername=null;
MyRMIServerImpl() throws RemoteException {
mysername="this is RMI server";
}
@Override
public String getName() throws RemoteException {
// TODO Auto-generated method stub
return "MyServer::getName() called: its value is "+mysername;
}
public static void main(String[] args) {
try {
MyRMIServerImpl testRemote = new MyRMIServerImpl();
Registry r=LocateRegistry.getRegistry();
r.bind("MyServer", testRemote);
//Naming.rebind("rmi://localhost:1099/MyServer", testRemote);
System.out.println("My RMI server is ready");
} catch (Exception e) {
// TODO Auto-generated catch block
e.printStackTrace();
}
}
}
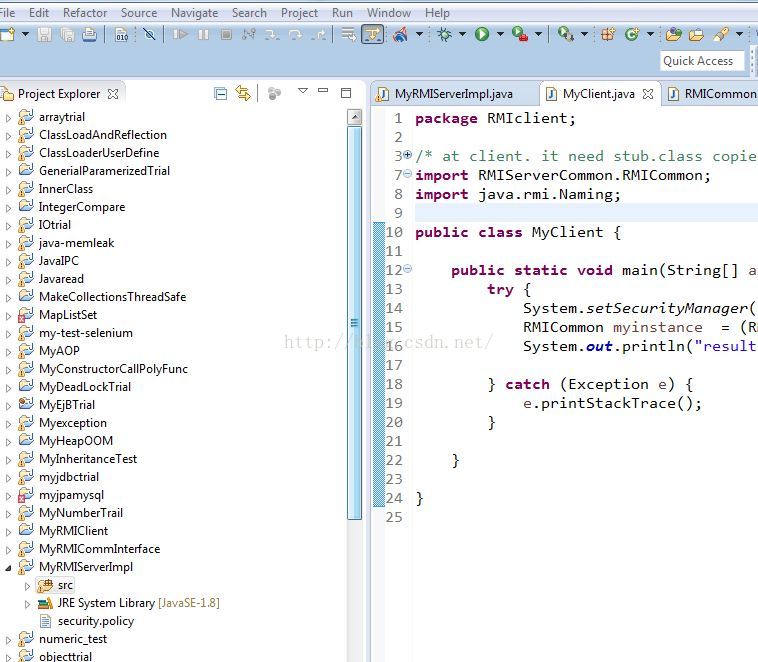
client.java
==================
package RMIclient;
/* at client. it need stub.class copied from server side mannually
* or at Eclipse, it also can use RMI editor to import server side stub.class
*
*/
import RMIServerCommon.RMICommon;
import java.rmi.Naming;
public class MyClient {
public static void main(String[] args) {
try {
System.setSecurityManager(new SecurityManager());
RMICommon myinstance = (RMICommon)Naming.lookup("rmi://localhost:1099/MyServer");
System.out.println("result from server is= "+myinstance.getName());
} catch (Exception e) {
e.printStackTrace();
}
}
}


 255
255


 被折叠的 条评论
为什么被折叠?
被折叠的 条评论
为什么被折叠?
 到【灌水乐园】发言


