


第一种:Intent方式
Intent分为两种,一种是显式Intent,只适合在同一进程内的不同组件之间通信,例如 new Intent(this,Target.class).
另外一种是隐式Intent,在AndroidMainifest.xml中注册,一般可以用户跨进程通信,例如new Intent(String action).
下面就介绍隐式Intent跨进程通信的例子:
Project A 中的代码比较简单,主要就是在的button onClick事件中:
button.setOnClickListener(new OnClickListener()
        {
            @Override public void onClick(View v)
            {
                Intent intent = new Intent();
                intent.setAction("com.example.IPCByIntent");
                intent.putExtra("data", "this is ipc by intent");
                startActivity(intent);

            }
        });
其中intent.SetAction里面的值是Project B中定义的。
在Project B中的AndroidMainifest.xml,在MainActivity的第二个intent-filter中,添加在Project A中用到的action值
      <activity
            android:name="com.example.adildemo.MainActivity"
            android:label="@string/app_name" >
            <intent-filter>
                <action android:name="android.intent.action.MAIN" />

                <category android:name="android.intent.category.LAUNCHER" />
            </intent-filter>
            <intent-filter>
                <action android:name="com.example.IPCByIntent"/>
                <category android:name="android.intent.category.DEFAULT"/>
            </intent-filter>
        </activity>
在Project B的MainActivity.java的OnCreate方法中,添加如下代码
       Intent intent = this.getIntent();
       if(null != intent.getStringExtra("data")){
           tv.setText(intent.getStringExtra("data"));
       }
Intent 可以非常方便的通信,但是它是非实时的,无法进行实时的像函数调用那样的实时通信。
第二种方式:AIDL方式
AIDL方式应该是应用的比较多的一种方式,下面介绍一个简单的例子来实现用AIDL解决进程之间的数据传递。
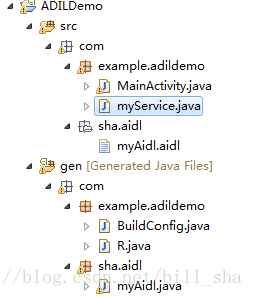
有两个Project,AIDLDemo 和AIDLDemoClient,AIDLDemo里面有一个Service,我们当作是Server Project,另外一个AIDLDemoClient我们当作是Client.
首先看Server Project,首先新建一个File,myAidl.aidl,注意后缀名要是.aidl.其实就是一个接口文件,在该文件中:
1.我们不需要使用public,protected,private等修饰符.
2.对于基本类型,如int,String等我们不需要import.
3.如果在文件中引用别的aidl文件接口,需要import进来,即使在一个包下面也需要import.
package com.sha.aidl;

interface myAidl{
   int add(int x,int y);
   String get();
}
然后在AndroidMainifest.xml中注册静态Service如下:
        <service android:name="com.example.adildemo.myService">
            <intent-filter >
                <action android:name="com.example.adildemo.myService"/>
            </intent-filter>

        </service>
这里面核心的步骤就是定义了一个 myAidl.Stub的 Binder,然后在onBinder函数里面,返回这个Binder.
package com.example.adildemo;

import android.app.Service;
import android.content.Intent;
import android.os.IBinder;
import android.os.RemoteException;

import com.sha.aidl.myAidl;

public class myService extends Service
{
    @Override public IBinder onBind(Intent intent)
    {
        return myBinder;
    }

    private myAidl.Stub myBinder = new myAidl.Stub()
    {

        @Override public int add(int x, int y) throws RemoteException
        {
            return x + y;
        }

        @Override public String get() throws RemoteException
        {
            return "test";
        }

    };
}
至此,Server Project的工作就完成了。
下面看看Client Project的内容:
把ADILDemo里面的myAidl.aidl拷贝到ADILDemo_Client项目中,注意myAidl.aidl的包名一定要一致,如果不一致会出现错误。
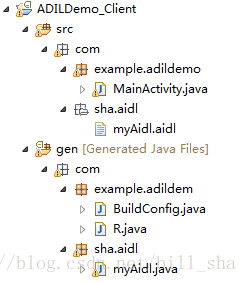
在ADIDemo_Client的MainActivity.java文件中:
首先在OnCreate函数里面,绑定Service,定义一个ServiceConnection变量,通过调用myAidl.stub.asInterface(IBinder)方法获取myAidl变量,然后调用myAidl变量的get方法
package com.example.adildemo;

import android.app.Activity;
import android.content.ComponentName;
import android.content.Context;
import android.content.Intent;
import android.content.ServiceConnection;
import android.os.Bundle;
import android.os.IBinder;
import android.os.RemoteException;
import android.view.View;
import android.view.View.OnClickListener;
import android.widget.Button;
import android.widget.TextView;
import android.widget.Toast;

import com.example.adildem.R;
import com.sha.aidl.myAidl;

public class MainActivity extends Activity
{
    private Button button;
    private myAidl aidl;
    private TextView tv;

    private ServiceConnection sc = new ServiceConnection()
    {

        @Override public void onServiceDisconnected(ComponentName name)
        {
            aidl = null;

        }

        @Override public void onServiceConnected(ComponentName name, IBinder service)
        {
           aidl = myAidl.Stub.asInterface(service);

        }
    };

    @Override protected void onCreate(Bundle savedInstanceState)
    {
        super.onCreate(savedInstanceState);
        setContentView(R.layout.activity_main);

        button = (Button)findViewById(android.R.id.button1);
        tv = (TextView)findViewById(android.R.id.text1);

        Intent intent = new Intent("com.example.adildemo.myService");
        bindService(intent, sc, Context.BIND_AUTO_CREATE);

     /*  Intent intent = this.getIntent();
       if(null != intent.getStringExtra("data")){
           tv.setText(intent.getStringExtra("data"));
       }*/

        button.setOnClickListener(new OnClickListener()
        {

            @Override public void onClick(View v)
            {

                String result = "";
                try
                {
                    result = aidl.get();
                }
                catch (RemoteException e)
                {
                    // TODO Auto-generated catch block
                    e.printStackTrace();
                }
                Toast.makeText(MainActivity.this, result+"", Toast.LENGTH_SHORT).show();
            }
        });

    }

}
先运行AIDLDemo project,再运行AIDLDemoClient project,点击button,弹出toast,表示client调用server成功
第三种方式:Messenger方式
在AndroidMainifest.xml中注册静态Service如下:
        <service android:name="com.example.aidldemomessager.myService">
            <intent-filter>
                <action android:name="com.example.aidldemomessager.myService"/>
            </intent-filter>
        </service>
Service文件:
package com.example.aidldemomessager;

import android.app.Service;
import android.content.Intent;
import android.os.Handler;
import android.os.IBinder;
import android.os.Message;
import android.os.Messenger;
import android.widget.Toast;

public class myService extends Service
{

    private Handler serviceHandler = new Handler(){

        @Override public void handleMessage(Message msg)
        {
            Toast.makeText(getApplicationContext(), "test", Toast.LENGTH_LONG).show();
        }

    };

    private Messenger messager = new Messenger(serviceHandler);

    @Override public IBinder onBind(Intent intent)
    {
        return messager.getBinder();
    }

}
MainActivity文件
package com.example.aidldemomessager;


import android.app.Activity;
import android.content.ComponentName;
import android.content.Context;
import android.content.Intent;
import android.content.ServiceConnection;
import android.os.Bundle;
import android.os.IBinder;
import android.os.Message;
import android.os.Messenger;
import android.os.RemoteException;
import android.view.View;
import android.view.View.OnClickListener;
import android.widget.Button;


public class MainActivity extends Activity
{


    private Button button;

    @Override protected void onCreate(Bundle savedInstanceState)
    {
        super.onCreate(savedInstanceState);
        setContentView(R.layout.activity_main);

        Intent intent = new Intent("com.example.aidldemomessager.myService");
        bindService(intent, sc, Context.BIND_AUTO_CREATE);

        button = (Button)findViewById(R.id.button);

        button.setOnClickListener(new OnClickListener()
        {

            @Override public void onClick(View v)
            {

                Message msg = new Message();
                msg.what = 1;
                try
                {
                    messenger.send(msg);
                }
                catch (RemoteException e)
                {
                    // TODO Auto-generated catch block
                    e.printStackTrace();
                }
            }
        });
    }


    private Messenger messenger;

    private ServiceConnection sc = new ServiceConnection()
    {

        @Override public void onServiceDisconnected(ComponentName name)
        {
            messenger = null;
        }

        @Override public void onServiceConnected(ComponentName name, IBinder service)
        {
            messenger = new Messenger(service);
        }
    };


}


 931
931


 被折叠的 条评论
为什么被折叠?
被折叠的 条评论
为什么被折叠?
 到【灌水乐园】发言


