


大多数应用程序都会在底部使用3~5个Tab对应用程序的主要功能进行划分,对于一些信息量非常大的应用程序,还需要在每个Tab下继续划分子Tab对信息进行分类显示.
本文实现采用FragmentTabHost+TabLayout+ViewPager实现双层嵌套Tab,实现原理如下:
第一层Tab:FragmentTabHost + Fragment;
第二层Tab:在第一层的Fragment中使用TabLayout和ViewPager实现.
第一层Tab实现:
1.布局文件activity_main.xml如下:

 1 <?xml version="1.0" encoding="utf-8"?>
 2 <android.support.v4.app.FragmentTabHost android:id="@android:id/tabhost"
 3     xmlns:android="http://schemas.android.com/apk/res/android"
 4     android:layout_width="match_parent"
 5     android:layout_height="match_parent">
 6
 7     <LinearLayout
 8         android:layout_width="match_parent"
 9         android:layout_height="match_parent"
10         android:orientation="vertical">
11         <FrameLayout
12             android:id="@android:id/tabcontent"
13             android:layout_width="match_parent"
14             android:layout_height="0dp"
15             android:layout_weight="1"/>
16
17         <TabWidget
18             android:id="@android:id/tabs"
19             android:layout_width="match_parent"
20             android:layout_height="?attr/actionBarSize"
21             android:layout_gravity="bottom"/>
22     </LinearLayout>
23
24 </android.support.v4.app.FragmentTabHost>
说明:其中FrameLayout用于显示内容,TabWidget用于显示标签。
2.底部Tab布局:view_tab_indicator.xml
<?xml version="1.0" encoding="utf-8"?>
<LinearLayout xmlns:android="http://schemas.android.com/apk/res/android"
    android:orientation="vertical" android:layout_width="match_parent"
    android:layout_height="wrap_content"
    android:gravity="center">

    <ImageView
        android:id="@+id/tab_iv_image"
        android:layout_width="26dp"
        android:layout_height="26dp"
        android:contentDescription="@null"/>

    <TextView
        android:id="@+id/tab_tv_text"
        android:layout_width="wrap_content"
        android:layout_height="wrap_content"
        android:layout_marginTop="1dp"
        android:textColor="#ff847d7b"
        android:textSize="12sp"/>

</LinearLayout>
底部Tab由一张图片和tab名称组成。
3.在mainActivity.java中定义一个内部类TabItem,用于表示底部tab:
 1     class TabItem {
 2         //正常情况下显示的图片
 3         private int imageNormal;
 4         //选中情况下显示的图片
 5         private int imagePress;
 6         //tab的名字
 7         private int title;
 8         private String titleString;
 9
10         //tab对应的fragment
11         public Class<? extends Fragment> fragmentClass;
12
13         public View view;
14         public ImageView imageView;
15         public TextView textView;
16
17         public TabItem(int imageNormal, int imagePress, int title,Class<? extends Fragment> fragmentClass) {
18             this.imageNormal = imageNormal;
19             this.imagePress = imagePress;
20             this.title = title;
21             this.fragmentClass =fragmentClass;
22         }
23
24         public Class<? extends  Fragment> getFragmentClass() {
25             return fragmentClass;
26         }
27         public int getImageNormal() {
28             return imageNormal;
29         }
30
31         public int getImagePress() {
32             return imagePress;
33         }
34
35         public int getTitle() {
36             return  title;
37         }
38
39         public String getTitleString() {
40             if (title == 0) {
41                 return "";
42             }
43             if(TextUtils.isEmpty(titleString)) {
44                 titleString = getString(title);
45             }
46             return titleString;
47         }
48
49         public View getView() {
50             if(this.view == null) {
51                 this.view = getLayoutInflater().inflate(R.layout.view_tab_indicator, null);
52                 this.imageView = (ImageView) this.view.findViewById(R.id.tab_iv_image);
53                 this.textView = (TextView) this.view.findViewById(R.id.tab_tv_text);
54                 if(this.title == 0) {
55                     this.textView.setVisibility(View.GONE);
56                 } else {
57                     this.textView.setVisibility(View.VISIBLE);
58                     this.textView.setText(getTitleString());
59                 }
60                 this.imageView.setImageResource(imageNormal);
61             }
62             return this.view;
63         }
64
65         //切换tab的方法
66         public void setChecked(boolean isChecked) {
67             if(imageView != null) {
68                 if(isChecked) {
69                     imageView.setImageResource(imagePress);
70                 }else {
71                     imageView.setImageResource(imageNormal);
72                 }
73             }
74             if(textView != null && title != 0) {
75                 if(isChecked) {
76                     textView.setTextColor(getResources().getColor(R.color.main_botton_text_select));
77                 } else {
78                     textView.setTextColor(getResources().getColor(R.color.main_bottom_text_normal));
79                 }
80             }
81         }
82     }
4.初始化Tab数据:
1     //初始化Tab数据
2     private void initTabData() {
3         mTableItemList = new ArrayList<>();
4         //添加tab
5         mTableItemList.add(new TabItem(R.drawable.main_bottom_home_normal,R.drawable.main_bottom_home_press,R.string.main_home_text, TestFragment1.class));
6         mTableItemList.add(new TabItem(R.drawable.main_bottom_attention_normal,R.drawable.main_bottom_attention_press,R.string.main_attention_text, TestFragment2.class));
7         mTableItemList.add(new TabItem(R.drawable.main_bottom_mine_normal,R.drawable.main_bottom_mine_press,R.string.main_mine_text, TestFragment3.class));
8
9     }
5.初始化选项卡视图:
 1 //初始化主页选项卡视图
 2     private void initTabHost() {
 3         //实例化FragmentTabHost对象
 4         FragmentTabHost fragmentTabHost = (FragmentTabHost) findViewById(android.R.id.tabhost);
 5         fragmentTabHost.setup(this,getSupportFragmentManager(),android.R.id.tabcontent);
 6
 7         //去掉分割线
 8         fragmentTabHost.getTabWidget().setDividerDrawable(null);
 9
10         for (int i = 0; i<mTableItemList.size(); i++) {
11             TabItem tabItem = mTableItemList.get(i);
12             //实例化一个TabSpec,设置tab的名称和视图
13             TabHost.TabSpec tabSpec = fragmentTabHost.newTabSpec(tabItem.getTitleString()).setIndicator(tabItem.getView());
14             fragmentTabHost.addTab(tabSpec,tabItem.getFragmentClass(),null);
15
16             //给Tab按钮设置背景
17             fragmentTabHost.getTabWidget().getChildAt(i).setBackgroundColor(getResources().getColor(R.color.main_bottom_bg));
18
19             //默认选中第一个tab
20             if(i == 0) {
21                 tabItem.setChecked(true);
22             }
23         }
24
25         fragmentTabHost.setOnTabChangedListener(new TabHost.OnTabChangeListener() {
26             @Override
27             public void onTabChanged(String tabId) {
28                 //重置Tab样式
29                 for (int i = 0; i< mTableItemList.size(); i++) {
30                     TabItem tabitem = mTableItemList.get(i);
31                     if (tabId.equals(tabitem.getTitleString())) {
32                         tabitem.setChecked(true);
33                     }else {
34                         tabitem.setChecked(false);
35                     }
36                 }
37             }
38         });
39     }
6.在oncreate()中调用以上两个方法:
1     @Override
2     protected void onCreate(Bundle savedInstanceState) {
3         super.onCreate(savedInstanceState);
4         setContentView(R.layout.activity_main);
5         initTabData();
6         initTabHost();
7     }
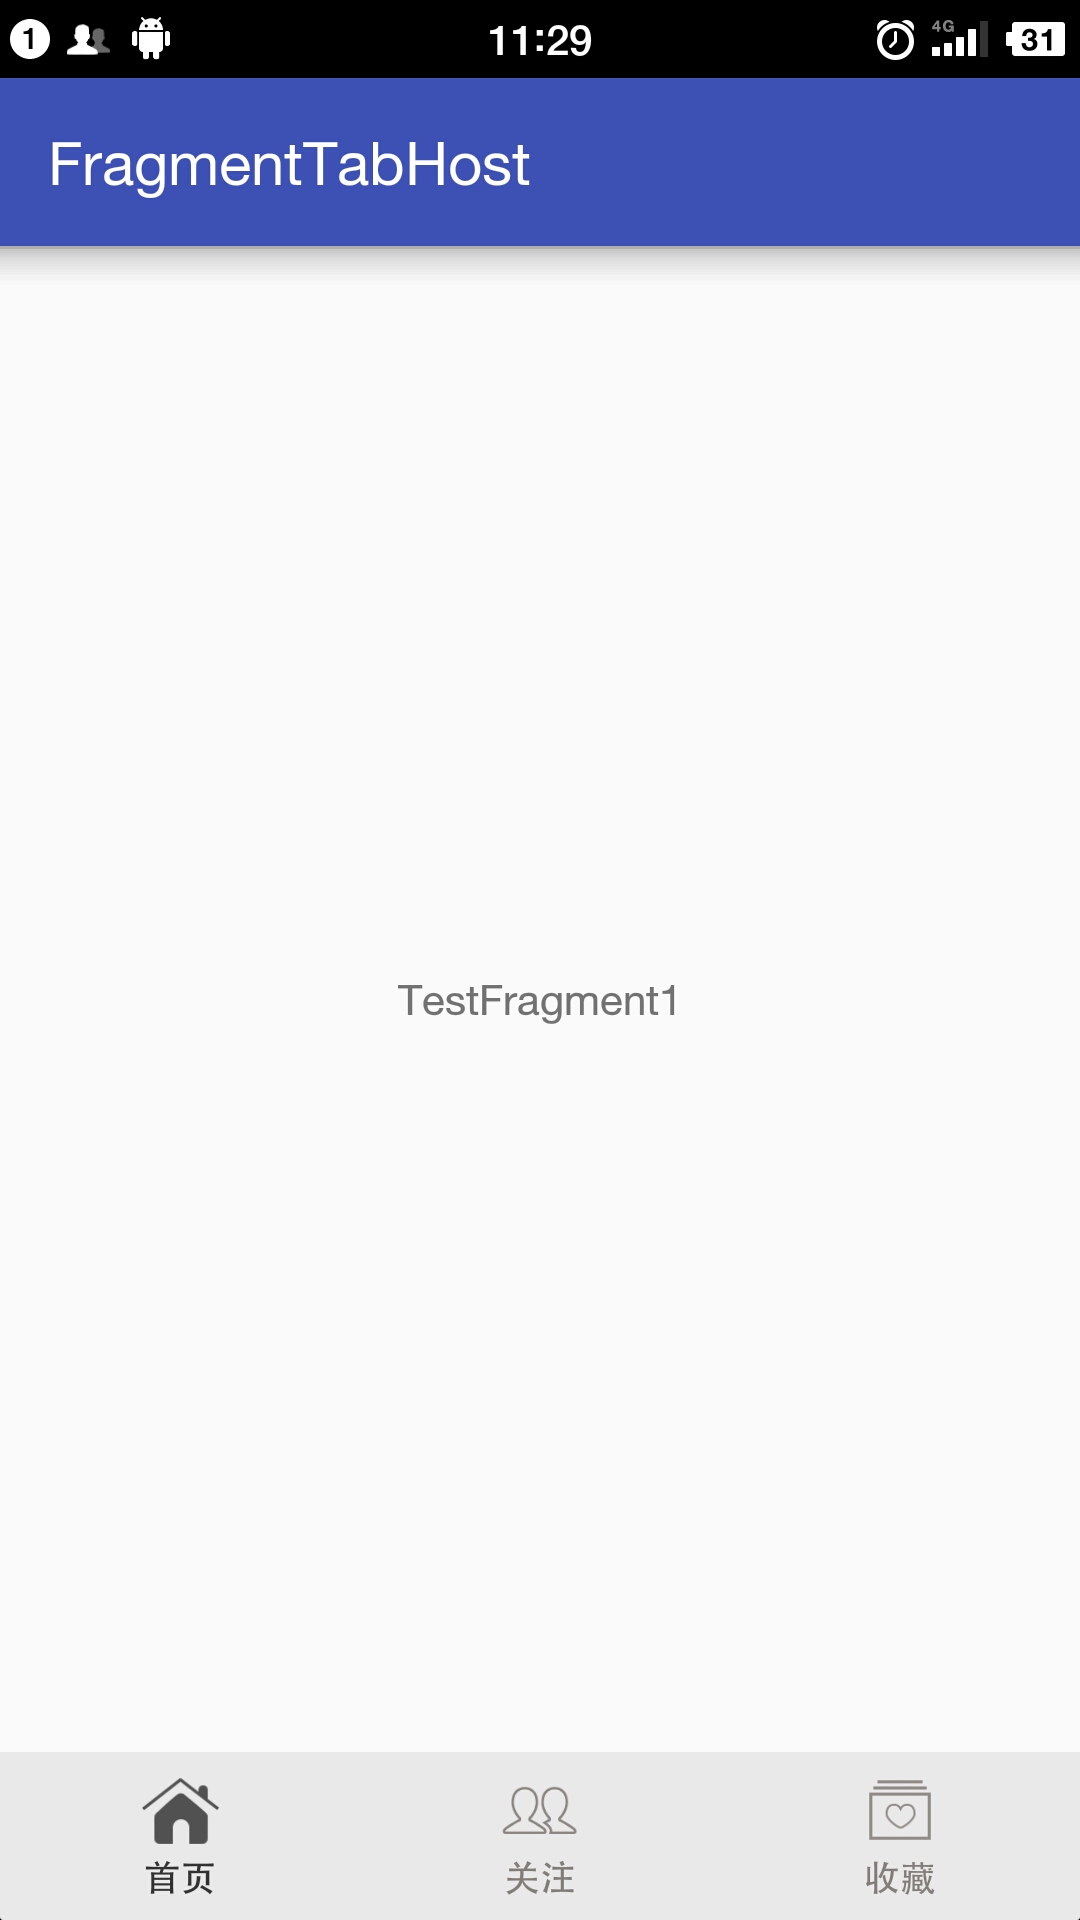
至此,第一层tab实现完成,效果如下图所示:
第二层Tab实现:
第二层的tab基于第一层中的Fragment实现,本文使用了TabLayout和ViewPager。
注意:在使用TabLayout之前需要添加依赖包,例如在build.gradle中添加compile 'com.android.support:design:23.3.0'。
1.第二层tab的布局文件:
 1 <LinearLayout xmlns:android="http://schemas.android.com/apk/res/android"
 2     xmlns:app="http://schemas.android.com/apk/res-auto"
 3     android:layout_width="match_parent"
 4     android:layout_height="match_parent"
 5     android:clickable="true"
 6     android:orientation="vertical">
 7
 8
 9     <android.support.design.widget.TabLayout
10         android:id="@+id/tab_essence"
11         android:layout_width="match_parent"
12         android:layout_height="40dp"
13         android:background="@color/essence_tab_bg"
14         app:tabMode="scrollable"
15         app:tabSelectedTextColor="@color/essence_tab_text_color_press"
16         app:tabTextColor="@color/essence_tab_text_color_normal"
17         app:tabIndicatorColor="@color/essence_tab_text_color_press"/>
18
19     <android.support.v4.view.ViewPager
20         android:id="@+id/vp_essence"
21         android:layout_width="match_parent"
22         android:layout_height="match_parent"
23         app:layout_behavior="@string/appbar_scrolling_view_behavior" />
24
25 </LinearLayout>
其中TabLayout用于显示子tab,VierPager用于显示子tab对应的内容。
2.在strings.xml中配置标签数据:
1     <array name="home_video_tab">
2         <item>全部@dream@0</item>
3         <item>视频@dream@1</item>
4         <item>声音@dream@2</item>
5         <item>图片@dream@3</item>
6         <item>段子@dream@4</item>
7         <item>广告@dream@5</item>
8         <item>剧情@dream@6</item>
9     </array>
3.定义显示在ViewPager中的Fragment:
 1 public class ContentFragment extends Fragment {
 2
 3     private View viewContent;
 4     private int mType = 0;
 5     private String mTitle;
 6
 7
 8     public void setType(int mType) {
 9         this.mType = mType;
10     }
11
12     public void setTitle(String mTitle) {
13         this.mTitle = mTitle;
14     }
15
16
17     @Nullable
18     @Override
19     public View onCreateView(LayoutInflater inflater, @Nullable ViewGroup container, @Nullable Bundle savedInstanceState) {
20         //布局文件中只有一个居中的TextView
21         viewContent = inflater.inflate(R.layout.fragment_content,container,false);
22         TextView textView = (TextView) viewContent.findViewById(R.id.tv_content);
23         textView.setText(this.mTitle);
24
25         return viewContent;
26     }
27
28 }
4.定义ViewPager的adapter:
 1 //继承FragmentStatePagerAdapter
 2 public class TestFragmentAdapter extends FragmentStatePagerAdapter {
 3
 4     public static final String TAB_TAG = "@dream@";
 5
 6     private List<String> mTitles;
 7
 8     public TestFragmentAdapter(FragmentManager fm, List<String> titles) {
 9         super(fm);
10         mTitles = titles;
11     }
12
13     @Override
14     public android.support.v4.app.Fragment getItem(int position) {
15         //初始化Fragment数据
16         ContentFragment fragment = new ContentFragment();
17         String[] title = mTitles.get(position).split(TAB_TAG);
18         fragment.setType(Integer.parseInt(title[1]));
19         fragment.setTitle(title[0]);
20         return fragment;
21     }
22
23     @Override
24     public int getCount() {
25         return mTitles.size();
26     }
27
28     @Override
29     public CharSequence getPageTitle(int position) {
30         return mTitles.get(position).split(TAB_TAG)[0];
31     }
32 }
5.Fragment具体实现:
 1 public class TestFragment1 extends android.support.v4.app.Fragment{
 2
 3     private View viewContent;
 4     private TabLayout tab_essence;
 5     private ViewPager vp_essence;
 6
 7     @Nullable
 8     @Override
 9     public View onCreateView(LayoutInflater inflater, @Nullable ViewGroup container, @Nullable Bundle savedInstanceState) {
10         viewContent = inflater.inflate(R.layout.fragment_test_1,container,false);
11         initConentView(viewContent);
12         initData();
13
14         return viewContent;
15     }
16
17     public void initConentView(View viewContent) {
18         this.tab_essence = (TabLayout) viewContent.findViewById(R.id.tab_essence);
19         this.vp_essence = (ViewPager) viewContent.findViewById(R.id.vp_essence);
20     }
21
22     public void initData() {
23         //获取标签数据
24         String[] titles = getResources().getStringArray(R.array.home_video_tab);
25
26         //创建一个viewpager的adapter
27         TestFragmentAdapter adapter = new TestFragmentAdapter(getFragmentManager(), Arrays.asList(titles));
28         this.vp_essence.setAdapter(adapter);
29
30         //将TabLayout和ViewPager关联起来
31         this.tab_essence.setupWithViewPager(this.vp_essence);
32     }
33 }
至此,第二层tab实现完成,效果如下:

总结:
1.本文实现的双层嵌套Tab使用到了FragmentTabHost,Fragment,ViewPager和TabLayout.
2.内外层的实现是解耦的,外层实现使用的是FragmentTabHost+Fragment,内层的实现是对外层Fragment的扩展,实现方式是使用TabLayout+VierPager。


 1219
1219


 被折叠的 条评论
为什么被折叠?
被折叠的 条评论
为什么被折叠?
 到【灌水乐园】发言


