


在这里,我将手把手教你从SSH项目到Maven项目。
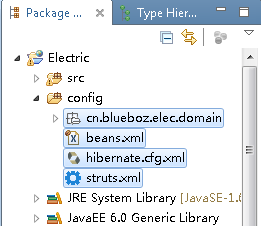
首先,我们在MyEclipse下有一个项目叫Electric
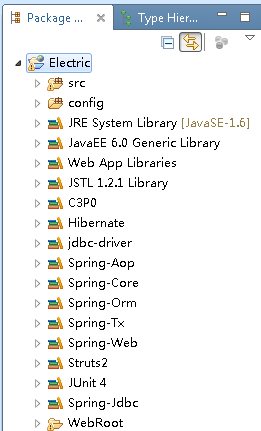
看到这么多的引入的包,想死的心都有了,有木有?
很多初学者肯定有很多疑问,这么多的依赖包我要怎么管理。确实。很难管理。在没有Maven前,第三方jar包的导入就是这样。有了maven之后就好了。只要在配置文件pom.xml中(Project Object Model)把依赖配置copy下。得了。可以写代码了,不用操心jar包的导入问题喽!!
具体怎么搞?
懂得怎么创建Maven项目的同学跳过这一部分,直接到开始移植项目
新建Maven项目
File->New->Web Project。有盆友肯定会奇怪了。不是新建Maven项目按吗。没错就是Web Project,只不过在新建项目的时候,把这个勾勾给勾上!切记!!!(Add Maven Support)
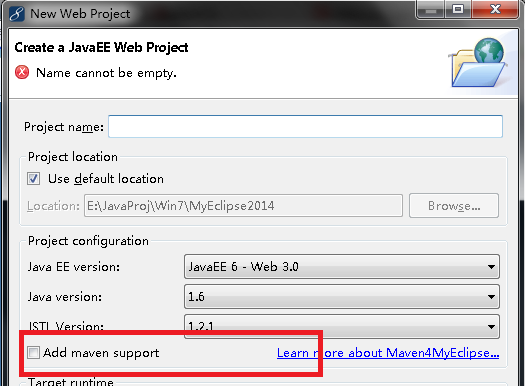
下面这个勾勾打上,不打也可以,不过要记得自己添加web.xml
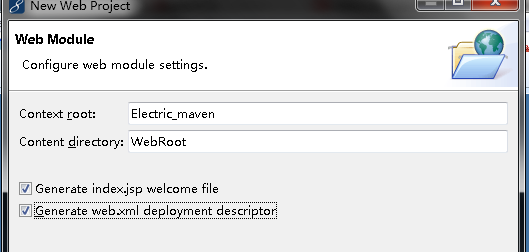
下面这里要注意啦,选择MyEclipse JEE Project ,那么将不是Maven规范,是我们普通项目。这里我选择Standard Maven JEE project struture,满足Maven约束。不这样做也可以,个人习惯。

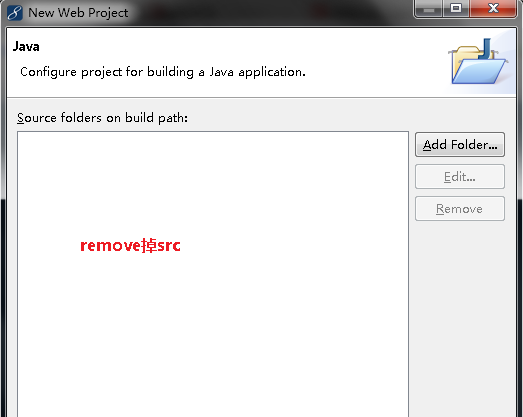
点击下一步,出现叫我们导包的界面。这里把勾勾都去掉

因为这些Jar包都是MyEclipse中自带的jar包,没有需要让maven为我们管理。免得pom.xml文件过大。点击Finish完成Maven项目的创建。
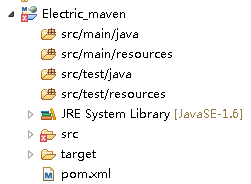
这时候,项目报错了,报错的原因是因为没有导入JavaEE5.0的支持。因为上一步我们把它勾掉了。现在我就来导入,导入大家都会导入吧。点击项目->右键->Build Path->Add Library->MyEclipse Library,在弹出的对话框中输入JavaEE,出现
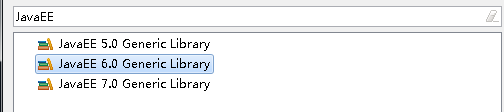
双击JavaEE 6.0 Generic Library。OK,项目没有报错了,说明我们所做正确。
接下来就是移植项目了。
开始移植项目
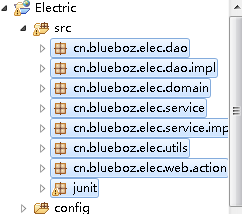
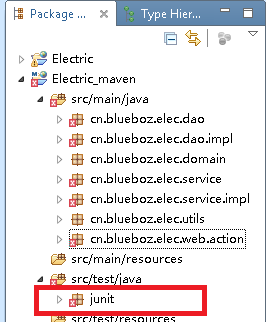
选中原来的项目,选中src包下所有的包。ctrl+c复制
到我们新建的maven项目下ctrl+v粘贴
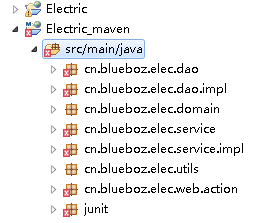
报错不要紧。
因为项目中有一部分是junit测试的,我把他移动到src/test/java目录下
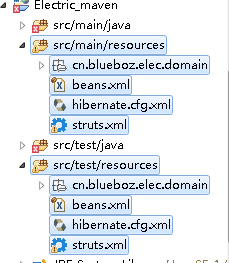
接下来是把配置文件移动过来!就是config目录下的配置文件,移动到新项目的src/main/resources和src/test/resources文件夹下,test和main中都要有,因为测试时候读取的是测试目录下的资源,如果不拷贝一份,测试可能不会通过。下面是旧的工程下的config目录下的资源,选中他们
下面是拷贝之后的图,记得test里面也要有。
到了这里,基本上已经完成了80%了。
接下来web.xml文件。项目原型。
不说,看图

记得不要选META-INF 和WEB-INF
WEB-INF要选择目录下的lib(如果有) 还有web.xml
Ctrl+C复制
到新项目src/main/webapp下粘贴。
如果WEB-INF下有lib,记得build path
重点来了,配置pom.xml
把这一段加入到pom.xml
记得,拷贝标签里面的到你的pom.xml文件中的标签里面。之所以全部粘出来是怕有些人看不懂
<project xmlns="http://maven.apache.org/POM/4.0.0" xmlns:xsi="http://www.w3.org/2001/XMLSchema-instance"
xsi:schemaLocation="http://maven.apache.org/POM/4.0.0 http://maven.apache.org/xsd/maven-4.0.0.xsd">
<modelVersion>4.0.0</modelVersion>
<groupId>Electric_mvn</groupId>
<artifactId>Electric_mvn</artifactId>
<version>0.0.1-SNAPSHOT</version>
<packaging>war</packaging>
<name>Electric_mvn</name>
<description />
<properties>
<project.build.sourceEncoding>UTF-8</project.build.sourceEncoding>
</properties>
<!--记得从这里看是拷贝,依赖部分-->
<dependencies>
<!-- spring 3.0.2需要的jar包 -->
<dependency>
<groupId>org.springframework</groupId>
<artifactId>spring-context</artifactId>
<version>3.0.2.RELEASE</version>
</dependency>
<dependency>
<groupId>org.springframework</groupId>
<artifactId>spring-orm</artifactId>
<version>3.0.2.RELEASE</version>
</dependency>
<dependency>
<groupId>org.springframework</groupId>
<artifactId>spring-aspects</artifactId>
<version>3.0.2.RELEASE</version>
</dependency>
<dependency>
<groupId>org.springframework</groupId>
<artifactId>spring-web</artifactId>
<version>3.0.2.RELEASE</version>
</dependency>
<dependency>
<groupId>org.springframework</groupId>
<artifactId>spring-test</artifactId>
<version>3.0.2.RELEASE</version>
</dependency>
<!-- Struts 2.3.3需要的jar包 -->
<dependency>
<groupId>org.apache.struts</groupId>
<artifactId>struts2-core</artifactId>
<version>2.3.3</version>
</dependency>
<dependency>
<groupId>org.apache.struts</groupId>
<artifactId>struts2-json-plugin</artifactId>
<version>2.3.3</version>
</dependency>
<dependency>
<groupId>org.apache.struts</groupId>
<artifactId>struts2-spring-plugin</artifactId>
<version>2.3.3</version>
</dependency>
<!-- Hibernate核心包,需要的jar包 -->
<dependency>
<groupId>org.hibernate</groupId>
<artifactId>hibernate-core</artifactId>
<version>3.5.6-Final</version>
</dependency>
<!-- chcache需要的jar包 -->
<dependency>
<groupId>org.hibernate</groupId>
<artifactId>hibernate-ehcache</artifactId>
<version>3.6.5.Final</version>
</dependency>
<dependency>
<groupId>net.sf.ehcache</groupId>
<artifactId>ehcache</artifactId>
<version>1.5.0</version>
</dependency>
<!-- JPA -->
<dependency>
<groupId>org.hibernate.javax.persistence</groupId>
<artifactId>hibernate-jpa-2.0-api</artifactId>
<version>1.0.1.Final</version>
</dependency>
<!-- Servlet & Jsp需要的jar包 -->
<dependency>
<groupId>javax.servlet</groupId>
<artifactId>servlet-api</artifactId>
<version>2.5</version>
<scope>provided</scope>
</dependency>
<dependency>
<groupId>javax.servlet</groupId>
<artifactId>jsp-api</artifactId>
<version>2.0</version>
<scope>provided</scope>
</dependency>
<!-- log4j需要的jar包 -->
<dependency>
<groupId>org.slf4j</groupId>
<artifactId>slf4j-log4j12</artifactId>
<version>1.7.2</version>
</dependency>
<dependency>
<groupId>log4j</groupId>
<artifactId>log4j</artifactId>
<version>1.2.16</version>
</dependency>
<!-- C3P0需要的jar包 -->
<dependency>
<groupId>c3p0</groupId>
<artifactId>c3p0</artifactId>
<version>0.9.1.2</version>
</dependency>
<!-- mysql需要的jar包 -->
<dependency>
<groupId>mysql</groupId>
<artifactId>mysql-connector-java</artifactId>
<version>5.1.6</version>
</dependency>
<!-- junit需要的jar包 -->
<dependency>
<groupId>junit</groupId>
<artifactId>junit</artifactId>
<version>4.9</version>
<scope>test</scope>
</dependency>
</dependencies>
<!--拷贝到这里为止-->
<!--下面这些是MyEclipse自动生成的,我们不管-->
<build>
<plugins>
<plugin>
<artifactId>maven-compiler-plugin</artifactId>
<version>2.3.2</version>
<configuration>
<source>1.6</source>
<target>1.6</target>
</configuration>
</plugin>
<plugin>
<artifactId>maven-war-plugin</artifactId>
<version>2.2</version>
<configuration>
<version>3.0</version>
<failOnMissingWebXml>false</failOnMissingWebXml>
</configuration>
</plugin>
</plugins>
</build>
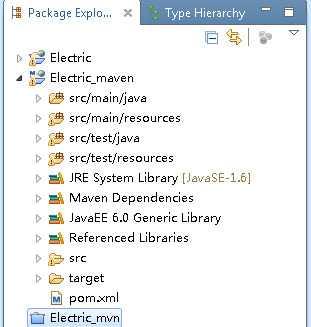
</project>下面这个是保存后的,可以看到,错误都没有了。
这样就大功告成了。
不过,往往新手到这里还是不行的。
还是报错!我在这里就折腾了很久。报错原因是没有更新索引。
错误处理
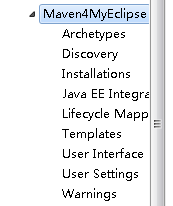
MyEclipse工具栏点击Windows->Preferences->MyEclipse->Maven4MyEclipse
首先点击Installations->Add(如果之前已经配置过了,可以跳过)
->选择Mave的所在目录,就是安装目录。
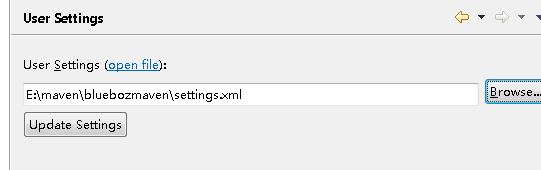
搞定之后,选择User setting点击Browser,到你的maven仓库。如果没有配置的话,默认是在C:\Users\Administrator.m2下的setting.xml,选中它。MyEclipse会自动更新目录。如果你在目录下找不到,你可以试着
C:\Users\用户名.m2这样子找。一个一个找。如果你配置了自定义仓库位置。但是又忘记仓库的所在位置。可以打开maven的安装目录下conf/settings.xml文件查看。
打开后你将会看到。
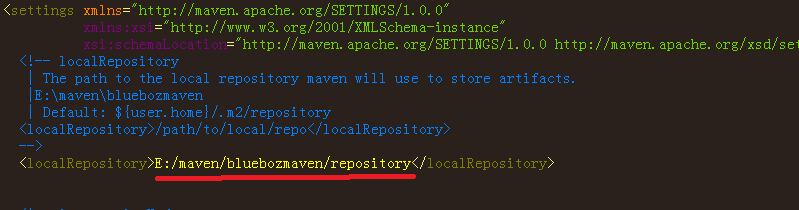
划线部分是仓库位置,如果没有配置的话,是没有的。注释掉那一部分就说明了默认仓库的位置。
好啦,回到MyEclipse,选择好了仓库下的settings.xml文件 后
在这里可能有人会有疑问,maven安装目录在conf/中有了settings.xml为什么要选择仓库的?全局配置不是更好吗。其实不然。你一个机子上难保只有一个仓库,所以,对于多仓库,需要不同配置。只有这样做才能够满足。
回到MyEclipse,点击Update Settings。接下来就是等。漫长的等待。
其实这里也有解决方案。我们知道,maven的中央仓库是在外国的服务器上的。在天朝,访问外国的服务器肯定慢了。
所以我们要把中央仓库配置为国内的maven.oschina.net这个。这样速度提高的不止10倍啊。
打开settings.xml文件。找到mirrors标签。在里面这样子配置。
  <mirrors>
     <!--这里配置的是中央库的地址,这里不是用官方库,因为官方库速度慢-->
    <mirror>
        <id>nexus-osc</id>
        <mirrorOf>*</mirrorOf>
        <name>Nexus osc</name>
        <url>http://maven.oschina.net/content/groups/public/</url>
    </mirror>
  </mirrors>
还有就是profile标签中也要配置。这里是配置补丁的位置
<profiles>
    <profile>
        <id>jdk-1.4</id>

        <activation>
            <jdk>1.4</jdk>
        </activation>

        <repositories>
            <repository>
                <id>nexus</id>
                <name>local private nexus</name>
                <url>http://maven.oschina.net/content/groups/public/</url>
                <releases>
                    <enabled>true</enabled>
                </releases>
                <snapshots>
                    <enabled>false</enabled>
                </snapshots>
            </repository>
        </repositories>
        <pluginRepositories>
            <pluginRepository>
                <id>nexus</id>
                <name>local private nexus</name>
                <url>http://maven.oschina.net/content/groups/public/</url>
                <releases>
                    <enabled>true</enabled>
                </releases>
                <snapshots>
                    <enabled>false</enabled>
                </snapshots>
            </pluginRepository>
        </pluginRepositories>
    </profile>

  </profiles>
大功告成


 513
513

 被折叠的 条评论
为什么被折叠?
被折叠的 条评论
为什么被折叠?
 到【灌水乐园】发言


