How to use GitHub with Android Studio
This article will explain how to use GitHub with Android Studio.
Firstly, let’s login to github.com and create a new repository. From the top right corner of the screen, click the +sign and select New repository.

Now complete the form to create a new repository called testproject. Leave the Initialize this repository with a README unticked.

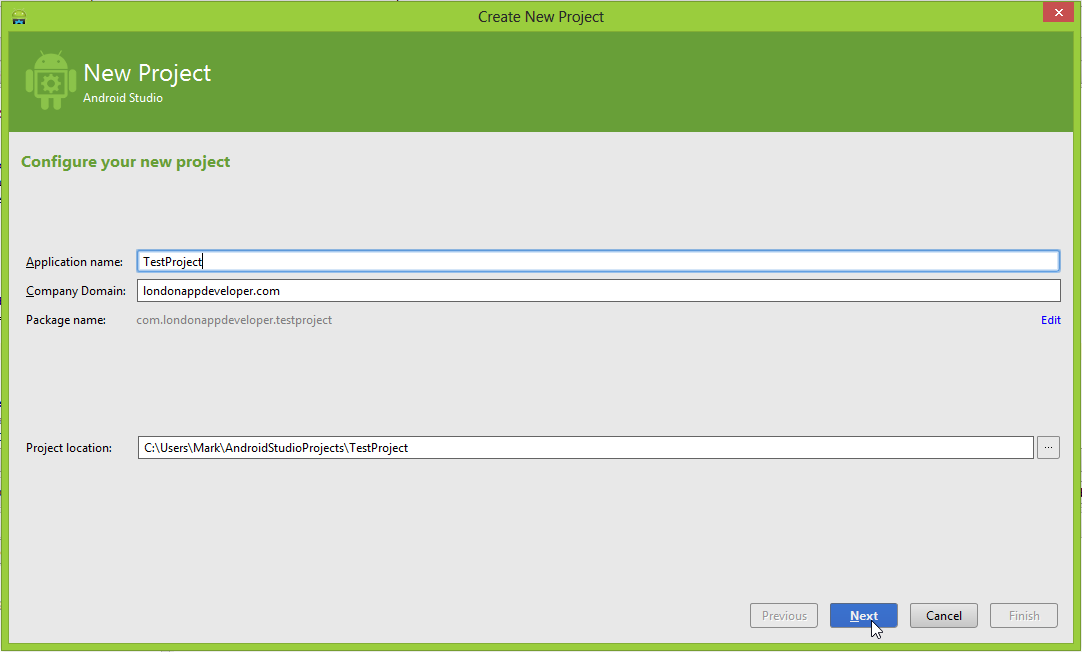
Next, open Android Studio and create a new project. Call your new application TestProject. Click Next to continue.

Leave the next page as default and click Next.

On the Add an activity to Mobile screen select Blank Activity and click Next.

In the next screen, leave the default activity name of MyActivity and click Finish.

Your new project will open in Android Studio. On the top menu, select VCS > Import into Version Control >Create Git Repository.

On the next screen, leave it all as default and click OK.

Now use Internet Explorer and navigate to the root of your projects folder. Right click and select Git Bash (If you do not see this option, then first install Git for Windows).
When the Git bash screen appears, type:
|
1
|
git remote add origin https:
//github
.com/[username]/[project_name].git
|
An example of a Git repository URL is: https://github.com/markwint/testproject.git

Then press enter. The GitHub remote will be added to your Git repository.
Next, jump back into Android Studio, right click your projects root directory and select Git > Add. This will add all your project files to your Git repository.

It will seem like nothing has happened, but trust me, the project files are added.
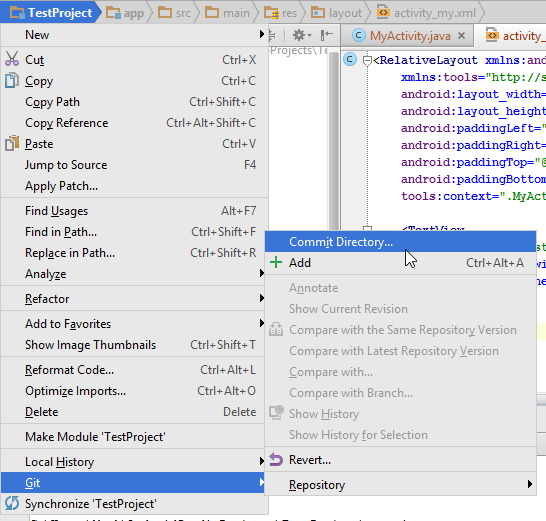
Now right click the project name again and this time select Git > Commit Directory.

In the next screen, type a Commit Message and select Commit.

If a Code Analysis warning appears, click Commit. (Unless it’s a real project, in which case review and fix the issue before committing!)

Now, right click the project name, select Git > Repository > Push.

Check the box Push current branch to alternative branch and leave the branch name as master. Then select push.

Now enter your GitHub Login (email address) and Password. Then click OK.

If it’s all good, you will see this message.

Now your code is pushed to your GitHub repository. Don’t believe me? Logon and check for yourself.

Hope that was helpful.


 2934
2934


 被折叠的 条评论
为什么被折叠?


