


 本文介绍了一种在SWT应用程序中实现ScrolledComposite组件复用的方法,通过将ScrolledComposite封装成独立类SubScrollCompsite,提高了组件的可重用性和维护性。文章详细展示了如何创建该组件类,并在SWTApplicationWindow类中使用。
本文与文章《 SWT应用之:随机RGB颜色、ScrolledComposite控件的使用 》实现相同的效果和功能,只是实现的方式不同。
文章《 SWT应用之:随机RGB颜色、ScrolledComposite控件的使用 》是采用直接实现的方式,就是所有的功能和组件都在同一个类中,这样不能达到组件重用,在其他类中使
用又要实现相同的功能。本文采用SWT 组件的功能,对ScrolledComposite控件进行分离实现,使之成为一个公用组件,能够被其他类使用。
开始分步骤进行实现:
A:分离ScrolledComposite控件,新建一个类,继承ScrolledComposite控件类。实现ScrolledComposite类的构造方法。代码如下:
package com.swtcomponent;

import java.io.File;
import java.io.FileInputStream;
import java.io.IOException;

import org.eclipse.swt.SWT;
import org.eclipse.swt.custom.ScrolledComposite;
import org.eclipse.swt.events.SelectionAdapter;
import org.eclipse.swt.events.SelectionEvent;
import org.eclipse.swt.graphics.Color;
import org.eclipse.swt.graphics.Image;
import org.eclipse.swt.graphics.ImageData;
import org.eclipse.swt.layout.GridData;
import org.eclipse.swt.layout.GridLayout;
import org.eclipse.swt.layout.grouplayout.GroupLayout;
import org.eclipse.swt.layout.grouplayout.LayoutStyle;
import org.eclipse.swt.widgets.Button;
import org.eclipse.swt.widgets.Composite;
import org.eclipse.swt.widgets.Display;
import org.eclipse.swt.widgets.Group;
import org.eclipse.swt.widgets.Label;
import org.eclipse.swt.widgets.ScrollBar;

public class SubScrollCompsite extends ScrolledComposite {
	private Composite composite;
	public Color color;

	public SubScrollCompsite(Composite parent, int count) {
		super(parent, SWT.BORDER | SWT.H_SCROLL | SWT.V_SCROLL);
		{
			showComposite(this,parent,count);
		}
		setContent(composite);
		setMinSize(composite.computeSize(SWT.DEFAULT, SWT.DEFAULT));
	}

	//设置ScrolledComposite相关属性
	private void setScrollBar(ScrolledComposite scrolledComposite){
		if (scrolledComposite != null) {
			ScrollBar vscrollBar = this.getVerticalBar();
			vscrollBar.setIncrement(100);
			super.setContent(composite);
			super.setExpandHorizontal(true);
			super.setExpandVertical(true);
			super.setMinSize(composite.computeSize(SWT.DEFAULT, SWT.DEFAULT));
			super.setFocus();
		}
	}

	//用于显示Composite里面的组件
	public void showComposite(ScrolledComposite scrolledComposite,Composite parent,int count) {
		if (scrolledComposite == null) {
			scrolledComposite = new ScrolledComposite(parent, SWT.BORDER | SWT.H_SCROLL | SWT.V_SCROLL);
		}
		composite = new Composite(scrolledComposite, SWT.NONE);
		GridLayout gridLayout = new GridLayout();
		gridLayout.numColumns = 5;
		composite.setLayout(gridLayout);
		{
			for (int i = 0; i < count; i++) {
				Group group_1 = new Group(composite, SWT.NONE);
				final Button button2 = new Button(group_1, SWT.NONE);
				Label label2 = new Label(group_1, SWT.NONE);
				group_1.setLayoutData(new GridData(SWT.CENTER, SWT.CENTER,
						true, true, 1, 1));
				{
					FileInputStream inputStream = null;
					try {
						inputStream = new FileInputStream(new File(".\\IMAGE\\a.jpg"));
						ImageData imageData = new ImageData(inputStream);
						button2.setImage(new Image(Display.getDefault(),imageData));
						color = new ProduceColor().produceColor();
						button2.setBackground(color);
						inputStream.close();
					} catch (IOException e) {
						e.printStackTrace();
					}
					button2.addSelectionListener(new SelectionAdapter() {
						@Override
						public void widgetSelected(SelectionEvent e) {
							color = button2.getBackground();
							ProduceColor.color = color;
						}
					});
				}
				{

					label2.setBounds(10, 40, 54, 12);
					label2.setText("Label" + i);
				}

				GroupLayout gl_group_1 = new GroupLayout(group_1);
				gl_group_1.setHorizontalGroup(gl_group_1.createParallelGroup(
						GroupLayout.LEADING).add(button2,
						GroupLayout.DEFAULT_SIZE, 90, Short.MAX_VALUE).add(
						GroupLayout.TRAILING,
						gl_group_1.createSequentialGroup().add(10).add(label2,
								GroupLayout.DEFAULT_SIZE, 101, Short.MAX_VALUE)
								.addContainerGap()));

				gl_group_1.setVerticalGroup(gl_group_1.createParallelGroup(
						GroupLayout.LEADING).add(
						GroupLayout.TRAILING,
						gl_group_1.createSequentialGroup().addContainerGap()
								.add(button2, GroupLayout.DEFAULT_SIZE, 84,
										Short.MAX_VALUE).addPreferredGap(
										LayoutStyle.UNRELATED).add(label2)
								.addContainerGap()));
				group_1.setLayout(gl_group_1);
			}
		}
		setScrollBar(scrolledComposite);
	}
}
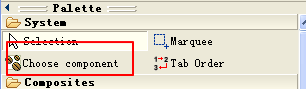
B:新建一个SWT Application Window类,通过选择上面的 SubScrollCompsite 为组件拖动到设计界面上进行布局。如下图:
然后,如图:
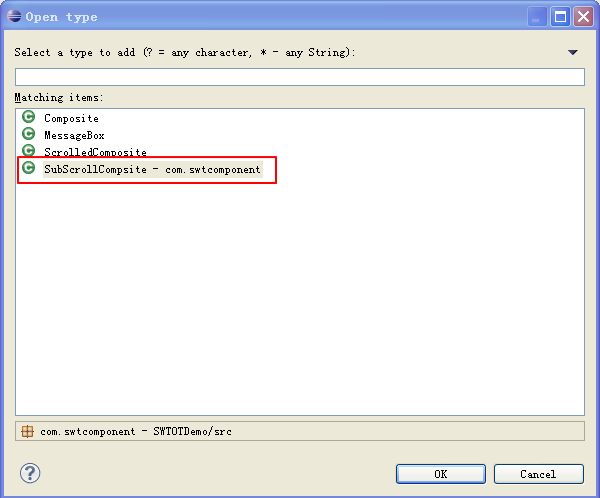
点击“OK”,这样就可以在设计界面上进行使用了。
(当然,也可以进行手动在代码中,进行添加组件)。
处理过后的源代码为:
package com.swtcomponent;

import org.eclipse.swt.SWT;
import org.eclipse.swt.events.MouseAdapter;
import org.eclipse.swt.events.MouseEvent;
import org.eclipse.swt.events.SelectionAdapter;
import org.eclipse.swt.events.SelectionEvent;
import org.eclipse.swt.graphics.Color;
import org.eclipse.swt.graphics.Font;
import org.eclipse.swt.graphics.GC;
import org.eclipse.swt.graphics.Rectangle;
import org.eclipse.swt.layout.FillLayout;
import org.eclipse.swt.layout.grouplayout.GroupLayout;
import org.eclipse.swt.widgets.Button;
import org.eclipse.swt.widgets.Canvas;
import org.eclipse.swt.widgets.Composite;
import org.eclipse.swt.widgets.Display;
import org.eclipse.swt.widgets.Shell;

public class DemoTest {

	protected Shell shell;
	private SubScrollCompsite subScrollCompsite;
	private Canvas canvas;

	/**
	 * Launch the application.
	 *
	 * @param args
	 */
	public static void main(String[] args) {
		try {
			DemoTest window = new DemoTest();
			window.open();
		} catch (Exception e) {
			e.printStackTrace();
		}
	}

	/**
	 * Open the window.
	 */
	public void open() {
		Display display = Display.getDefault();
		createContents();
		shell.open();
		shell.layout();
		while (!shell.isDisposed()) {
			if (!display.readAndDispatch()) {
				display.sleep();
			}
		}
	}

	/**
	 * Create contents of the window.
	 */
	protected void createContents() {
		shell = new Shell();
		shell.setSize(944, 664);
		shell.setText("SWT Application");
		shell.setLayout(new FillLayout(SWT.HORIZONTAL));
		Composite composite = new Composite(shell, SWT.NONE);
		{
			canvas = new Canvas(composite, SWT.BORDER);
			canvas.setBackground(new Color(Display.getDefault(), 200,200, 200));
			canvas.addMouseListener(new MouseAdapter() {
				@Override
				public void mouseDown(MouseEvent e) {
					GC gc = new GC(canvas);
					Rectangle rect = canvas.getClientArea();
					gc.fillRectangle(rect.x, rect.y, rect.width,rect.height);
					gc.setForeground(ProduceColor.color);
					Font font = new Font(Display.getDefault(),"Arial", 32, SWT.BOLD);
					gc.setFont(font);
					gc.drawText("SHOW TEXT", e.x, e.y);
				}
			});
		}
		Button btnbutton = new Button(composite, SWT.NONE);
		btnbutton.addSelectionListener(new SelectionAdapter() {
			@Override
			public void widgetSelected(SelectionEvent e) {
				showSomething(500);
			}
		});
		btnbutton.setText("500个Button");
		Button button_1 = new Button(composite, SWT.NONE);
		button_1.setText("改变字体颜色");
		GroupLayout gl_composite = new GroupLayout(composite);
		gl_composite.setHorizontalGroup(gl_composite.createParallelGroup(
				GroupLayout.LEADING).add(canvas, GroupLayout.DEFAULT_SIZE, 468,
				Short.MAX_VALUE).add(
				GroupLayout.TRAILING,
				gl_composite.createSequentialGroup().addContainerGap(125,
						Short.MAX_VALUE).add(button_1).add(68).add(btnbutton)
						.add(131)));
		gl_composite.setVerticalGroup(gl_composite.createParallelGroup(
				GroupLayout.LEADING).add(
				gl_composite.createSequentialGroup().add(canvas,
						GroupLayout.DEFAULT_SIZE, 479, Short.MAX_VALUE).add(48)
						.add(
								gl_composite.createParallelGroup(
										GroupLayout.BASELINE).add(btnbutton)
										.add(button_1)).add(81)));
		composite.setLayout(gl_composite);
		{
			showSomething(300);
		}
	}

	public void showSomething(int count) {
		if (subScrollCompsite == null) {
			subScrollCompsite = new SubScrollCompsite(shell, count);
		} else {
			subScrollCompsite.showComposite(subScrollCompsite, shell, count);
		}
	}
}
C:处理颜色的类为:
package com.swtcomponent;

import java.util.Random;

import org.eclipse.swt.graphics.Color;
import org.eclipse.swt.graphics.RGB;
import org.eclipse.swt.widgets.Display;

public class ProduceColor {
	public static Color color;
	public Color produceColor() {
		Random random = new Random();
		int red = random.nextInt(255);
		int green = random.nextInt(255);
		int blue = random.nextInt(255);
		System.out.println("(" + red + "," + green + "," + blue + ")");
		RGB rgb = new RGB(red, green, blue);
		Color color = new Color(Display.getDefault(), rgb);
		return color;
	}
}
D:实现完成,效果图为:
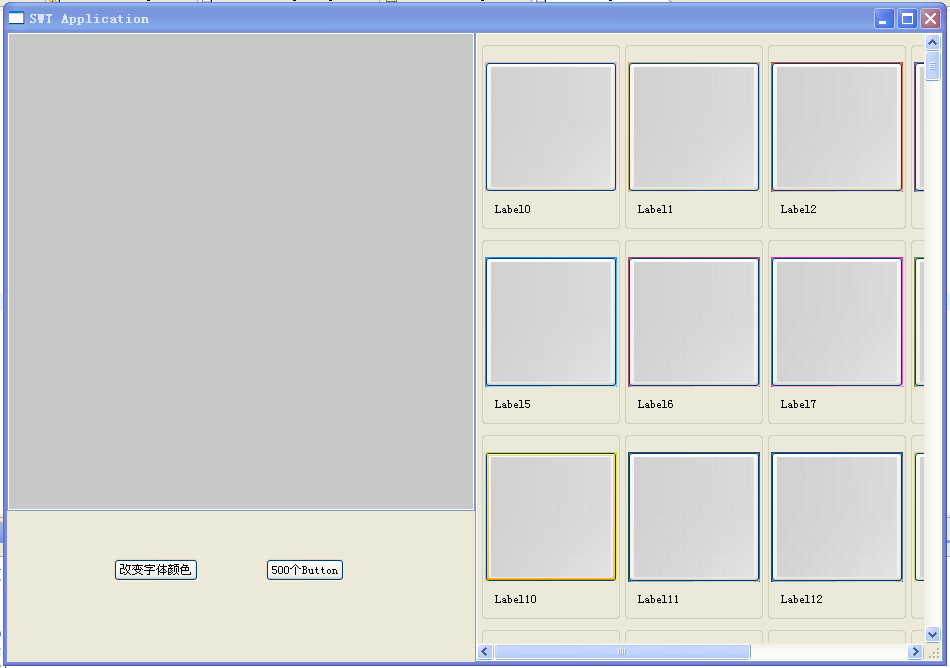
D:文章到此结束。
=========================== OVER ======================================


 601
601

 被折叠的 条评论
为什么被折叠?
被折叠的 条评论
为什么被折叠?
 到【灌水乐园】发言


