


在前面已经说过android的文件操作的2种方式了,这次就介绍一下文件的第三种操作,这种操作只要是用来设置软件参数的。在后面还会有基于数据库的操作,这次的这种文件操作比较简单,下面就一步步的来弄下这个小实验。
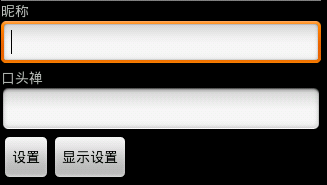
1.设置界面,提供昵称,口头禅以及相应文本框,2个按钮如下图所示
下面是strings.xml文件
<?xml version="1.0" encoding="utf-8"?>
<resources>
	<string name="hello">Hello World, PreferenceActivity!</string>
	<string name="app_name">参数操作</string>
	<string name="nickname">昵称</string>
	<string name="words">口头禅</string>
	<string name="button">设置</string>
	<string name="reset">显示设置</string>
	<string name="success">参数设置成功</string>
	<string name="tip">昵称和口头禅不能为空</string>
</resources>
接下来就是main.xml了,界面比较简单,该文件如下所示
<?xml version="1.0" encoding="utf-8"?>
<LinearLayout xmlns:android="http://schemas.android.com/apk/res/android"
    android:orientation="vertical"
    android:layout_width="fill_parent"
    android:layout_height="fill_parent"
    >
   <TextView
      android:layout_width="fill_parent"
      android:layout_height="wrap_content"
      android:text="@string/nickname"
    />
    <EditText
     android:layout_width="fill_parent"
      android:layout_height="wrap_content"
      android:id="@+id/nickname"
    />
     <TextView
      android:layout_width="fill_parent"
      android:layout_height="wrap_content"
      android:text="@string/words"
    />
    <EditText
      android:layout_width="fill_parent"
      android:layout_height="wrap_content"
      android:id="@+id/words"
    />
    <LinearLayout
    android:orientation="horizontal"
    android:layout_width="wrap_content"
    android:layout_height="wrap_content">
    <Button
     android:layout_width="wrap_content"
      android:layout_height="wrap_content"
      android:id="@+id/button"
      android:text="@string/button"
    />
    <Button
     android:layout_width="wrap_content"
      android:layout_height="wrap_content"
      android:id="@+id/reset"
      android:text="@string/reset"
    />
    </LinearLayout>
</LinearLayout>
2.编写activity,先保存设置
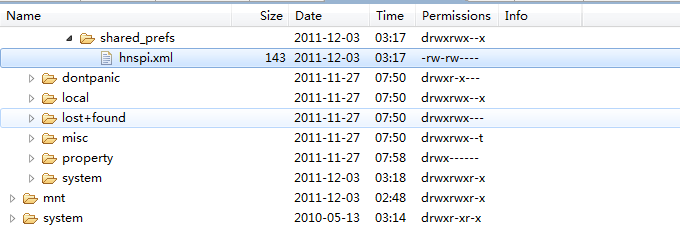
这里为了把执行效率和速度考虑在内,控件就单独拿了出来,后面通过事件监听保存设置。hnspi代表该文件的文件名称,后面是操作模式,保存之后弹出吐司,这里我没做非空控制。
private EditText username;
    private EditText userwords;
    public void onCreate(Bundle savedInstanceState) {
        super.onCreate(savedInstanceState);
        setContentView(R.layout.main);
        username=(EditText)findViewById(R.id.nickname);
        userwords=(EditText)findViewById(R.id.words);
        Button saveSet=(Button)findViewById(R.id.button);
        saveSet.setOnClickListener(new View.OnClickListener() {

			public void onClick(View v) {
				String nickname=username.getText().toString();  //取得文本框里的值
				String words=userwords.getText().toString();
				//开始保存参数
				SharedPreferences preference=getSharedPreferences("hnspi",Context.MODE_PRIVATE);
				Editor edit=preference.edit();  //取得编辑器
				/*
				 * 通过编辑器把内容写入xml,这里首先存储在内存中,之后commit
				 * */
				edit.putString("nickname", nickname);
				edit.putString("words", words);
				edit.commit();
				Toast.makeText(PreferenceActivity.this, R.string.success, 1).show();
			}
		});
需要注意的是最后要提交(commit),否则文件不会被保存
3.取出文件的内容,上面保存的是xml.使用参数取出昵称和口头禅显示在文本框了
 Button showSet=(Button)findViewById(R.id.reset);
        showSet.setOnClickListener(new View.OnClickListener() {

			public void onClick(View v) {
				SharedPreferences preference=getSharedPreferences("hnspi",Context.MODE_PRIVATE);
				String nickname=preference.getString("nickname", "");
				String words=preference.getString("words", "");
				username.setText(nickname);  //设置文本框的value
				userwords.setText(words);

			}
		});
到这里代码就写好了,学习android你我同行,有问题给我些留言啊。下面是效果截图


 881
881


 被折叠的 条评论
为什么被折叠?
被折叠的 条评论
为什么被折叠?
 到【灌水乐园】发言


