


啥都不说先看效果:
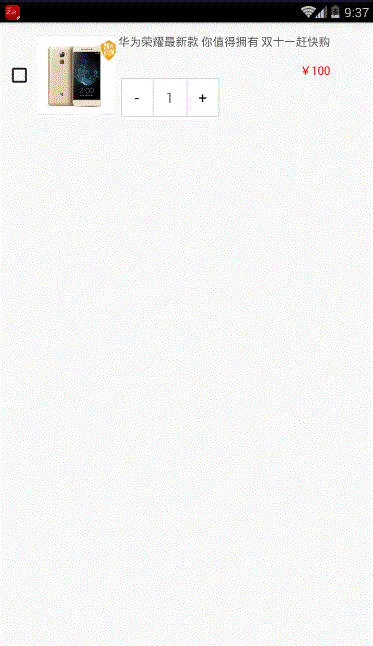
可实现:
1.加减功能
2.点击背景变色
3.有最大值和最小值限制
源码下载地址:https://github.com/junmei520/JMAddSubView
现如今,无论什么软件都避免不了陷入”盈利“的爱河。这也是人之常情,唯有资金全备,才会有下文可谈。于是乎,我也开始学习做与商城有关的项目啦。
我发现在商城购物车模块,这种简单的加减功能,如若直接零散地写在代码中,还要对它进行各种处理,会显得代码凌乱而臃肿。
于是我便把这个控件及其内部的处理逻辑都封装在一个类中,并对外提供接口,以方便外界监听到数字的变化,最后我还自定义了属性,以便设置默认值以及获取属性。
这样再用起来就特别方便了。
实现的思路
1.自定义加减控件的布局和样式
布局 number_add_sub_view.xml
<?xml version="1.0" encoding="utf-8"?>
<LinearLayout xmlns:android="http://schemas.android.com/apk/res/android"
android:layout_width="wrap_content"
android:layout_height="wrap_content"
android:background="@drawable/selector_number_add_sub"
android:orientation="horizontal">
<Button
android:id="@+id/btn_sub"
android:layout_width="wrap_content"
android:layout_height="wrap_content"
android:background="@drawable/bg_btn_style_white"
android:padding="5dp"
android:text="-"
android:textColor="#000000"
android:textSize="20sp" />
<TextView
android:id="@+id/tv_num"
android:layout_width="wrap_content"
android:layout_height="wrap_content"
android:gravity="center"
android:minWidth="100dp"
android:text="1" />
<Button
android:id="@+id/btn_add"
android:layout_width="wrap_content"
android:layout_height="wrap_content"
android:background="@drawable/bg_btn_style_white"
android:padding="5dp"
android:text="+"android:textColor="#000000"
android:textSize="20sp" />
</LinearLayout>
样式 selector_number_add_sub.xml
<?xml version="1.0" encoding="utf-8"?>
<shape xmlns:android="http://schemas.android.com/apk/res/android"
android:shape="rectangle">
<corners android:radius="2dp" />
<stroke
android:width="1dp"
android:color="#dddddd" />
<solid android:color="#FFFFFF" />
</shape>
按钮背景样式 bg_btn_style_white.xml
<?xml version="1.0" encoding="utf-8"?>
<selector xmlns:android="http://schemas.android.com/apk/res/android">
<item android:state_enabled="false">
<shape android:shape="rectangle">
<corners android:radius="2.0dp" />
<solid android:color="#7fd8d8d8" />
<stroke android:width="1.0dp"
android:color="#dddddd" />
</shape>
</item>
<item android:state_pressed="true">
<shape android:shape="rectangle">
<corners android:radius="2.0dp" />
<solid android:color="#ffd8d8d8" />
<stroke android:width="1.0dp"
android:color="#dddddd" />
</shape>
</item>
<item>
<shape android:shape="rectangle">
<corners android:radius="2.0dp" /><solid android:color="#ffffff" />
<stroke android:width="1.0dp"
android:color="#dddddd" />
</shape>
</item>
</selector>
2.自定义 NumberAddSubView 继承线性布局
public class NumberAddSubView extends LinearLayout {
private Button btn_sub;
private Button btn_add;
private TextView tv_num;
private Context mContext;
public NumberAddSubView(Context context) {
this(context, null);
}
public NumberAddSubView(Context context, AttributeSet attrs) {
this(context, attrs, 0);
}
public NumberAddSubView(Context context, AttributeSet attrs, int
defStyleAttr) {
super(context, attrs, defStyleAttr);
this.mContext = context;
initView(context);
}
private void initView(Context context) {
//第三个参数:把当前 View 加载到 NumberAddSubView 控件上
View.inflate(context, R.layout.number_add_sub_view, this);
btn_sub = (Button) findViewById(R.id.btn_sub);
btn_add = (Button) findViewById(R.id.btn_add);
tv_num = (TextView) findViewById(R.id.tv_num);}
}
3.设置点击事件
public class NumberAddSubView extends LinearLayout implements
View.OnClickListener {
private Button btn_sub;
private Button btn_add;
private TextView tv_num;
private Context mContext;
/**
* 设置默认值
*/
private int value = 1;
private int minValue = 1;
private int maxValue = 5;
public NumberAddSubView(Context context) {
this(context, null);
}
public NumberAddSubView(Context context, AttributeSet attrs) {
this(context, attrs, 0);
}
public NumberAddSubView(Context context, AttributeSet attrs, int
defStyleAttr) {
super(context, attrs, defStyleAttr);
this.mContext = context;
initView(context);
}
private void initView(Context context) {
//第三个参数:把当前 View 加载到 NumberAddSubView 控件上View.inflate(context, R.layout.number_add_sub_view, this);
btn_sub = (Button) findViewById(R.id.btn_sub);
btn_add = (Button) findViewById(R.id.btn_add);
tv_num = (TextView) findViewById(R.id.tv_num);
btn_sub.setOnClickListener(this);
btn_add.setOnClickListener(this);
}
public int getValue() {
String val = tv_num.getText().toString();
if (!TextUtils.isEmpty(val)) {
value = Integer.parseInt(val);
}
return value;
}
public void setValue(int value) {
this.value = value;
tv_num.setText(value + "");
}
public int getMinValue() {
return minValue;
}
public void setMinValue(int minValue) {
this.minValue = minValue;
}
public int getMaxValue() {
return maxValue;
}
public void setMaxValue(int maxValue) {
this.maxValue = maxValue;
}
@Override
public void onClick(View v) {
if (v.getId() == R.id.btn_sub) {
// Toast.makeText(mContext,"减",Toast.LENGTH_SHORT).show();subNum();
} else if (v.getId() == R.id.btn_add) {
// Toast.makeText(mContext,"加",Toast.LENGTH_SHORT).show();
addNum();
}
}
/**
* 减少数据
*/
private void subNum() {
if (value > minValue) {
value = value - 1;
tv_num.setText(value + "");
}
}
/**
* 添加数据
*/
private void addNum() {
if (value < maxValue) {
value = value + 1;
tv_num.setText(value + "");
}
}
}
4.提供接口,让外界监听到数字的变化
4.1设置接口
@Override
public void onClick(View v) {
if (v.getId() == R.id.btn_sub) {
// Toast.makeText(mContext,"减",Toast.LENGTH_SHORT).show();subNum();
if (onButtonClickListenter != null) {
onButtonClickListenter.onButtonSubClick(v, value);
}
} else if (v.getId() == R.id.btn_add) {
// Toast.makeText(mContext,"加",Toast.LENGTH_SHORT).show();
addNum();
if (onButtonClickListenter != null) {
onButtonClickListenter.onButtonAddClick(v, value);
}
}
}
public interface OnButtonClickListenter {
/**
* 当增加按钮被点击的时候回调该方法
* *
@param view
* @param value
*/
public void onButtonAddClick(View view, int value);
/**
* 当减少按钮被点击的时候回调这个方法
* *
@param view
* @param value
*/
public void onButtonSubClick(View view, int value);
}
private OnButtonClickListenter onButtonClickListenter;
public void setOnButtonClickListenter(OnButtonClickListenter
onButtonClickListenter) {
this.onButtonClickListenter = onButtonClickListenter;
}
4.2监听变化
public class MainActivity extends AppCompatActivity {
private NumberAddSubView nb_addsub_view;
@Override
protected void onCreate(Bundle savedInstanceState) {
super.onCreate(savedInstanceState);
setContentView(R.layout.activity_main);
nb_addsub_view = (NumberAddSubView)
findViewById(R.id.nb_addsub_view);
nb_addsub_view.setOnButtonClickListenter(new
NumberAddSubView.OnButtonClickListenter() {
@Override
public void onButtonAddClick(View view, int value) {
Toast.makeText(MainActivity.this,"AddClick
Vaule=="+value,Toast.LENGTH_SHORT).show();
}
@Override
public void onButtonSubClick(View view, int value) {
Toast.makeText(MainActivity.this,"SubClick
Vaule=="+value,Toast.LENGTH_SHORT).show();
}
});
}
}
5.自定义属性设置默认值并且获取属性
5.1在 value 目录下创建文件 number_add_sub_attrs.xml 内容
<?xml version="1.0" encoding="utf-8"?>
<resources>
<declare-styleable name="NumberAddSubView">
<attr name="value" format="integer|reference"/>
<attr name="minValue" format="integer|reference"/><attr name="maxValue" format="integer|reference"/>
<attr name="btnAddBackground" format="reference"/>
<attr name="btnSubBackground" format="reference"/>
<attr name="textViewBackground" format="reference"/>
</declare-styleable>
</resources>
5.2在布局文件中使用自定义属性(此处简写,具体看源代码)
<com.atguigu.numberaddsubview.NumberAddSubView
android:id="@+id/nb_addsub_view"
android:layout_width="wrap_content"
android:layout_height="wrap_content"
app:value="3"
app:minValue="3"
app:maxValue="10"
/>
5.3在代码中获取属性,并且设置值
@TargetApi(Build.VERSION_CODES.JELLY_BEAN)
public NumberAddSubView(Context context, AttributeSet attrs, int
defStyleAttr) {
super(context, attrs, defStyleAttr);
this.mContext = context;
initView(context);
//得到属性
if (attrs != null) {
TintTypedArray a = TintTypedArray.obtainStyledAttributes(context,
attrs, R.styleable.NumberAddSubView, defStyleAttr, 0);
int value = a.getInt(R.styleable.NumberAddSubView_value, 0);
setValue(value);
int maxValue = a.getInt(R.styleable.NumberAddSubView_maxValue, 0);
setMaxValue(maxValue);
int minValue = a.getInt(R.styleable.NumberAddSubView_minValue, 0);
setMinValue(minValue);
Drawable btnSubBackground =
a.getDrawable(R.styleable.NumberAddSubView_btnSubBackground);
if (btnSubBackground != null)
btn_sub.setBackground(btnSubBackground);
Drawable btnAddBackground =
a.getDrawable(R.styleable.NumberAddSubView_btnAddBackground);
if (btnAddBackground != null)
btn_sub.setBackground(btnAddBackground);
Drawable textViewBackground =
a.getDrawable(R.styleable.NumberAddSubView_textViewBackground);
if (textViewBackground != null)
tv_num.setBackground(textViewBackground);
a.recycle();
}
}
这样就可以很方便的对这个控件进行操作了~


 1350
1350


 被折叠的 条评论
为什么被折叠?
被折叠的 条评论
为什么被折叠?
 到【灌水乐园】发言


