


访问我的个人博客 秋码个人博客
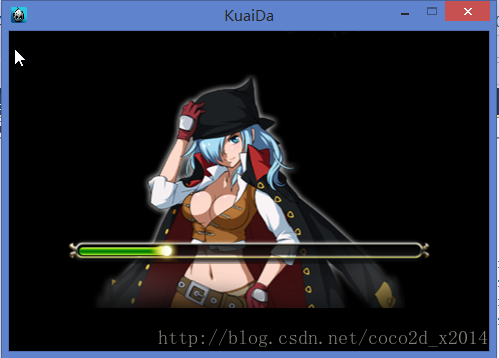
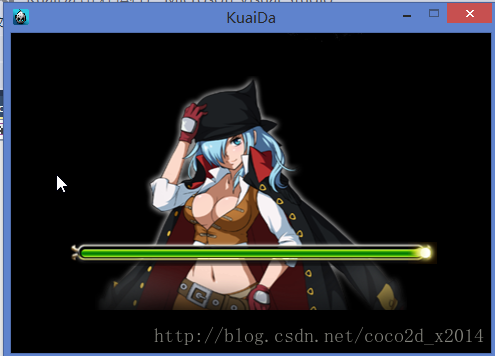
最终呈现的效果图如下:
cocos2dx版本:cocos2d-x3.8
IDE版本:VS2013
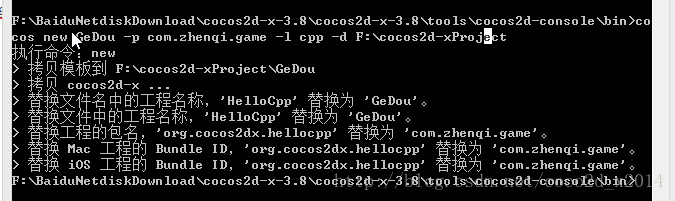
首先使用cocos命令创建项目:
cocos new GeDou -p com.zhenqi.game -l cpp -d F:\cocos2d-xProject
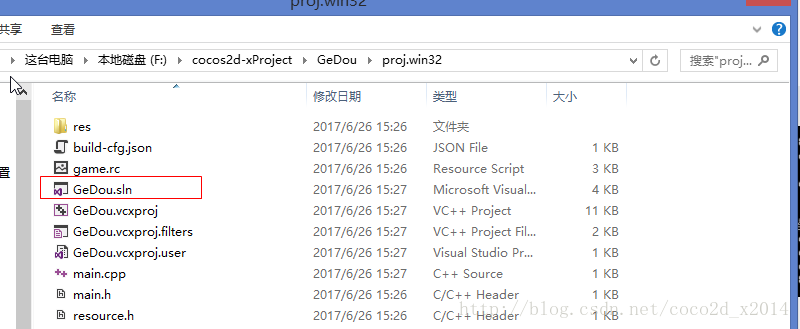
双击它
新建一个场景 LoadingScene
LoadingScene.h文件定义如下
#ifndef __LOADING_SCENE_H__
#define __LOADING_SCENE_H__

#include "ui/CocosGUI.h"

#include "cocos2d.h"
USING_NS_CC;

class Loading : public Layer
{
public:
	static Scene* createScene();
	virtual bool init();

	//设置进度条
	void SetPro(float fRate);
	//资源预加载
	void LoadRec();
	//资源预加载回调函数
	void OnLoadArmatureData(float percent);
	//资源加载回调
	void OnLoadRecCallBack(Object *pObj);

    CREATE_FUNC(Loading);

protected:
	int	m_nLoadRecNum;				//资源加载数
	int	m_nLoadRecTotalNum;			//资源加载总数

	ui::LoadingBar* pProLoadRec;    //进度条
};
init方法的实现内容,基本上就是添加图片。
bool Loading::init()
{
    if ( !Layer::init() )
    {
        return false;
    }

    Size visibleSize = Director::getInstance()->getVisibleSize();
    Vec2 origin = Director::getInstance()->getVisibleOrigin();

	Size size = Director::getInstance()->getWinSize();
	/************************************************************************/
	/*				背景图片                                                */
	/************************************************************************/
	//人物图片
	auto pPersonBg = Sprite::create("ui/loading_bg.png");
	pPersonBg->setPosition(ccp(size.width*0.5f, size.height*0.5f));
	addChild(pPersonBg, 100);

	//创建logo图
	auto pLogo = Sprite::create("ui/logo_bg.png");
	pLogo->setScale(0.95f);
	pLogo->setPosition(ccp(size.width*0.5f, 410));
	addChild(pLogo, 100);

	/************************************************************************/
	/*				进度条                                                  */
	/************************************************************************/
	//创建加载进度条背景
	auto pProBg = Sprite::create("ui/loading_progress_bg.png");
	pProBg->setPosition(ccp(size.width*0.5f, 100));
	addChild(pProBg, 100000);

	pProLoadRec = ui::LoadingBar::create("ui/loading_progress_bar.png");
	pProLoadRec->setPosition(pProBg->getPosition());
	pProLoadRec->setDirection(ui::LoadingBar::Direction::LEFT);
	pProLoadRec->setPercent(0);
	addChild(pProLoadRec, 100001, 1);//同时设置Tag值为1

	auto pLight = Sprite::create("ui/loading_progress_light.png");
	addChild(pLight, 300000, 2);
	pLight->setPosition(ccp(pProLoadRec->getPositionX() - pProLoadRec->getContentSize().width*0.5f, pProLoadRec->getPositionY()));

	m_nLoadRecNum = 0;
	m_nLoadRecTotalNum = 16;

	//预加载本层资源
	LoadRec();

    return true;
}
再看LoadRec()方法,实现如下:
关于ArmatureDataManager类运用,首先添加头文件。
#include "cocostudio/CocoStudio.h"
using namespace cocostudio;
//资源预加载
void Loading::LoadRec()
{
	TextureCache::getInstance()->addImageAsync("ui/serverselect_bg.png", CC_CALLBACK_1(Loading::OnLoadRecCallBack,this));

	ArmatureDataManager::getInstance()->addArmatureFileInfoAsync("armature/kulougongshou.ExportJson",this,schedule_selector(Loading::OnLoadArmatureData,this));
	ArmatureDataManager::getInstance()->addArmatureFileInfoAsync("armature/kulouzhanshi.ExportJson", this, schedule_selector(Loading::OnLoadArmatureData, this));
	ArmatureDataManager::getInstance()->addArmatureFileInfoAsync("armature/mayi.ExportJson", this, schedule_selector(Loading::OnLoadArmatureData, this));
	ArmatureDataManager::getInstance()->addArmatureFileInfoAsync("armature/bianyikunchong.ExportJson", this, schedule_selector(Loading::OnLoadArmatureData, this));

	ArmatureDataManager::getInstance()->addArmatureFileInfoAsync("armature/bubing.ExportJson", this, schedule_selector(Loading::OnLoadArmatureData, this));
	ArmatureDataManager::getInstance()->addArmatureFileInfoAsync("armature/xiaoyin.ExportJson", this, schedule_selector(Loading::OnLoadArmatureData, this));
	ArmatureDataManager::getInstance()->addArmatureFileInfoAsync("armature/NewProject.ExportJson", this, schedule_selector(Loading::OnLoadArmatureData, this));
	ArmatureDataManager::getInstance()->addArmatureFileInfoAsync("armature/minren1.ExportJson", this, schedule_selector(Loading::OnLoadArmatureData, this));

	ArmatureDataManager::getInstance()->addArmatureFileInfoAsync("armature/kulou_arrow.ExportJson", this, schedule_selector(Loading::OnLoadArmatureData, this));
	ArmatureDataManager::getInstance()->addArmatureFileInfoAsync("armature/naili.ExportJson", this, schedule_selector(Loading::OnLoadArmatureData, this));
	ArmatureDataManager::getInstance()->addArmatureFileInfoAsync("armature/NPC_kakaxi.ExportJson", this, schedule_selector(Loading::OnLoadArmatureData, this));
	ArmatureDataManager::getInstance()->addArmatureFileInfoAsync("armature/portal.ExportJson", this, schedule_selector(Loading::OnLoadArmatureData, this));

	ArmatureDataManager::getInstance()->addArmatureFileInfoAsync("armature/hited_light.ExportJson", this, schedule_selector(Loading::OnLoadArmatureData, this));
	ArmatureDataManager::getInstance()->addArmatureFileInfoAsync("armature/public_casting.ExportJson", this, schedule_selector(Loading::OnLoadArmatureData, this));
	ArmatureDataManager::getInstance()->addArmatureFileInfoAsync("armature/skill_light_1.ExportJson", this, schedule_selector(Loading::OnLoadArmatureData, this));
}
下面是回调函数:
void Loading::OnLoadArmatureData(float percent){
	m_nLoadRecNum++;
	SetPro((float)m_nLoadRecNum / (float)m_nLoadRecTotalNum);
	if (percent >= 1)
	{
		CCLog("addArmatureFileInfoAsync over");
	}
}

void Loading::OnLoadRecCallBack(Object *pObj){
	do
	{
		m_nLoadRecNum++;
		SetPro((float)m_nLoadRecNum / (float)m_nLoadRecTotalNum);
		return;
	} while (false);
	CCLog("Fun CNFLoginScene::OnLoadRecCallBack Error!");
}
最后再来看看这个setPro方法,也就是设置进度条进度。
void Loading::SetPro(float fRate)
{
	do
	{
		pProLoadRec->setPercent(fRate * 100);

		//同步光点
		auto pLight = dynamic_cast<Sprite *>(getChildByTag(2));
		if (pLight != NULL)
			pLight->setPositionX(pProLoadRec->getPositionX() + pProLoadRec->getContentSize().width*(fRate - 0.5f));

		//若加载完成
		if (fRate >= 1)
		{
			auto pDicLang = Dictionary::createWithContentsOfFile("ui_xml/loading_xml.xml");

			//得到加载信息label
			auto pStrLoading = dynamic_cast<String*>(pDicLang->objectForKey("loading_end"));
			auto pLabelLoading = dynamic_cast<LabelTTF *>(getChildByTag(3));
		}

		return;
	} while (false);
	CCLog("Fun CNFLoadingLayer::SetPro Error!");
}
后续将完成人物选择界面。待续中。。。。。。


 867
867


 被折叠的 条评论
为什么被折叠?
被折叠的 条评论
为什么被折叠?
 到【灌水乐园】发言


