uCrop使用及源码浅析

本文介绍了如何使用uCrop库进行图片裁剪,并提供了配置步骤,包括在build.gradle和AndroidManifest.xml中的设置。此外,文章还深入探讨了uCrop的源码,特别是裁剪过程,涉及GestureCropImageView、CropImageView和TransformImageView等关键类的功能。在裁剪前,通过setImageToWrapCropBounds确保图片充满裁剪框,随后在异步任务中完成实际的裁剪操作。
摘要由CSDN通过智能技术生成

uCrop使用

github地址

https://github.com/Yalantis/uCrop
然后clone或下载到本地,运行之。

效果预览
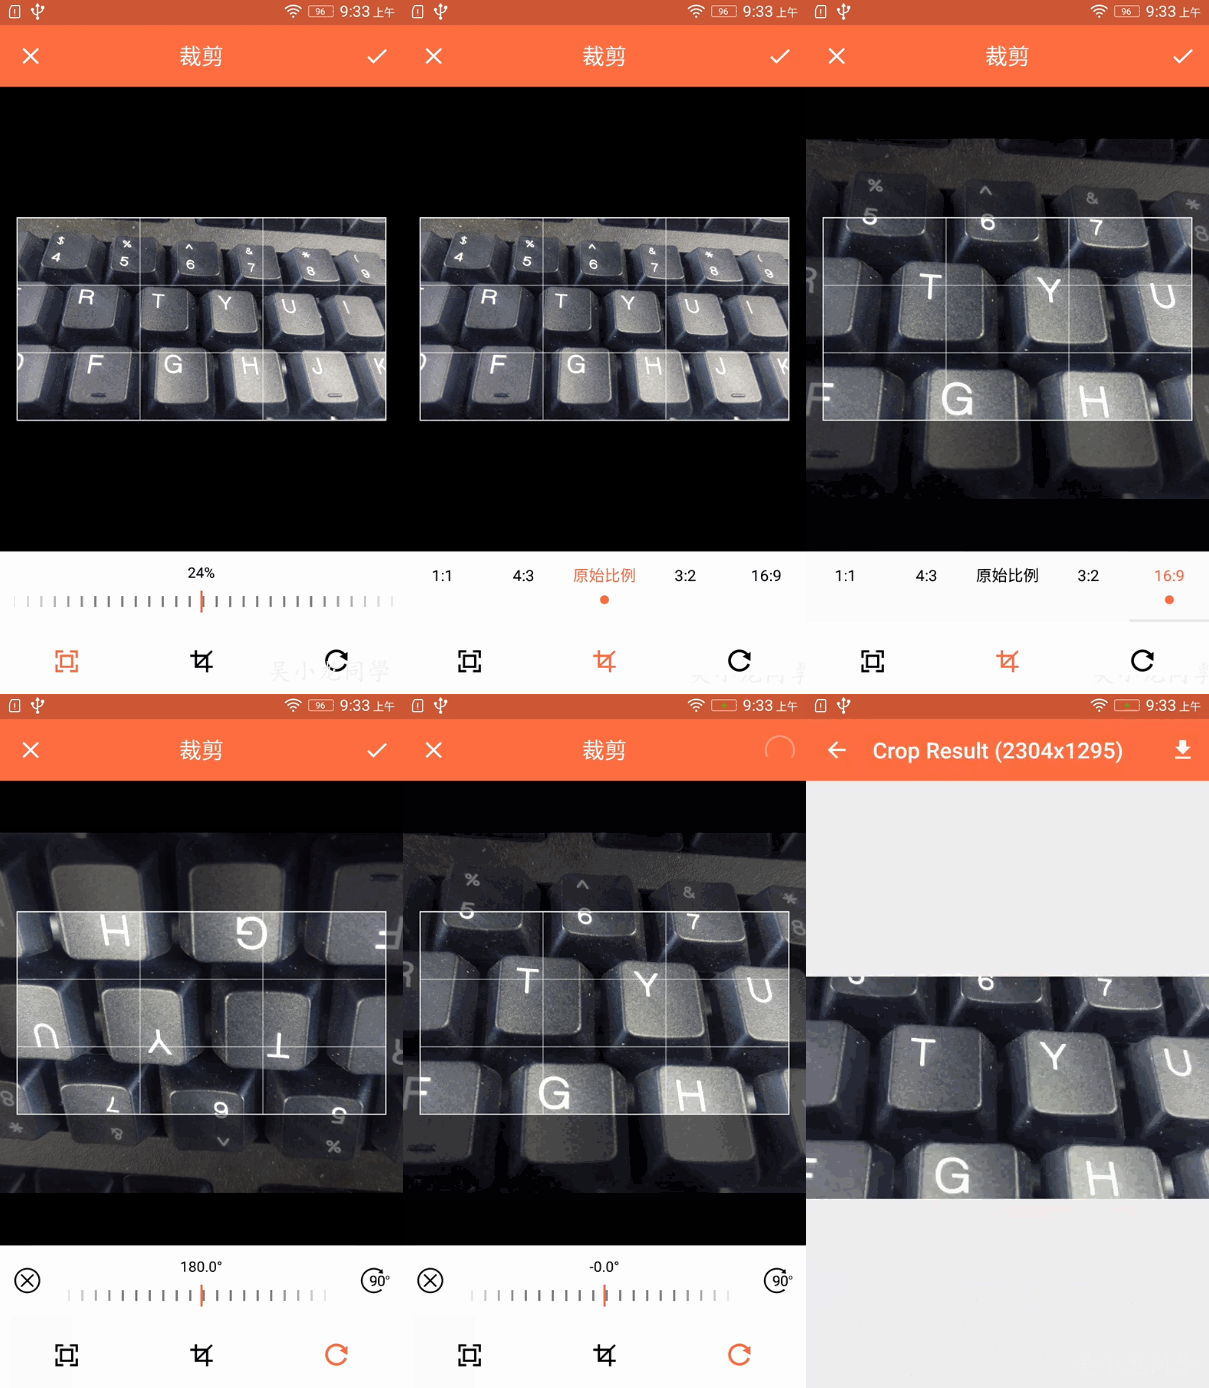
app/build.gradle

1
compile 'com.yalantis:ucrop:1.5.0'

AndroidManifest.xml

1
2
3
4
<activity
    android:name="com.yalantis.ucrop.UCropActivity"
    android:screenOrientation="portrait"
    android:theme="@style/Theme.AppCompat.Light.NoActionBar" />

这里theme可以改成自己的

配置uCrop

1
2
3
4
5
6
7
8
9
10
11
12
13
14
15
16
17
18
19
20
21
22
23
24
25
26
27
28
29
30
31
32
33
34
35
36
37
38
39
40
41
42
43
 /**
  * 启动裁剪
  * @param activity 上下文
  * @param sourceFilePath 需要裁剪图片的绝对路径
  * @param requestCode 比如:UCrop.REQUEST_CROP
  * @param aspectRatioX 裁剪图片宽高比
  * @param aspectRatioY 裁剪图片宽高比
  * @return
  */
public static String startUCrop(Activity activity, String sourceFilePath, 
	int requestCode, float aspectRatioX, float aspectRatioY) {
      
    Uri sourceUri = Uri.fromFile(new File(sourceFilePath));
    File outDir = Environment.getExternalStoragePublicDirectory(Environment.DIRECTORY_PICTURES);
    if (!outDir.exists()) {
      
        outDir.mkdirs();
    }
    File outFile = new File(outDir, System.currentTimeMillis() + ".jpg");
    //裁剪后图片的绝对路径
    String cameraScalePath = outFile.getAbsolutePath();
    Uri destinationUri = Uri.fromFile(outFile);
    //初始化,第一个参数:需要裁剪的图片;第二个参数:裁剪后图片
    UCrop uCrop = UCrop.of(sourceUri, destinationUri);
    //初始化UCrop配置
    UCrop.Options options = new UCrop.Options();
    //设置裁剪图片可操作的手势
    options.setAllowedGestures(UCropActivity.SCALE, UCropActivity.ROTATE, UCropActivity.ALL);
    //是否隐藏底部容器,默认显示
    options.setHideBottomControls(true);
    //设置toolbar颜色
    options.setToolbarColor(ActivityCompat.getColor(activity, R.color.colorPrimary));
    //设置状态栏颜色
    options.setStatusBarColor(ActivityCompat.getColor(activity, R.color.colorPrimary));
    //是否能调整裁剪框
    options.setFreeStyleCropEnabled(true);
    //UCrop配置
    uCrop.withOptions(options);
    //设置裁剪图片的宽高比,比如16:9
    uCrop.withAspectRatio(aspectRatioX, aspectRatioY);
    //uCrop.useSourceImageAspectRatio();
    //跳转裁剪页面
    uCrop.start(activity, requestCode);
    return cameraScalePath;
}

其他配置

1
2
3
4
5
6
7
8
9
10
11
12
13
14
15
16
17
18
19
20
21
22
23
24
25
26
//设置Toolbar标题
void setToolbarTitle(@Nullable String text)
//设置裁剪的图片格式
void setCompressionFormat(@NonNull Bitmap.CompressFormat format)
//设置裁剪的图片质量,取值0-100
void setCompressionQuality(@IntRange(from = 0) int compressQuality)
//设置最多缩放的比例尺
void setMaxScaleMultiplier(@FloatRange(from = 1.0, fromInclusive = false) float maxScaleMultiplier)
//动画时间
void setImageToCropBoundsAnimDuration(@IntRange(from = 100) 
以下是使用UCrop自定义圆形样式并将其显示到手机的完整代码: 1. 添加UCrop库到你的项目中。你可以使用以下依赖项: ```gradle implementation 'com.github.yalantis:ucrop:2.2.2' ``` 2. 在你的Activity中添加以下代码: ```java private void startCropActivity(Uri sourceUri) { // 设置裁剪后的保存位置 Uri destinationUri = Uri.fromFile(new File(getCacheDir(), "crop_image.jpg")); // 创建选项对象 UCrop.Options options = new UCrop.Options(); options.setToolbarColor(ContextCompat.getColor(this, R.color.colorPrimary)); options.setStatusBarColor(ContextCompat.getColor(this, R.color.colorPrimaryDark)); options.setActiveWidgetColor(ContextCompat.getColor(this, R.color.colorAccent)); options.setToolbarWidgetColor(ContextCompat.getColor(this, android.R.color.white)); // 创建UCrop任务 UCrop task = UCrop.of(sourceUri, destinationUri) .withAspectRatio(1, 1) // 设置裁剪比例为1:1 .withOptions(options); // 设置UCrop选项 // 创建自定义的UCropActivity Intent intent = new Intent(this, CustomUCropActivity.class); intent.putExtra(UCrop.EXTRA_OUTPUT_URI, destinationUri); // 启动UCrop任务 task.start(this, intent); } ``` 在这个方法中,我们通过UCrop.of()方法创建一个UCrop任务,并设置裁剪比例和选项。然后,我们创建一个自定义的UCropActivity并将其启动。 3. 创建CustomUCropActivity并添加以下代码: ```java public class CustomUCropActivity extends UCropActivity { @Override protected void onCreate(Bundle savedInstanceState) { super.onCreate(savedInstanceState); // 加载自定义布局 View customView = LayoutInflater.from(this).inflate(R.layout.custom_ucrop, null); setContentView(customView); // 获取UCropView UCropView uCropView = findViewById(R.id.ucrop); // 获取裁剪框 View cropOverlayView = findViewById(R.id.crop_overlay); // 设置裁剪框形状为圆形 cropOverlayView.setBackgroundResource(R.drawable.ucrop_circle); // 设置UCropView的缩放类型为FIT_CENTER uCropView.setScaleType(ImageView.ScaleType.FIT_CENTER); } } ``` 在这个Activity中,我们加载自定义布局并获取UCropView和裁剪框的视图。然后,我们将裁剪框的形状设置为圆形,并将UCropView的缩放类型设置为FIT_CENTER。 4. 创建自定义布局custom_ucrop.xml: ```xml <RelativeLayout xmlns:android="http://schemas.android.com/apk/res/android" android:layout_width="match_parent" android:layout_height="match_parent"> <!-- UCropView --> <com.yalantis.ucrop.view.UCropView android:id="@+id/ucrop" android:layout_width="match_parent" android:layout_height="match_parent" android:background="@android:color/black"/> <!-- 裁剪框 --> <View android:id="@+id/crop_overlay" android:layout_width="match_parent" android:layout_height="match_parent" android:background="@drawable/ucrop_circle"/> </RelativeLayout> ``` 在这个布局中,我们使用UCropView来显示裁剪后的图片,并使用View来定义圆形的裁剪框。 5. 在你的Activity中调用startCropActivity()方法来启动UCrop任务: ```java Uri sourceUri = Uri.fromFile(new File("/sdcard/source_image.jpg")); startCropActivity(sourceUri); ``` 在这个例子中,我们使用了一个文件路径来创建源Uri。你可以根据自己的需要使用不同的方法来创建Uri。 这样,当你启动startCropActivity()方法时,它将显示你自定义的圆形裁剪区域,并将裁剪后的图片保存到指定的位置。
评论 1
添加红包

请填写红包祝福语或标题

红包个数最小为10个

红包金额最低5元

当前余额3.43前往充值 >
需支付:10.00
成就一亿技术人!
领取后你会自动成为博主和红包主的粉丝 规则
hope_wisdom
发出的红包
实付
使用余额支付
点击重新获取
扫码支付
钱包余额 0

抵扣说明:

1.余额是钱包充值的虚拟货币,按照1:1的比例进行支付金额的抵扣。
2.余额无法直接购买下载,可以购买VIP、付费专栏及课程。

余额充值