


原文:http://blog.askfermi.me/2016/09/27/diy-prisma/
大约2个月前的一天,一款叫做PRISMA的应用突然刷爆了朋友圈,后来还出现了叫做Ostagram之类的更丰富的应用,它可以让一张照片变成世界名画的风格。实话说,这款app突然火起来还是很让我惊讶的,因为之前也恰好看到了相关的论文,和一个开源的实现。而且在6月的《互联网编程》的课上还有一位同学实现了出来。今天,我们就来一起来实现一个高级版的PRISMA,不仅仅是世界名画,任意两幅图片,我们都能将它们融合在一起。
由于这不是一篇太学术意义上的科普文章,因此本文中会介绍相关的论文,和一些开源的项目,并利用这个开源的项目来实现一个简单的类PRISMA应用。算是一篇踏坑纪实。这篇文章将只会实现后台的一部分。
原理
PRISMA工作在一种叫做卷积神经网络的理论之上,论文可以按此:A Neural Algorithm of Artistic Style,我们的这个项目根据的是这篇论文在torch上的一个实现,作者也将其开源在了Github上了:Neural Style。我们将其安装在我们的系统上,在做一些简单的操作就可以完成类似PRISMA的操作了。
硬件配置
PRISMA所用的卷积神经网络(CNN)通常都对计算机的性能有着较高的要求,在科研和工业环境中,通常需要使用较高配置的显卡来进行基于CUDA的运算才可以在较快的时间内完成。Neural Style的作者也提供了对CUDA的支持,因此有一块较好的显卡是比较推荐的配置。
根据测试,大约需要6~8G的内存,才可以较好地在CPU模式下运行Neural Style。
强烈不建议在小内存的主机上运行这一程序。
安装
Neural Style的作者提供了安装文档,然而,还是会经常遇到一些问题。推荐的安装流程如下(以Ubuntu为例):
升级GCC
GCC 5是必备的组件之一。最初我使用gcc 4.8和gcc 4.9都失败了,这是特别坑的一点,只有使用gcc 5以上的版本才可以正常编译。
sudo add-apt-repository ppa:ubuntu-toolchain-r/test
sudo apt-get update
sudo apt-get install gcc-5 g++-5
sudo update-alternatives --install /usr/bin/gcc gcc /usr/bin/gcc-5 60 --slave /usr/bin/g++ g++ /usr/bin/g++-5
之后使用gcc -v就可以看到当前的版本,若为5就可以进行下面的步骤了。
安装Torch及依赖
cd ~/
curl -s https://raw.githubusercontent.com/torch/ezinstall/master/install-deps | bash
git clone https://github.com/torch/distro.git ~/torch --recursive
cd ~/torch
./install.sh执行最后一条之后就会开始自动安装torch,在安装结束之后,会自动将环境变量信息写入bashrc,我们只需要source ~/.bashrc就可以使其生效,之后,在命令行中输入th,若出现 Torch,就表示安装成功了。
安装loadcaffe
loadcaffe 可以在Torch中加载Caffe的网络,也是一个经常使用的库。它依赖Google的Protocol Buffer Library,所以要先安装它们 sudo apt-get install libprotobuf-dev protobuf-compiler 我们可以通过luarocks(一个lua的Package Manager)来安装loadcaffe luarocks install loadcaffe
安装 Neural-Style
先从github上把仓库clone下来
cd ~/
git clone https://github.com/jcjohnson/neural-style.git
cd neural-style之后下载提前训练好的神经网络数据,这个数据会比较大sh models/download_models.sh 下载结束之后,就基本可以开始使用了。
使用
最基础的使用:th neural_style.lua -style_image <image.jpg> -content_image <image.jpg> 就可以用默认的参数来输出融合后的图像了。我们也可以为其增加参数来实现不同的功能,基本可以实现PRISMA的各项功能:
Options:
- image_size: Maximum side length (in pixels) of of the generated image. Default is 512.
- style_blend_weights: The weight for blending the style of multiple style images, as a comma-separated list, such as -style_blend_weights 3,7. By default all style images are equally weighted.
- gpu: Zero-indexed ID of the GPU to use; for CPU mode set -gpu to -1.
Optimization options:
- content_weight: How much to weight the content reconstruction term. Default is 5e0.
- style_weight: How much to weight the style reconstruction term. Default is 1e2.
- tv_weight: Weight of total-variation (TV) regularization; this helps to smooth the image. Default is 1e-3. Set to 0 to disable TV regularization.
- num_iterations: Default is 1000.
- init: Method for generating the generated image; one of random or image. Default is random which uses a noise initialization as in the paper; image initializes with the content image.
- optimizer: The optimization algorithm to use; either lbfgs or adam; default is lbfgs. L-BFGS tends to give better results, but uses more memory. Switching to ADAM will reduce memory usage; when using ADAM you will probably need to play with other parameters to get good results, especially the style weight, content weight, and learning rate; you may also want to normalize gradients when using ADAM.
- learning_rate: Learning rate to use with the ADAM optimizer. Default is 1e1.
- normalize_gradients: If this flag is present, style and content gradients from each layer will be L1 normalized. Idea from andersbll/neural_artistic_style.
Output options:
- output_image: Name of the output image. Default is out.png.
- print_iter: Print progress every print_iter iterations. Set to 0 to disable printing.
- save_iter: Save the image every save_iter iterations. Set to 0 to disable saving intermediate results.
Layer options:
- content_layers: Comma-separated list of layer names to use for content reconstruction. Default is relu4_2.
- style_layers: Comma-separated list of layer names to use for style reconstruction. Default is relu1_1,relu2_1,relu3_1,relu4_1,relu5_1.
Other options:
- style_scale: Scale at which to extract features from the style image. Default is 1.0.
- original_colors: If you set this to 1, then the output image will keep the colors of the content image.
- proto_file: Path to the deploy.txt file for the VGG Caffe model.
- model_file: Path to the .caffemodel file for the VGG Caffe model. Default is the original VGG-19 model; you can also try the normalized VGG-19 model used in the paper.
- pooling: The type of pooling layers to use; one of max or avg. Default is max. The VGG-19 models uses max pooling layers, but the paper mentions that replacing these layers with average pooling layers can improve the results. I haven’t been able to get good results using average pooling, but the option is here.
- backend: nn, cudnn, or clnn. Default is nn. cudnn requires cudnn.torch and may reduce memory usage. clnn requires cltorch and clnn
- cudnn_autotune: When using the cuDNN backend, pass this flag to use the built-in cuDNN autotuner to select the best convolution algorithms for your architecture. This will make the first iteration a bit slower and can take a bit more memory, but may significantly speed up the cuDNN backend.
运行结果
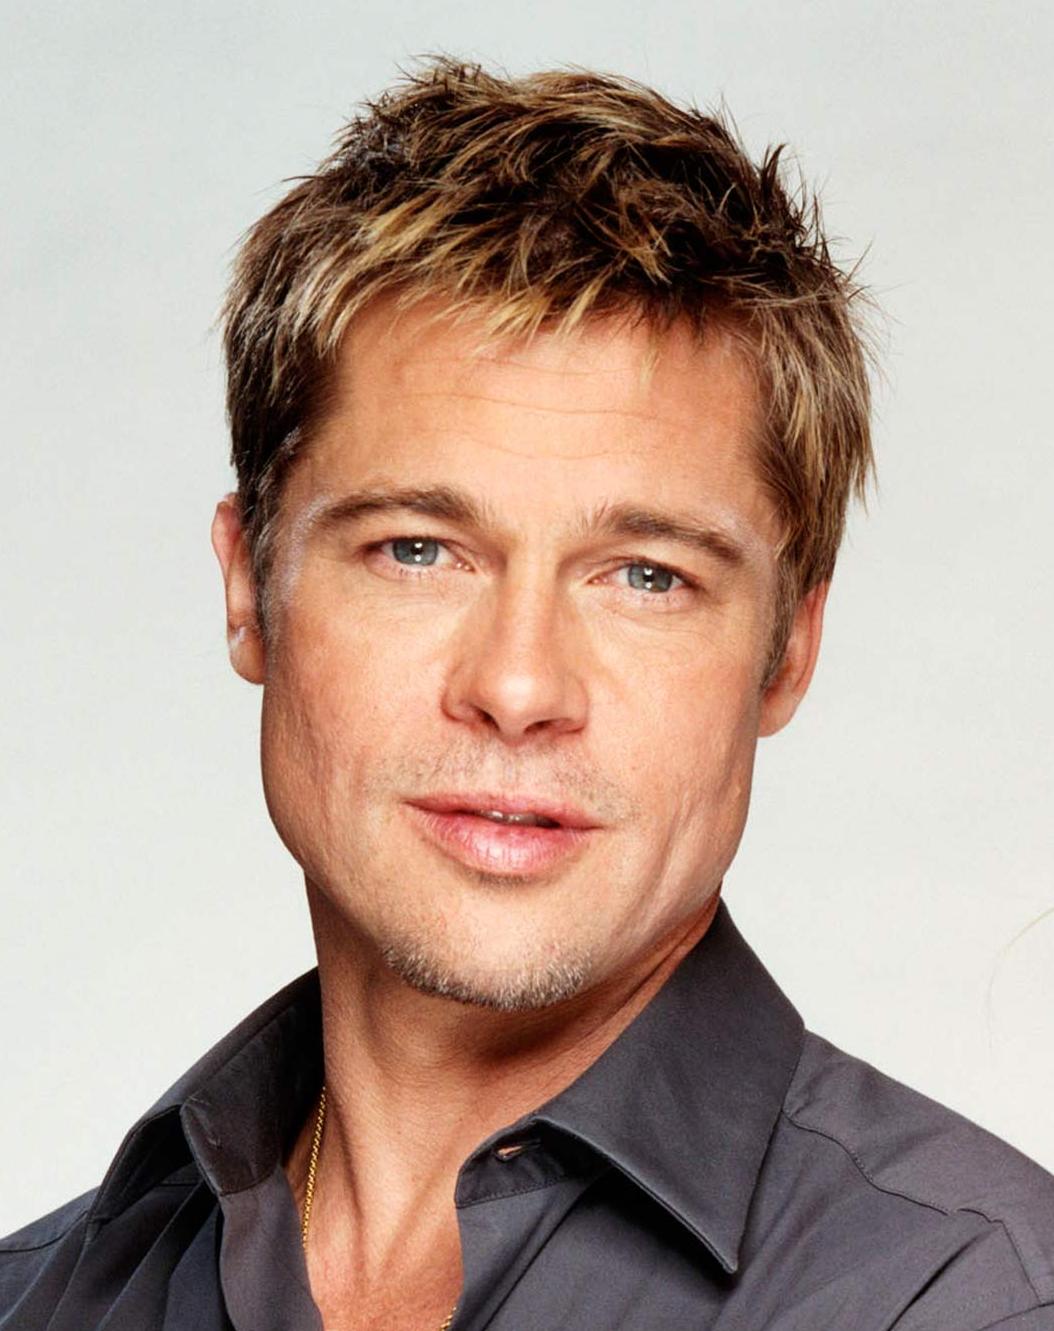
我对示例中的两幅图片进行了测试,分别使用50次迭代,100次迭代和200次迭代来达到不同的效果。效果图如下:
Content Image:
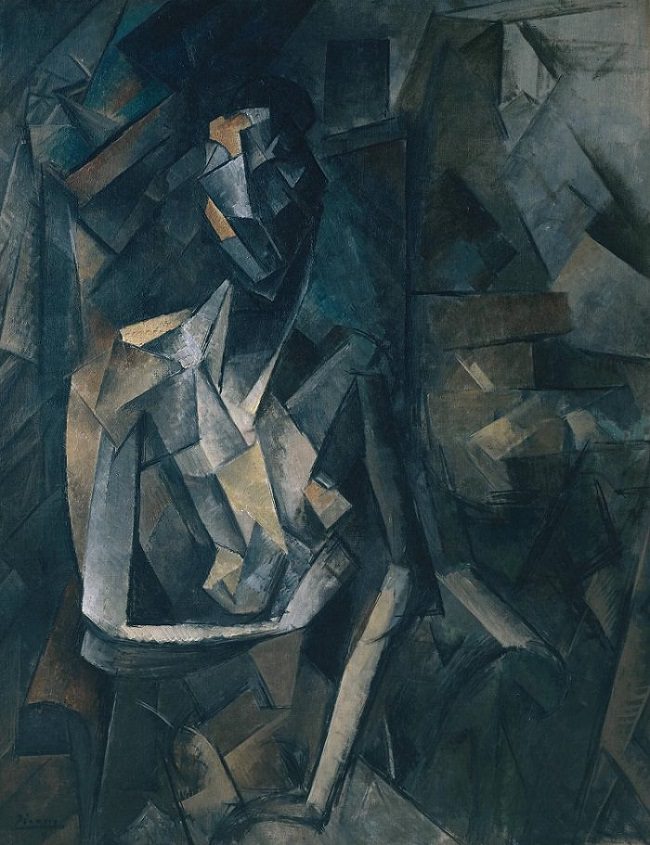
Style Image:
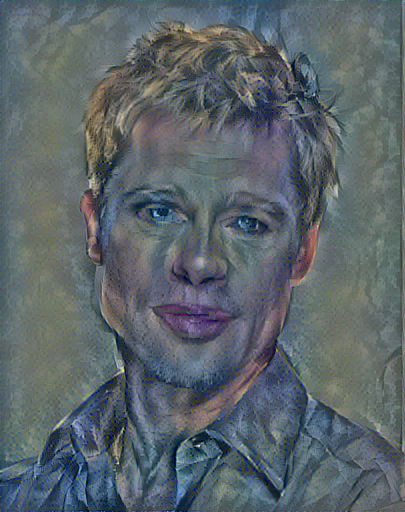
50次迭代:

100次迭代:
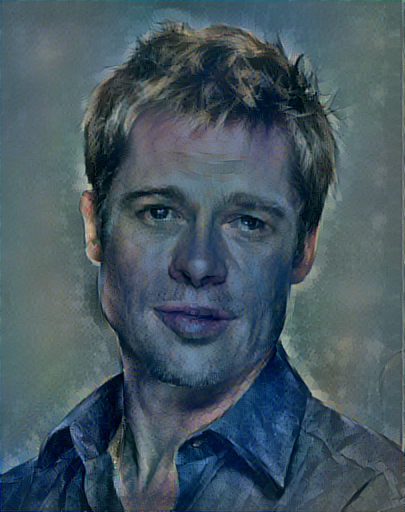
200次迭代:


 4282
4282


 被折叠的 条评论
为什么被折叠?
被折叠的 条评论
为什么被折叠?
 到【灌水乐园】发言


