


引言
样式和主题(Styles and Themes)都是用于对Android app 界面进行美化的,与Web开发中的CSS的作用大同小异,只有充分利用样式和主题才能开发出各种风格优秀的app 。
一、样式和主题概述
样式(style)是用来Activity元素级别的,改变指定控件或者Layout的外观和格式的一组属性集合。样式可以用来指定高度、填充、自字体大小、背景颜色等等。样式在xml资源文件(res/values/styles.xml)中定义,和指定布局的xml文件是分开的,以达到设计与内容分开的思想。
而主题(theme)是应用到整个Activity或者应用程序的样式,而不能只应用到单个View。当一个样式变成主题后,Activity或应用程序中的所有视图都将应用这个样式中它所支持的属性。主题也是在xml资源文件中定义的(res/values/themes.xml),同时主题定义的style应该是改变窗口外观的,比如窗口标题、边框等等。
二、样式style和主题theme的基本语法
1、基本语法
<!--样式的基本语法:
    style下的name节点:你定义的样式名称值  parent:要继承的父样式,可继承父样式的所有属性
    item下的name:View的实质属性及对应的值,其中属性对应的值也可以是引用其他xml资源文件定义的值
    -->
<resource>
    <style name="YourStyleName" [parent="ParentStyle"]>
        <item name="View's attrs">attr's value</item>
        <item name="other View's attrs">values</item>
    </style>
</resource>
<!--主题的基本语法-->
<resource>
<style name="YourStyleName" [parent="ParentStyle"]>
<item name="Window's attrs">Window's value</item>
<item name="other Window's attrs">Window's</item>
</style>
</resource>2、样式的继承
样式的继承其实和我们Java的继承机制是大同小异的,通过继承我们可以把一些共有的属性封装到一起形成父样式,我们再针对各自的需求去个性化定义自己的样式,极而言之就是继承了,子样式就拥有了父样式所有的特点。
2.1、使用parent节点 继承系统的样式(主题)
<!--继承自 @android:style/TextAppearance-->
<resource>
    <style name="appearence" parent="@android:style/TextAppearance">
    ...
    </style>
</resource>2.2、使用.继承我们自己定义的样式
样式也支持多级继承,机制也是一样的。
 <style name="TitleBase">
        <item name="android:textColor">@color/colorGreen</item>
    </style>
    <!--继承了TitleBase 也就相当于已经设置了textColor属性值为绿色 ,当然样式的名字则变为TitleBase.TextStyle-->
    <style name="TitleBase.TextStyle">
        <item name="android:padding">10dp</item>
        <item name="android:textSize">30sp</item>
    </style>
    <style name="TitleBase.TextStyle.EditStyle">
        <item name="android:padding">10dp</item>
        <item name="android:textSize">26sp</item>
    </style>
三、创建样式和主题步骤
为每一个你要创建的样式指定一个唯一style name,那么在编译期间都会被转化为对应的一个应用程序资源对象。并且IDE会在R文件中为这个样式创建一个Id,我们就可以在布局文件中根据@style/id来引用相应的样式。
1、在res/values下创建styles.xml文件(themes.xml)
2、添加resource根节点
3、添加style、item节点和自定义属性。
<resource>
    <style name="appearence" parent="@android:style/TextAppearance">---继承自@android:style/TextAppearance
        <item name="android:layout_width">match_parent</item>
        <item name="android:layout_height">match_parent</item>
    </style>

    <style name="appearence.childappearance">
        <item name="" parent="@android:style/TextAppearance"/>---继承自@android:style/TextAppearance
    </style>

    <style name="textRed">---样式名称
        <item name="android:background">@color/redColor</item>----item的name 里面是View的属性
    </style>

    <style name="textBlue">---样式名称
        <item name="android:background">@color/blueColor</item>----item的name 里面是View的属性
    </style>
</resource>
四、使用样式和主题
- @ :表示引用资源,形如 @[package:]type/res_name,其中如@android:string则表示引用的是系统的(android.*)资源。
- @+id/ : 用于定义一个id
- @id/ :用于引用一个已经存在的id
- @+android:id/costom_id:加上android:则表示引用android.R里的资源,则表示如果在android.R.id里存在名为costom_id的id,就直接使用,反之则在当前应用中的R里产生一个名为costom_id的id。Ps:id是一个控件的一个基本属性,但并非代表着每个控件的id都不一样,所有的控件加载到内存之后就会形成一个树形结构,当查找控件时候,只会返回第一个匹配的的控件。
- ?: 用于应用属性,形如?[namespace:]typpe/name,使用这个标记,你所提供的资源名必须能够在主题属性中找到,因为资源工具认为这个资源属性是被期望得到的,您不需要明确的指出它的类型(如?android:attr/android:textDisabledColor)。
1、使用样式
在布局文件中的对应View节点下style属性(请注意是android中唯一没有任何前缀的属性)直接引用即可。
   <style name="TitleStyle">
        <item name="android:textColor">@color/colorGreen</item>
        <item name="android:textSize">@dimen/activity_txt_title</item>
        <item name="android:padding">@dimen/activity_txt_padding</item>
    </style>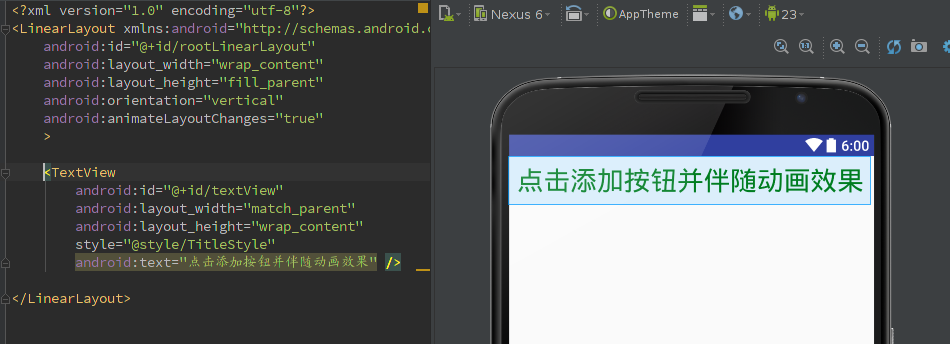
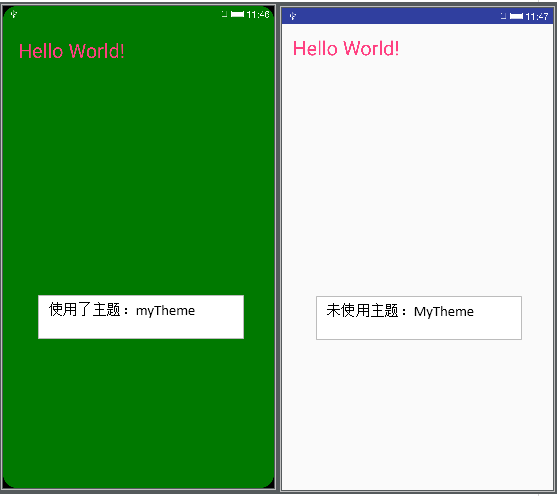
2、使用主题
使用主题有两种方式:xml和java 代码setTheme。
<!--themes.xml-->
<?xml version="1.0" encoding="utf-8"?>
<resources>
    <style name="MyTheme" parent="Base.Animation.AppCompat.Dialog">
        <item name="android:windowBackground">@drawable/window_border</item>
        <item name="android:windowNoTitle">true</item>
    </style>
</resources>
2.1、在清单xml文件指定应用(application 节点下的android:theme属性设置则该app 所有Activity都使用该主题)、指定应用的Activity下的android:theme属性设置
<?xml version="1.0" encoding="utf-8"?>
<manifest xmlns:android="http://schemas.android.com/apk/res/android"
    package="com.crazymo.styleattrdemo" >

    <application
        android:allowBackup="true"
        android:icon="@mipmap/ic_launcher"
        android:label="@string/app_name"
        android:supportsRtl="true"
        android:theme="@style/MyTheme" >
        <activity android:name=".MainActivity">
            <intent-filter>
                <action android:name="android.intent.action.MAIN" />
                <category android:name="android.intent.category.LAUNCHER" />
            </intent-filter>
        </activity>
    </application>
</manifest>
2.2、setTheme(R.style.style_name)
@Override
    protected void onCreate(Bundle savedInstanceState) {
        super.onCreate(savedInstanceState);
        setTheme(R.style.MyTheme);
        setContentView(R.layout.activity_main);
    }
五、自定义属性(Atrribute)资源
在布局文件中使用系统View或者自定义View,我们可以通过指定属性来控制美化View的外观。
1、属性基本知识
属性资源文件存放在/res/values/attr.xml下,其根元素也是resource,包含俩个子节点:
- attr :定义一个属性
- declare-styleable: 用于组合一组属性
当我们在属性文件里定义了属性之后,就可以在自定义View的构造方法通过AtrributeSet对象来获取这些属性了。
2、定义自定义属性文件
值得注意的是,属性文件只是定义了该属性,至于使用于哪个View,起何作用,与属性资源文件无关,只取决于自定义View的代码实现。
<?xml version="1.0" encoding="utf-8"?>
<resources>
    <style name="duration"/>
    <declare-styleable name="AlphaImgView">
        <attr name="duration" format="integer"></attr>
    </declare-styleable>
</resources>
3、使用自定义属性
使用自定义属性一般步骤有三:
- 定义属性文件
- 自定义View,并实现属性的具体作用。
- 在布局中应用。
接下来通过实现一个显示图片淡入旋转的效果来说明。
package com.crazymo.styleattrdemo.costomview;

import android.content.Context;
import android.content.res.TypedArray;
import android.graphics.Canvas;
import android.os.Handler;
import android.os.Message;
import android.util.AttributeSet;
import android.util.Log;
import android.widget.ImageView;

import com.crazymo.styleattrdemo.R;

import java.util.Timer;
import java.util.TimerTask;

/**
 * Created by cmo on 16-4-15.
 */
public class CostomImgView extends ImageView {

    private int mAlphaDelta=0;//透明度每次改变的大小
    private int mCurrAphla=0;//当前透明度
    private final int SPEED=500;//每隔500ms 改变一次

    Handler handler=new Handler(){
        @Override
        public void handleMessage(Message msg) {
            if(msg.what==0x123){
                Log.d("TAG","Handle message"+String.valueOf(mCurrAphla));
                mCurrAphla +=mAlphaDelta;
                if(mCurrAphla>255){
                    mCurrAphla=255;
                }
                CostomImgView.this.setAlpha((float) mCurrAphla);
                CostomImgView.this.setRotation((float)mCurrAphla);
            }
        }
    };

    public CostomImgView(Context context, AttributeSet attrs) {
        super(context, attrs);
        TypedArray typedArray=context.obtainStyledAttributes(attrs, R.styleable.AlphaImgView);
        int duration=typedArray.getInt(R.styleable.AlphaImgView_duration,0);
        mAlphaDelta=255*SPEED/duration;
        Log.d("TAG"," 构造方法"+String.valueOf(mAlphaDelta));
    }

    @Override
    protected void onDraw(Canvas canvas) {
        this.setAlpha((float) mCurrAphla);
        Log.d("TAG",String.valueOf(mCurrAphla));
        super.onDraw(canvas);
        final Timer timer=new Timer();
        timer.schedule(new TimerTask() {
            @Override
            public void run() {
                Message msg=new Message();
                msg.what=0x123;
                Log.d("TAG","timer run"+String.valueOf(mCurrAphla));
                if(mCurrAphla>=255){

                    timer.cancel();
                }
                else{
                    handler.sendMessage(msg);
                }
            }
        },0,SPEED);
    }
}
<?xml version="1.0" encoding="utf-8"?>
<RelativeLayout xmlns:android="http://schemas.android.com/apk/res/android"
xmlns:crazymo="http://schemas.android.com/apk/res-auto"
xmlns:tools="http://schemas.android.com/tools" android:layout_width="match_parent"
android:layout_height="match_parent" android:paddingLeft="@dimen/activity_horizontal_margin"
android:paddingRight="@dimen/activity_horizontal_margin"
android:paddingTop="@dimen/activity_vertical_margin"
android:paddingBottom="@dimen/activity_vertical_margin" tools:context=".MainActivity">
<TextView android:text="Hello World!" android:layout_width="wrap_content"
android:layout_height="wrap_content"
android:textColor="@color/colorAccent"
android:textSize="30sp"
android:id="@+id/id_txt"
/>
<com.crazymo.styleattrdemo.costomview.CostomImgView
android:layout_width="match_parent"
android:layout_height="match_parent"
android:src="@mipmap/ic_launcher"
android:alpha="255"
crazymo:duration="100000"/>
</RelativeLayout>


 2060
2060


 被折叠的 条评论
为什么被折叠?
被折叠的 条评论
为什么被折叠?
 到【灌水乐园】发言


