【安卓】如何制作Spinner的Hint提示效果,并自定义Spinner样式

这个需求其实还是有的,有时候我们想在Spinner中制作出一个类似于TextView的hint那样的效果。

如下:


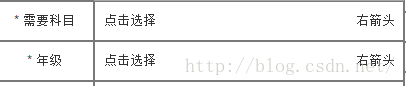
当你第一次看到这个Spinner的时候,其中显示“点击选择”,而你点了一下,就会出现选项,一旦点选了某个选项,“点击选择”就会从此消失,也就是说,那只是提示,不参与逻辑判断。


那么如何做到这种效果呢?我去stackoverflow上查了一下,发现http://stackoverflow.com/questions/6602339/android-spinner-hint#,这个问题下的回答比较好——

也就是boni2k提供的solution,于是我复制过来做了一些自己的测试和理解如下:


代码部分:

// 布局文件 R.layout.spinner_showed_item 决定了spinner中被显示出的那条的样式
        // 这个布局文件有一个默认安卓布局,名字叫做,自己写布局的时候不妨前去参考其中的各种要求
        // 例如必须是一个CheckedTextView 等等,事实上,顶多也就自己改一个背景图片之类的
  
  • 0
    点赞
  • 1
    收藏
    觉得还不错? 一键收藏
  • 2
    评论
好的,我可以帮您编写这段代码。以下是一个简单的布局,其中包括了TextView、Edittext、Button、ImageButton、CheckBox、RadioButton、Spinner和ListView,并为Button、ImageButton、RadioButton、Spinner和ListView添加了监听事件。 activity_main.xml: ```xml <?xml version="1.0" encoding="utf-8"?> <LinearLayout xmlns:android="http://schemas.android.com/apk/res/android" android:layout_width="match_parent" android:layout_height="match_parent" android:orientation="vertical" android:padding="16dp"> <TextView android:layout_width="wrap_content" android:layout_height="wrap_content" android:text="TextView" /> <EditText android:id="@+id/editText" android:layout_width="match_parent" android:layout_height="wrap_content" android:hint="EditText" /> <Button android:id="@+id/button" android:layout_width="wrap_content" android:layout_height="wrap_content" android:text="Button" /> <ImageButton android:id="@+id/imageButton" android:layout_width="wrap_content" android:layout_height="wrap_content" android:src="@drawable/ic_launcher_foreground" /> <CheckBox android:id="@+id/checkBox" android:layout_width="wrap_content" android:layout_height="wrap_content" android:text="CheckBox" /> <RadioGroup android:id="@+id/radioGroup" android:layout_width="wrap_content" android:layout_height="wrap_content" android:orientation="horizontal"> <RadioButton android:id="@+id/radioButton1" android:layout_width="wrap_content" android:layout_height="wrap_content" android:text="RadioButton 1" /> <RadioButton android:id="@+id/radioButton2" android:layout_width="wrap_content" android:layout_height="wrap_content" android:text="RadioButton 2" /> </RadioGroup> <Spinner android:id="@+id/spinner" android:layout_width="match_parent" android:layout_height="wrap_content" /> <ListView android:id="@+id/listView" android:layout_width="match_parent" android:layout_height="wrap_content" /> </LinearLayout> ``` MainActivity.java: ```java public class MainActivity extends AppCompatActivity { private EditText editText; private Button button; private ImageButton imageButton; private CheckBox checkBox; private RadioButton radioButton1, radioButton2; private Spinner spinner; private ListView listView; @Override protected void onCreate(Bundle savedInstanceState) { super.onCreate(savedInstanceState); setContentView(R.layout.activity_main); editText = findViewById(R.id.editText); button = findViewById(R.id.button); imageButton = findViewById(R.id.imageButton); checkBox = findViewById(R.id.checkBox); radioButton1 = findViewById(R.id.radioButton1); radioButton2 = findViewById(R.id.radioButton2); spinner = findViewById(R.id.spinner); listView = findViewById(R.id.listView); // 设置Spinner的选项 String[] options = new String[]{"Option 1", "Option 2", "Option 3"}; ArrayAdapter<String> adapter = new ArrayAdapter<>(this, android.R.layout.simple_spinner_item, options); adapter.setDropDownViewResource(android.R.layout.simple_spinner_dropdown_item); spinner.setAdapter(adapter); // 设置ListView的数据 String[] data = new String[]{"Item 1", "Item 2", "Item 3"}; ArrayAdapter<String> listViewAdapter = new ArrayAdapter<>(this, android.R.layout.simple_list_item_1, data); listView.setAdapter(listViewAdapter); // 添加Button的监听事件 button.setOnClickListener(new View.OnClickListener() { @Override public void onClick(View v) { // 处理Button的点击事件 String text = editText.getText().toString(); Toast.makeText(MainActivity.this, "Button Clicked: " + text, Toast.LENGTH_SHORT).show(); } }); // 添加ImageButton的监听事件 imageButton.setOnClickListener(new View.OnClickListener() { @Override public void onClick(View v) { // 处理ImageButton的点击事件 Toast.makeText(MainActivity.this, "ImageButton Clicked", Toast.LENGTH_SHORT).show(); } }); // 添加RadioButton的监听事件 radioButton1.setOnCheckedChangeListener(new CompoundButton.OnCheckedChangeListener() { @Override public void onCheckedChanged(CompoundButton buttonView, boolean isChecked) { // 处理RadioButton的选择事件 if (isChecked) { Toast.makeText(MainActivity.this, "RadioButton 1 Checked", Toast.LENGTH_SHORT).show(); } } }); radioButton2.setOnCheckedChangeListener(new CompoundButton.OnCheckedChangeListener() { @Override public void onCheckedChanged(CompoundButton buttonView, boolean isChecked) { // 处理RadioButton的选择事件 if (isChecked) { Toast.makeText(MainActivity.this, "RadioButton 2 Checked", Toast.LENGTH_SHORT).show(); } } }); // 添加Spinner的监听事件 spinner.setOnItemSelectedListener(new AdapterView.OnItemSelectedListener() { @Override public void onItemSelected(AdapterView<?> parent, View view, int position, long id) { // 处理Spinner的选择事件 String selectedOption = (String) parent.getItemAtPosition(position); Toast.makeText(MainActivity.this, "Spinner Option Selected: " + selectedOption, Toast.LENGTH_SHORT).show(); } @Override public void onNothingSelected(AdapterView<?> parent) { } }); // 添加ListView的监听事件 listView.setOnItemClickListener(new AdapterView.OnItemClickListener() { @Override public void onItemClick(AdapterView<?> parent, View view, int position, long id) { // 处理ListView的点击事件 String selectedItem = (String) parent.getItemAtPosition(position); Toast.makeText(MainActivity.this, "ListView Item Clicked: " + selectedItem, Toast.LENGTH_SHORT).show(); } }); } } ``` 这里我们为Button、ImageButton、RadioButton、Spinner和ListView添加了监听事件,并在触发这些事件时,在屏幕上显示了相应的消息。您可以根据自己的需要修改这些事件的处理方式。

“相关推荐”对你有帮助么?

  • 非常没帮助
  • 没帮助
  • 一般
  • 有帮助
  • 非常有帮助
提交
评论 2
添加红包

请填写红包祝福语或标题

红包个数最小为10个

红包金额最低5元

当前余额3.43前往充值 >
需支付:10.00
成就一亿技术人!
领取后你会自动成为博主和红包主的粉丝 规则
hope_wisdom
发出的红包
实付
使用余额支付
点击重新获取
扫码支付
钱包余额 0

抵扣说明:

1.余额是钱包充值的虚拟货币,按照1:1的比例进行支付金额的抵扣。
2.余额无法直接购买下载,可以购买VIP、付费专栏及课程。

余额充值