


写本文的目的是为了方便在windows环境下能够布署上Gerrit代码评审环境和GitWeb实现代码管理,并总结本人在安装中所遇到的问题,以使后来者少走弯路,如果是在linux环境下配置就可以略过了。
工欲善其事必先利其器,先准备好要用的软件
Git的下载地址:http://code.google.com/p/msysgit/downloads/list Git-1.8.4-preview20130916.exe
gerrit 的下载地址:http://code.google.com/p/gerrit/ gerrit-2.8.war
Apache的下载地址:http://httpd.apache.org/download.cgi httpd-2.2.25-win32-x86-openssl-0.9.8y.msi
Mysql的下载地址:http://www.mysql.com/downloads/ mysql-5.5.34-win32.msi
tomcat7的下载地址:http://tomcat.apache.org/download-70.cgi apache-tomcat-7.0.47.zip
下载jdk jdk-6u35-windows-i586.exe
以上是所需要用到的软件,下面开始安装了,安装目录的安排如下:(根据自己需要)
E:\GitServer\
E:\GitServer\Apache
E:\GitServer\gerrit
E:\GitServer\Git
E:\GitServer\Tomcat7
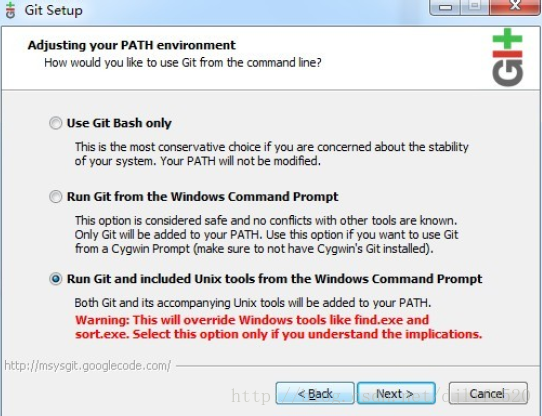
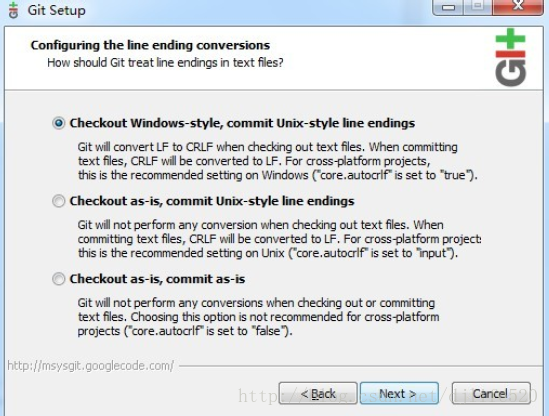
1、首先安装Git,我在安装时的选择

在Git中没有CGI模块,因此不能正确启动GitWeb脚本,因此要先下载CGI模块 http://search.cpan.org/~markstos/CGI/,下一个CGI3.59版本,把里面的lib文件夹里的文件拷到E:\GitServer\Git\lib\perl5\5.8.8目录下。
在E:\GitServer\Git\share\gitweb目录下找到gitweb.cgi用UE打开修改
our $GIT = "E:/GitServer/Git/bin/git";
our $projectroot = "/E/XXXXXX/XXXXXXX"; 这个是Git代码的项目目录
2、Apache、MySQL、JDK的安装,直接安照向导安装就可以了,这里就不贴图了。
3、Gerrit的安装,首先在mysql中建好reviewdb数据库
CREATE USER 'gerrit'@'localhost' IDENTIFIED BY 'gerrit';
CREATE DATABASE reviewdb;
ALTER DATABASE reviewdb charset=latin1;
GRANT ALL ON reviewdb.* TO 'gerrit'@'localhost';
FLUSH PRIVILEGES;
脚本的意思是建一个reviewdb的数据库并给它gerrit用户名和密码来管理
打开命令行cmd,将gerrit-2.8.war放在E:\GitServer\下,java -jar gerrit-2.8.war init -d E:/GitServer/gerrit/review_site
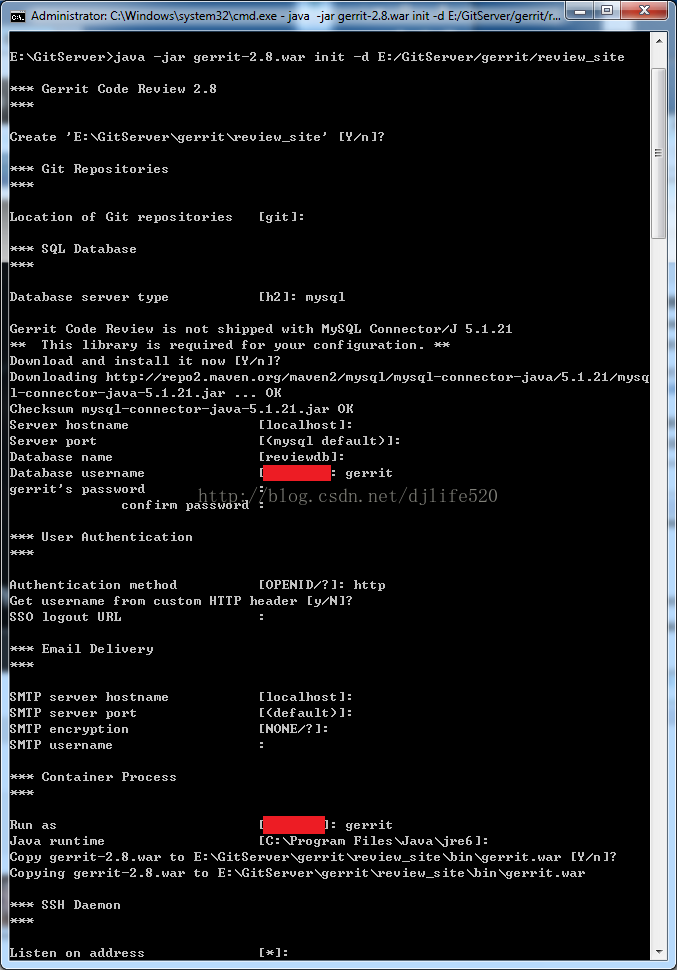
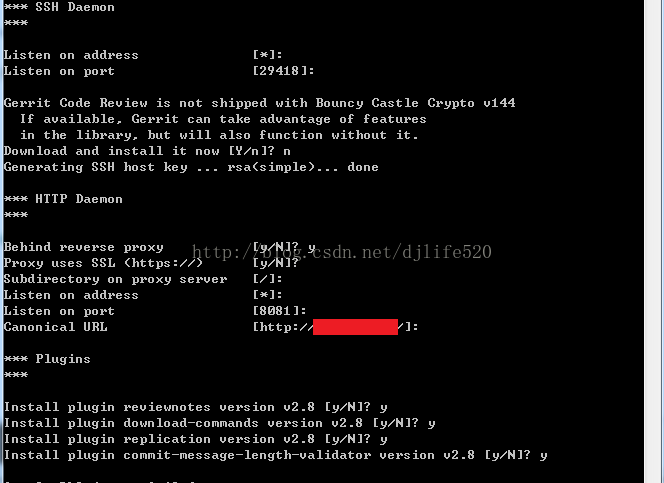
后面就提示安装完成,然后不能在win32下运行,这个提示不要紧,我们的gerrit不是用它自带的jetty服务器而是tomcat和apache,下面是我的gerrit配置文件,在review_site\etc下找到gerrit.config文件,就可以编辑它,根据需要把一些配置改过来
[gerrit]
basePath = E:/GitStack/repositories 这个是git仓库的位置
canonicalWebUrl = http://192.168.1.100:8080/gerrit/ 这是gerrit的起始链接
[gitweb]
url = http://192.168.1.100:81/gitweb 这是gitweb查看的链接
[database] mysql的一些信息
type = mysql
hostname = localhost
port = 3306
database = reviewdb
username = gerrit
[auth]
type = HTTP
logoutUrl = http://admin:admin@192.168.1.100:8080/
[sendemail] 注册发确认邮件配置
smtpServer = smtp.qq.com
smtpServerPort = 465
smtpEncryption = SSL
smtpUser = xxxxxxxxx@qq.com
smtpPass = xxxxxxxxx
from = Code Review <xxxxxxxx@qq.com>
[container]
user = admin
javaHome = C:\\jdk1.6\\jre
[sshd]
listenAddress = *:29418
[httpd]
listenUrl = proxy-http://192.168.1.100:8080/ 监听的链接用于apache反向连接
[cache]
directory = cache
把gerrit-2.8.war改为gerrit-2.8.zip,并解压到E:\GitServer\gerrit\gerrit-2.8里面,这是tomcat来作为服务器运行这个web
4、将tomcat7解压到E:\GitServer\Tomcat7下, 然后在tomcat7\conf\Catalina\localhost下建一个文件gerrit.xml内容是
<?xml version="1.0" encoding="utf-8"?>
<Context path="/gerrit" docBase="E:/GitServer/gerrit/gerrit-2.8" reloadable="true"/>
接着修改tomcat7\conf下context.xml,在<context>中加入如下代码
<Resource
	     name="jdbc/ReviewDb"
	     type="javax.sql.DataSource"
	     driverClassName="com.mysql.jdbc.Driver"
	     username="gerrit"
	     password="gerrit"
	     maxIdle="30"
       maxWait="10000"
       maxActive="100"
	     url="jdbc:mysql://localhost:3306/ReviewDB?autoReconnect=true"
	     auth="Container"
	/>
5、配置Apache:将Apache\Apache2\conf\http.conf里如下地方前面的#号去掉表示启用功能
LoadModule proxy_module modules/mod_proxy.so
LoadModule proxy_connect_module modules/mod_proxy_connect.so
LoadModule proxy_http_module modules/mod_proxy_http.so
LoadModule proxy_ftp_module modules/mod_proxy_ftp.so
LoadModule negotiation_module modules/mod_negotiation.so
在最后面加上
Include conf/extra/httpd-git.conf
Include conf/extra/httpd-gerrit.conf
在Listen 80后加上Listen 81,这个81用来访问gitweb
在conf/extra目录下新建如上两个配置文件内容如下
http-git.conf GIT_PROJECT_ROOT 的路径和E:\GitServer\Git\share\gitweb\gitweb.cgi 里的 our $projectroot = "/E/XXXXXX/XXXXXXX";一致
AuthUserFile "E:/GitServer/Git/htpassword" 这个文件通过Aapche\bin\htpasswd.exe 创建,如:htpasswd -c E:\GitServer\Git\htpassword admin
<VirtualHost *:81>
	SetEnv GIT_PROJECT_ROOT "E:/XXXXXXXXX/XXXXXXXX"
 	SetEnv GIT_HTTP_EXPORT_ALL 1
	ScriptAlias /repos "E:/GitServer/Git/libexec/git-core/git-http-backend.exe/"
	<Directory "E:/GitServer/Git/libexec/git-core/">
	    Allow From All
	</Directory>
	<Location "/repos">
	  Order Allow,Deny
	  Allow from all
	  AuthType Basic
	  AuthName "GIT Repository"
	  AuthUserFile "E:/GitServer/Git/htpassword"
	  Require valid-user
	</Location>
	Alias /gitweb "E:/GitServer/Git/share/gitweb"
	<Directory "E:/GitServer/Git/share/gitweb">
  	AddHandler cgi-script .cgi
 		<Files ~ "\.cgi$">
   		Options +ExecCGI
  	</Files>
  	AllowOverride None
  	Order allow,deny
  	Allow from all
  	DirectoryIndex gitweb.cgi
	</Directory>
	ErrorLog "E:/GitServer/Apache/Apache2/logs/gitweb_error.log"
  CustomLog "E:/GitServer/Apache/Apache2/logs/gitweb_access.log" common
</VirtualHost>
httpd-gerrit.conf
<VirtualHost *:80>
ServerName 填你的域名/IP
ProxyRequests Off
ProxyVia Off
ProxyPreserveHost On
ErrorLog E:/GitServer/Apache/Apache2/logs/gerrit_error.log
<Proxy *>
Order deny,allow
Allow from all
</Proxy>
<Location /gerrit/login/>
AuthType Basic
AuthName "Gerrit Android Code Review"
AuthBasicProvider file
Require valid-user
AuthUserFile E:/GitServer/Git/htpassword
</Location>
AllowEncodedSlashes On
ProxyPass / http://192.168.1.100:8080/ nocanon
ProxyPassReverse / http://192.168.1.100:8080/ nocanon
SetEnv force-proxy-request-1.0 1
SetEnv proxy-nokeepalive 1
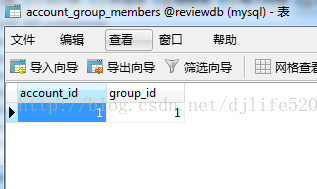
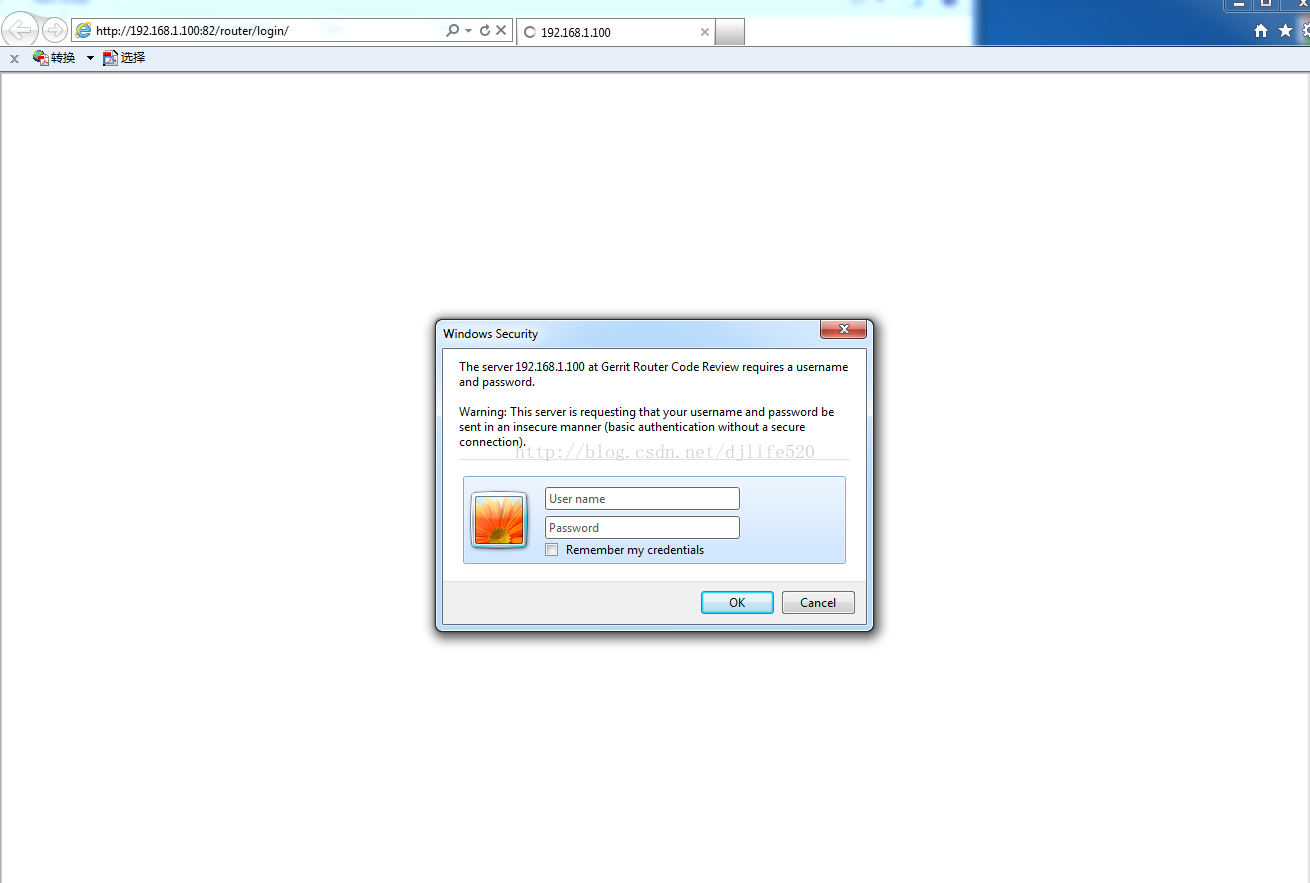
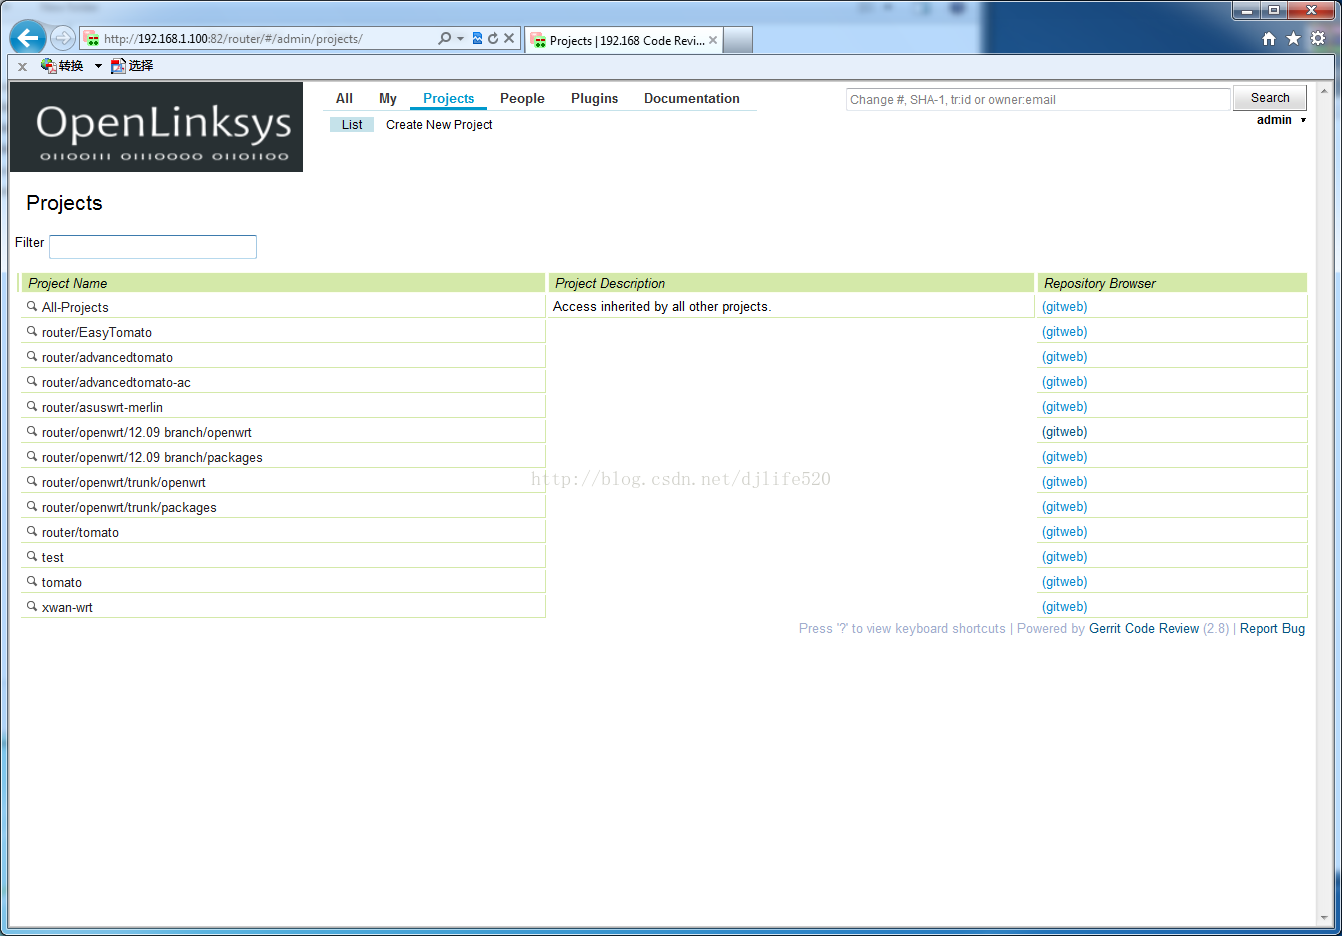
</VirtualHost> 有以上的配置步骤然后启动tomcat和apcahe基本上gerrit和gitweb就已经可以运行起来了,通过http://localhost/gerrit/login/ 就可以来登录了,由于这里gerrit是用的htttp认证方式,用户帐号都是在htpassword里的,要添加用户就在htpassword里面加,第一个登录gerrit的帐号自动成为管理员,因此在登录进后最好马上修改用户名和验证邮箱,不然再次登录的时候就没有管理员的权限,不能创建项目和管理组了,如果出现这个情况就只有直接去mysql里修改数据库了如下图:
还有一个问题大家会遇到就是有多层目录的时候,浏览时会报Error Bad Request,这是因为tomcat对"/"的解析有问题,此时要在tomcat/bin/catalina.bat里要加上-Dorg.apache.tomcat.util.buf.UDecoder.ALLOW_ENCODED_SLASH=true,还有如果库的代码很大的话,在浏览时会报500的错误,这是java的虚拟内存不够用,解决办法还是修改catalina.bat加上-Xmx800m,因此总的解决办法就来了,在它里面加上set JAVA_OPTS=-server -Xms800m -Xmx800m -XX:MaxNewSize=256m -Dorg.apache.tomcat.util.buf.UDecoder.ALLOW_ENCODED_SLASH=true,同时解决这两个问题。
以上就是我在安装Gerrit时的经验


 5108
5108


 被折叠的 条评论
为什么被折叠?
被折叠的 条评论
为什么被折叠?
 到【灌水乐园】发言


