


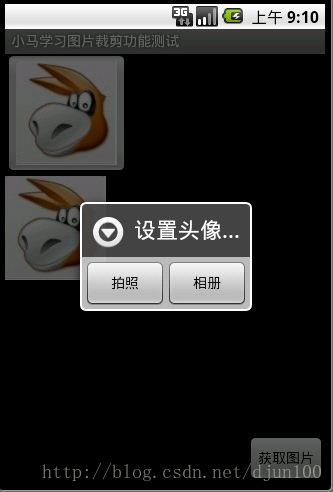
一:主布局界面

二:点击控件触发事件后效果图
三:拍照完之后效果图
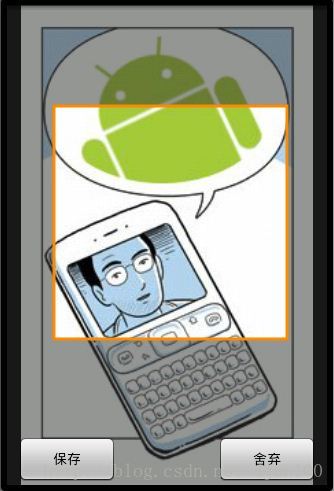
四:裁剪界面效果图
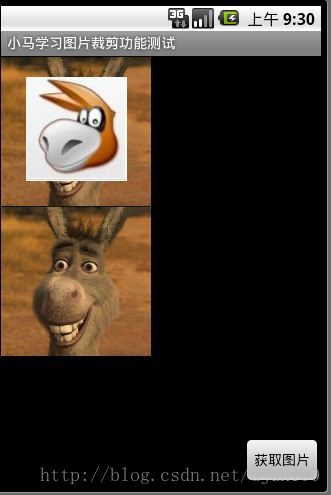
五:点击相册后返回的图片效果图
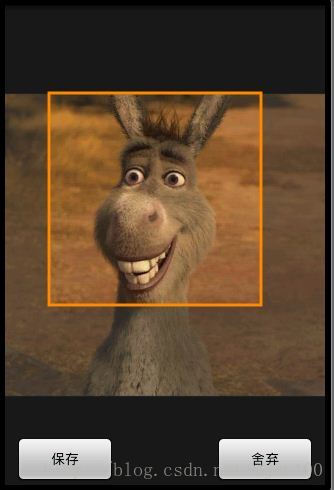
六:裁剪完从相册PICK的保存后的效果图
下面直接来看下主控制类代码,如下:
package com.example.photocapture;

//下面来看下裁剪中用到的类,大家详细看下头注释:
/**
 * 下面这些注释是下载这个类的时候本来就有的,本来要删除的,但看了下竟然是license,吼吼,
 * 好东西,留在注释里,以备不时之用,大家有需要加license的可以到下面的网址找哦
 */

//EPL, Eclipse Public License, V1.0 or later, http://www.eclipse.org/legal
//LGPL, GNU Lesser General Public License, V2.1 or later, http://www.gnu.org/licenses/lgpl.html
//GPL, GNU General Public License, V2 or later, http://www.gnu.org/licenses/gpl.html
//AL, Apache License, V2.0 or later, http://www.apache.org/licenses
//BSD, BSD License, http://www.opensource.org/licenses/bsd-license.php
/**
 * A Base64 encoder/decoder.
 *
 * <p>
 * This class is used to encode and decode data in Base64 format as described in RFC 1521.
 *
 * <p>
 * Project home page: <a href="http://www.source-code.biz/base64coder/java/">www.source-code.biz/base64coder/java</a><br>
 * Author: Christian d'Heureuse, Inventec Informatik AG, Zurich, Switzerland<br>
 * Multi-licensed: EPL / LGPL / GPL / AL / BSD.
 */

/**
 * 这个类在上面注释的网址中有,大家可以自行下载下,也可以直接用这个, 公开的Base64Coder类(不用深究它是怎么实现的,
 * 还是那句话,有轮子直接用轮子),好用的要死人了... 小马也很无耻的引用了这个网址下的东东,吼吼...
 *
 * @Title: Base64Coder.java
 * @Package com.xiaoma.piccut.demo
 * @Description: TODO
 * @author XiaoMa
 */

public class Base64Coder {

	// The line separator string of the operating system.
	private static final String systemLineSeparator = System
			.getProperty("line.separator");

	// Mapping table from 6-bit nibbles to Base64 characters.
	private static char[] map1 = new char[64];
	static {
		int i = 0;
		for (char c = 'A'; c <= 'Z'; c++)
			map1[i++] = c;
		for (char c = 'a'; c <= 'z'; c++)
			map1[i++] = c;
		for (char c = '0'; c <= '9'; c++)
			map1[i++] = c;
		map1[i++] = '+';
		map1[i++] = '/';
	}

	// Mapping table from Base64 characters to 6-bit nibbles.
	private static byte[] map2 = new byte[128];
	static {
		for (int i = 0; i < map2.length; i++)
			map2[i] = -1;
		for (int i = 0; i < 64; i++)
			map2[map1[i]] = (byte) i;
	}

	/**
	 * Encodes a string into Base64 format. No blanks or line breaks are
	 * inserted.
	 *
	 * @param s
	 *            A String to be encoded.
	 * @return A String containing the Base64 encoded data.
	 */
	public static String encodeString(String s) {
		return new String(encode(s.getBytes()));
	}

	/**
	 * Encodes a byte array into Base 64 format and breaks the output into lines
	 * of 76 characters. This method is compatible with
	 * <code>sun.misc.BASE64Encoder.encodeBuffer(byte[])</code>.
	 *
	 * @param in
	 *            An array containing the data bytes to be encoded.
	 * @return A String containing the Base64 encoded data, broken into lines.
	 */
	public static String encodeLines(byte[] in) {
		return encodeLines(in, 0, in.length, 76, systemLineSeparator);
	}

	/**
	 * Encodes a byte array into Base 64 format and breaks the output into
	 * lines.
	 *
	 * @param in
	 *            An array containing the data bytes to be encoded.
	 * @param iOff
	 *            Offset of the first byte in <code>in</code> to be processed.
	 * @param iLen
	 *            Number of bytes to be processed in <code>in</code>, starting
	 *            at <code>iOff</code>.
	 * @param lineLen
	 *            Line length for the output data. Should be a multiple of 4.
	 * @param lineSeparator
	 *            The line separator to be used to separate the output lines.
	 * @return A String containing the Base64 encoded data, broken into lines.
	 */
	public static String encodeLines(byte[] in, int iOff, int iLen,
			int lineLen, String lineSeparator) {
		int blockLen = (lineLen * 3) / 4;
		if (blockLen <= 0)
			throw new IllegalArgumentException();
		int lines = (iLen + blockLen - 1) / blockLen;
		int bufLen = ((iLen + 2) / 3) * 4 + lines * lineSeparator.length();
		StringBuilder buf = new StringBuilder(bufLen);
		int ip = 0;
		while (ip < iLen) {
			int l = Math.min(iLen - ip, blockLen);
			buf.append(encode(in, iOff + ip, l));
			buf.append(lineSeparator);
			ip += l;
		}
		return buf.toString();
	}

	/**
	 * Encodes a byte array into Base64 format. No blanks or line breaks are
	 * inserted in the output.
	 *
	 * @param in
	 *            An array containing the data bytes to be encoded.
	 * @return A character array containing the Base64 encoded data.
	 */
	public static char[] encode(byte[] in) {
		return encode(in, 0, in.length);
	}

	/**
	 * Encodes a byte array into Base64 format. No blanks or line breaks are
	 * inserted in the output.
	 *
	 * @param in
	 *            An array containing the data bytes to be encoded.
	 * @param iLen
	 *            Number of bytes to process in <code>in</code>.
	 * @return A character array containing the Base64 encoded data.
	 */
	public static char[] encode(byte[] in, int iLen) {
		return encode(in, 0, iLen);
	}

	/**
	 * Encodes a byte array into Base64 format. No blanks or line breaks are
	 * inserted in the output.
	 *
	 * @param in
	 *            An array containing the data bytes to be encoded.
	 * @param iOff
	 *            Offset of the first byte in <code>in</code> to be processed.
	 * @param iLen
	 *            Number of bytes to process in <code>in</code>, starting at
	 *            <code>iOff</code>.
	 * @return A character array containing the Base64 encoded data.
	 */
	public static char[] encode(byte[] in, int iOff, int iLen) {
		int oDataLen = (iLen * 4 + 2) / 3; // output length without padding
		int oLen = ((iLen + 2) / 3) * 4; // output length including padding
		char[] out = new char[oLen];
		int ip = iOff;
		int iEnd = iOff + iLen;
		int op = 0;
		while (ip < iEnd) {
			int i0 = in[ip++] & 0xff;
			int i1 = ip < iEnd ? in[ip++] & 0xff : 0;
			int i2 = ip < iEnd ? in[ip++] & 0xff : 0;
			int o0 = i0 >>> 2;
			int o1 = ((i0 & 3) << 4) | (i1 >>> 4);
			int o2 = ((i1 & 0xf) << 2) | (i2 >>> 6);
			int o3 = i2 & 0x3F;
			out[op++] = map1[o0];
			out[op++] = map1[o1];
			out[op] = op < oDataLen ? map1[o2] : '=';
			op++;
			out[op] = op < oDataLen ? map1[o3] : '=';
			op++;
		}
		return out;
	}

	/**
	 * Decodes a string from Base64 format. No blanks or line breaks are allowed
	 * within the Base64 encoded input data.
	 *
	 * @param s
	 *            A Base64 String to be decoded.
	 * @return A String containing the decoded data.
	 * @throws IllegalArgumentException
	 *             If the input is not valid Base64 encoded data.
	 */
	public static String decodeString(String s) {
		return new String(decode(s));
	}

	/**
	 * Decodes a byte array from Base64 format and ignores line separators, tabs
	 * and blanks. CR, LF, Tab and Space characters are ignored in the input
	 * data. This method is compatible with
	 * <code>sun.misc.BASE64Decoder.decodeBuffer(String)</code>.
	 *
	 * @param s
	 *            A Base64 String to be decoded.
	 * @return An array containing the decoded data bytes.
	 * @throws IllegalArgumentException
	 *             If the input is not valid Base64 encoded data.
	 */
	public static byte[] decodeLines(String s) {
		char[] buf = new char[s.length() + 3];
		int p = 0;
		for (int ip = 0; ip < s.length(); ip++) {
			char c = s.charAt(ip);
			if (c != ' ' && c != '\r' && c != '\n' && c != '\t')
				buf[p++] = c;
		}
		while ((p % 4) != 0)
			buf[p++] = '0';

		return decode(buf, 0, p);
	}

	/**
	 * Decodes a byte array from Base64 format. No blanks or line breaks are
	 * allowed within the Base64 encoded input data.
	 *
	 * @param s
	 *            A Base64 String to be decoded.
	 * @return An array containing the decoded data bytes.
	 * @throws IllegalArgumentException
	 *             If the input is not valid Base64 encoded data.
	 */
	public static byte[] decode(String s) {
		return decode(s.toCharArray());
	}

	/**
	 * Decodes a byte array from Base64 format. No blanks or line breaks are
	 * allowed within the Base64 encoded input data.
	 *
	 * @param in
	 *            A character array containing the Base64 encoded data.
	 * @return An array containing the decoded data bytes.
	 * @throws IllegalArgumentException
	 *             If the input is not valid Base64 encoded data.
	 */
	public static byte[] decode(char[] in) {
		return decode(in, 0, in.length);
	}

	/**
	 * Decodes a byte array from Base64 format. No blanks or line breaks are
	 * allowed within the Base64 encoded input data.
	 *
	 * @param in
	 *            A character array containing the Base64 encoded data.
	 * @param iOff
	 *            Offset of the first character in <code>in</code> to be
	 *            processed.
	 * @param iLen
	 *            Number of characters to process in <code>in</code>, starting
	 *            at <code>iOff</code>.
	 * @return An array containing the decoded data bytes.
	 * @throws IllegalArgumentException
	 *             If the input is not valid Base64 encoded data.
	 */
	public static byte[] decode(char[] in, int iOff, int iLen) {
		if (iLen % 4 != 0)
			throw new IllegalArgumentException(
					"Length of Base64 encoded input string is not a multiple of 4.");
		while (iLen > 0 && in[iOff + iLen - 1] == '=')
			iLen--;
		int oLen = (iLen * 3) / 4;
		byte[] out = new byte[oLen];
		int ip = iOff;
		int iEnd = iOff + iLen;
		int op = 0;
		while (ip < iEnd) {
			int i0 = in[ip++];
			int i1 = in[ip++];
			int i2 = ip < iEnd ? in[ip++] : 'A';
			int i3 = ip < iEnd ? in[ip++] : 'A';
			if (i0 > 127 || i1 > 127 || i2 > 127 || i3 > 127)
				throw new IllegalArgumentException(
						"Illegal character in Base64 encoded data.");
			int b0 = map2[i0];
			int b1 = map2[i1];
			int b2 = map2[i2];
			int b3 = map2[i3];
			if (b0 < 0 || b1 < 0 || b2 < 0 || b3 < 0)
				throw new IllegalArgumentException(
						"Illegal character in Base64 encoded data.");
			int o0 = (b0 << 2) | (b1 >>> 4);
			int o1 = ((b1 & 0xf) << 4) | (b2 >>> 2);
			int o2 = ((b2 & 3) << 6) | b3;
			out[op++] = (byte) o0;
			if (op < oLen)
				out[op++] = (byte) o1;
			if (op < oLen)
				out[op++] = (byte) o2;
		}
		return out;
	}

	// Dummy constructor.
	private Base64Coder() {
	}

} // end class Base64Coder
package com.example.photocapture;

import java.io.File;
import android.app.Activity;
import android.app.AlertDialog;
import android.content.DialogInterface;
import android.content.Intent;
import android.graphics.Bitmap;
import android.graphics.drawable.BitmapDrawable;
import android.graphics.drawable.Drawable;
import android.net.Uri;
import android.os.Bundle;
import android.os.Environment;
import android.provider.MediaStore;
import android.view.View;
import android.view.View.OnClickListener;
import android.widget.Button;
import android.widget.ImageButton;
import android.widget.ImageView;
/**
 * @Title: PicCutDemoActivity.java
 * @Package com.xiaoma.piccut.demo
 * @Description: 图片裁剪功能测试
 * @author XiaoMa
 */
public class MainActivity extends Activity implements OnClickListener {

    private ImageButton ib = null;
    private ImageView iv = null;
    private Button btn = null;
    private String tp = null;


    /** Called when the activity is first created. */
    @Override
    public void onCreate(Bundle savedInstanceState) {
        super.onCreate(savedInstanceState);
        setContentView(R.layout.activity_main);
        //初始化
        init();
    }

    /**
     * 初始化方法实现
     */
    private void init() {
        ib = (ImageButton) findViewById(R.id.imageButton1);
        iv = (ImageView) findViewById(R.id.imageView1);
        btn = (Button) findViewById(R.id.button1);
        ib.setOnClickListener(this);
        iv.setOnClickListener(this);
        btn.setOnClickListener(this);
    }


    /**
     * 控件点击事件实现
     *
     * 因为有朋友问不同控件的背景图裁剪怎么实现,
     * 我就在这个地方用了三个控件,只为了自己记录学习
     * 大家觉得没用的可以跳过啦
     */
    @Override
    public void onClick(View v) {
        switch (v.getId()) {
        case R.id.imageButton1:
            ShowPickDialog();
            break;
        case R.id.imageView1:
            ShowPickDialog();
            break;
        case R.id.button1:
            ShowPickDialog();
            break;

        default:
            break;
        }
    }

    /**
     * 选择提示对话框
     */
    private void ShowPickDialog() {
        new AlertDialog.Builder(this)
                .setTitle("设置头像...")
                .setNegativeButton("相册", new DialogInterface.OnClickListener() {
                    public void onClick(DialogInterface dialog, int which) {
                        dialog.dismiss();
                        /**
                         * 刚开始,我自己也不知道ACTION_PICK是干嘛的,后来直接看Intent源码,
                         * 可以发现里面很多东西,Intent是个很强大的东西,大家一定仔细阅读下
                         */
                        Intent intent = new Intent(Intent.ACTION_PICK, null);

                        /**
                         * 下面这句话,与其它方式写是一样的效果,如果:
                         * intent.setData(MediaStore.Images.Media.EXTERNAL_CONTENT_URI);
                         * intent.setType(""image/*");设置数据类型
                         * 如果朋友们要限制上传到服务器的图片类型时可以直接写如:"image/jpeg 、 image/png等的类型"
                         * 这个地方小马有个疑问,希望高手解答下:就是这个数据URI与类型为什么要分两种形式来写呀?有什么区别?
                         */
                        intent.setDataAndType(
                                MediaStore.Images.Media.EXTERNAL_CONTENT_URI,
                                "image/*");
                        startActivityForResult(intent, 1);

                    }
                })
                .setPositiveButton("拍照", new DialogInterface.OnClickListener() {
                    public void onClick(DialogInterface dialog, int whichButton) {
                        dialog.dismiss();
                        /**
                         * 下面这句还是老样子,调用快速拍照功能,至于为什么叫快速拍照,大家可以参考如下官方
                         * 文档,you_sdk_path/docs/guide/topics/media/camera.html
                         * 我刚看的时候因为太长就认真看,其实是错的,这个里面有用的太多了,所以大家不要认为
                         * 官方文档太长了就不看了,其实是错的,这个地方小马也错了,必须改正
                         */
                        Intent intent = new Intent(
                                MediaStore.ACTION_IMAGE_CAPTURE);
                        //下面这句指定调用相机拍照后的照片存储的路径
                        intent.putExtra(MediaStore.EXTRA_OUTPUT, Uri
                                .fromFile(new File(Environment
                                        .getExternalStorageDirectory(),
                                        "xiaoma.jpg")));
                        startActivityForResult(intent, 2);
                    }
                }).show();
    }

    @Override
    protected void onActivityResult(int requestCode, int resultCode, Intent data) {
        switch (requestCode) {
        // 如果是直接从相册获取
        case 1:
            startPhotoZoom(data.getData());
            break;
        // 如果是调用相机拍照时
        case 2:
            File temp = new File(Environment.getExternalStorageDirectory()
                    + "/xiaoma.jpg");
            startPhotoZoom(Uri.fromFile(temp));
            break;
        // 取得裁剪后的图片
        case 3:
            /**
             * 非空判断大家一定要验证,如果不验证的话,
             * 在剪裁之后如果发现不满意,要重新裁剪,丢弃
             * 当前功能时,会报NullException,小马只
             * 在这个地方加下,大家可以根据不同情况在合适的
             * 地方做判断处理类似情况
             *
             */
            if(data != null){
                setPicToView(data);
            }
            break;
        default:
            break;

        }
        super.onActivityResult(requestCode, resultCode, data);
    }

    /**
     * 裁剪图片方法实现
     * @param uri
     */
    public void startPhotoZoom(Uri uri) {
        /*
         * 至于下面这个Intent的ACTION是怎么知道的,大家可以看下自己路径下的如下网页
         * yourself_sdk_path/docs/reference/android/content/Intent.html
         * 直接在里面Ctrl+F搜:CROP ,之前小马没仔细看过,其实安卓系统早已经有自带图片裁剪功能,
         * 是直接调本地库的,小马不懂C C++  这个不做详细了解去了,有轮子就用轮子,不再研究轮子是怎么
         * 制做的了...吼吼
         */
        Intent intent = new Intent("com.android.camera.action.CROP");
        intent.setDataAndType(uri, "image/*");
        //下面这个crop=true是设置在开启的Intent中设置显示的VIEW可裁剪
        intent.putExtra("crop", "true");
        // aspectX aspectY 是宽高的比例
        intent.putExtra("aspectX", 1);
        intent.putExtra("aspectY", 1);
        // outputX outputY 是裁剪图片宽高
        intent.putExtra("outputX", 150);
        intent.putExtra("outputY", 150);
        intent.putExtra("return-data", true);
        startActivityForResult(intent, 3);
    }

    /**
     * 保存裁剪之后的图片数据
     * @param picdata
     */
    private void setPicToView(Intent picdata) {
        Bundle extras = picdata.getExtras();
        if (extras != null) {
            Bitmap photo = extras.getParcelable("data");
            Drawable drawable = new BitmapDrawable(photo);

            /**
             * 下面注释的方法是将裁剪之后的图片以Base64Coder的字符方式上
             * 传到服务器,QQ头像上传采用的方法跟这个类似
             */

            /*ByteArrayOutputStream stream = new ByteArrayOutputStream();
            photo.compress(Bitmap.CompressFormat.JPEG, 60, stream);
            byte[] b = stream.toByteArray();
            // 将图片流以字符串形式存储下来

            tp = new String(Base64Coder.encodeLines(b));
            这个地方大家可以写下给服务器上传图片的实现,直接把tp直接上传就可以了,
            服务器处理的方法是服务器那边的事了,吼吼

            如果下载到的服务器的数据还是以Base64Coder的形式的话,可以用以下方式转换
            为我们可以用的图片类型就OK啦...吼吼
            Bitmap dBitmap = BitmapFactory.decodeFile(tp);
            Drawable drawable = new BitmapDrawable(dBitmap);
            */
            ib.setBackgroundDrawable(drawable);
            iv.setBackgroundDrawable(drawable);
        }
    }

}
<RelativeLayout xmlns:android="http://schemas.android.com/apk/res/android"
    xmlns:tools="http://schemas.android.com/tools"
    android:layout_width="match_parent"
    android:layout_height="match_parent"
    android:paddingBottom="@dimen/activity_vertical_margin"
    android:paddingLeft="@dimen/activity_horizontal_margin"
    android:paddingRight="@dimen/activity_horizontal_margin"
    android:paddingTop="@dimen/activity_vertical_margin"
    tools:context=".MainActivity" >

    <TextView
        android:id="@+id/textView1"
        android:layout_width="wrap_content"
        android:layout_height="wrap_content"
        android:text="@string/hello_world" />

    <Button
        android:id="@+id/button1"
        style="?android:attr/buttonStyleSmall"
        android:layout_width="wrap_content"
        android:layout_height="wrap_content"
        android:layout_alignLeft="@+id/textView1"
        android:layout_alignParentBottom="true"
        android:layout_marginBottom="42dp"
        android:text="Button" />

    <ImageView
        android:id="@+id/imageView1"
        android:layout_width="wrap_content"
        android:layout_height="wrap_content"
        android:layout_below="@+id/textView1"
        android:layout_centerHorizontal="true"
        android:layout_marginTop="68dp"
        android:src="@drawable/ic_launcher" />

    <ImageButton
        android:id="@+id/imageButton1"
        android:layout_width="wrap_content"
        android:layout_height="wrap_content"
        android:layout_alignTop="@+id/button1"
        android:layout_toRightOf="@+id/imageView1"
        android:src="@drawable/ic_launcher" />

</RelativeLayout>
Base64算法大家可以参考我转载的另一篇文章,其作用有详细解释。


 883
883


 被折叠的 条评论
为什么被折叠?
被折叠的 条评论
为什么被折叠?
 到【灌水乐园】发言


