


1、首先是一个基于httpclient的java 应用程序,代码在这篇文章的开头:点击打开链接
2、我们首先写一个基于springMVC框架的简单接收请求上传的文件保存本地文件系统的demo,程序代码在这:点击打开链接,不过因为之后与hadoop所以来的jar包同时使用,加上有一些三方jar包可能会冲突,这里我们简化这个demo里面maven所依赖的选项,更新的pom文件如下:
<project xmlns="http://maven.apache.org/POM/4.0.0" xmlns:xsi="http://www.w3.org/2001/XMLSchema-instance" xsi:schemaLocation="http://maven.apache.org/POM/4.0.0 http://maven.apache.org/xsd/maven-4.0.0.xsd">
  <modelVersion>4.0.0</modelVersion>
  <groupId>springmvx</groupId>
  <artifactId>springmvx</artifactId>
  <version>0.0.1-SNAPSHOT</version>
  <packaging>war</packaging>
  <build>
    <sourceDirectory>src</sourceDirectory>
    <plugins>
      <plugin>
        <artifactId>maven-compiler-plugin</artifactId>
        <version>3.3</version>
        <configuration>
          <source>1.7</source>
          <target>1.7</target>
        </configuration>
      </plugin>
      <plugin>
        <artifactId>maven-war-plugin</artifactId>
        <version>2.6</version>
        <configuration>
          <warSourceDirectory>WebContent</warSourceDirectory>
          <failOnMissingWebXml>false</failOnMissingWebXml>
        </configuration>
      </plugin>
    </plugins>
  </build>
  <dependencies>
  	<dependency>
        <groupId>jstl</groupId>
        <artifactId>jstl</artifactId>
        <version>1.2</version>
    </dependency>
    <dependency>
        <groupId>org.springframework</groupId>
        <artifactId>spring-webmvc</artifactId>
        <version>3.1.1.RELEASE</version>
    </dependency>
  	<dependency>
        <groupId>org.springframework</groupId>
        <artifactId>spring-web</artifactId>
        <version>3.1.1.RELEASE</version>
    </dependency>
    <dependency>
        <groupId>commons-fileupload</groupId>
        <artifactId>commons-fileupload</artifactId>
        <version>1.3.1</version>
    </dependency>
    <dependency>
        <groupId>jdk.tools</groupId>
        <artifactId>jdk.tools</artifactId>
        <version>1.7</version>
        <scope>system</scope>
        <systemPath>${JAVA_HOME}/lib/tools.jar</systemPath>
    </dependency>
    <dependency>
		<groupId>org.apache.hadoop</groupId>
		<artifactId>hadoop-client</artifactId>
		<version>2.6.0</version>
	</dependency>
  </dependencies>
</project>
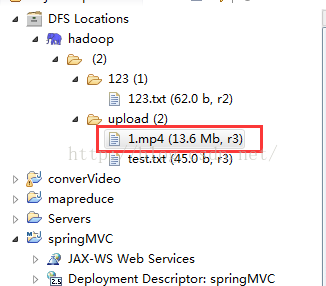
3、我们将springMVC控制器里的代码稍加修改,改为直接上传文件到hdfs,而不是本地文件系统,代码如下:
package net.spring.controller;

import java.io.File;
import java.io.IOException;
import java.util.Iterator;
import javax.servlet.http.HttpServletRequest;
import javax.servlet.http.HttpServletResponse;

import org.apache.commons.fileupload.disk.DiskFileItem;
import org.springframework.stereotype.Controller;
import org.springframework.web.bind.annotation.RequestMapping;
import org.springframework.web.multipart.MultipartFile;
import org.springframework.web.multipart.MultipartHttpServletRequest;
import org.springframework.web.multipart.commons.CommonsMultipartFile;
import org.springframework.web.multipart.commons.CommonsMultipartResolver;
import org.springframework.web.servlet.ModelAndView;

import com.busymonkey.hadoop.*;

@Controller
public class HelloWorldController {

    @RequestMapping("/hello")
    public ModelAndView hello() {
        String message = "Hello World, Spring 3.0!";
        System.out.println(message);
        return new ModelAndView("hello1", "message", message);
    }
    @RequestMapping("/upload")
    public String upLoad(HttpServletRequest request, HttpServletResponse response)
    		throws IllegalStateException, IOException{
    	//解析器解析request的上下文
    	CommonsMultipartResolver multipartResolver = new CommonsMultipartResolver(request.getSession().getServletContext());
    	//先判断request中是否包涵multipart类型的数据,
    	if(multipartResolver.isMultipart(request)) {
    		//再将request中的数据转化成multipart类型的数据
    		MultipartHttpServletRequest multiRequest = (MultipartHttpServletRequest) request;
    		Iterator<String> iter = multiRequest.getFileNames();
    		while(iter.hasNext()) {
    			MultipartFile file = multiRequest.getFile((String)iter.next());
    			if(file != null) {
    				CommonsMultipartFile cf= (CommonsMultipartFile)file;
    		        DiskFileItem fi = (DiskFileItem)cf.getFileItem();
    		        File inputFile = fi.getStoreLocation();
    		        HdfsFileSystem.createFile(inputFile, "hdfs://192.168.241.149:9000/upload/1.mp4");
    			}
    		}
    	}
    	return "/hello1";
    }
}
4、同时我们再新建一个hdfs的工具类,在上面的类中有引用,代码如下:
package com.busymonkey.hadoop;

import java.io.BufferedInputStream;
import java.io.File;
import java.io.FileInputStream;
import java.io.IOException;
import java.io.InputStream;
import java.net.URI;

import org.apache.hadoop.conf.Configuration;
import org.apache.hadoop.fs.FSDataOutputStream;
import org.apache.hadoop.fs.FileSystem;
import org.apache.hadoop.fs.Path;
import org.apache.hadoop.io.IOUtils;

public class HdfsFileSystem {
    /**
     * 按路径上传文件到hdfs
     * @param conf
     * @param local
     * @param remote
     * @throws IOException
     */
    public static void copyFile(Configuration conf , String uri , String local, String remote) throws IOException {
    	FileSystem fs = FileSystem.get(URI.create(uri), conf);
        fs.copyFromLocalFile(new Path(local), new Path(remote));
        System.out.println("copy from: " + local + " to " + remote);
        fs.close();
    }

    /**
     * 按路径下载hdfs上的文件
     * @param conf
     * @param uri
     * @param remote
     * @param local
     * @throws IOException
     */
    public static void download(Configuration conf , String uri ,String remote, String local) throws IOException {
           Path path = new Path(remote);
           FileSystem fs = FileSystem.get(URI.create(uri), conf);
           fs.copyToLocalFile(path, new Path(local));
           System.out.println("download: from" + remote + " to " + local);
           fs.close();
   }

    /**
     * File对象上传到hdfs
     * @param conf
     * @param uri
     * @param remote
     * @param local
     * @throws IOException
     */
    public static void createFile(File localPath, String hdfsPath) throws IOException {
        InputStream in = null;
        try {
            Configuration conf = new Configuration();
            FileSystem fileSystem = FileSystem.get(URI.create(hdfsPath), conf);
            FSDataOutputStream out = fileSystem.create(new Path(hdfsPath));
            in = new BufferedInputStream(new FileInputStream(localPath));
            IOUtils.copyBytes(in, out, 4096, false);
            out.hsync();
            out.close();
            System.out.println("create file in hdfs:" + hdfsPath);
        } finally {
            IOUtils.closeStream(in);
        }
    }
}
其他代码跟本地上传文件的demo是一样的。结果如下:
5、jsp页面提交文件上传请求,不使用 java 应用 httpclient,将 index.jsp 修改如下:
<%@ page language="java" contentType="text/html; charset=ISO-8859-1"  pageEncoding="ISO-8859-1"%>
<!DOCTYPE html PUBLIC "-//W3C//DTD HTML 4.01 Transitional//EN" "http://www.w3.org/TR/html4/loose.dtd">
<html>
<head>
	<title>Spring 3.0 MVC demo</title>
</head>
<body>
	<a href="hello.html">Say Hello</a>
	<h3>upload :</h3>
	Please choose the file :<br />
	<form action="upload.html" method="post" enctype="multipart/form-data">
		<input type="file" name="file" size="50" />
		<br />
	<input type="submit" value="Upload" />
	</form>
</body>
</html>
6、将hello1.jsp 重命名为 result.jsp,代码如下:
<%@ page language="java" contentType="text/html; charset=ISO-8859-1"
    pageEncoding="ISO-8859-1"%>
<!DOCTYPE html PUBLIC "-//W3C//DTD HTML 4.01 Transitional//EN" "http://www.w3.org/TR/html4/loose.dtd">
<html>
	<head>
		<meta http-equiv="Content-Type" content="text/html; charset=ISO-8859-1">
		<title>result</title>
	</head>
	<body>
		<p>success!</p>
	</body>
</html>


 1万+
1万+


 被折叠的 条评论
为什么被折叠?
被折叠的 条评论
为什么被折叠?
 到【灌水乐园】发言


