


1.编写activity的布局文件
<?
xml version=
"1.0"
encoding=
"utf-8"
?>
< RelativeLayout
xmlns: android = "http://schemas.android.com/apk/res/android"
android :layout_width= "match_parent"
android :layout_height= "match_parent"
>
<!-- 一般框架的布局不要轻易改动
< RelativeLayout
xmlns: android = "http://schemas.android.com/apk/res/android"
android :layout_width= "match_parent"
android :layout_height= "match_parent"
>
<!-- 一般框架的布局不要轻易改动
-->
<android.support.v4.app.FragmentTabHost
android
:id=
"@+id/tabHost"
android :layout_width= "match_parent"
android :layout_height= "match_parent"
android :layout_alignParentEnd= "true"
android :layout_alignParentRight= "true"
android :layout_alignParentTop= "true">
<!--
想改变 TabWidget 位置 , 在 LinearLayout 中调节即可 -->
< LinearLayout
android :layout_width= "match_parent"
android :layout_height= "match_parent"
android :orientation= "vertical">
<!-- 这里的 FrameLayout 和 TabWidget 的 id 是特定的 , 最好不要修改 -->
< FrameLayout
android :id= "@android:id/tabcontent"
android :layout_width= "match_parent"
android :layout_height= "0dp"
android :layout_weight= "1">
</ FrameLayout>
< TabWidget
android :id= "@android:id/tabs"
android :layout_width= "match_parent"
android :layout_height= "wrap_content"
android :background= "#000000">
</ TabWidget>
android :layout_width= "match_parent"
android :layout_height= "match_parent"
android :layout_alignParentEnd= "true"
android :layout_alignParentRight= "true"
android :layout_alignParentTop= "true">
<!--
想改变 TabWidget 位置 , 在 LinearLayout 中调节即可 -->
< LinearLayout
android :layout_width= "match_parent"
android :layout_height= "match_parent"
android :orientation= "vertical">
<!-- 这里的 FrameLayout 和 TabWidget 的 id 是特定的 , 最好不要修改 -->
< FrameLayout
android :id= "@android:id/tabcontent"
android :layout_width= "match_parent"
android :layout_height= "0dp"
android :layout_weight= "1">
</ FrameLayout>
< TabWidget
android :id= "@android:id/tabs"
android :layout_width= "match_parent"
android :layout_height= "wrap_content"
android :background= "#000000">
</ TabWidget>
</LinearLayout>
</
android.support.v4.app.FragmentTabHost>
</RelativeLayout>
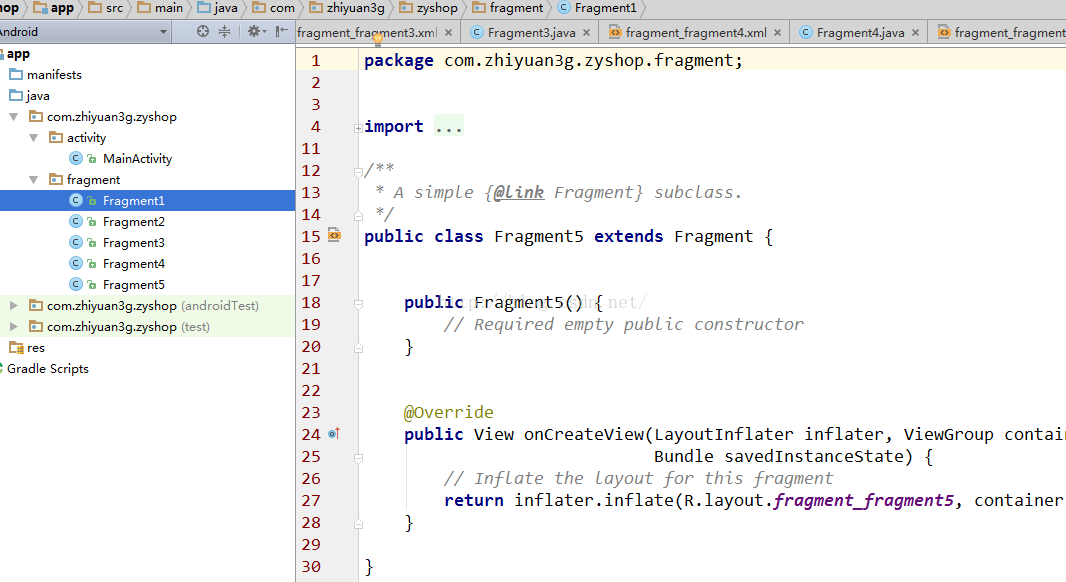
2.创建底部所需要的fragment
因为底部有五个标签,所以创建5个fragment
在每个碎片布局进行简单的设置,其它的类似
<FrameLayout xmlns:android="http://schemas.android.com/apk/res/android"
             xmlns:tools="http://schemas.android.com/tools"
             android:layout_width="match_parent"
             android:layout_height="match_parent"
             >

    <!-- TODO: Update blank fragment layout -->
    <TextView
        android:layout_width="match_parent"
        android:layout_height="match_parent"
        android:text="这是首页"
        android:textSize="35sp"
        android:gravity="center"/>

</FrameLayout>
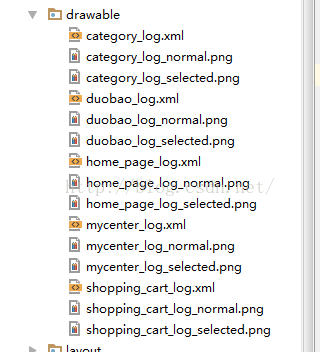
3.设置底部的图片和文字
使用SelectorChapek for Android(更加图片资源生产状态选择器)
用于生成Selector的插件。你需要在drawable文件夹中右键,在弹出的菜单中选择Generate Android Selectors,它就会根据你的几个drawable文件夹里的资源的命名,帮你生成Selector代码。
注意:(使用这个插件,命名必须规范,前缀名必须一致,都必须是同一类型,资源文件需要根据约定的后缀来命名。最后一个单词分为按下状态为_pressed,正常状态为_normal,不可用状态为_disable,等等。)
比如:category_log_normal.png和category_log_selected.png方可以.如下所示,
再右键drawable文件创建一个teble_txt.xml文件,用来设置底部文字的颜色变化
在values--color下设置颜色
<?xml version="1.0" encoding="utf-8"?>
<resources>
    <color name="colorPrimary">#3F51B5</color>
    <color name="colorPrimaryDark">#303F9F</color>
    <color name="colorAccent">#FF4081</color>
    <color name="tab_normal">#ffffff</color>
    <color name="tab_selected">#00faee</color>
</resources>
在teble_txt.xml文件中进行设置, 平时为白色,选中时为蓝色
<?xml version="1.0" encoding="utf-8"?>
<selector xmlns:android="http://schemas.android.com/apk/res/android">
    <item android:color="@color/tab_selected" android:state_selected="true"></item>
    <item android:color="@color/tab_normal" ></item>
</selector>
4.主窗体实现代码
public class MainActivity
extends AppCompatActivity {
// 创建一个 fragment 的数组 , 方便以后更改一级界面中 fragment 的个数 ,
// 如需修改在这里添加或删除即可
private Class[] fragments = {Fragment1. class, Fragment2. class, Fragment3. class,
Fragment4. class, Fragment5. class};
// 为框架底部设置选择器的图片数组 , 如需添加新的模块 , 再添加状态选择器即可
// 注意 : 这里的数组中放的是 drawable 文件中的 xml 文件
// 设置图片底下对应的文字
private String[] titles = { " 首页 ", " 分类 ", " 乐一乐 ", " 购物车 ", " 我的 "};
private FragmentTabHost tabHost;
@Override
protected void onCreate(Bundle savedInstanceState) {
super.onCreate(savedInstanceState);
setContentView(R.layout. activity_main);
// 初始化控件 , 只需要初始化 TabHost 即可
initView();
// 使用此方法为 TabHost 添加 fragment
// 第一个参数为上下文 , 第二个参数为 fragment 的管理器 ( 有 support 是 v4 包下的 , 可支持低版本 )
// 第三个参数是写死的 ( 布局中碎片的 id)
tabHost.setup(MainActivity. this, getSupportFragmentManager(), android.R.id. tabcontent);
// 使用 for 循环为每一个 fragment 添加子标签 , 根据 fragment 集合中的个数动态添加
for ( int i = 0; i < fragments. length; i++) {
// 把一个布局的 XML 资源转换为一个 view 的对象 , 第一个参数就是 layout, 第二个设置为空
View view = getLayoutInflater().inflate(R.layout. item_table, null);
// 进行控件查找 , 将 xml 的控件初始化
ImageView imgShow = (ImageView) view.findViewById(R.id. imgShow);
TextView txtShow = (TextView) view.findViewById(R.id. txtShow);
// 从对应的集合中拿到图片资源
imgShow.setImageResource( imgSelects[i]);
// 从对应的集合中拿到文本资源
txtShow.setText( titles[i]);
// 使用 fragmentTableHost 去添加子标签的核心代码
// 第一个参数为 tabHost.newTabSpec(""+i) 为每个子标签添加标识 , 并添加在底部 view
// 第二个参数为动态加载的 fragment 对象即合理的从数组中拿 fragment
// 第三个参数为空
tabHost.addTab( tabHost.newTabSpec( "" + i).setIndicator(view), fragments[i], null);
}
}
private void initView() {
tabHost = (FragmentTabHost) findViewById(R.id. tabHost);
}
}
// 创建一个 fragment 的数组 , 方便以后更改一级界面中 fragment 的个数 ,
// 如需修改在这里添加或删除即可
private Class[] fragments = {Fragment1. class, Fragment2. class, Fragment3. class,
Fragment4. class, Fragment5. class};
// 为框架底部设置选择器的图片数组 , 如需添加新的模块 , 再添加状态选择器即可
// 注意 : 这里的数组中放的是 drawable 文件中的 xml 文件
private int[]
imgSelects = {R.drawable.
home_page_log,R.drawable.
category_log,
R.drawable.duobao_log,R.drawable.shopping_cart_log,
R.drawable.
mycenter_log};
// 设置图片底下对应的文字
private String[] titles = { " 首页 ", " 分类 ", " 乐一乐 ", " 购物车 ", " 我的 "};
private FragmentTabHost tabHost;
@Override
protected void onCreate(Bundle savedInstanceState) {
super.onCreate(savedInstanceState);
setContentView(R.layout. activity_main);
// 初始化控件 , 只需要初始化 TabHost 即可
initView();
// 使用此方法为 TabHost 添加 fragment
// 第一个参数为上下文 , 第二个参数为 fragment 的管理器 ( 有 support 是 v4 包下的 , 可支持低版本 )
// 第三个参数是写死的 ( 布局中碎片的 id)
tabHost.setup(MainActivity. this, getSupportFragmentManager(), android.R.id. tabcontent);
// 使用 for 循环为每一个 fragment 添加子标签 , 根据 fragment 集合中的个数动态添加
for ( int i = 0; i < fragments. length; i++) {
// 把一个布局的 XML 资源转换为一个 view 的对象 , 第一个参数就是 layout, 第二个设置为空
View view = getLayoutInflater().inflate(R.layout. item_table, null);
// 进行控件查找 , 将 xml 的控件初始化
ImageView imgShow = (ImageView) view.findViewById(R.id. imgShow);
TextView txtShow = (TextView) view.findViewById(R.id. txtShow);
// 从对应的集合中拿到图片资源
imgShow.setImageResource( imgSelects[i]);
// 从对应的集合中拿到文本资源
txtShow.setText( titles[i]);
// 使用 fragmentTableHost 去添加子标签的核心代码
// 第一个参数为 tabHost.newTabSpec(""+i) 为每个子标签添加标识 , 并添加在底部 view
// 第二个参数为动态加载的 fragment 对象即合理的从数组中拿 fragment
// 第三个参数为空
tabHost.addTab( tabHost.newTabSpec( "" + i).setIndicator(view), fragments[i], null);
}
}
private void initView() {
tabHost = (FragmentTabHost) findViewById(R.id. tabHost);
}
}
最终实现结果


 644
644

 被折叠的 条评论
为什么被折叠?
被折叠的 条评论
为什么被折叠?
 到【灌水乐园】发言


