


LayoutInflaterCompat这个类一般很少用到,但是学习了这个类可以让我们加深对android的认识。首先来看一段代码:
public class MainActivity extends AppCompatActivity
{
    @Override
    protected void onCreate(Bundle savedInstanceState)
    {
        LayoutInflaterCompat.setFactory(LayoutInflater.from(this), new LayoutInflaterFactory()
        {
            @Override
            public View onCreateView(View parent, String name, Context context, AttributeSet attrs)
            {
            Log.i("way",name);
                int n = attrs.getAttributeCount();
                for (int i = 0; i < n; i++)
                {
                    Log.i("way", attrs.getAttributeName(i) + " , " + attrs.getAttributeValue(i));
                }
                return null;
            }
        });
        super.onCreate(savedInstanceState);
        setContentView(R.layout.activity_main);
    }
打印结果:
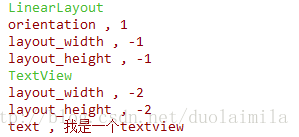
这只是部分log,上面还有顶层linerlayout Framelayout等。
实际上LayoutInflaterCompat.setFactory调用的还是LayoutInflater的setFactory。解决了一些兼容问题。
看看布局文件:
<?xml version="1.0" encoding="utf-8"?>
<LinearLayout xmlns:android="http://schemas.android.com/apk/res/android"
    xmlns:tools="http://schemas.android.com/tools"
    android:layout_width="match_parent"
    android:layout_height="match_parent"
    android:orientation="vertical"
    tools:context="com.qxj.skin.MainActivity">

    <TextView
        android:layout_width="wrap_content"
        android:layout_height="wrap_content"
        android:text="我是一个textview" />
</LinearLayout>
可以看出通过这个方法可以返回view所有的信息,然后我们稍微修改下代码看看:
 @Override
            public View onCreateView(View parent, String name, Context context, AttributeSet attrs)
            {
                if (name.equals("TextView"))
                {
                    Button button = new Button(context, attrs);
                    return button;
                }
                return null;
            }
判断name是不是Textview,如果是的话返回一个button。运行后截图:
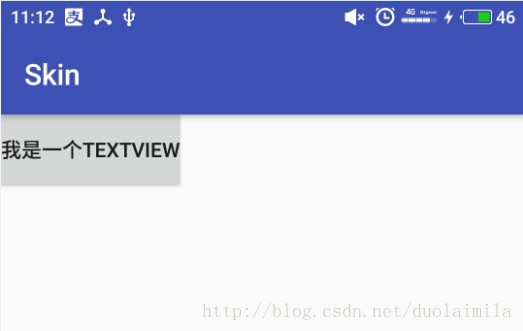
是不是很神奇,原先的textview变成了button。
通过这个,我们可以简单实现一些功能,例如把项目中所有textview换成自定义的textview。还有实现换肤功能。
现在我们新建activity,一般都继承自AppCompatActivity。其实在ApcompatActivity也使用setFactory方法,来将定义的普通Button,TextView之类的控件替换成了AppcompatButton等。来看ApcompatActivity的onCreate方法代码:
 final AppCompatDelegate delegate = getDelegate();
        delegate.installViewFactory();
        delegate.onCreate(savedInstanceState);
        if (delegate.applyDayNight() && mThemeId != 0) {
            // If DayNight has been applied, we need to re-apply the theme for
            // the changes to take effect. On API 23+, we should bypass
            // setTheme(), which will no-op if the theme ID is identical to the
            // current theme ID.
            if (Build.VERSION.SDK_INT >= 23) {
                onApplyThemeResource(getTheme(), mThemeId, false);
            } else {
                setTheme(mThemeId);
            }
        }
        super.onCreate(savedInstanceState);
首先获取一个AppCompatDelegate 对象,然后调用installViewFactory方法。看起来就和setFactory方法有关联,进去看看:
public abstract void installViewFactory();是一个抽象方法。使用快捷键ctrl+t查看具体实现
 @Override
    public void installViewFactory() {
        LayoutInflater layoutInflater = LayoutInflater.from(mContext);
        if (layoutInflater.getFactory() == null) {
            LayoutInflaterCompat.setFactory(layoutInflater, this);
        } else {
            if (!(LayoutInflaterCompat.getFactory(layoutInflater)
                    instanceof AppCompatDelegateImplV9)) {
                Log.i(TAG, "The Activity's LayoutInflater already has a Factory installed"
                        + " so we can not install AppCompat's");
            }
        }
    }
首先判断是否已经存在factory,没有就setFactory,有的话就不再处理。然后看看AppcompActivity是怎么处理的,查看onCreateView方法:
   /**
     * From {@link android.support.v4.view.LayoutInflaterFactory}
     */
    @Override
    public final View onCreateView(View parent, String name,
            Context context, AttributeSet attrs) {
        // First let the Activity's Factory try and inflate the view
        final View view = callActivityOnCreateView(parent, name, context, attrs);
        if (view != null) {
            return view;
        }

        // If the Factory didn't handle it, let our createView() method try
        return createView(parent, name, context, attrs);
    }
最终会调用createView方法:
    @Override
    public View createView(View parent, final String name, @NonNull Context context,
            @NonNull AttributeSet attrs) {
        final boolean isPre21 = Build.VERSION.SDK_INT < 21;

        if (mAppCompatViewInflater == null) {
            mAppCompatViewInflater = new AppCompatViewInflater();
        }

        // We only want the View to inherit its context if we're running pre-v21
        final boolean inheritContext = isPre21 && shouldInheritContext((ViewParent) parent);

        return mAppCompatViewInflater.createView(parent, name, context, attrs, inheritContext,
                isPre21, /* Only read android:theme pre-L (L+ handles this anyway) */
                true, /* Read read app:theme as a fallback at all times for legacy reasons */
                VectorEnabledTintResources.shouldBeUsed() /* Only tint wrap the context if enabled */
        );
    }
直接进入mAppCompatViewInflater.createView方法
public final View createView(View parent, final String name, @NonNull Context context,
            @NonNull AttributeSet attrs, boolean inheritContext,
            boolean readAndroidTheme, boolean readAppTheme, boolean wrapContext) {
        final Context originalContext = context;

        // We can emulate Lollipop's android:theme attribute propagating down the view hierarchy
        // by using the parent's context
        if (inheritContext && parent != null) {
            context = parent.getContext();
        }
        if (readAndroidTheme || readAppTheme) {
            // We then apply the theme on the context, if specified
            context = themifyContext(context, attrs, readAndroidTheme, readAppTheme);
        }
        if (wrapContext) {
            context = TintContextWrapper.wrap(context);
        }

        View view = null;

        // We need to 'inject' our tint aware Views in place of the standard framework versions
        switch (name) {
            case "TextView":
                view = new AppCompatTextView(context, attrs);
                break;
            case "ImageView":
                view = new AppCompatImageView(context, attrs);
                break;
            case "Button":
                view = new AppCompatButton(context, attrs);
                break;
            case "EditText":
                view = new AppCompatEditText(context, attrs);
                break;
            case "Spinner":
                view = new AppCompatSpinner(context, attrs);
                break;
            case "ImageButton":
                view = new AppCompatImageButton(context, attrs);
                break;
            case "CheckBox":
                view = new AppCompatCheckBox(context, attrs);
                break;
            case "RadioButton":
                view = new AppCompatRadioButton(context, attrs);
                break;
            case "CheckedTextView":
                view = new AppCompatCheckedTextView(context, attrs);
                break;
            case "AutoCompleteTextView":
                view = new AppCompatAutoCompleteTextView(context, attrs);
                break;
            case "MultiAutoCompleteTextView":
                view = new AppCompatMultiAutoCompleteTextView(context, attrs);
                break;
            case "RatingBar":
                view = new AppCompatRatingBar(context, attrs);
                break;
            case "SeekBar":
                view = new AppCompatSeekBar(context, attrs);
                break;
        }

        if (view == null && originalContext != context) {
            // If the original context does not equal our themed context, then we need to manually
            // inflate it using the name so that android:theme takes effect.
            view = createViewFromTag(context, name, attrs);
        }

        if (view != null) {
            // If we have created a view, check it's android:onClick
            checkOnClickListener(view, attrs);
        }

        return view;
    }
看,它也是通过判断name然后替换了原先的控件 返回了Appcompat系列的控件。以此来支持一些新的特性。在installViewFactory方法中我们看到 如果我们自己调用的setFactory,系统就不会在调用。所以我们需要做一点处理,在onCreateView方法中获取AppCompatDelegate对象然后调用createView方法
                    AppCompatDelegate delegate = getDelegate();
                    view = delegate.createView(parent, name, context, attrs);
例子:如果项目中要求替换所有字体,在baseActivity中,调用setFactory方法,判断view,然后在最后调用setTypeface就可以了。


 450
450


 被折叠的 条评论
为什么被折叠?
被折叠的 条评论
为什么被折叠?
 到【灌水乐园】发言


