


环境:centos7
track:192.168.65.155
storage:192.168.65.110
storage:192.168.65.111
源码包:nginx-1.9.4.tar.gz
ngx_cache_purge-2.3.tar.gz
FastDFS_v5.05.tar.gz
libfastcommon-1.0.7.zip
fastdfs-nginx-module_v1.16.tar.gz
首先在192.168.65.155这台机器执行
安装依赖包:yum –y install unzip gcc gcc-c++ pcre-devel openssl-devel zlib-devel
安装tracker
unzip libfastcommon-1.0.7.zip
#cp –rf libfastcommon-1.0.7 /usr/local/
#
#./make.sh install
安装FastDFS
#tar –zxvf FastDFS_v5.05.tar.gz –C /usr/local/
#cd /usr/local/FastDFS
#./make
#./make install
安装nginx以及缓存
#tar –zxvf nginx-1.9.4.tar.gz
#tar –zxvf ngx_cache_purge-2.3.tar.gz
#cd nginx-1.9.4
#./configure --prefix=/usr/local/nginx/ --sbin-path=/usr/sbin/ --conf-path=/etc/nginx/nginx.conf --add-module=/root/ngx_cache_purge-2.3
#make && make install
配置Tracker
安装需要的目录
#mkdir /mnt/fastdfs_tracker
#mkdir/fdfs/tracker
mkdir /var/cache/nginx/proxy_cache
mkdir -p /var/cache/nginx/proxy_cache
mkdir /var/cache/nginx/proxy_cache
mkdir /var/cache/nginx/
mkdir /var/cache/nginx/proxy_cache
mkdir /var/cache/nginx/proxy_cache/tmp
复制tracker配置文件
#cp /usr/local/FastDFS/conf/tracker.conf /etc/fdfs #没有fdfs目录,自建修改配置文件
vi /etc/fdfs/tracker.conf
修改:base_path=/mnt/fastdfs_tracker
在tracker配置nginx的负载均衡以及缓存,vim/etc/nginx/nginx.conf
worker_processes  1;

events {
    worker_connections  1024;
}

http {
    server_names_hash_bucket_size 128;
    client_header_buffer_size 32k;
    large_client_header_buffers 4 32k;
    client_max_body_size 300m;
    tcp_nopush on;
    proxy_redirect off;
    proxy_set_header Host $http_host;
    proxy_set_header X-Real-IP $remote_addr;
    proxy_set_header X-Forwarded-For $proxy_add_x_forwarded_for;
    proxy_connect_timeout 90;
    proxy_send_timeout 90;
    proxy_read_timeout 90;
    proxy_buffer_size 16k;
    proxy_buffers 4 64k;
    proxy_busy_buffers_size 128k;
    proxy_temp_file_write_size 128k;
    proxy_cache_path /var/cache/nginx/proxy_cache levels=1:2 keys_zone=http-cache:500m max_size=10g inactive=30d;
    proxy_temp_path /var/cache/nginx/proxy_cache/tmp;
    upstream fdfs_group1 {
        server 192.168.65.110:80 weight=1 max_fails=2 fail_timeout=30s;
        server 192.168.65.111:80 weight=1 max_fails=2 fail_timeout=30s;
        }
    include       mime.types;
    default_type  application/octet-stream;
    sendfile        on;
    keepalive_timeout  65;

    server {
        listen       80;

        location / {
            root   html;
            index  index.html index.htm;
        }

    location /group1/M00 {
        proxy_next_upstream http_502 http_504 error timeout invalid_header;
        proxy_cache http-cache;
        proxy_cache_valid 200 304 12h;
        proxy_cache_key $uri$is_args$args;
        proxy_pass http://fdfs_group1;
        expires 30d;
        }
    location ~ /purge(/.*) {
        allow 127.0.0.1;
        allow 192.168.65.0/24;
        deny all;
        proxy_cache_purge http-cache $1$is_args$args;
        }

        error_page   500 502 503 504  /50x.html;
        location = /50x.html {
            root   html;
        }
    }
}
启动nginx和tracker
/usr/sbin/nginx –c /etc/nginx/nginx.conf
/usr/bin/fdfs_trackerd /etc/fdfs/tracker.conf
查看nginx的和track的日志文件:
查看端口
netstat –antlp | grep 22122 tracker的开启端口
安装和配置storage
在192.168.65.110和192.168.65.111两台机器做同样的配置
#unzip libfastcommon-1.0.7.zip
#cp –rf libfastcommon-1.0.7 /usr/local
#cd /usr/local/libfastcommon-1.0.7
#./make.sh
#./make.sh install
安装FastDFS
#tar –zxvf FastDFS_v5.05.tar.gz –C /usr/local/
#cd /usr/local/FastDFS
#./make
#./make install
安装nginx以及fastDFS模块
#tar –zxvf nginx-1.9.4.tar.gz
#tar –zxvf fastdfs-nginx-module_v1.16.tar.gz –C /usr/local/ (注意:这里先修改fsadDFS插件的路径,修改之后执行nginx的安装命令)
#cd nginx-1.9.4
#./configure --prefix=/usr/local/nginx/ --sbin-path=/usr/sbin/ --conf-path=/etc/nginx/nginx.conf
--add-module=/usr/local/fastdfs-nginx-module/src
#make && make install
配置Storage和nginx
mkdir /mnt/fastdfs_storage_info
mkdir /mnt/fastdfs_storage_data
mkdir /mnt/fastdfs_storage_dada/data
mkdir /fdfs/tracker
设置配置文件
cp /usr/local/FastDFS/storage.conf.sample /etc/fdfs/
cp /usr/local/FastDFS/storage_ids.conf.sample /etc/fdfs/
cd /etc/fdfs/
mv storage.conf.sample storage.conf
mv storage_ids.conf.sample storage_ids.conf
修改配置文件
vim /etc/fdfs/storage.conf
group_name=group1
base_path=/mnt/fastdfs_storage_info
store_path0=/mnt/fastdfs_storage_data
tracker_server=192.168.65.155:22122
设置软链接
ln -sv /mnt/fastdfs_storage_data/data /mnt/fastdfs_storage_data/M00
ln -sv/usr/include/fastcommon /usr/local/include/fastcommon
ln -sv /usr/include/fastdfs/ /usr/local/include/fastdfs
ln -sv/usr/lib64/libfastcommon.so /usr/local/lib/libfastcommon.so
修改fastDFS的nginx插件路径
vi /usr/local/fastdfs-nginx-module/src/config
修改内容:CORE_INCS=”$CORE_INCS /usr/include/fastdfs /usr/local/include/fastcommon/”
修改fastdfs插件的相关的配置文件
cp /usr/local/fastdfs-nginx-module/src/mod_fastdfs.conf /etc/fdfs/
cp /usr/local/FastDFS/conf/http.conf /etc/fdfs/
cp /usr/local/FastDFS/conf/mime.types /etc/fdfs/
修改插件的文件内容
base_path=/mnt/fastdfs_storage_info/logs
group_name=group1
tracker_server=192.168.65.155:22122 #修改为tracker server信息
url_have_group_name= true #改为true
store_path_count=1 #存储路径个数,需要和store_path个数匹配
store_path0=/mnt/fastdfs_storage_data #改为数据存储路径,和storage.conf一样。
修改nginx的配置文件 vim /etc/nginx/nginx.conf
#user  nobody;
worker_processes  1;
events {
    worker_connections  1024;
}
http {
    include       mime.types;
    default_type  application/octet-stream;
sendfile        on;
keepalive_timeout  65;
    server {
        listen       80;
        server_name  localhost;
      location ~/group1/M00 {
        root /fdfs/storage/data;
        ngx_fastdfs_module;
    }
        location / {
            root   html;
            index  index.html index.htm;
        }
        error_page   500 502 503 504  /50x.html;
        location = /50x.html {
            root   html;
        }
}
启动nginx和storage服务
/usr/sbin/nginx –c /etc/nginx/nginx.conf
/usr/bin/fdfs_storage /etc/fdfs/tracker.conf
至此storage配置完成。进行最后的测试
在192.168.65.155这台tracker服务器上面
配置客户端文件
cp /usr/local/FastDFS/client.conf.sample /etc/fdfs/
mv client.conf.sample client.conf
修改客户端文件
vi /etc/fdfs/client.conf
修改以下属性
base_path=/fdfs/tracker #日志存放路径
tracker_server=192.168.1.31:22122 #tracker服务器IP地址和端口号
http.tracker_server_port=80 #tracker服务器的http端口号
上传文件,这里的图片文件可以自己上网找,并上传到服务器
fdfs_upload_file /etc/fdfs/client.conf /mnt/monk.jpg
如果成功会返回如下字段:

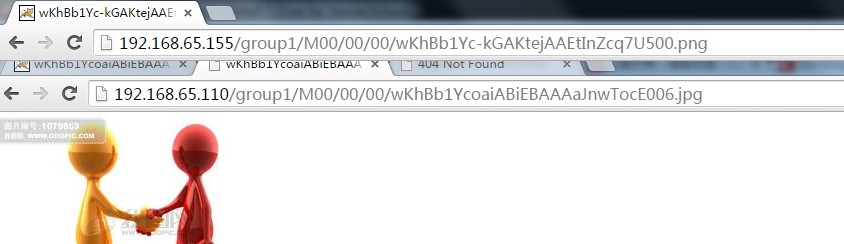
在浏览器访问:
http://192.168.65.155/group1/M00/00/00/wKhBb1Yc-kGAKtejAAEtInZcq7U500.png
http://192.168.65.110/group1/M00/00/00/wKhBb1Yc-kGAKtejAAEtInZcq7U500.png
http://192.168.65.111/group1/M00/00/00/wKhBb1Yc-kGAKtejAAEtInZcq7U500.png


 911
911

 被折叠的 条评论
为什么被折叠?
被折叠的 条评论
为什么被折叠?
 到【灌水乐园】发言


