


SSH整合:
Spring和Struts的整合
Spring和Hibernate的整合
整合步骤:
1) 引入SSH Jar文件
Struts核心jar
Hibernate核心jar
Spring
Core 核心功能
Web 对web模块支持
Aop aop支持
Orm 对hibernate支持
Jdbc/tx jdbc支持包、事务相关包
2)配置
Web.xml
初始化struts功能、spring容器
Struts.xml 配置请求路径与映射action的关系
Spring.xml IOC容器配置
bean-base.xml 【公用信息】
bean-service.xml
bean-dao.xml
bean-action.xml
先写好实体类Employeepackage cn.qblank.entity;
public class Employee {
private int id;
private String empName;
private double salary;
private Dept dept;
public int getId() {
return id;
}
public void setId(int id) {
this.id = id;
}
public String getEmpName() {
return empName;
}
public void setEmpName(String empName) {
this.empName = empName;
}
public double getSalary() {
return salary;
}
public void setSalary(double salary) {
this.salary = salary;
}
public Dept getDept() {
return dept;
}
public void setDept(Dept dept) {
this.dept = dept;
}
}
实体类Dept
package cn.qblank.entity;

public class Dept {
	private int id;
	private String name;
	public int getId() {
		return id;
	}
	public void setId(int id) {
		this.id = id;
	}
	public String getName() {
		return name;
	}
	public void setName(String name) {
		this.name = name;
	}
}
然后配置对应的hibernate配置文件Employee.hbm.xml
<?xml version="1.0" encoding="UTF-8"?>
<!DOCTYPE hibernate-mapping PUBLIC
	"-//Hibernate/Hibernate Mapping DTD 3.0//EN"
	"http://www.hibernate.org/dtd/hibernate-mapping-3.0.dtd">

<hibernate-mapping package="cn.qblank.entity">
	<!-- 配置多对一 -->
	<class name="Employee" table="t_employee">
		<id name="id" column="id">
			<generator class="native"></generator>
		</id>
		<property name="empName"></property>
		<property name="salary"></property>
		<!-- 多对一 -->
		<many-to-one name="dept" column="dept_id" class="Dept"></many-to-one>
	</class>
</hibernate-mapping>
以及Dept.hbm.xml
<?xml version="1.0" encoding="UTF-8"?>
<!DOCTYPE hibernate-mapping PUBLIC
"-//Hibernate/Hibernate Mapping DTD 3.0//EN"
"http://www.hibernate.org/dtd/hibernate-mapping-3.0.dtd">
<hibernate-mapping package="cn.qblank.entity">
<class name="Dept" table="t_dept">
<id name="id" column="deptId">
<generator class="native"></generator>
</id>
<property name="name" column="deptName" type="string"></property>
</class>
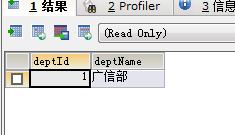
</hibernate-mapping>然后在数据库中创建相应的表,表结构如下:
CREATE TABLE t_employee(
	id INT PRIMARY KEY AUTO_INCREMENT,
	empName VARCHAR(20),
	salary DOUBLE,
	dept_id INT
);

CREATE TABLE t_dept(
	deptId INT PRIMARY KEY AUTO_INCREMENT,
	deptName VARCHAR(20)
)
插入如下数据:

然后建立一个EmployeeDao
package cn.qblank.dao;

import java.io.Serializable;

import org.hibernate.SessionFactory;

import cn.qblank.entity.Employee;

public class EmployeeDao {
	//注入sessionFactory对象
	private SessionFactory sessionFactory;
	public void setSessionFactory(SessionFactory sessionFactory) {
		this.sessionFactory = sessionFactory;
	}
	public Employee findById(Serializable id){
		return (Employee) sessionFactory.getCurrentSession().get(Employee.class, id);
	}
}
创建对应的EmployeeService
package cn.qblank.service;

import java.io.Serializable;

import cn.qblank.dao.EmployeeDao;
import cn.qblank.entity.Employee;

public class EmployeeService {
	//注入dao对象
	private EmployeeDao employeeDao;
	public void setEmployeeDao(EmployeeDao employeeDao) {
		this.employeeDao = employeeDao;
	}
	public Employee findById(Serializable id){
		return employeeDao.findById(id);
	}
}
然后将数据库连接信息写入db.properties中
jdbc.user=root
jdbc.password=root
jdbc.driverClass=com.mysql.jdbc.Driver
jdbc.jdbcUrl=jdbc:mysql:///day09
jdbc.initPoolSize=5
jdbc.maxPoolSize=10
jdbc.maxStatements=100
jdbc.acquireIncrement=2
编写bean-base.xml加载配置信息,以及事务管理,aop配置(将实例放入IOC容器交给其他的文件,这里只写通用配置)
<?xml version="1.0" encoding="UTF-8"?>
<beans xmlns="http://www.springframework.org/schema/beans"
	xmlns:xsi="http://www.w3.org/2001/XMLSchema-instance"
	xmlns:p="http://www.springframework.org/schema/p"
	xmlns:context="http://www.springframework.org/schema/context"
	xmlns:aop="http://www.springframework.org/schema/aop"
	xmlns:tx="http://www.springframework.org/schema/tx"
	xsi:schemaLocation="http://www.springframework.org/schema/beans
    	 http://www.springframework.org/schema/beans/spring-beans.xsd
     	 http://www.springframework.org/schema/context
         http://www.springframework.org/schema/context/spring-context.xsd
         http://www.springframework.org/schema/aop
         http://www.springframework.org/schema/aop/spring-aop.xsd
         http://www.springframework.org/schema/tx
     	 http://www.springframework.org/schema/tx/spring-tx.xsd">

      <!-- 加载文件 -->
      <context:property-placeholder location="classpath:db.properties"/>
      <!-- 配置数据源 -->
      <bean id="dataSource" class="com.mchange.v2.c3p0.ComboPooledDataSource">
      	<property name="user" value="${jdbc.user}"></property>
      	<property name="password" value="${jdbc.password}"></property>
      	<property name="driverClass" value="${jdbc.driverClass}"></property>
      	<property name="jdbcUrl" value="${jdbc.jdbcUrl}"></property>
      	<property name="initialPoolSize" value="${jdbc.initPoolSize}"></property>
      	<property name="maxPoolSize" value="${jdbc.maxPoolSize}"></property>
      	<property name="maxStatements" value="${jdbc.maxStatements}"></property>
      	<property name="acquireIncrement" value="${jdbc.acquireIncrement}"></property>
      </bean>

      <!-- 配置sessionFactory -->
      <bean id="sessionFactory" class="org.springframework.orm.hibernate3.LocalSessionFactoryBean">
      	<!-- 1.连接池 -->
      	<property name="dataSource" ref="dataSource"></property>
      	<!-- 2.hibernate常用配置:方言,显示sql,自动建表 -->
      	<property name="hibernateProperties">
      		<props>
      			<prop key="hibernate.dialect">org.hibernate.dialect.MySQLDialect</prop>
      			<prop key="hibernate.show_sql">true</prop>
      			<prop key="hibernate.hbm2ddl.auto">update</prop>
      		</props>
      	</property>
      	<!-- hibernate映射配置:拦截hibernate文件 -->
      	<property name="mappingLocations">
      		<list>
      			<value>classpath:cn/qblank/entity/*.hbm.xml</value>
      		</list>
      	</property>
      </bean>
      <!-- 事务配置 -->
      <!-- 1.事务管理类配置 -->
      <bean id="txManager" class="org.springframework.orm.hibernate3.HibernateTransactionManager">
      	<property name="sessionFactory" ref="sessionFactory"></property>
      </bean>

      <!-- 2.事务增强类 -->
      <tx:advice id="txAdvice" transaction-manager="txManager">
      	<tx:attributes>
      		<tx:method name="*" read-only="false"/>
      	</tx:attributes>
      </tx:advice>

      <!-- AOP配置 -->
      <aop:config>
      	<aop:pointcut expression="execution(* cn.qblank.service.*.*(..))" id="pt"/>
      	<aop:advisor advice-ref="txAdvice" pointcut-ref="pt"/>
      </aop:config>
</beans>
配置web.xml,分别配置懒加载OpenSessionInView(拦截*.action请求)、Struts核心过滤器、以及Spring配置
<?xml version="1.0" encoding="UTF-8"?>
<web-app xmlns:xsi="http://www.w3.org/2001/XMLSchema-instance" xmlns="http://java.sun.com/xml/ns/javaee" xsi:schemaLocation="http://java.sun.com/xml/ns/javaee http://java.sun.com/xml/ns/javaee/web-app_3_0.xsd" id="WebApp_ID" version="3.0">

	<!-- 配置spring的OpenSessionInView模式 【目的:JSp页面访问懒加载数据】 -->
	<!-- 注意:访问struts时候需要带上*.action后缀 -->
	<filter>
		<filter-name>OpenSessionInView</filter-name>
		<filter-class>org.springframework.orm.hibernate3.support.OpenSessionInViewFilter</filter-class>
	</filter>
	<filter-mapping>
		<filter-name>OpenSessionInView</filter-name>
		<url-pattern>*.action</url-pattern>
	</filter-mapping>

	<!-- 核心过滤器 -->
	  <filter>
	  	<filter-name>struts2</filter-name>
		<filter-class>org.apache.struts2.dispatcher.ng.filter.StrutsPrepareAndExecuteFilter</filter-class>
	  </filter>
	  <filter-mapping>
	  	<filter-name>struts2</filter-name>
	  	<url-pattern>/*</url-pattern>
	  </filter-mapping>

	<!-- Spring配置 -->
	<context-param>
		<param-name>contextConfigLocation</param-name>
		<param-value>classpath:bean*.xml</param-value>
	</context-param>
	<listener>
		<listener-class>org.springframework.web.context.ContextLoaderListener</listener-class>
	</listener>
</web-app>
然后编写struts.xml,配置页面的跳转
<?xml version="1.0" encoding="UTF-8"?>
<!DOCTYPE struts PUBLIC
	"-//Apache Software Foundation//DTD Struts Configuration 2.3//EN"
	"http://struts.apache.org/dtds/struts-2.3.dtd">

<struts>
	<package name="emp" extends="struts-default">
		<!-- action实例交给spring容器创建 -->
		<action name="*.action" class="employeeAction" method="execute">
			<result name="success">/index.jsp</result>
		</action>
	</package>
</struts>
然后分别编写bean-dao.xml、bean-service.xml以及bean-action加载各类的实例
bean-dao.xml配置
<?xml version="1.0" encoding="UTF-8"?>
<beans xmlns="http://www.springframework.org/schema/beans"
	xmlns:xsi="http://www.w3.org/2001/XMLSchema-instance"
	xmlns:p="http://www.springframework.org/schema/p"
	xmlns:context="http://www.springframework.org/schema/context"
	xmlns:aop="http://www.springframework.org/schema/aop"
	xmlns:tx="http://www.springframework.org/schema/tx"
	xsi:schemaLocation="http://www.springframework.org/schema/beans
    	 http://www.springframework.org/schema/beans/spring-beans.xsd
     	 http://www.springframework.org/schema/context
         http://www.springframework.org/schema/context/spring-context.xsd
         http://www.springframework.org/schema/aop
         http://www.springframework.org/schema/aop/spring-aop.xsd
         http://www.springframework.org/schema/tx
     	 http://www.springframework.org/schema/tx/spring-tx.xsd">
     <!-- dao -->
     <bean id="employeeDao" class="cn.qblank.dao.EmployeeDao">
     	<property name="sessionFactory" ref="sessionFactory"></property>
     </bean>
</beans>
bean-service.xml配置
<?xml version="1.0" encoding="UTF-8"?>
<beans xmlns="http://www.springframework.org/schema/beans"
	xmlns:xsi="http://www.w3.org/2001/XMLSchema-instance"
	xmlns:p="http://www.springframework.org/schema/p"
	xmlns:context="http://www.springframework.org/schema/context"
	xmlns:aop="http://www.springframework.org/schema/aop"
	xmlns:tx="http://www.springframework.org/schema/tx"
	xsi:schemaLocation="http://www.springframework.org/schema/beans
    	 http://www.springframework.org/schema/beans/spring-beans.xsd
     	 http://www.springframework.org/schema/context
         http://www.springframework.org/schema/context/spring-context.xsd
         http://www.springframework.org/schema/aop
         http://www.springframework.org/schema/aop/spring-aop.xsd
         http://www.springframework.org/schema/tx
     	 http://www.springframework.org/schema/tx/spring-tx.xsd">
     <!-- service -->
     <bean id="employeeService" class="cn.qblank.service.EmployeeService">
     	<property name="employeeDao" ref="employeeDao"></property>
     </bean>
</beans>
bean-action.xml配置
<?xml version="1.0" encoding="UTF-8"?>
<beans xmlns="http://www.springframework.org/schema/beans"
	xmlns:xsi="http://www.w3.org/2001/XMLSchema-instance"
	xmlns:p="http://www.springframework.org/schema/p"
	xmlns:context="http://www.springframework.org/schema/context"
	xmlns:aop="http://www.springframework.org/schema/aop"
	xmlns:tx="http://www.springframework.org/schema/tx"
	xsi:schemaLocation="http://www.springframework.org/schema/beans
    	 http://www.springframework.org/schema/beans/spring-beans.xsd
     	 http://www.springframework.org/schema/context
         http://www.springframework.org/schema/context/spring-context.xsd
         http://www.springframework.org/schema/aop
         http://www.springframework.org/schema/aop/spring-aop.xsd
         http://www.springframework.org/schema/tx
     	 http://www.springframework.org/schema/tx/spring-tx.xsd">
     <!-- action -->
     <bean id="employeeAction" class="cn.qblank.action.EmployeeAction" scope="prototype">
     	<property name="employeeService" ref="employeeService"></property>
     </bean>

</beans>
最后我们编写EmployeeAction以及跳转也index.jsp进行测试
EmployeeAction类:
package cn.qblank.action;

import java.util.Map;

import com.opensymphony.xwork2.ActionContext;
import com.opensymphony.xwork2.ActionSupport;

import cn.qblank.entity.Employee;
import cn.qblank.service.EmployeeService;

public class EmployeeAction extends ActionSupport{
	// 容器注入Service
	private EmployeeService employeeService;
	public void setEmployeeService(EmployeeService employeeService) {
		this.employeeService = employeeService;
	}
	@Override
	public String execute() throws Exception {
		int empId = 1;
		// 调用Service
		Employee employee = employeeService.findById(empId);
		// 保存到request
		Map<String,Object> request = (Map<String, Object>) ActionContext.getContext().get("request");
		request.put("emp", employee);
		System.out.println(employee);
		return SUCCESS;
	}
}
index.jsp显示action存入域中的数据
<%@ page language="java" contentType="text/html; charset=UTF-8"
pageEncoding="UTF-8"%>
<!DOCTYPE html PUBLIC "-//W3C//DTD HTML 4.01 Transitional//EN" "http://www.w3.org/TR/html4/loose.dtd">
<html>
<head>
<meta http-equiv="Content-Type" content="text/html; charset=UTF-8">
<title>显示页面</title>
</head>
<body>
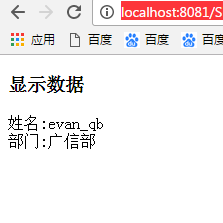
<h3>显示数据</h3>
姓名:${emp.empName}<br/>
部门:${emp.dept.name}<br/>
</body>
</html>在地址栏中输入: http://localhost:8081/Spring04-hibernate-struts/show.action 运行结果如下:


 被折叠的 条评论
为什么被折叠?
被折叠的 条评论
为什么被折叠?
 到【灌水乐园】发言


