安卓高级xml布局(一)高级输入框EditText设计

转载请注明来源 
代码连接 
http://download.csdn.net/detail/androidmsky/9274037

欢迎加安卓开发交流群:308372687(博主尽可能帮助大家)

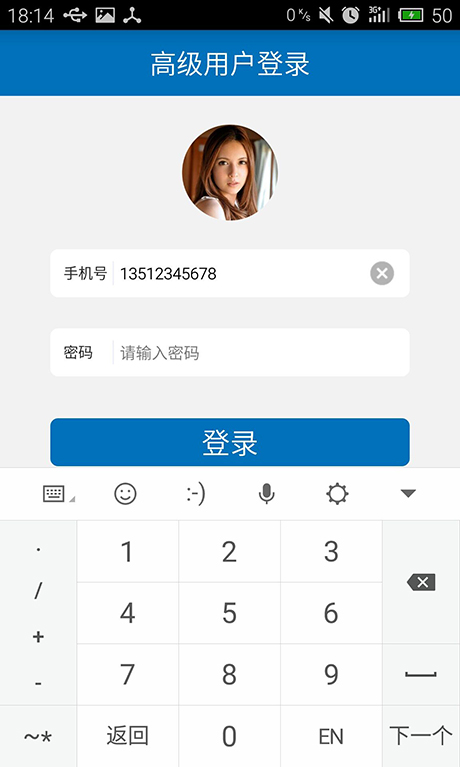
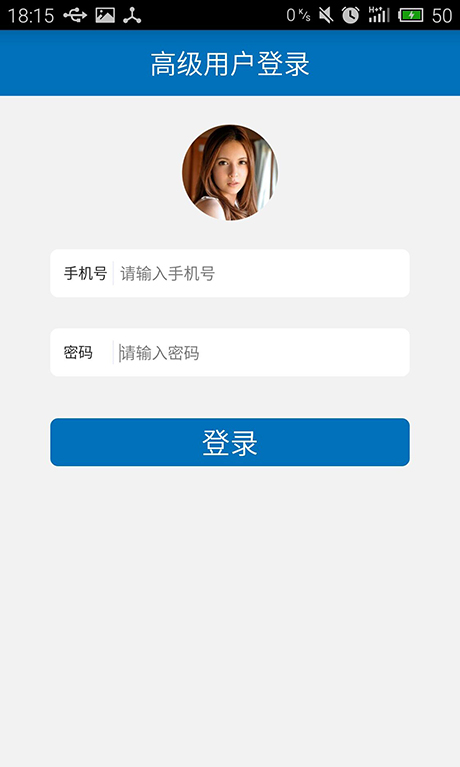
今天给大家介绍一下如何实现一款简约时尚的安卓登陆界面。大家先看一下效果图
这里写图片描述

当用户输入时动态出现删除按钮

这里写图片描述 
这里写图片描述

现在先罗列一下技术点: 
1.如何使用圆角输入框和按钮背景 
2.如何实现“手机号”、“密码”后面的竖线 
3.如何嵌套输入框的布局 
4.如何监听输入框的输入事件及删除按钮的动态显示隐藏

1.如何使用圆角输入框和按钮背景

安卓为开发者准备了shape这个xml标签,用于自定义一些形状。 
那么我就来定义一个白色的输入框背景。代码如下:

    <!-- 形状 -->
<shape xmlns:android="http://schemas.android.com/apk/res/android"
    android:shape="rectangle" >

    <solid android:color="#ffffff" />
    <!-- 边框 -->
    <stroke
        android:width="1dip"
        android:color="#ffffff" />
    <!-- 内填充颜色 -->
    <padding
        android:bottom="10dp"
        android:left="10dp"
        android:right="10dp"
        android:top="10dp" />
    <!-- 圆角 -->
    <corners android:radius="6dp" />

</shape>
 
 
  • 1
  • 2
  • 3
  • 4
  • 5
  • 6
  • 7
  • 8
  • 9
  • 10
  • 11
  • 12
  • 13
  • 14
  • 15
  • 16
  • 17
  • 18
  • 19

将其设置成任何View的background就可以了

android:background="@drawable/shape_wihte_frame"


  • 1
  • 2

2.如何实现“手机号”、“密码”后面的竖线

这个其实很简单,只需书写一个竖线即可,宽度为1dp或者1px(或你认为更合适的数值)。

   <View
                android:id="@+id/view1"
                android:layout_width="1dip"
                android:layout_height="fill_parent"
                android:layout_centerVertical="true"
                android:layout_gravity="center_horizontal"
                android:layout_marginLeft="2dp"
                android:layout_marginRight="2dp"
                android:layout_toRightOf="@+id/textView1"
                android:background="#EEEFFF" />


  • 1
  • 2
  • 3
  • 4
  • 5
  • 6
  • 7
  • 8
  • 9
  • 10
  • 11
  • 12

3.如何嵌套输入框的布局

安卓给我们提供了多种布局,但是你用任何一种都没办法把界面设计好。必须嵌套,很多新手不敢去嵌套,大家一定要大胆的去嵌套去使用各种布局,一定会组合出炫酷的效果的。这里布局很简单仅仅是一层嵌套(整个页面布局嵌套输入框的布局)。

 <RelativeLayout
            android:layout_width="fill_parent"
            android:layout_height="fill_parent"
            android:layout_alignParentTop="true"
            android:layout_centerHorizontal="true"
            android:background="@drawable/shape_wihte_frame" >

            <TextView
                android:id="@+id/textView1"
                android:layout_width="40dp"
                android:layout_height="wrap_content"
                android:layout_alignParentLeft="true"
                android:layout_centerVertical="true"
                android:lines="1"
                android:padding="1dp"
                android:text="手机号"
                android:textSize="11sp" />

            <View
                android:id="@+id/view1"
                android:layout_width="1dip"
                android:layout_height="fill_parent"
                android:layout_centerVertical="true"
                android:layout_gravity="center_horizontal"
                android:layout_marginLeft="2dp"
                android:layout_marginRight="2dp"
                android:layout_toRightOf="@+id/textView1"
                android:background="#EEEFFF" />

            <EditText
                android:id="@+id/phonenumber"
                android:layout_width="wrap_content"
                android:layout_height="40dp"
                android:layout_centerVertical="true"
                android:layout_marginLeft="2dp"
                android:layout_toRightOf="@+id/view1"
                android:background="@drawable/transparent"
                android:ems="19"
                android:hint="请输入手机号"
                android:inputType="phone"
                android:padding="1dp"
                android:textSize="12sp" >

                <requestFocus />
            </EditText>

            <ImageView
                android:id="@+id/del_phonenumber"
                android:layout_width="20dp"
                android:layout_height="20dp"
                android:layout_alignParentRight="true"
                android:layout_centerVertical="true"
                android:layout_marginRight="3dp"
                android:src="@drawable/text_del"
                android:visibility="invisible" />
        </RelativeLayout>
 
 
  • 1
  • 2
  • 3
  • 4
  • 5
  • 6
  • 7
  • 8
  • 9
  • 10
  • 11
  • 12
  • 13
  • 14
  • 15
  • 16
  • 17
  • 18
  • 19
  • 20
  • 21
  • 22
  • 23
  • 24
  • 25
  • 26
  • 27
  • 28
  • 29
  • 30
  • 31
  • 32
  • 33
  • 34
  • 35
  • 36
  • 37
  • 38
  • 39
  • 40
  • 41
  • 42
  • 43
  • 44
  • 45
  • 46
  • 47
  • 48
  • 49
  • 50
  • 51
  • 52
  • 53
  • 54
  • 55
  • 56

4.如何监听输入框的输入事件及删除按钮的动态显示隐藏

思想很简单,就是监听EditText的输入事件,之后如果输入长度大于0就显示后面的删除按钮,如果=0就隐藏删除按键,点击删除按钮就清空输入框。在这里我写出了一个工具类方便大家调用。高内聚低耦合是我们共同的追求。

public class EditTextClearTools {
    public static void addclerListener(final EditText e1, final ImageView m1) {

        e1.addTextChangedListener(new TextWatcher() {

            @Override
            public void onTextChanged(CharSequence s, int start, int before,
                    int count) {
                // TODO Auto-generated method stub

            }

            @Override
            public void beforeTextChanged(CharSequence s, int start, int count,
                    int after) {
                // TODO Auto-generated method stub

            }

            @Override
            public void afterTextChanged(Editable s) {
                // TODO Auto-generated method stub
                // 监听如果输入串长度大于0那么就显示clear按钮。
                String s1 = s + "";
                if (s.length() > 0) {
                    m1.setVisibility(View.VISIBLE);
                } else {
                    m1.setVisibility(View.INVISIBLE);
                }

            }
        });

        m1.setOnClickListener(new OnClickListener() {

            @Override
            public void onClick(View v) {
                // TODO Auto-generated method stub
                // 清空输入框
                e1.setText("");

            }
        });

    }

}
 
 
  • 1
  • 2
  • 3
  • 4
  • 5
  • 6
  • 7
  • 8
  • 9
  • 10
  • 11
  • 12
  • 13
  • 14
  • 15
  • 16
  • 17
  • 18
  • 19
  • 20
  • 21
  • 22
  • 23
  • 24
  • 25
  • 26
  • 27
  • 28
  • 29
  • 30
  • 31
  • 32
  • 33
  • 34
  • 35
  • 36
  • 37
  • 38
  • 39
  • 40
  • 41
  • 42
  • 43
  • 44
  • 45
  • 46
  • 47

主程序代码

public class MainActivity extends Activity {
    EditText e1, e2;
    ImageView m1, m2;

    @Override
    protected void onCreate(Bundle savedInstanceState) {
        super.onCreate(savedInstanceState);
        requestWindowFeature(Window.FEATURE_NO_TITLE);
        setContentView(R.layout.activity_user_login);
        init();
    }

    private void init() {
        // TODO Auto-generated method stub
        e1 = (EditText) findViewById(R.id.phonenumber);
        e2 = (EditText) findViewById(R.id.password);
        m1 = (ImageView) findViewById(R.id.del_phonenumber);
        m2 = (ImageView) findViewById(R.id.del_password);
        // 添加清楚监听器大气
        EditTextClearTools.addclerListener(e1, m1);
        EditTextClearTools.addclerListener(e2, m2);

    }

}
 
 
  • 1
  • 2
  • 3
  • 4
  • 5
  • 6
  • 7
  • 8
  • 9
  • 10
  • 11
  • 12
  • 13
  • 14
  • 15
  • 16
  • 17
  • 18
  • 19
  • 20
  • 21
  • 22
  • 23
  • 24
  • 25

xml对于安卓程序的重要性相信大家在开发的路程中会慢慢体会到。在这里仅仅是给了一个简单的例子,后面会更新很多很好的安卓技术博客。我是安卓天,感谢大家支持。希望大家多多沟通交流 
欢迎加安卓开发交流群:308372687(博主尽可能帮助大家) 
代码连接http://download.csdn.net/detail/androidmsky/9274037

  • 2
    点赞
  • 7
    收藏
    觉得还不错? 一键收藏
  • 1
    评论
### 回答1: 可以参考以下XML布局:<LinearLayout xmlns:android="http://schemas.android.com/apk/res/android" xmlns:app="http://schemas.android.com/apk/res-auto" xmlns:tools="http://schemas.android.com/tools" android:layout_width="match_parent" android:layout_height="match_parent" android:orientation="vertical" android:gravity="center_horizontal" tools:context=".MainActivity"> <ImageView android:layout_width="wrap_content" android:layout_height="wrap_content" android:src="@drawable/logo"/> <EditText android:id="@+id/username" android:layout_width="match_parent" android:layout_height="wrap_content" android:hint="Username" android:inputType="text"/> <EditText android:id="@+id/password" android:layout_width="match_parent" android:layout_height="wrap_content" android:hint="Password" android:inputType="textPassword"/> <Button android:layout_width="wrap_content" android:layout_height="wrap_content" android:text="Login" /></LinearLayout> ### 回答2: 安卓APP登录页面的XML布局可以使用LinearLayout来实现。以下是一个简单的例子: ```xml <LinearLayout xmlns:android="http://schemas.android.com/apk/res/android" xmlns:tools="http://schemas.android.com/tools" android:layout_width="match_parent" android:layout_height="match_parent" android:orientation="vertical" android:gravity="center" android:padding="16dp"> <ImageView android:id="@+id/logoImageView" android:layout_width="100dp" android:layout_height="100dp" android:src="@drawable/app_logo" android:scaleType="centerCrop" android:layout_gravity="center" /> <EditText android:id="@+id/usernameEditText" android:layout_width="match_parent" android:layout_height="wrap_content" android:layout_marginTop="16dp" android:hint="用户名" android:inputType="text" /> <EditText android:id="@+id/passwordEditText" android:layout_width="match_parent" android:layout_height="wrap_content" android:layout_marginTop="8dp" android:hint="密码" android:inputType="textPassword" /> <Button android:id="@+id/loginButton" android:layout_width="match_parent" android:layout_height="wrap_content" android:layout_marginTop="16dp" android:text="登录" /> <TextView android:id="@+id/forgotPasswordTextView" android:layout_width="match_parent" android:layout_height="wrap_content" android:layout_marginTop="8dp" android:text="忘记密码?" android:textAlignment="center" android:textColor="@android:color/white" /> </LinearLayout> ``` 在这个例子中,我们使用了一个纵向的LinearLayout来布局登录页面。页面中包括一个Logo的ImageView、一个用于输入用户名的EditText、一个用于输入密码的EditText、一个登录的Button和一个忘记密码的TextView。可以根据具体需求进行样式和设计的修改。 ### 回答3: 下面是一个安卓app登录页面的xml布局的示例: ```xml <LinearLayout xmlns:android="http://schemas.android.com/apk/res/android" android:layout_width="match_parent" android:layout_height="match_parent" android:orientation="vertical" android:background="@color/background_color"> <ImageView android:layout_width="wrap_content" android:layout_height="150dp" android:src="@drawable/app_logo" android:layout_gravity="center"/> <EditText android:id="@+id/username_edittext" android:layout_width="match_parent" android:layout_height="wrap_content" android:hint="@string/username_hint" android:inputType="text" android:layout_marginTop="20dp" android:layout_marginStart="20dp" android:layout_marginEnd="20dp" android:background="@drawable/edittext_background" android:textColor="@color/text_color"/> <EditText android:id="@+id/password_edittext" android:layout_width="match_parent" android:layout_height="wrap_content" android:hint="@string/password_hint" android:inputType="textPassword" android:layout_marginTop="10dp" android:layout_marginStart="20dp" android:layout_marginEnd="20dp" android:background="@drawable/edittext_background" android:textColor="@color/text_color"/> <Button android:layout_width="match_parent" android:layout_height="wrap_content" android:text="@string/login_button" android:layout_marginTop="20dp" android:layout_marginStart="20dp" android:layout_marginEnd="20dp" android:background="@drawable/button_background" android:textColor="@color/button_text_color"/> <TextView android:id="@+id/forgot_password_textview" android:layout_width="wrap_content" android:layout_height="wrap_content" android:text="@string/forgot_password" android:layout_marginTop="10dp" android:layout_marginStart="20dp" android:layout_marginEnd="20dp" android:textColor="@color/text_color" android:gravity="center"/> </LinearLayout> ``` 这个布局包含一个垂直方向的线性布局,包含一个应用程序的logo图像、用户名输入框、密码输入框、登录按钮和“忘记密码”的文本视图。用户名输入框和密码输入框具有自定义的背景样式。

“相关推荐”对你有帮助么?

  • 非常没帮助
  • 没帮助
  • 一般
  • 有帮助
  • 非常有帮助
提交
评论 1
添加红包

请填写红包祝福语或标题

红包个数最小为10个

红包金额最低5元

当前余额3.43前往充值 >
需支付:10.00
成就一亿技术人!
领取后你会自动成为博主和红包主的粉丝 规则
hope_wisdom
发出的红包
实付
使用余额支付
点击重新获取
扫码支付
钱包余额 0

抵扣说明:

1.余额是钱包充值的虚拟货币,按照1:1的比例进行支付金额的抵扣。
2.余额无法直接购买下载,可以购买VIP、付费专栏及课程。

余额充值