


https://beta.wikiversity.org/wiki/Topic:Git/%E5%9C%A8Windows%E4%B8%8B%E5%AE%89%E8%A3%85Gitolite
环境:
1需要联网
2windows8 64位
3cygwin
步骤:
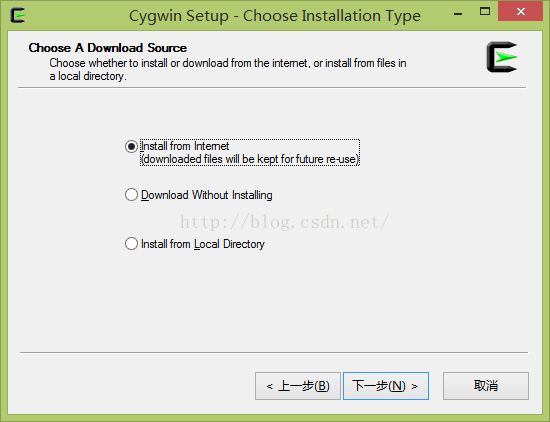
1 下载cygwin安装包
使用32位的安装包,不然到时候会出错
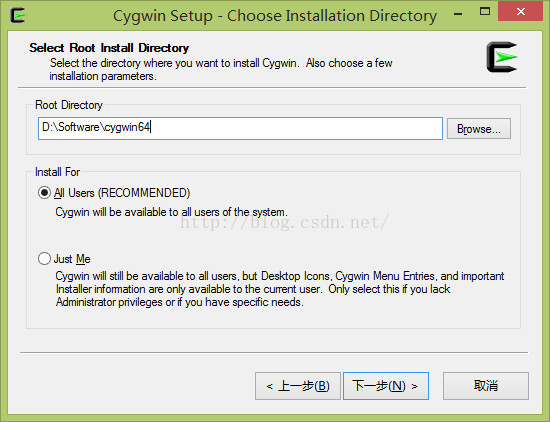
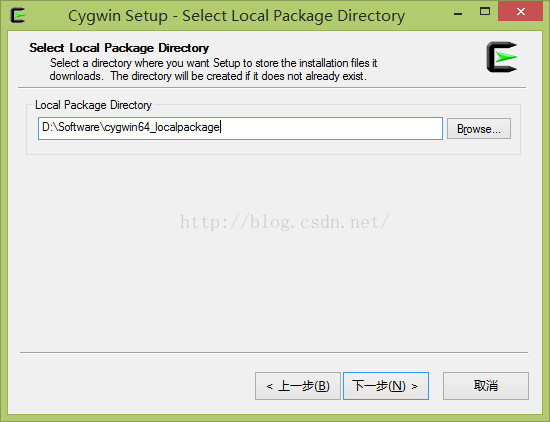
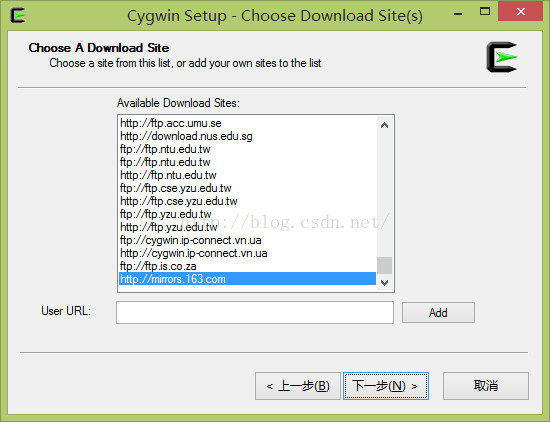
2安装cygwin

选择163的节点http://mirrors.163.com/cygwin/
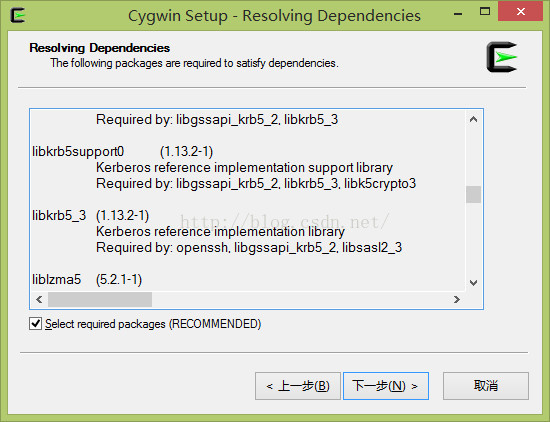
安装包选择:
- Net | openssh
- Devel->git/git-completion/git-gui/gitk
3.连接cygwin到windows Security
- 将cygwin的bin目录加入到Windows系统环境变量中,重启生效
找到D:\Software\cygwin64\Cygwin.bat,右击,选择“以管理员身份运行”
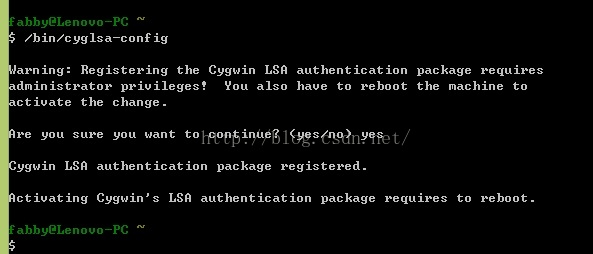
重启电脑
4.配置SSH Server
以管理员身份运行D:\Software\cygwin64\Cygwin.bat,
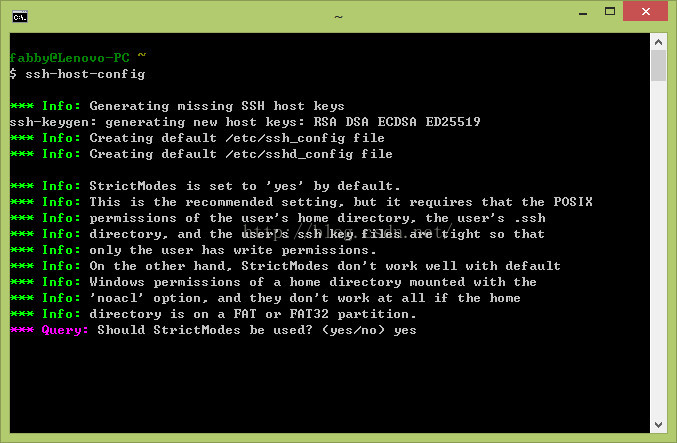
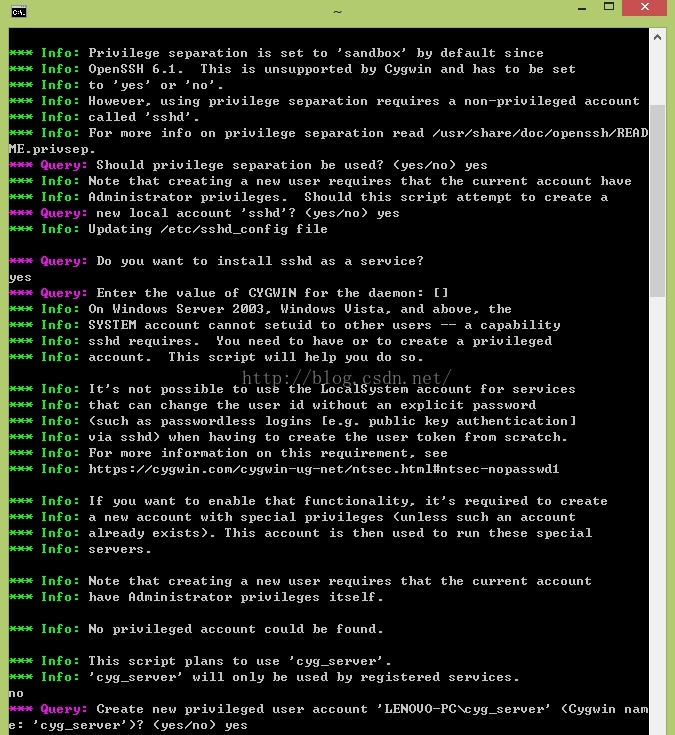
配置防火墙,允许ssh服务使用端口22
netsh advfirewall firewall add rule dir=in action=allow localport=22 protocol=tcp name="Cygwin SSHD"
接下来执行
$ sc start sshd5.准备git账账户
- 转到Windows控制面板,新建名为“git”账户(这步不区分大小写)
- 进入终端,执行:
$ mkpasswd -l -u git >> /etc/passwd
这步是为了让cygwin系统认得git账户对应Windows的哪个账户
登入git账户
- 打开终端,通过ssh登入git账户,参考命令:
$ ssh git@localhost
6.安装gitolite
编辑.bashrc
在第一行添加:
PATH="$PATH:$HOME/bin"
为了使应用立即生效需要执行:
$ source ~/.bashrc
确认添加结果可以执行:
$ echo $PATH刚才添加的路径应该加到最后面了,示例为“/home/git/bin”。
7.安装 Gitolite
git@Lenovo-PC /tmp
$ mkdir share
$ cd /tmp/share
然后从远端clone gitolite仓库:
$ git clone git://github.com/sitaramc/gitolite.git
* login to "git" on the server
* make sure `~/.ssh/authorized_keys` is empty or non-existent
* make sure your ssh public key from your workstation has been copied as
$HOME/YourName.pub
git@Lenovo-PC ~
$ mkdir -p $HOME/bin
git@Lenovo-PC ~
$ /tmp/share/gitolite/install -to $HOME/bin
git@Lenovo-PC ~
$ gitolite setup -pk fabby_cyg_id_rsa.pub
初始化空的 Git 版本库于 /home/git/repositories/gitolite-admin.git/
初始化空的 Git 版本库于 /home/git/repositories/testing.git/
WARNING: /home/git/.ssh/authorized_keys missing; creating a new one
(this is normal on a brand new install)
git@Lenovo-PC ~
$ exit
注销
Connection to localhost closed.
回到刚刚公钥的用户
fabby@Lenovo-PC ~
$ git clone git@localhost:gitolite-admin
正克隆到 'gitolite-admin'...
remote: Counting objects: 6, done.
remote: Compressing objects: 100% (4/4), done.
remote: Total 6 (delta 0), reused 0 (delta 0)
接收对象中: 100% (6/6), 完成.
检查连接... 完成。
接下来对权限之类的配置就行了


 1310
1310


 被折叠的 条评论
为什么被折叠?
被折叠的 条评论
为什么被折叠?
 到【灌水乐园】发言


