


一步一步 Sql Azure
1. 使用 windowsazure 平台账号登陆 https://windows.azure.com/
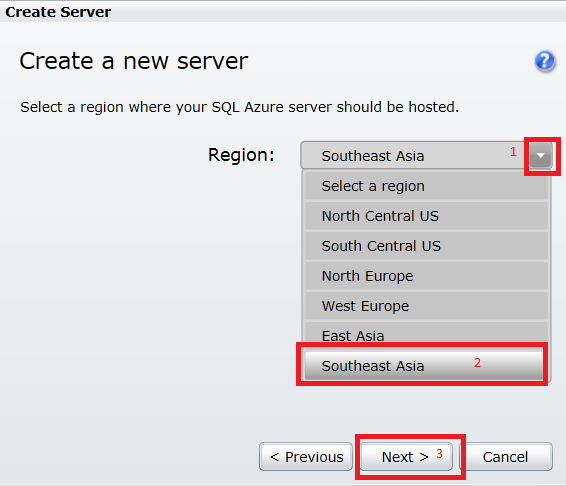
2. 新建Sql Azure Server


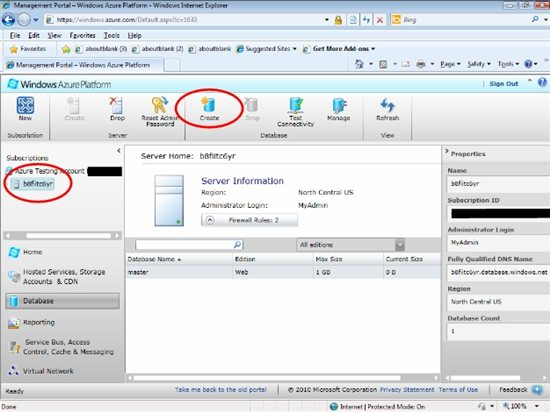
3. 新建数据库

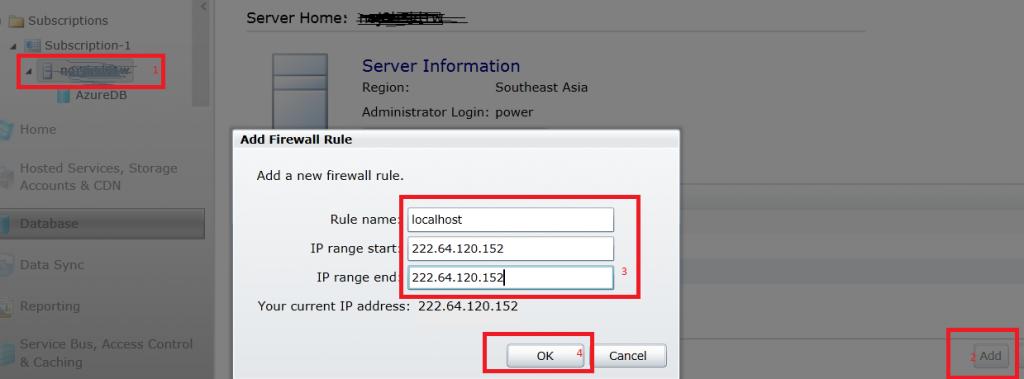
4. 为Sql azure server 添加防火墙规则,只有将本机添加到规则里才能从本机连接到该Sqlazure server
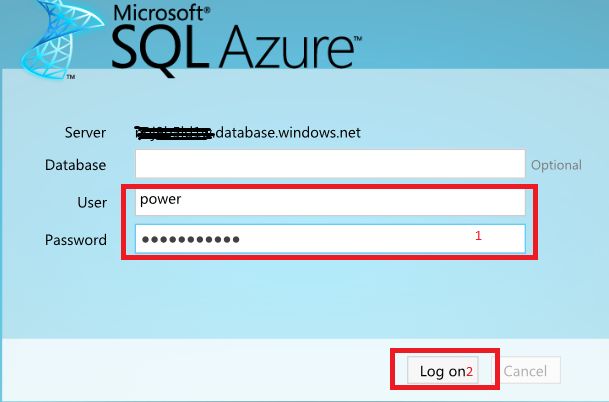
5. 连接到Sql azure server
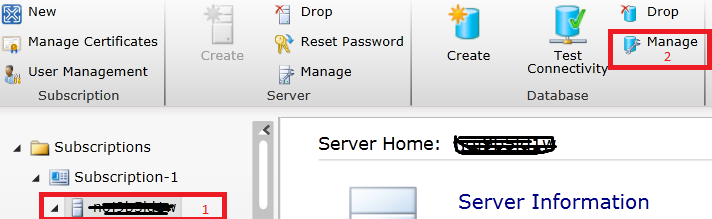
输入新建Sql Azure Server时定义的用户名和密码
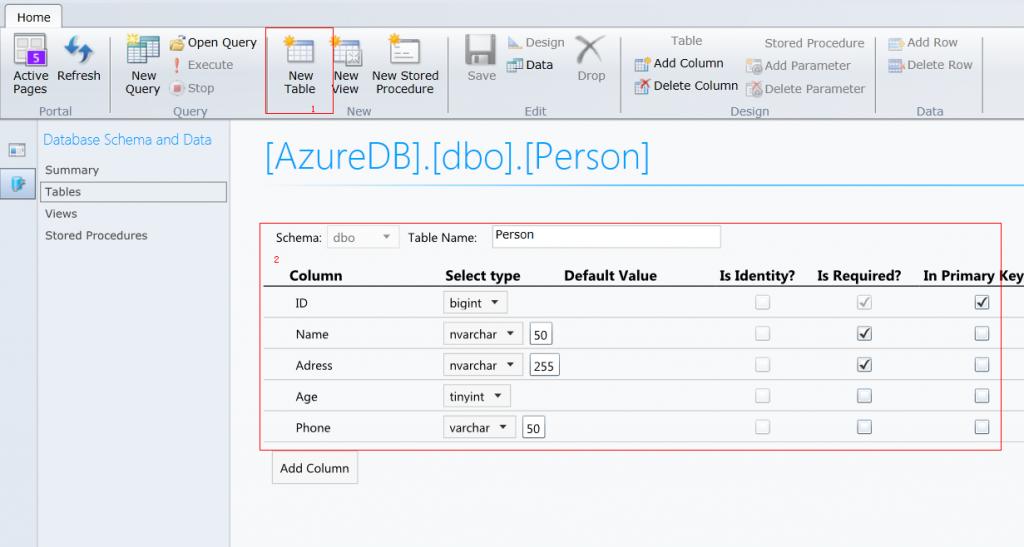
6. 新建表
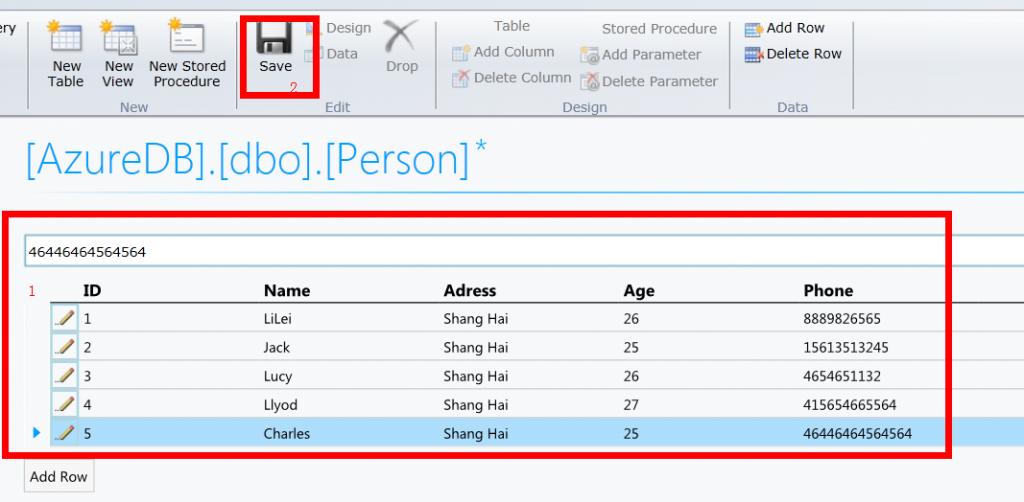
7. 向表中填充数据
8. 使用代码访问Sql Azure 中的数据
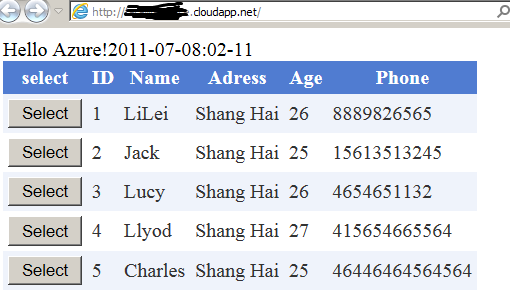
附访问Sql Azure 数据库的主要代码:
Default.aspx.cs:
using System;
using System.Collections.Generic;
using System.Linq;
using System.Web;
using System.Web.UI;
using System.Web.UI.WebControls;
using Microsoft.WindowsAzure;
using Microsoft.WindowsAzure.StorageClient;
using Microsoft.WindowsAzure.ServiceRuntime;
using System.Threading;
using System.Data.SqlClient;
using System.Data;

namespace WebRole1
{
    public partial class _Default : System.Web.UI.Page
    {
        private static string userName = "yourSqlAzureUsernam";
        private static string password = "yourSqlAzureUserPassword";
        private static string dataSource = "yourSqlAzureServerName.database.windows.net";
        private static string sampleDatabaseName = "AzureDB";

        protected void Page_Load(object sender, EventArgs e)
        {
            if (!this.IsPostBack)
            {
                SqlConnectionStringBuilder connStringBuilder = new SqlConnectionStringBuilder();
                connStringBuilder.DataSource = dataSource;
                connStringBuilder.InitialCatalog = sampleDatabaseName;
                connStringBuilder.Encrypt = true;
                connStringBuilder.TrustServerCertificate = false;
                connStringBuilder.UserID = userName;
                connStringBuilder.Password = password;
                using (SqlConnection conn = new SqlConnection(connStringBuilder.ToString()))
                {
                    using (SqlCommand command = conn.CreateCommand())
                    {
                        // Create the AzureDB
                        string cmdText = "select * from dbo.Person";
                        command.CommandText = cmdText;
                        SqlDataAdapter dataApater = new SqlDataAdapter(command);
                        DataSet dataSet = new DataSet();
                        dataApater.Fill(dataSet);
                        GridView1.DataSource = dataSet.Tables[0].DefaultView;
                        GridView1.DataBind();
                    }
                }

            }
        }
    }
}<%@ Page Language="C#" AutoEventWireup="true" CodeBehind="Default.aspx.cs" Inherits="WebRole1._Default" %>
<!DOCTYPE html PUBLIC "-//W3C//DTD XHTML 1.0 Transitional//EN" "http://www.w3.org/TR/xhtml1/DTD/xhtml1-transitional.dtd">
<html xmlns="http://www.w3.org/1999/xhtml">
<head runat="server">
<title></title>
</head>
<body>
<form id="form1" runat="server">
<div>
<asp:GridView ID="GridView1" runat="server" CellPadding="4"
EnableModelValidation="True" ForeColor="#333333" GridLines="None">
<AlternatingRowStyle BackColor="White" />
<Columns>
<asp:CommandField ButtonType="Button" HeaderText="select" ShowHeader="True"
ShowSelectButton="True" />
</Columns>
<EditRowStyle BackColor="#2461BF" />
<FooterStyle BackColor="#507CD1" Font-Bold="True" ForeColor="White" />
<HeaderStyle BackColor="#507CD1" Font-Bold="True" ForeColor="White" />
<PagerStyle BackColor="#2461BF" ForeColor="White" HorizontalAlign="Center" />
<RowStyle BackColor="#EFF3FB" />
<SelectedRowStyle BackColor="#D1DDF1" Font-Bold="True" ForeColor="#333333" />
</asp:GridView>
<br />
<asp:DetailsView ID="DetailsView1" runat="server" CellPadding="4"
EnableModelValidation="True" ForeColor="#333333" GridLines="None" Height="50px"
Width="265px">
<AlternatingRowStyle BackColor="White" />
<CommandRowStyle BackColor="#D1DDF1" Font-Bold="True" />
<EditRowStyle BackColor="#2461BF" />
<FieldHeaderStyle BackColor="#DEE8F5" Font-Bold="True" />
<FooterStyle BackColor="#507CD1" Font-Bold="True" ForeColor="White" />
<HeaderStyle BackColor="#507CD1" Font-Bold="True" ForeColor="White" />
<PagerStyle BackColor="#2461BF" ForeColor="White" HorizontalAlign="Center" />
<RowStyle BackColor="#EFF3FB" />
</asp:DetailsView>
<br />
<br />
</form>
</body>
</html>
如何创建并部署云应用程序,请参考 http://blog.csdn.net/farawayplace613/article/details/6933915


 1万+
1万+


 被折叠的 条评论
为什么被折叠?
被折叠的 条评论
为什么被折叠?
 到【灌水乐园】发言


